Sponsored
JTdiRtyD ever changing build, trip reports, and BS thread
Midwestracer
Member
I really like the idea of enclosing the half rack cant wait to see your finished project
OP
OP
JTdiRtyD
Well-Known Member
- Thread starter
- #18
Installed door cup holders. Haven't actually used the yet, but they seem ok. Drives side doesn't block the mirror but the passenger one blocks a little bit, but not enough to matter. The shorter you are the more it will block.

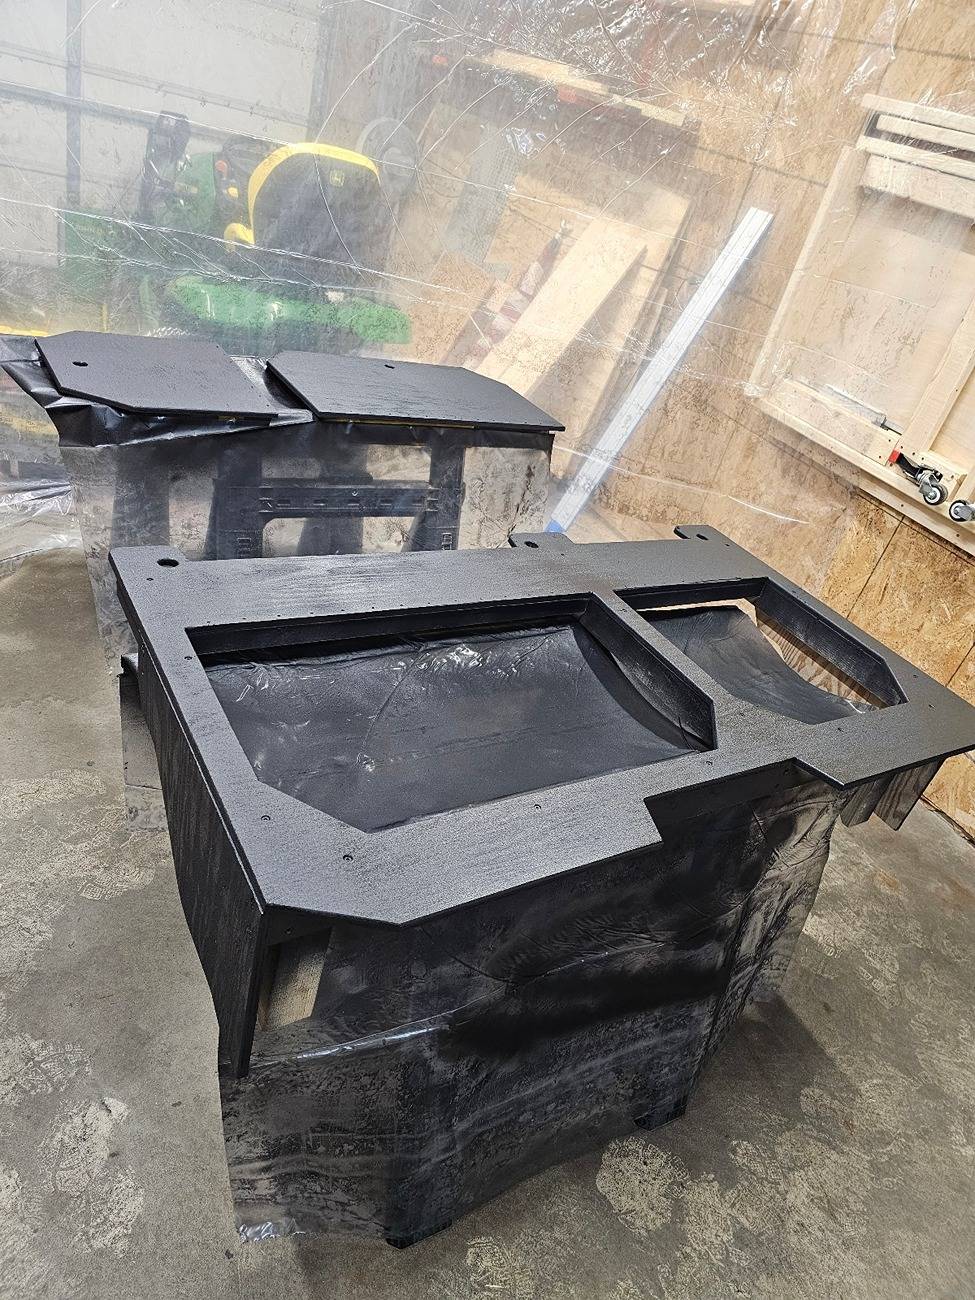
I also got some updates on the half rack enclosure. Panels are wrapped and test fit. I'll be picking up the revised rear door panel today after work. Should have it all finished up and installed by this weekend.
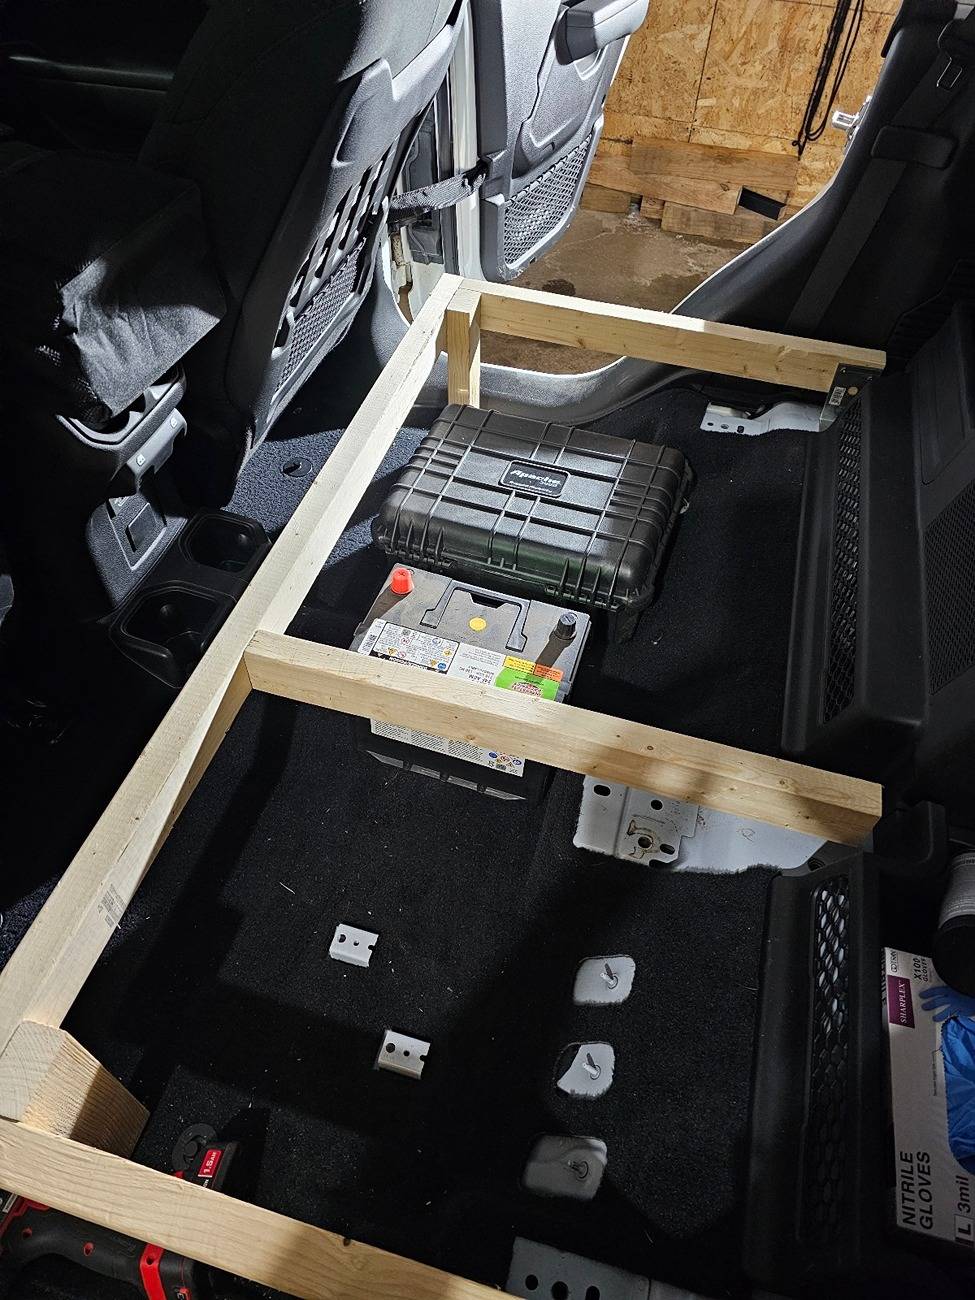
Also tested my battery box setup with the air comp. It works. The MORRFlate 10six PRO draws about 90amps on startup and 62-65amps consistently, with 62amps at 15psi and 65 at 35psi. Burned up about 7ah of battery to air up the 35s.
And now that I tested the batt box, I'm probably going to rip it all apart and mount it in the back seat area because this setup takes up more room in the bed than I would like. I never can make up my mind.
I also got some updates on the half rack enclosure. Panels are wrapped and test fit. I'll be picking up the revised rear door panel today after work. Should have it all finished up and installed by this weekend.
Also tested my battery box setup with the air comp. It works. The MORRFlate 10six PRO draws about 90amps on startup and 62-65amps consistently, with 62amps at 15psi and 65 at 35psi. Burned up about 7ah of battery to air up the 35s.
And now that I tested the batt box, I'm probably going to rip it all apart and mount it in the back seat area because this setup takes up more room in the bed than I would like. I never can make up my mind.
Splenda
Well-Known Member
It looks a lot like the one Rebel Off-road sells.Installed door cup holders. Haven't actually used the yet, but they seem ok. Drives side doesn't block the mirror but the passenger one blocks a little bit, but not enough to matter. The shorter you are the more it will block.
I also got some updates on the half rack enclosure. Panels are wrapped and test fit. I'll be picking up the revised rear door panel today after work. Should have it all finished up and installed by this weekend.
Also tested my battery box setup with the air comp. It works. The MORRFlate 10six PRO draws about 90amps on startup and 62-65amps consistently, with 62amps at 15psi and 65 at 35psi. Burned up about 7ah of battery to air up the 35s.
And now that I tested the batt box, I'm probably going to rip it all apart and mount it in the back seat area because this setup takes up more room in the bed than I would like. I never can make up my mind.
OP
OP
JTdiRtyD
Well-Known Member
- Thread starter
- #20
It's very similar, except my side panels wrap up over the uprights instead of the roof panels coming down over the edges, and I used a hurricane hinge for the rear door to make it easier to seal up.It looks a lot like the one Rebel Off-road sells.

It also cost me less than half what Rebel charges, which is the main reason I did my own.
Sponsored
OP
OP
JTdiRtyD
Well-Known Member
- Thread starter
- #21
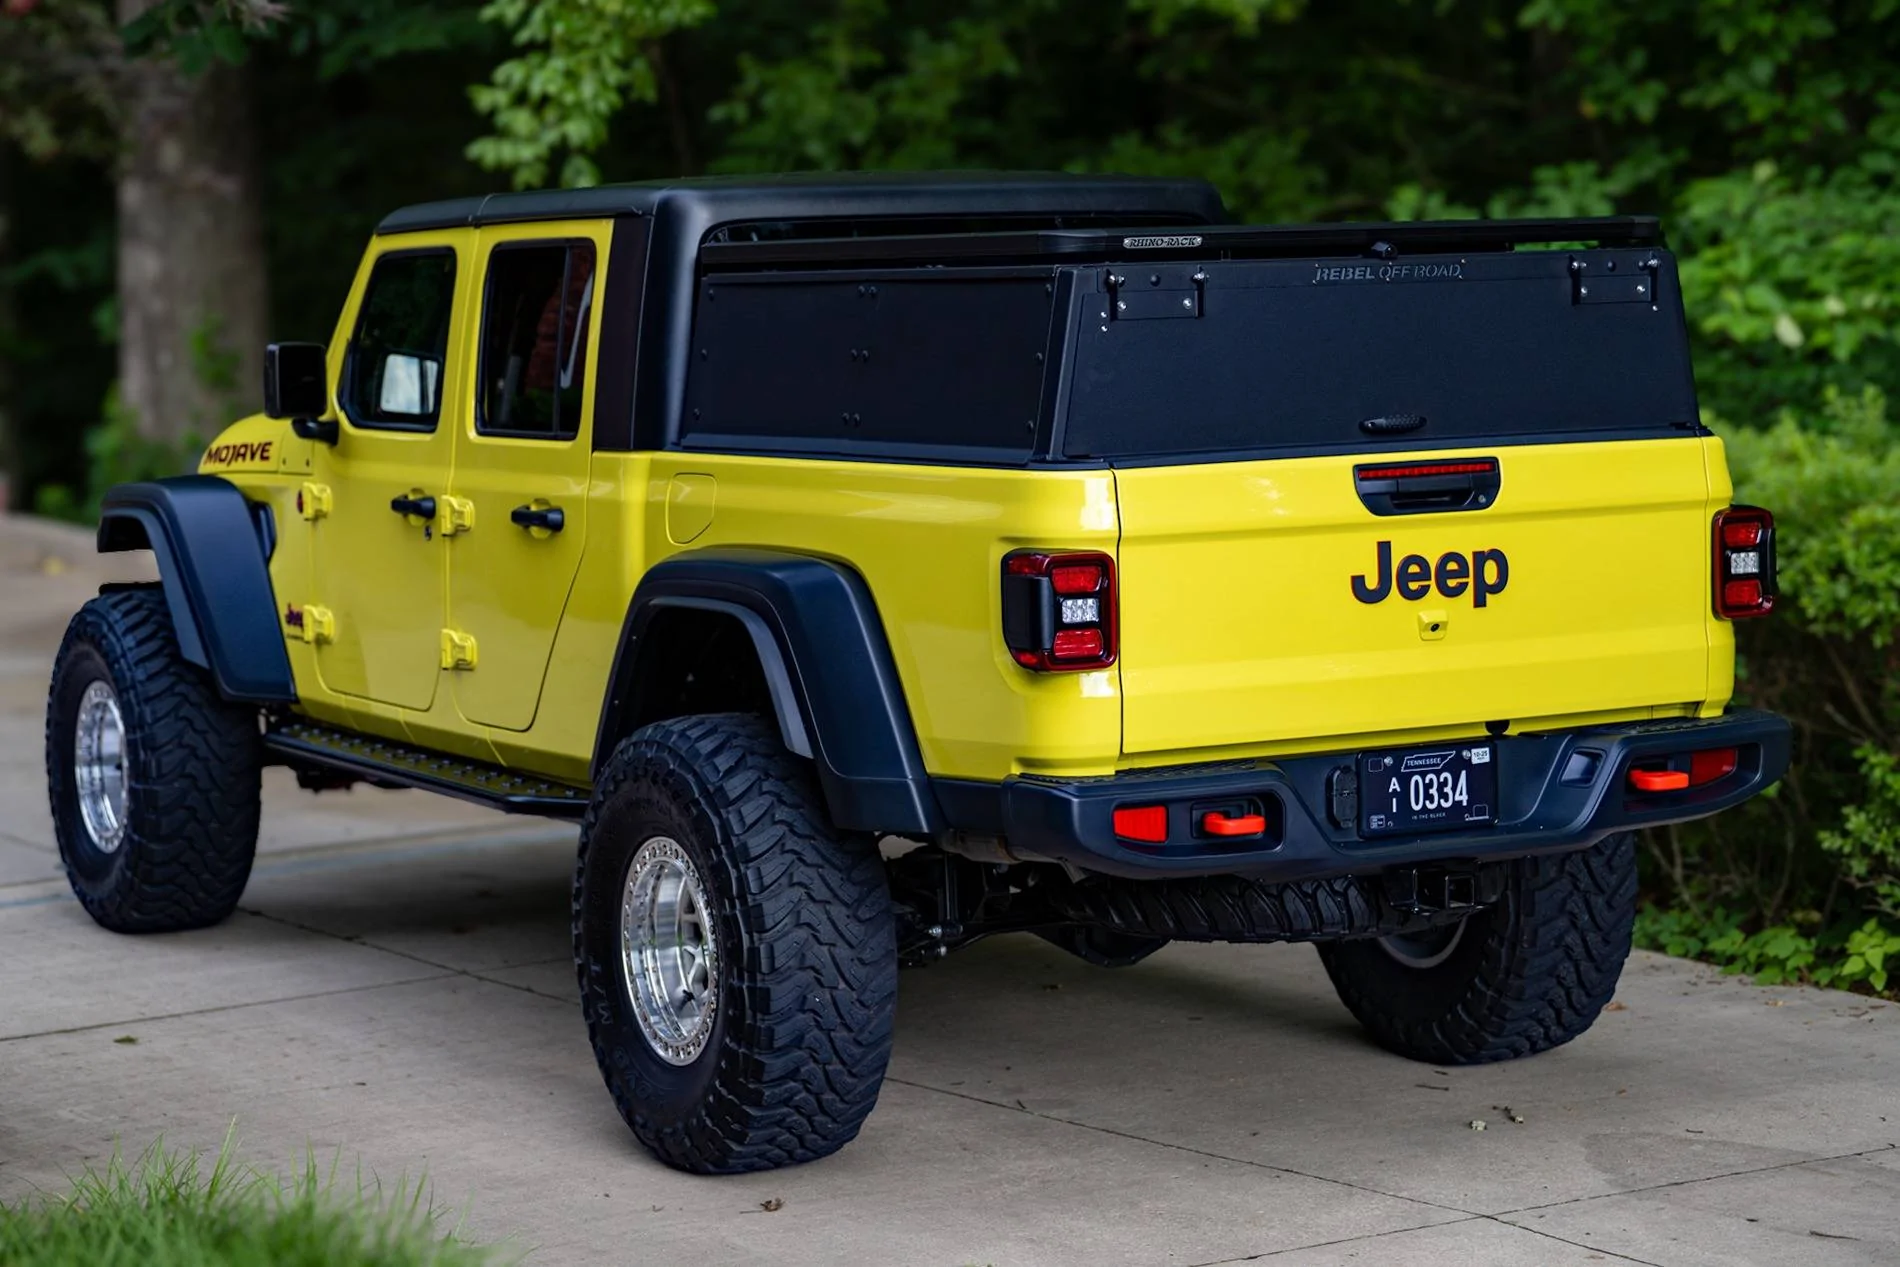
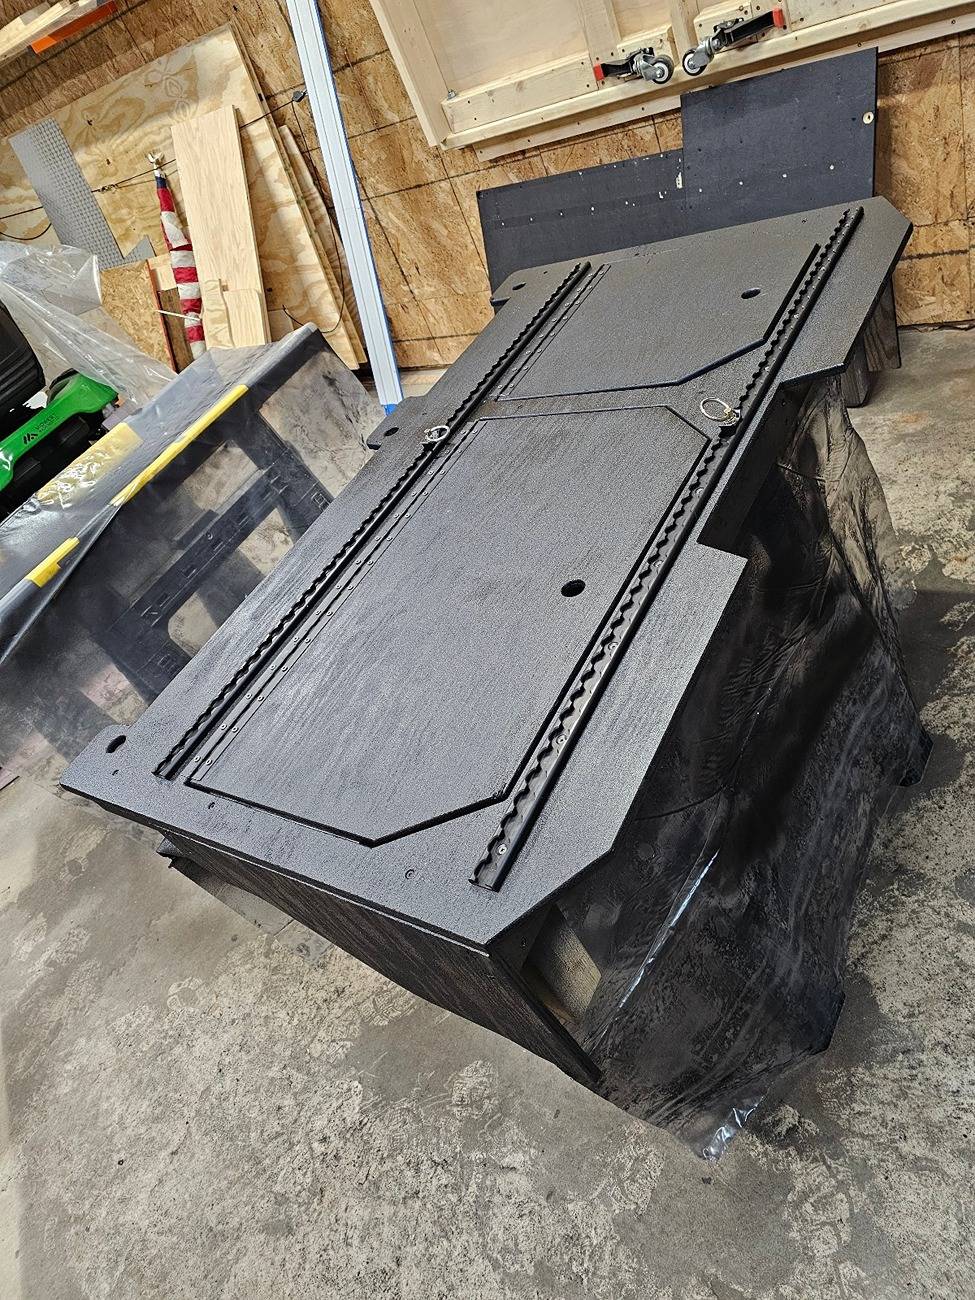
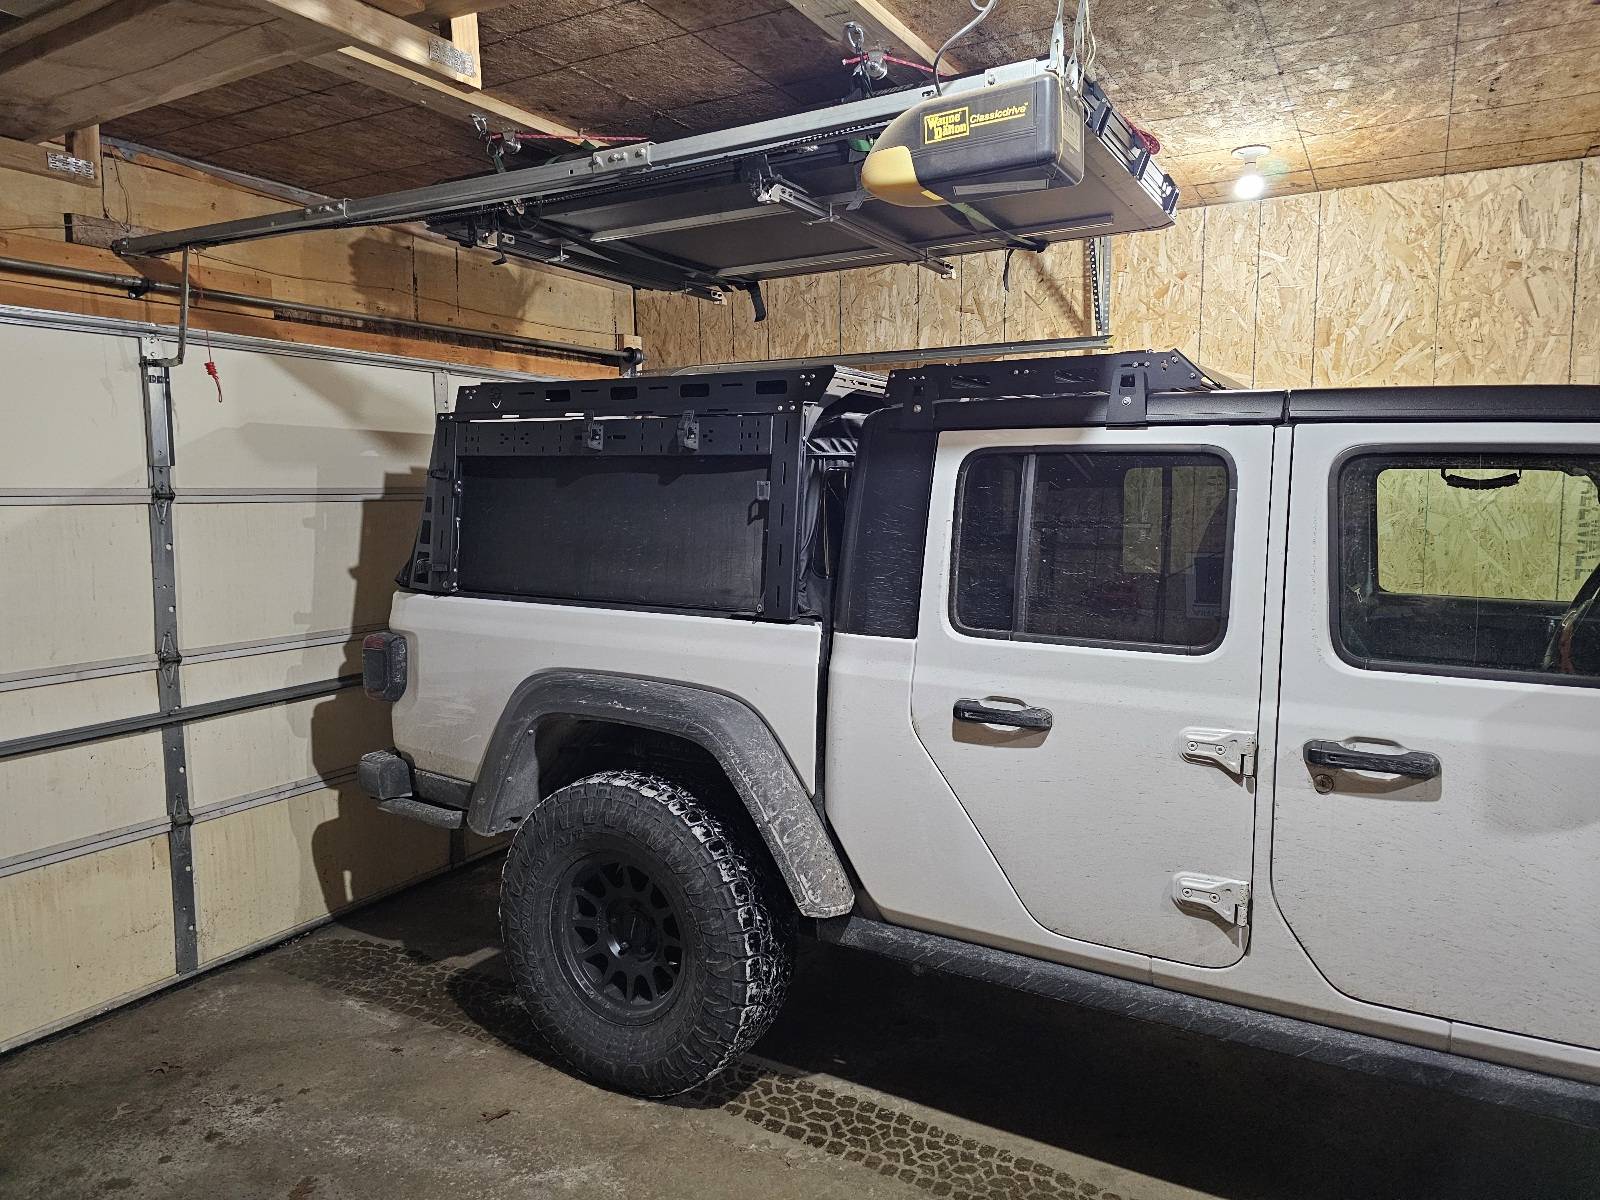
Installed the enclosure for the Rebel rack. Everything worked out really good except the rear door, which still worked out fine just not the way I hoped and I had to improvise. I should have designed it like a normal topper door and use use latches instead of following Rebels idea of using the tailgate to lock in the door. It would have allowed me to do the hurricane hinge a little differently and been easier to seal off from the elements.
Why did I chose a hurricane hinge? It covers the entire length of the top of the door panel, so no water will get it even if the door is open.
What you cant see are lights built into the cross members of the rack, amber and white. When I tested them they didn't seem too bright individually, so I have three across the rear crossmember and three across the center crossmember facing forward. White light for daytime use, and amber for at night to not attract bugs.
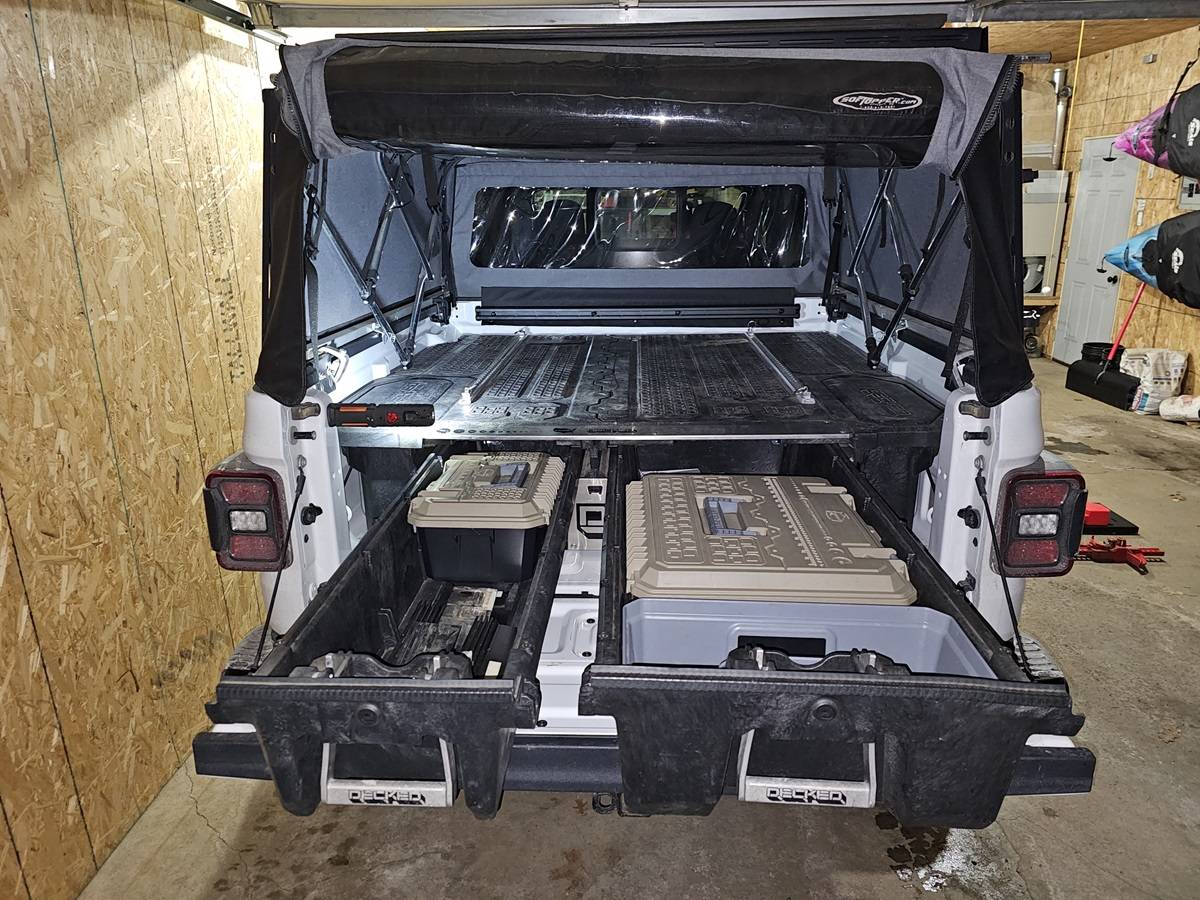
I also started working on my bed slide out. I'm skeptical of this one, simply because I kind of expect the Vevor slides to fail, but we will see. I opted for this design over one of the cargo-slide or Decked slide systems because they are expensive and sit so damn high off the deck. With having a half height cap I wanted as much vertical space as I could get. Because if this, I built mine a little too low, and when weight is added it sags just enough to scrape the tailgate, so I added some HDPE pieces for it to slide on to keep it off the tailgate. Effective and easy to replace when they get worn. Next step is coat the decking in Herculiner and some t-track.
Also ordered my lift. AEV Dualsport with high cap springs. From my measurements with the lift, 37's (once I get them), and my tent installed I should have about 1.5-2 inches of clearance to fit in the garage.
Why did I chose a hurricane hinge? It covers the entire length of the top of the door panel, so no water will get it even if the door is open.
What you cant see are lights built into the cross members of the rack, amber and white. When I tested them they didn't seem too bright individually, so I have three across the rear crossmember and three across the center crossmember facing forward. White light for daytime use, and amber for at night to not attract bugs.
I also started working on my bed slide out. I'm skeptical of this one, simply because I kind of expect the Vevor slides to fail, but we will see. I opted for this design over one of the cargo-slide or Decked slide systems because they are expensive and sit so damn high off the deck. With having a half height cap I wanted as much vertical space as I could get. Because if this, I built mine a little too low, and when weight is added it sags just enough to scrape the tailgate, so I added some HDPE pieces for it to slide on to keep it off the tailgate. Effective and easy to replace when they get worn. Next step is coat the decking in Herculiner and some t-track.
Also ordered my lift. AEV Dualsport with high cap springs. From my measurements with the lift, 37's (once I get them), and my tent installed I should have about 1.5-2 inches of clearance to fit in the garage.
OP
OP
JTdiRtyD
Well-Known Member
- Thread starter
- #22
AEV Dualsport RT with HD springs installed. I love the height, the Mrs might need a step stool. Took about 12 hours total, would have been faster had I known to drop the track bars right from the start to allow more axle drop. AEV claims you don't need adjustable track bars, but I'm about 3/4 inch to the drivers side so I'll be ordering some soon. They also claim the diesel doesn't need the passenger side spring spacer, but it's about 1/4" lower on t he passenger side even with a full fuel tank. I figure I'll let everything settle and check again, and if I still have a difference I'll put the spacer in when I do the track bars.
Also installed Wolfbox G930 mirror. I was able to get it to fit without interfering with the visors by taking a file to the ball socket arm and clocking the arm a little towards the passenger side. Much better fitment than the massive G900.
Also also installed a switched power fuse panel in the drivers footwell for any accessories that need switched power. It's connected directly to the battery through a continuous duty relay and triggered by fuse 57 (or whatever the heated seats fuse is).
And lastly, while I was removing the wheels I noticed a slight dip then bump in the sidewall of one of them (hard to see in the photo). Unsure if it's just weird from the side lugs or if the sidewall has a defect. Sent image to my tire guy. It's almost time for 37's anyways.
BlueScapegoat
Well-Known Member
You've been busy.AEV Dualsport RT with HD springs installed. I love the height, the Mrs might need a step stool. Took about 12 hours total, would have been faster had I known to drop the track bars right from the start to allow more axle drop. AEV claims you don't need adjustable track bars, but I'm about 3/4 inch to the drivers side so I'll be ordering some soon. They also claim the diesel doesn't need the passenger side spring spacer, but it's about 1/4" lower on t he passenger side even with a full fuel tank. I figure I'll let everything settle and check again, and if I still have a difference I'll put the spacer in when I do the track bars.
Also installed Wolfbox G930 mirror. I was able to get it to fit without interfering with the visors by taking a file to the ball socket arm and clocking the arm a little towards the passenger side. Much better fitment than the massive G900.
Also also installed a switched power fuse panel in the drivers footwell for any accessories that need switched power. It's connected directly to the battery through a continuous duty relay and triggered by fuse 57 (or whatever the heated seats fuse is).
And lastly, while I was removing the wheels I noticed a slight dip then bump in the sidewall of one of them (hard to see in the photo). Unsure if it's just weird from the side lugs or if the sidewall has a defect. Sent image to my tire guy. It's almost time for 37's anyways.
Did you double check the coil is rotated properly in the lower bucket? It's indexed for the coil. Mine sits level but not all Jeeps are the same and certainly parts can vary more than they should but I'd be surprised to see that from AEV. I always take mine to the local CAT scale to get measurements because I know it's perfectly flat and I'm trying to stay within GVWR.
I've had real slight bulges like that in sidewalls before and I just kept an eye on it and never had one develop worse. Then again, maybe a welcome opportunity to have to upgrade.
That rack turned out real nice. I'd be tempted to grab those files from you but I think I'm just going to end up going in a different direction. I have an issue with spending money three times to get where I wanted to go. But that's better, it used to be four or five.
What's next?
OP
OP
JTdiRtyD
Well-Known Member
- Thread starter
- #24
You've been busy.
Did you double check the coil is rotated properly in the lower bucket? It's indexed for the coil. Mine sits level but not all Jeeps are the same and certainly parts can vary more than they should but I'd be surprised to see that from AEV. I always take mine to the local CAT scale to get measurements because I know it's perfectly flat and I'm trying to stay within GVWR.
I've had real slight bulges like that in sidewalls before and I just kept an eye on it and never had one develop worse. Then again, maybe a welcome opportunity to have to upgrade.
That rack turned out real nice. I'd be tempted to grab those files from you but I think I'm just going to end up going in a different direction. I have an issue with spending money three times to get where I wanted to go. But that's better, it used to be four or five.
What's next?
Yeah I checked the coils. I'm going to measure again after some miles and see. 1/4" really isn't a big deal, but I'm OCD. And honestly I was a little disappointed in AEV on some things, particularly the hardware they give you. Some hardware was supposed to be used with OEM nuts, but threads weren't the same, some bolts weren't the correct diameter for the hole they were meant for, etc. I expected a little more attention to detail. And the fact that even though they claim you don't need adj track bars or extended brake lines, you honestly do. It should be the other way around, recommend these things but state you can technically get away without them in some cases.
Tire guy says the bumps/indents are where the belts comes together. As long as it indents inwards and not outwards they are fine.
If I were to do this rack setup again I'd just build from scratch like I did the Tacoma. I thought the Rebel rack would make things easier especially since they have their own enclosure system, I thought maybe it would end up being lighter, and there was some peace of mind knowing the weight rating of it all, but I could have made it far easier and better functioning if I had built it myself. Maybe I'll do it again down the road, but we will see how this plays out first.
Whats next? Oh man...
Near future items, not necessarily in this order
Adjustable track bars. Was looking at the Core4x4 you suggested and I think I'll snatch a set up.
Extended rear brake lines
Install house battery system under the rear seat platform
Design and build the elec panel for in the bed that will run all outdoor accessories and air comp
Get winch installed
Probably end up canceling myRTT order with 4x4Co and find another brand to work with (thinking Sterling Adventure Company)
Relocate GMRS antenna to the rear on a collapsible/foldable mount once I get an RTT
Farther out future things (hopefully before our Oct Utah trip, but likely winter projects)
Diet and tune (you've convinced me for stage 2)
37s
Might wrap the bed in matte black to match the rack and tent
rharr
Well-Known Member
- Joined
- May 6, 2021
- Threads
- 29
- Messages
- 2,025
- Reaction score
- 2,772
- Location
- Tucson, AZ
- Vehicle(s)
- 21 JTRD 3" RKK lift, (former) 95 XJ 5sp 8" lift
If you are getting adjustable track bars, might as well pick up a bent rear one if you ever decide to go with 37's.AEV Dualsport RT with HD springs installed. I love the height, the Mrs might need a step stool. Took about 12 hours total, would have been faster had I known to drop the track bars right from the start to allow more axle drop. AEV claims you don't need adjustable track bars, but I'm about 3/4 inch to the drivers side so I'll be ordering some soon. They also claim the diesel doesn't need the passenger side spring spacer, but it's about 1/4" lower on t he passenger side even with a full fuel tank. I figure I'll let everything settle and check again, and if I still have a difference I'll put the spacer in when I do the track bars.
Also installed Wolfbox G930 mirror. I was able to get it to fit without interfering with the visors by taking a file to the ball socket arm and clocking the arm a little towards the passenger side. Much better fitment than the massive G900.
Also also installed a switched power fuse panel in the drivers footwell for any accessories that need switched power. It's connected directly to the battery through a continuous duty relay and triggered by fuse 57 (or whatever the heated seats fuse is).
And lastly, while I was removing the wheels I noticed a slight dip then bump in the sidewall of one of them (hard to see in the photo). Unsure if it's just weird from the side lugs or if the sidewall has a defect. Sent image to my tire guy. It's almost time for 37's anyways.
Sponsored
BlueScapegoat
Well-Known Member
Oh that's a bummer. I've only bought AEV's individual components and I'm usually pretty impressed. They've got an OEM reputation to live up to since you can buy their stuff with factory warranties but then again the OEM quality isn't what it used to be either...Yeah I checked the coils. I'm going to measure again after some miles and see. 1/4" really isn't a big deal, but I'm OCD. And honestly I was a little disappointed in AEV on some things, particularly the hardware they give you. Some hardware was supposed to be used with OEM nuts, but threads weren't the same, some bolts weren't the correct diameter for the hole they were meant for, etc. I expected a little more attention to detail. And the fact that even though they claim you don't need adj track bars or extended brake lines, you honestly do. It should be the other way around, recommend these things but state you can technically get away without them in some cases.
Tire guy says the bumps/indents are where the belts comes together. As long as it indents inwards and not outwards they are fine.
If I were to do this rack setup again I'd just build from scratch like I did the Tacoma. I thought the Rebel rack would make things easier especially since they have their own enclosure system, I thought maybe it would end up being lighter, and there was some peace of mind knowing the weight rating of it all, but I could have made it far easier and better functioning if I had built it myself. Maybe I'll do it again down the road, but we will see how this plays out first.
Whats next? Oh man...
Near future items, not necessarily in this order
Adjustable track bars. Was looking at the Core4x4 you suggested and I think I'll snatch a set up.
Extended rear brake lines
Install house battery system under the rear seat platform
Design and build the elec panel for in the bed that will run all outdoor accessories and air comp
Get winch installed
Probably end up canceling myRTT order with 4x4Co and find another brand to work with (thinking Sterling Adventure Company)
Relocate GMRS antenna to the rear on a collapsible/foldable mount once I get an RTT
Farther out future things (hopefully before our Oct Utah trip, but likely winter projects)
Diet and tune (you've convinced me for stage 2)
37s
Might wrap the bed in matte black to match the rack and tent
Totally agree on track bars. They may not strictly be needed because depending on the size tire you're running vs what they suggest you might still be able to go lock to lock at flex without rubbing and it doesn't really affect alignment. But it's ugly. The stock brake lines go pretty far, I didn't upgrade mine until I went to longer Fox shocks. A lot of these companies package shocks that are honestly way too short for the lift height they advertise but it's so they can get around creeping the price up for brake lines and eventually front driveshafts. Also, on that note, a rear driveshaft spacer is a good idea.
You're talking about wrapping the entire bedside? I'd be interested in how that looks. Sort of Aussie tray-like?
I told JTdiRtyD this elsewhere already but I'll restate because I don't want to lead anyone astray. I installed a straight track bar on the rear of my diesel rubicon and it still cleared my STT Pro 37" spare when I had it back there. All 37s aren't created equal though. Nor are the Jeep frame measurements that precise sometimes. It was very close. And I kept the pressure low on it, something like 15 psiIf you are getting adjustable track bars, might as well pick up a bent rear one if you ever decide to go with 37's.
rharr
Well-Known Member
- Joined
- May 6, 2021
- Threads
- 29
- Messages
- 2,025
- Reaction score
- 2,772
- Location
- Tucson, AZ
- Vehicle(s)
- 21 JTRD 3" RKK lift, (former) 95 XJ 5sp 8" lift
Yes to your point, i used a bent track bar for my 37" MT legends mud terrains, the stock had 1/2" clearance but i wanted a little more room.Oh that's a bummer. I've only bought AEV's individual components and I'm usually pretty impressed. They've got an OEM reputation to live up to since you can buy their stuff with factory warranties but then again the OEM quality isn't what it used to be either...
Totally agree on track bars. They may not strictly be needed because depending on the size tire you're running vs what they suggest you might still be able to go lock to lock at flex without rubbing and it doesn't really affect alignment. But it's ugly. The stock brake lines go pretty far, I didn't upgrade mine until I went to longer Fox shocks. A lot of these companies package shocks that are honestly way too short for the lift height they advertise but it's so they can get around creeping the price up for brake lines and eventually front driveshafts. Also, on that note, a rear driveshaft spacer is a good idea.
You're talking about wrapping the entire bedside? I'd be interested in how that looks. Sort of Aussie tray-like?
I told JTdiRtyD this elsewhere already but I'll restate because I don't want to lead anyone astray. I installed a straight track bar on the rear of my diesel rubicon and it still cleared my STT Pro 37" spare when I had it back there. All 37s aren't created equal though. Nor are the Jeep frame measurements that precise sometimes. It was very close. And I kept the pressure low on it, something like 15 psi
capncking
Well-Known Member
- First Name
- Charles
- Joined
- Mar 25, 2023
- Threads
- 2
- Messages
- 53
- Reaction score
- 37
- Location
- Friendswood, Texas
- Vehicle(s)
- 2023 Gladiator JT
- Occupation
- Retired
Very, very nice set up! I wish I had seen yours before installing my Rebel 1/2 rack. By the way, the side panels and rear door panels are on back order.Got a few things done.
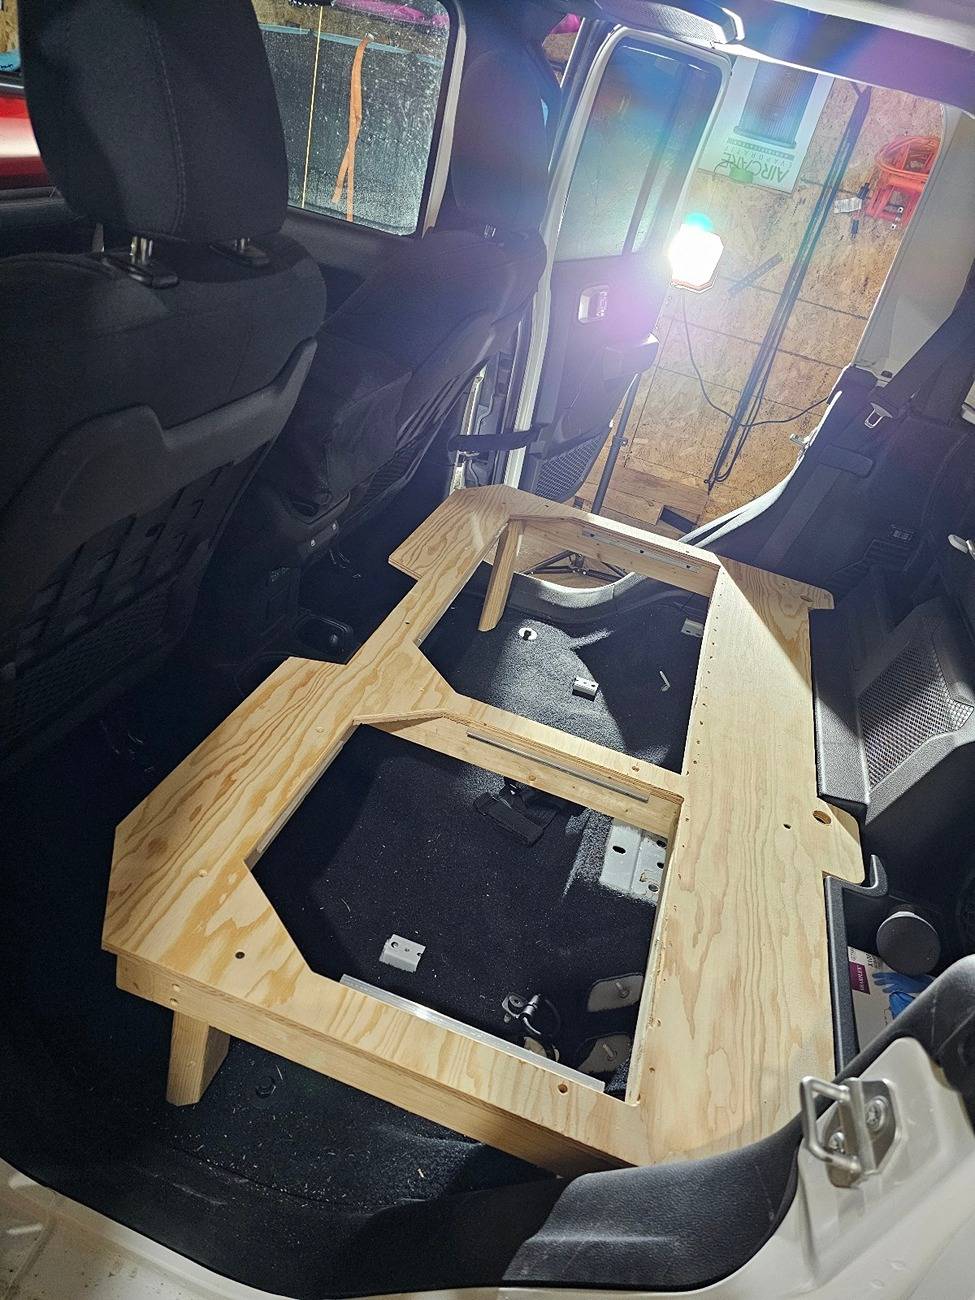
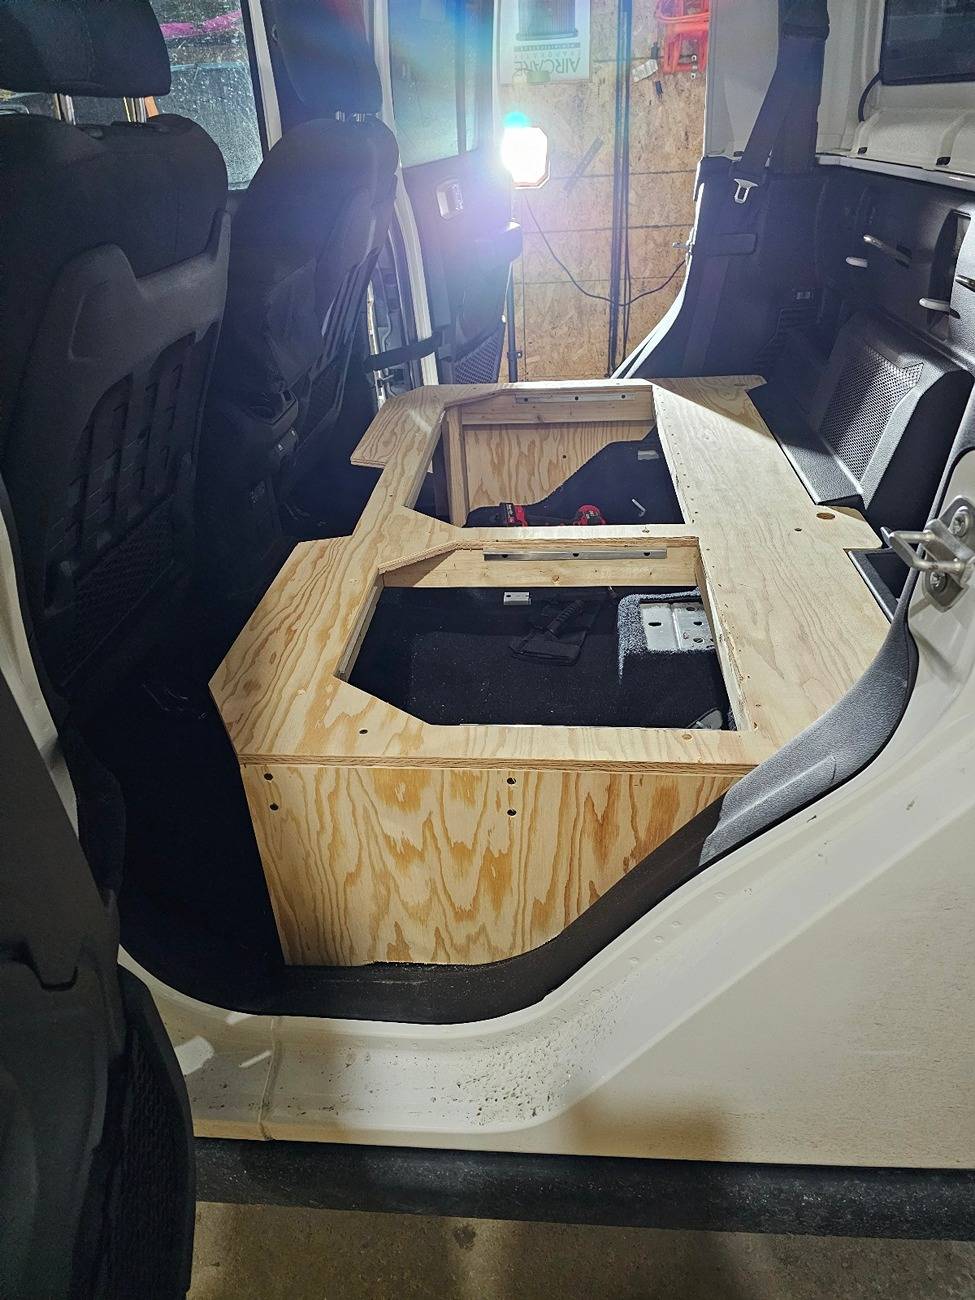
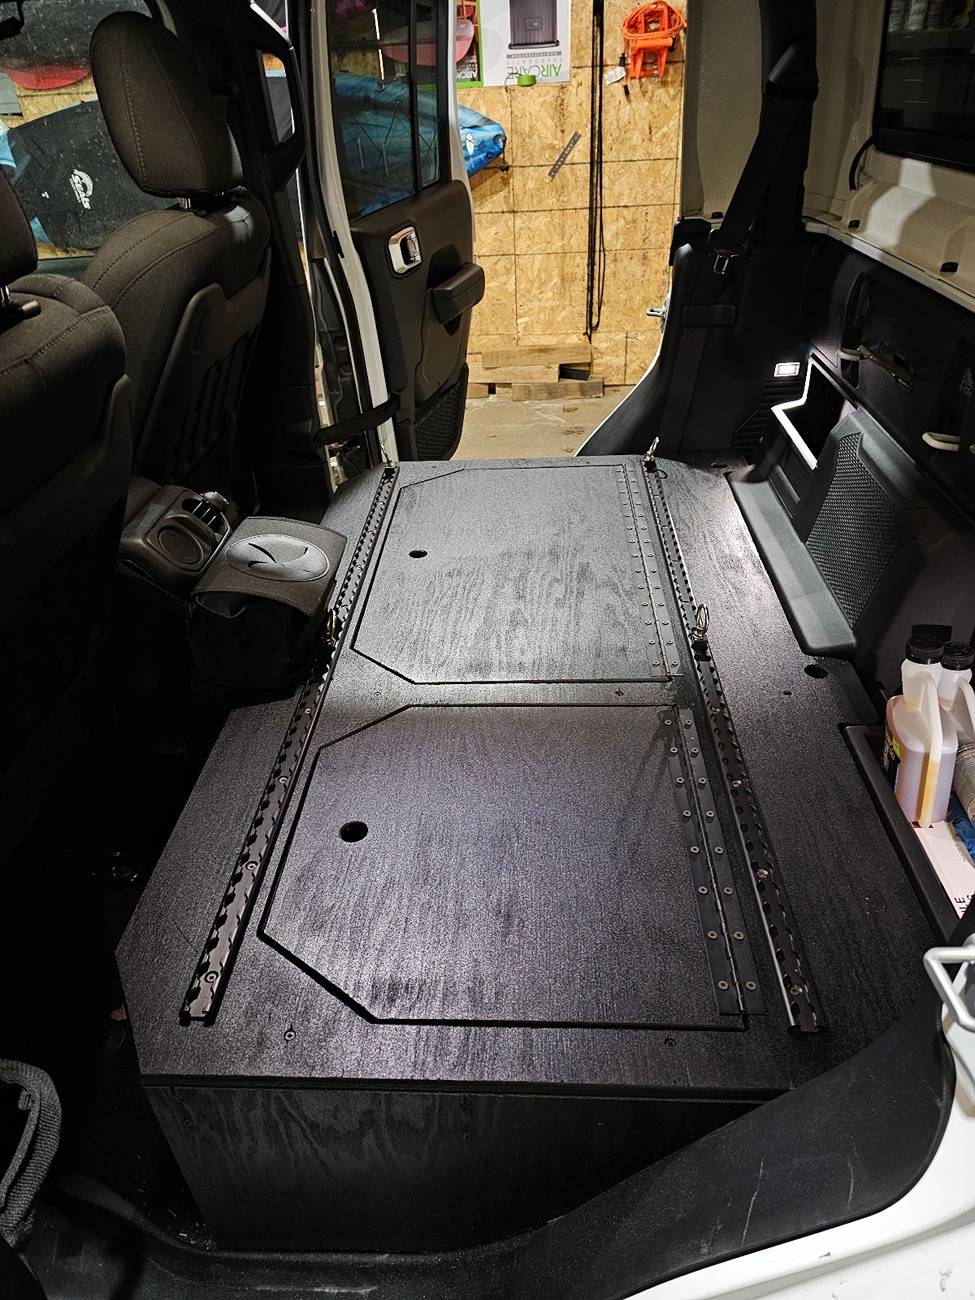
I finished my rear seat platform. Fridge and personal bags will be stored on the platform, and my second battery system will be installed under the passenger side. Under the drivers side will be more storage. Sprayed with Herculiner.
On the back wall will be some charging ports, but I'm still working out how I want to do that. I don't want to cut anything, so I'm thinking of printing new covers for whatever that cover is in the upper corners, and having all the charging ports on those. (if that doesnt make sense, you'll see what I mean when I start that project)

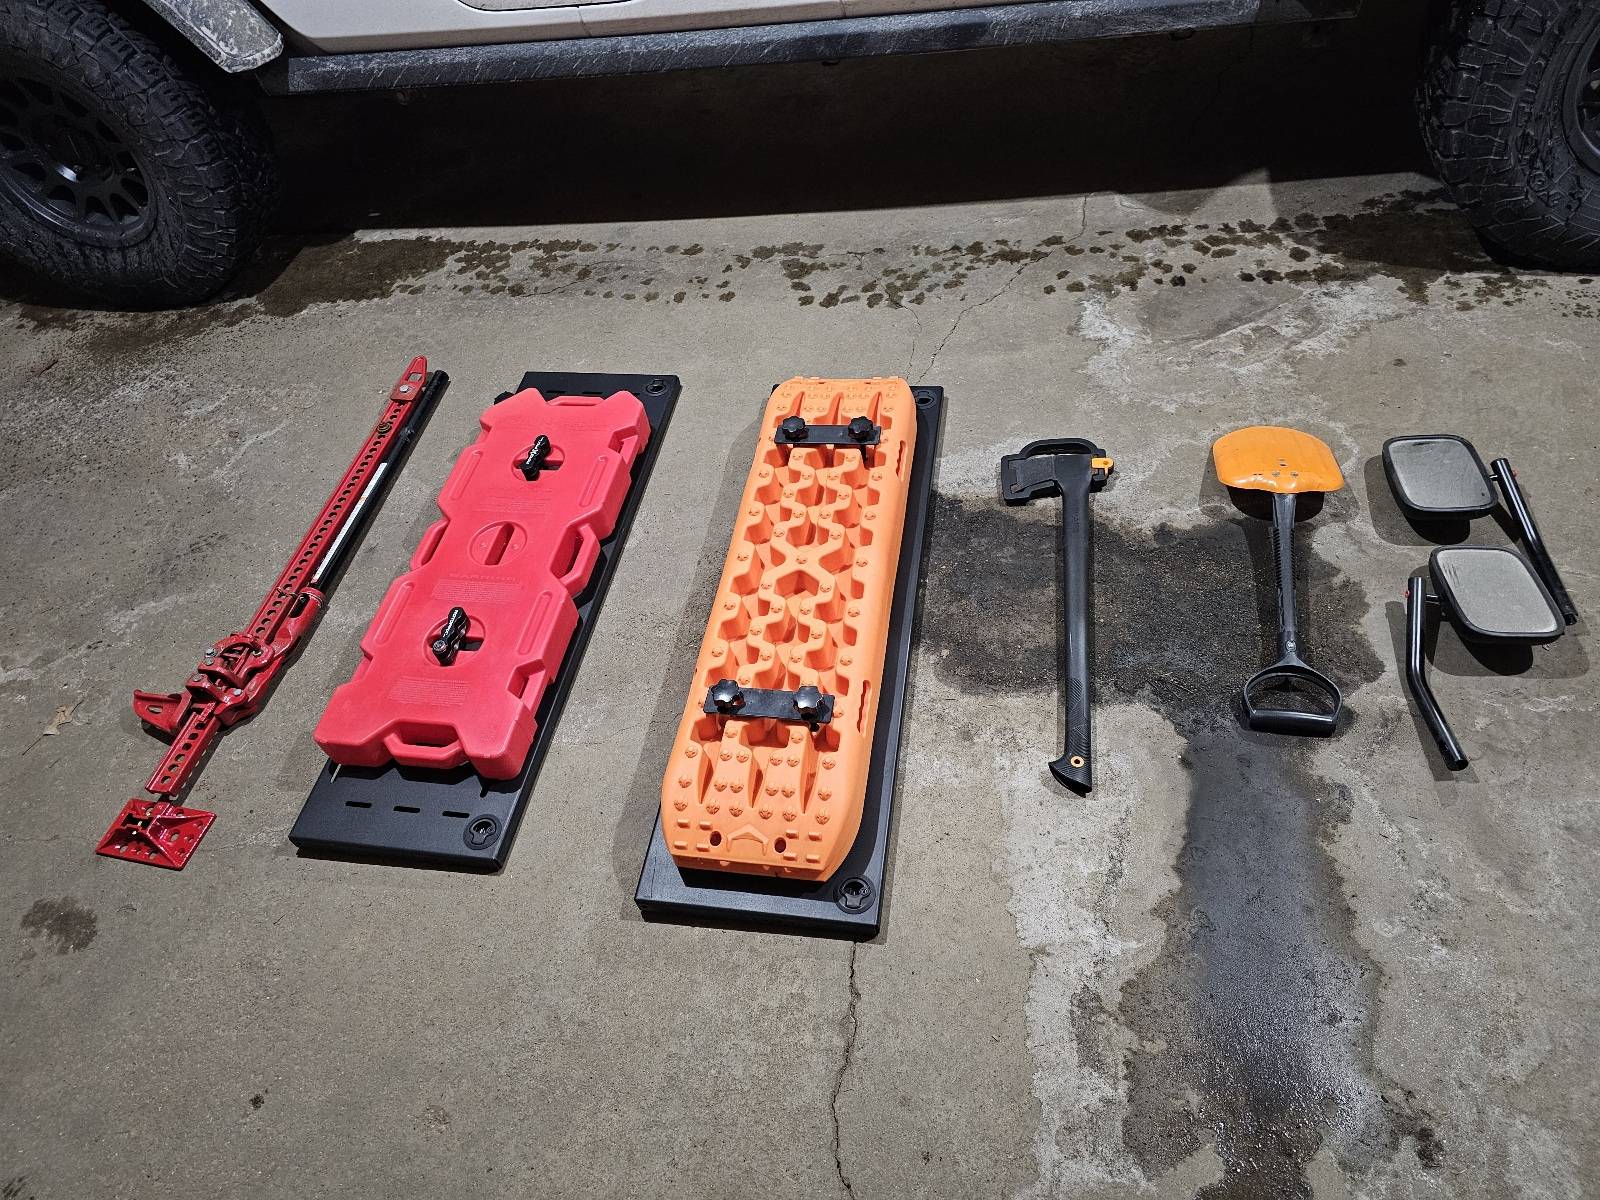
I also picked up a JCR bed rack, soft topper, and half roof rack. It came with the gull wing side plates, traction boards, Rotopax, shovel, axe, hi-lift, and Milwuakee pack out mounts. Bought this from the same guy I bought the Decked drawers from. I got it all for $1,000! My original plan ws to build a GFC topper/tent, and I still plan to, but I couldn't pass this deal up and I can use this for trips and take my time building the setup I really want.


Next up on my radar is the dual battery install and suspension. Still need to pick up a lipo battery before I start that, and I'm thinking AEV Dual Sport XP for suspension.
Any chance you have drawing or dimensions for the rear seat delete you did such a great job on? It would save me from killing a million brain cells
TIA
CapnCking
BlueScapegoat
Well-Known Member
For sure, I cut my own rear seat delete and it's not nearly as clean as hisVery, very nice set up! I wish I had seen yours before installing my Rebel 1/2 rack. By the way, the side panels and rear door panels are on back order.
Any chance you have drawing or dimensions for the rear seat delete you did such a great job on? It would save me from killing a million brain cells
TIA
CapnCking
OP
OP
JTdiRtyD
Well-Known Member
- Thread starter
- #30
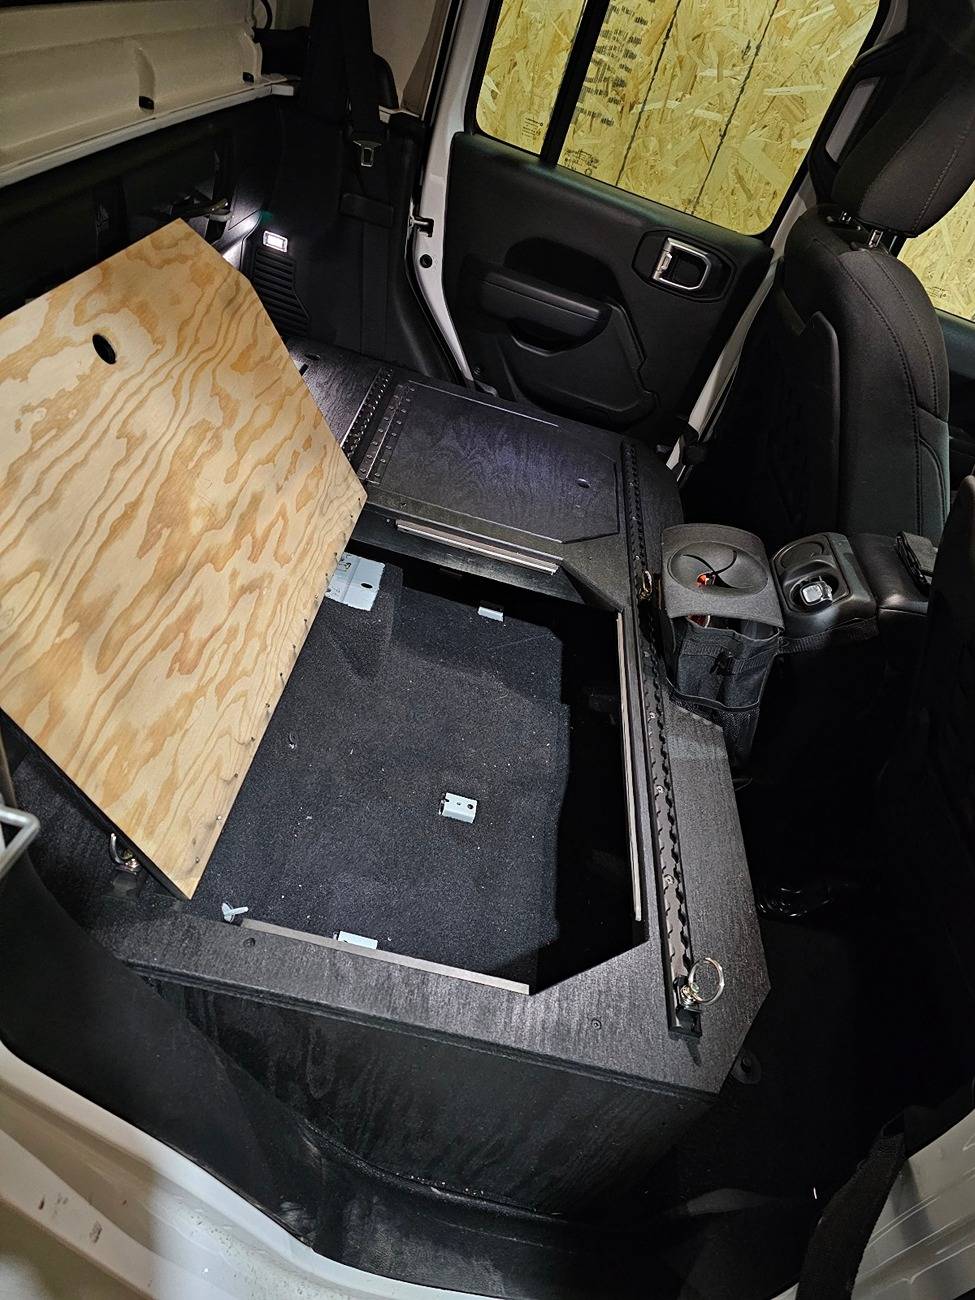
I actually have it out of the truck right now so I can see if I can get some measurements that will help out.Very, very nice set up! I wish I had seen yours before installing my Rebel 1/2 rack. By the way, the side panels and rear door panels are on back order.
Any chance you have drawing or dimensions for the rear seat delete you did such a great job on? It would save me from killing a million brain cells
TIA
CapnCking
The ticket is using cardboard to make a template of the platform first. Much easier to just cut another one if you screw it up.
Sponsored
Similar threads

- Replies
- 190
- Views
- 62,361