Sponsored

RokBlokz Splash Guards Value

JeepguyNY

Member
Joined
Aug 12, 2020
Threads
0
Messages
10
Reaction score
31
Location
Upstate New York
Vehicle(s)
2020 Jeep Gladiator Mojave 2020 Cadillac XT4 Turbo Sport 2014 VW Passat TDI
Occupation
Engineer
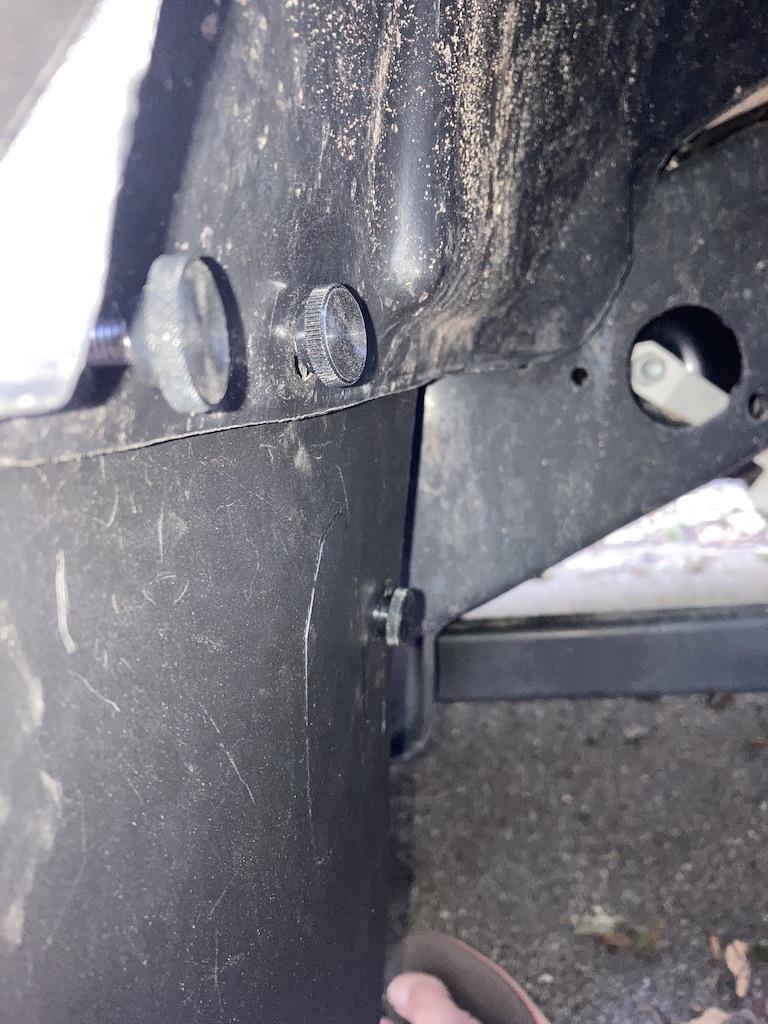
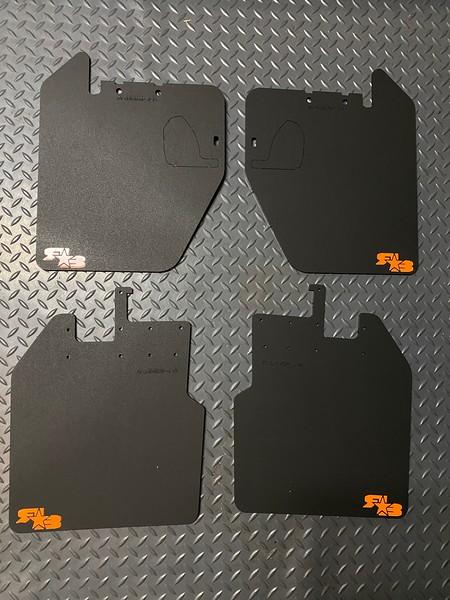
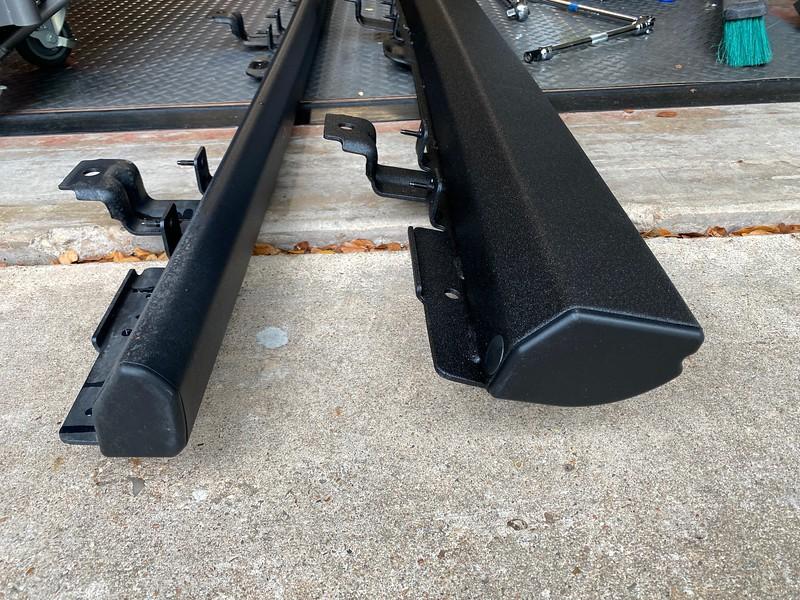
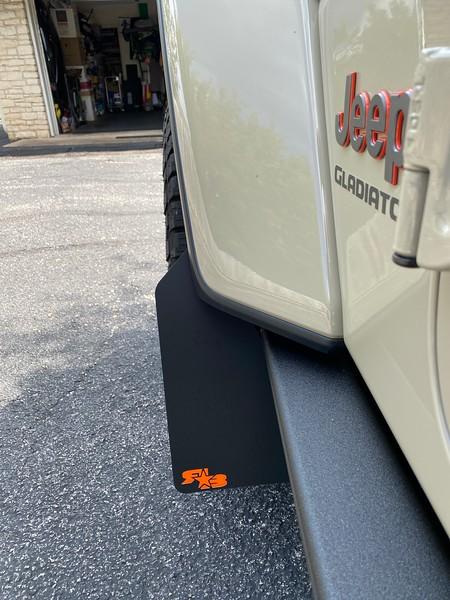
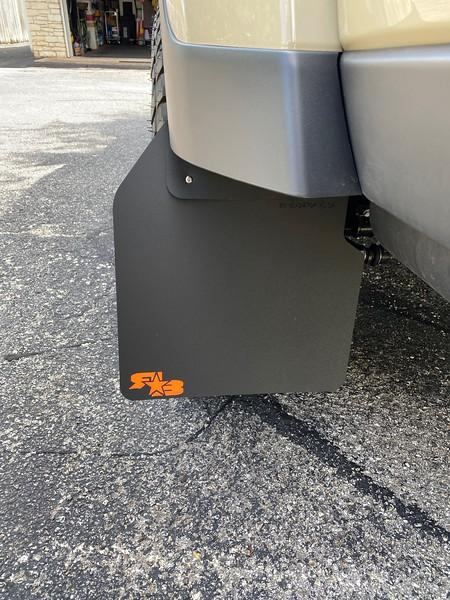
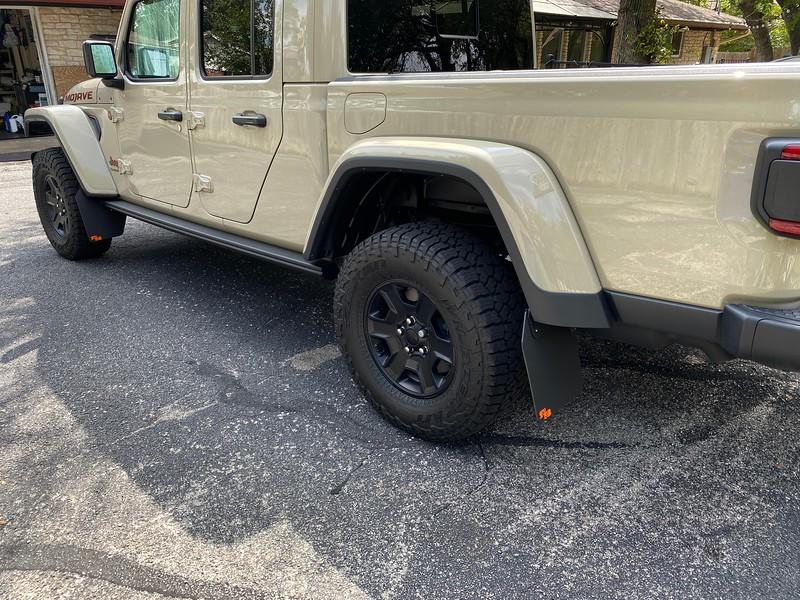
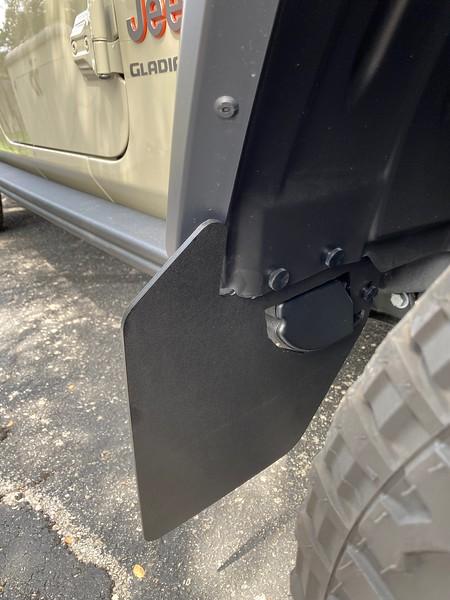
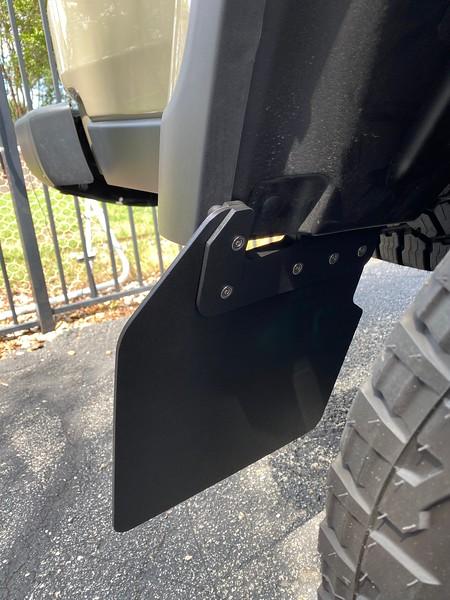
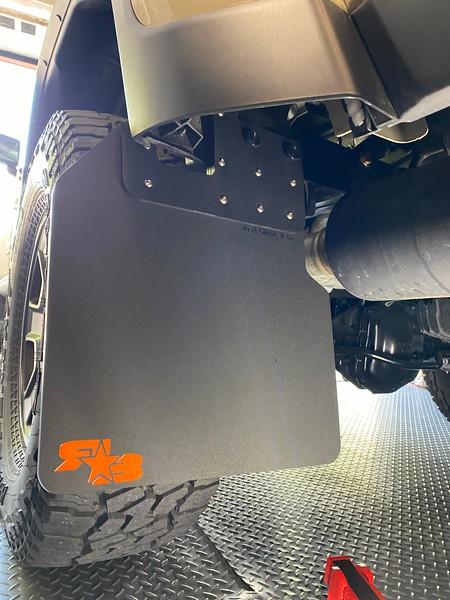
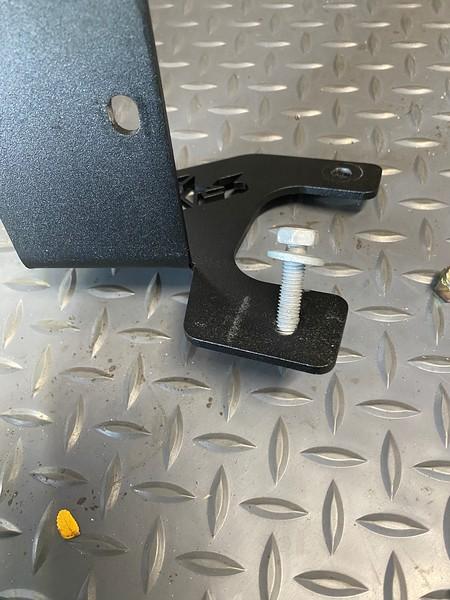
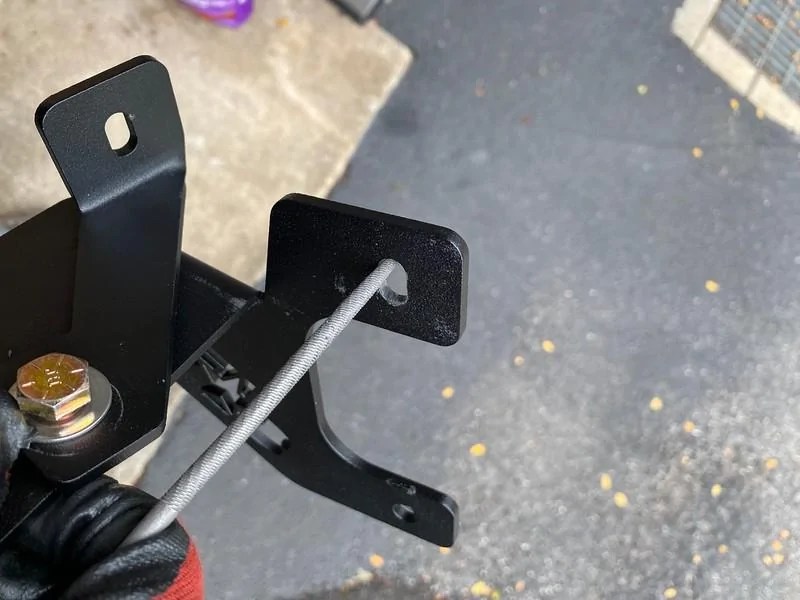
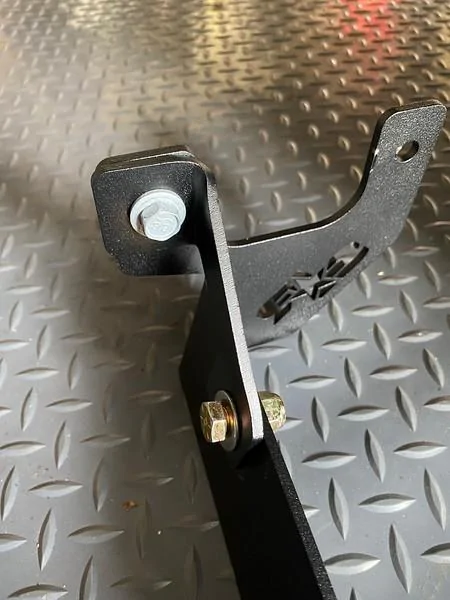
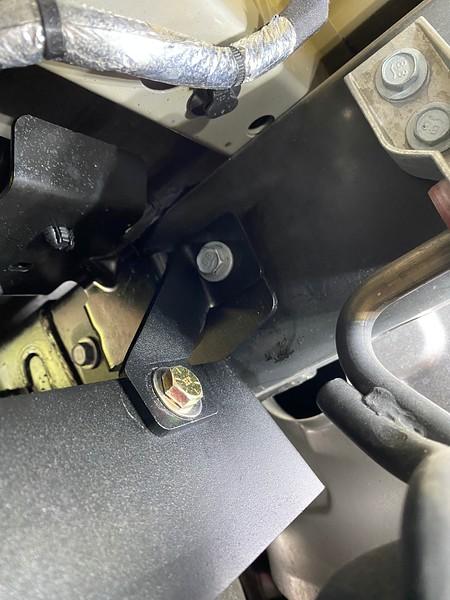
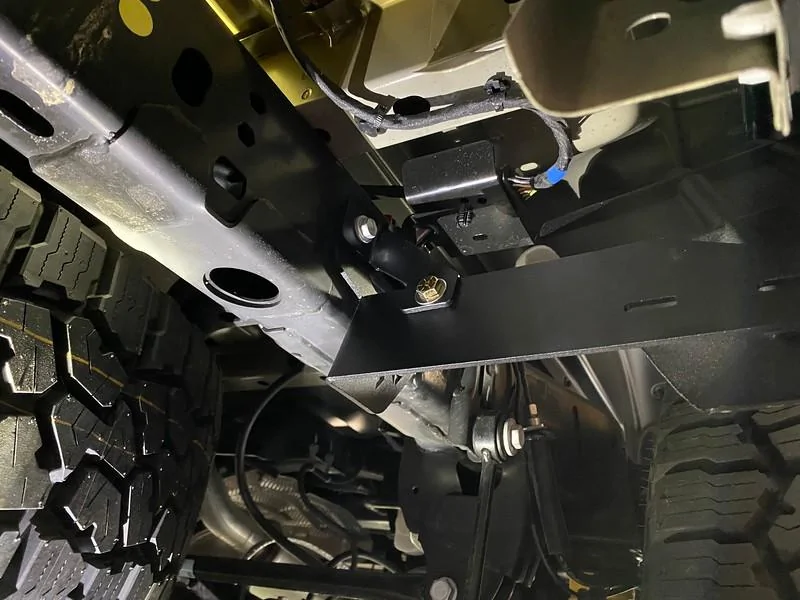
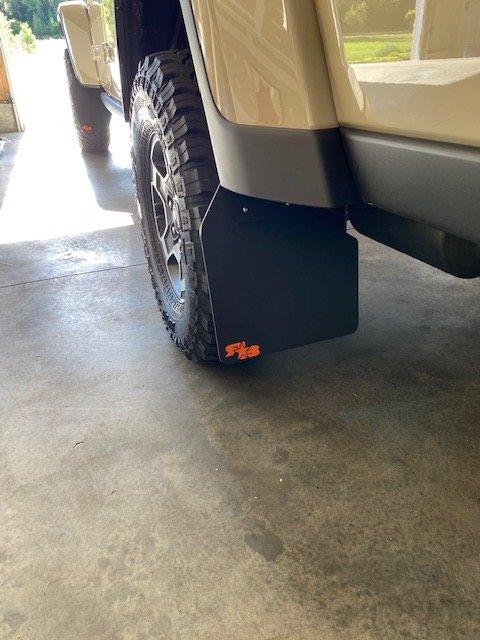
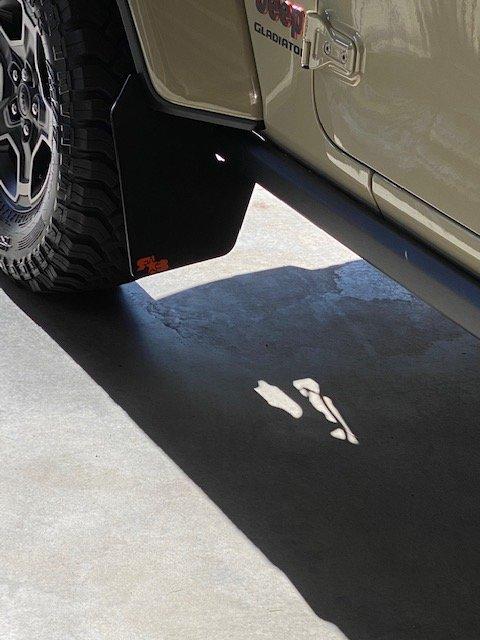
Installed my flaps yesterday. I love the quality of the product, but the instructions were subpar. Thank god for Youtube. I will say great customer service at Rokblokz.

IMG_1761.jpg


IMG_1762.jpg
Sponsored


Forum Crawler

Well-Known Member
Joined
May 14, 2020
Threads
2
Messages
329
Reaction score
530
Location
USA
Vehicle(s)
2020 Gladiator
Occupation
Working for the man every night and day
Had these on my JL. They are best of breed.
 

JT_Ollie

Well-Known Member
Joined
May 18, 2019
Threads
15
Messages
142
Reaction score
186
Location
32819
Vehicle(s)
LBB BMW M2, SG Jeep Gladiator
Has anyone had success installing the front RokBlokz flaps on the Overland trim? The groove that goes over the fender is 1-2cm too shallow, and I cannot seem to get the flap high enough to get the outer hole screwed in.

I am considering mounting the metal clips that are meant to go on the flap onto the fender and fender mount holes (so all of the clips would go onto the vehicle rather than 1 on the vehicle and 2 on the flap). Doing so would mean having the flap on the inner portion of the fender (seems ok...). Has anyone done this?

Thanks!
Did you get this to work?
 
OP
OP
MrZappo

MrZappo

Well-Known Member
First Name
Tom
Joined
Aug 9, 2020
Threads
13
Messages
777
Reaction score
1,855
Location
Granger, Indiana
Vehicle(s)
Gladiator Mojave
Occupation
Computer Consultant
I am beyond pissed about these Rokblokz rear mudflaps. $160 and they cant include the correct hardware! I traded our 2009 heavily modified JK fot a JT and own a heavily modified CJ7. So I know my way around wrenching. I 'm embarrassed to have paid for these. AND I had ordered more stuff from them before these showed up today.
So there was a shipping mishap and that has made you "beyond pissed"?

Have you called or emailed them? Have they refused to help?

Is a part missing? What is the issue?
 
OP
OP
MrZappo

MrZappo

Well-Known Member
First Name
Tom
Joined
Aug 9, 2020
Threads
13
Messages
777
Reaction score
1,855
Location
Granger, Indiana
Vehicle(s)
Gladiator Mojave
Occupation
Computer Consultant
Seems like your a bit more upset than a wrong screw size should warrant.

In any event. Mine were perfect and continue to be.

Which was the purpose of my thread. If your really that angry, maybe start a thread of your own.

I'm sure all of the other unhappy customers would welcome the chance to vent.
 

Sponsored

J33p3r_b3ast

Member
First Name
Rob
Joined
Aug 14, 2020
Threads
1
Messages
20
Reaction score
7
Location
Stevensville, MI
Vehicle(s)
2020 Jeep Gladiator Overland
Occupation
Ninja
Did you get this to work?
I sort of did -- the outer corner of the flap had to be bent forward to the inside of the wheel well to get the flap "up" far enough for the flap holes to align with the mount holes. That's fair enough.
However, still seeing an issue where the thumb screws are not flush with the vehicle wheel well. This was sort of awkward to photograph, I definitely felt the misalignment when screwing them in. Not really concerned about aesthetics, more concerned that over time the screws won't be secure. Will try again to re-align shortly, just have not had the desire to mess with these again after finally getting them on last week.
Jeep Gladiator RokBlokz Splash Guards Value UNADJUSTEDNONRAW_mini_629


Jeep Gladiator RokBlokz Splash Guards Value UNADJUSTEDNONRAW_thumb_62b
 

JKABBQ

Well-Known Member
First Name
Ron
Joined
Dec 10, 2019
Threads
3
Messages
116
Reaction score
228
Location
Vancouver
Vehicle(s)
1986 Corsair, 1991 P40
I sort of did -- the outer corner of the flap had to be bent forward to the inside of the wheel well to get the flap "up" far enough for the flap holes to align with the mount holes. That's fair enough.
However, still seeing an issue where the thumb screws are not flush with the vehicle wheel well. This was sort of awkward to photograph, I definitely felt the misalignment when screwing them in. Not really concerned about aesthetics, more concerned that over time the screws won't be secure. Will try again to re-align shortly, just have not had the desire to mess with these again after finally getting them on last week.
Jeep Gladiator RokBlokz Splash Guards Value UNADJUSTEDNONRAW_thumb_62b


Jeep Gladiator RokBlokz Splash Guards Value UNADJUSTEDNONRAW_thumb_62b
I haven’t seen up close what the Mojave has as I have the Rubicon which has the cut outs that allow them to be installed with the existing Rubi rails. Mine actually installed with the Ace engineering rock bolt on rock sliders as well. Would these fit more flush if they also had a cut out for the Mojave gladiator?
 

J33p3r_b3ast

Member
First Name
Rob
Joined
Aug 14, 2020
Threads
1
Messages
20
Reaction score
7
Location
Stevensville, MI
Vehicle(s)
2020 Jeep Gladiator Overland
Occupation
Ninja
I haven’t seen up close what the Mojave has as I have the Rubicon which has the cut outs that allow them to be installed with the existing Rubi rails. Mine actually installed with the Ace engineering rock bolt on rock sliders as well. Would these fit more flush if they also had a cut out for the Mojave gladiator?
Can’t speak to the Mojave, ours is an Overland.
 

Sponsored

atxatxatx

Well-Known Member
Joined
Aug 13, 2020
Threads
4
Messages
380
Reaction score
534
Location
Washington
Vehicle(s)
WK2Grand Cherokee,Gladiator Mojave
My set arrived via fedex this evening.
I'll probably install them tmrw morning, I need to cut out some extra on the front flaps to match the profile for the new "performance" mopar rock rails which I installed this evening to replace the rubicon ones.

i-Vqnz5Jw-L.jpg


rock rail difference
i-xbSqWdD-L.jpg
 

rvillano8188

Well-Known Member
First Name
Rob
Joined
May 20, 2019
Threads
38
Messages
799
Reaction score
761
Location
Long Island, NY
Vehicle(s)
2020 Punk'n JT Rubi, 2018 VW Tiguan SEL
Occupation
Financial Services
Has anyone installed these with rock hard rails? Wanted to see if the cutout is necessary or not
 

Benbean66

Well-Known Member
First Name
Ben
Joined
Apr 29, 2019
Threads
13
Messages
1,210
Reaction score
1,750
Location
PA
Vehicle(s)
1973 Honda CB350, '88 RHD YJ, '88 YJ, 2020 JT Spor
Occupation
Railroad Equipment Operator
Vehicle Showcase
1
My set arrived via fedex this evening.
I'll probably install them tmrw morning, I need to cut out some extra on the front flaps to match the profile for the new "performance" mopar rock rails which I installed this evening to replace the rubicon ones.

Jeep Gladiator RokBlokz Splash Guards Value i-xbSqWdD-L


rock rail difference
Jeep Gladiator RokBlokz Splash Guards Value i-xbSqWdD-L
How do you like these rock rails? I'm thinking about getting a set and would have trim my RokBloks, too.
 

atxatxatx

Well-Known Member
Joined
Aug 13, 2020
Threads
4
Messages
380
Reaction score
534
Location
Washington
Vehicle(s)
WK2Grand Cherokee,Gladiator Mojave
So I got them installed today, took me way too long.

Now first up, I fully expected to trimming the front flaps to make it fit due to my rails so that's on me I took my time doing this, but man that is thick rubber, I had to remove a lot of material to get the profile of the "performance" rock rails.
Even after all that I for whatever reason had a real hard time trying to screw in the thumb screws, it took me multiple attempts at adjusting it to get them in. Can't saw I'm a fan of this system IMO.
So I worked on the fronts first expecting these to be the most difficult thing to work on. Then I moved to the rears.
Ok so it looks pretty simple, fit the bracket and go. Well it appears that the bracket has had a redesign since these guys made their install instructions and their youtube video, there is now an extra brace on the bracket - so this brace prevents you from sliding it under the metal "electrical" cover as they have described it on their install instructions. Ok no biggie, so I then realize that I also can't get the OEM bolt into the bracket hole, I take it off again and take a closer look, so starters due to the new brace and how it's aligned it leaves a very small opening due to it overlapping the main bracket - so I took the brace off and then tried a test fit - bolt would still not go in. So then I got out a file and took some material off, only then then I get the OEM bolt through the hole, I also filed the brace hole, at this point I had figured out that my first action would be to put on the bracket to the frame first with the brace, and then after that finally tighten down the other location where the brace is secured. After all that I had the bracket on securely. Prior to this I had sent an email to the rokblokz guys asking them for assistance and gave my phone number for them to call me. I had no immediate response and when I was looking back at this thread I saw MrZappo photo which showed the same bracket design, so at least I knew I had the right style - no thanks to rokblokz on that.

Only for the youtube video I would have had a hard time figuring out how to assemble the rear mudflap, there are 5 shorter screws and then longer ones (only marginally longer). I'm a guy that likes to put together and have worked on many vehicles, but I did feel that Rokblokz should preassembly these rear mudflaps, it doesn't really take up much more shipping space. For a $200 set for mudflaps I can't say that I'm fully convinced that these are worth it, anyway they are on now and they will be staying, I'm not sure about the thumb screws being a good idea on the front considering how they might get slammed with debris. And they badly need to update their instructions, just feels like a lazy effort to me.

Oh and here we go, at 11:40am I had sent the email to the company asking them to give me a call, I just see in my email now that they responded at 5:27pm - never called me.
Anyway their quote "So we have updated our brackets to this kit. The OEM plate mounts between the main bracket and the support bracket. You'll want to loosen the bolt prior to placing it on, and tighten that bolt last. Attached you'll find a photo demonstration of how its supposed to mount." image they attached to the email is corrupt.
Good job I figured it out myself.

i-BFTsVbW-L.jpg


i-6Gv5zvb-L.jpg


i-FS7CW6m-L.jpg


i-g3Z7hdb-L.jpg


i-Mxd2Zkt-L.jpg


i-PsFCtbh-L.jpg


i-WmHszzZ-L.jpg


i-KH6ktVs-L.jpg


This is when I first realized the issue
i-fvTpzCn-L.jpg


Hole alignment due to brace as it was shipped
i-R7Rffpj-L.jpg


OEM bolt would not pass through
i-C8Lpvp7-L.jpg


Had to file the paint/powercoat away to make the bolt fit
i-t6gSJDK-L.jpg


Finally it could slide in, note I had the other brace bolt loose to install
i-HbP2W94-L.jpg


Brace installed
i-XPW7r2d-L.jpg


Other side went much quicker as I had it figured out at this stage
i-G6s4Brp-L.jpg


Anyway, excuse my rant. It's honestly never taken me this long before to mount mudflaps on a vehicle.
Hopefully my advice will help the next guy that tries to install the rear bracket.

I'm going to drink good tonight after all this.
 

JKABBQ

Well-Known Member
First Name
Ron
Joined
Dec 10, 2019
Threads
3
Messages
116
Reaction score
228
Location
Vancouver
Vehicle(s)
1986 Corsair, 1991 P40
So I got them installed today, took me way too long.

Now first up, I fully expected to trimming the front flaps to make it fit due to my rails so that's on me I took my time doing this, but man that is thick rubber, I had to remove a lot of material to get the profile of the "performance" rock rails.
Even after all that I for whatever reason had a real hard time trying to screw in the thumb screws, it took me multiple attempts at adjusting it to get them in. Can't saw I'm a fan of this system IMO.
So I worked on the fronts first expecting these to be the most difficult thing to work on. Then I moved to the rears.
Ok so it looks pretty simple, fit the bracket and go. Well it appears that the bracket has had a redesign since these guys made their install instructions and their youtube video, there is now an extra brace on the bracket - so this brace prevents you from sliding it under the metal "electrical" cover as they have described it on their install instructions. Ok no biggie, so I then realize that I also can't get the OEM bolt into the bracket hole, I take it off again and take a closer look, so starters due to the new brace and how it's aligned it leaves a very small opening due to it overlapping the main bracket - so I took the brace off and then tried a test fit - bolt would still not go in. So then I got out a file and took some material off, only then then I get the OEM bolt through the hole, I also filed the brace hole, at this point I had figured out that my first action would be to put on the bracket to the frame first with the brace, and then after that finally tighten down the other location where the brace is secured. After all that I had the bracket on securely. Prior to this I had sent an email to the rokblokz guys asking them for assistance and gave my phone number for them to call me. I had no immediate response and when I was looking back at this thread I saw MrZappo photo which showed the same bracket design, so at least I knew I had the right style - no thanks to rokblokz on that.

Only for the youtube video I would have had a hard time figuring out how to assemble the rear mudflap, there are 5 shorter screws and then longer ones (only marginally longer). I'm a guy that likes to put together and have worked on many vehicles, but I did feel that Rokblokz should preassembly these rear mudflaps, it doesn't really take up much more shipping space. For a $200 set for mudflaps I can't say that I'm fully convinced that these are worth it, anyway they are on now and they will be staying, I'm not sure about the thumb screws being a good idea on the front considering how they might get slammed with debris. And they badly need to update their instructions, just feels like a lazy effort to me.

Oh and here we go, at 11:40am I had sent the email to the company asking them to give me a call, I just see in my email now that they responded at 5:27pm - never called me.
Anyway their quote "So we have updated our brackets to this kit. The OEM plate mounts between the main bracket and the support bracket. You'll want to loosen the bolt prior to placing it on, and tighten that bolt last. Attached you'll find a photo demonstration of how its supposed to mount." image they attached to the email is corrupt.
Good job I figured it out myself.

Jeep Gladiator RokBlokz Splash Guards Value i-G6s4Brp-L


Jeep Gladiator RokBlokz Splash Guards Value i-G6s4Brp-L


Jeep Gladiator RokBlokz Splash Guards Value i-G6s4Brp-L


Jeep Gladiator RokBlokz Splash Guards Value i-G6s4Brp-L


Jeep Gladiator RokBlokz Splash Guards Value i-G6s4Brp-L


Jeep Gladiator RokBlokz Splash Guards Value i-G6s4Brp-L


Jeep Gladiator RokBlokz Splash Guards Value i-G6s4Brp-L


Jeep Gladiator RokBlokz Splash Guards Value i-G6s4Brp-L


This is when I first realized the issue
Jeep Gladiator RokBlokz Splash Guards Value i-G6s4Brp-L


Hole alignment due to brace as it was shipped
Jeep Gladiator RokBlokz Splash Guards Value i-G6s4Brp-L


OEM bolt would not pass through
Jeep Gladiator RokBlokz Splash Guards Value i-G6s4Brp-L


Had to file the paint/powercoat away to make the bolt fit
Jeep Gladiator RokBlokz Splash Guards Value i-G6s4Brp-L


Finally it could slide in, note I had the other brace bolt loose to install
Jeep Gladiator RokBlokz Splash Guards Value i-G6s4Brp-L


Brace installed
Jeep Gladiator RokBlokz Splash Guards Value i-G6s4Brp-L


Other side went much quicker as I had it figured out at this stage
Jeep Gladiator RokBlokz Splash Guards Value i-G6s4Brp-L


Anyway, excuse my rant. It's honestly never taken me this long before to mount mudflaps on a vehicle.
Hopefully my advice will help the next guy that tries to install the rear bracket.

I'm going to drink good tonight after all this.
So I think I got that extra piece on my rear mounting bracket as well. I just assumed I was sent the wrong one but everything else matched up so I just installed it by watching their YouTube vid. I didn’t realize this was a redesign.
Sponsored


Top