Sponsored
What did you do TO your Gladiator today? [ADMIN WARNING: NO POLITICS, NO GUN TALK]
- Thread starter The4x4Guys
- Start date
- Watchers 1,483
mx5red
Well-Known Member
I agree, it’s irritating having to fit all these parts that are supposed to be bolt on... but there’s nothing else like the Rusty’s frame skids on the market. TBH opening the holes wasn’t too terrible, I hated lining up the LCA bolts though!I really want these, but I guess really I want a set that fits.
Last edited:
![Jeep Gladiator What did you do TO your Gladiator today? [ADMIN WARNING: NO POLITICS, NO GUN TALK] 20210108_133023](https://cdn.jeepgladiatorforum.com/attachments/125/125934-db92e72b04d112a189c2cb4693b5d8d1.jpg)
Rubiwoo
Well-Known Member
- First Name
- Michael
- Joined
- Jul 8, 2020
- Threads
- 34
- Messages
- 306
- Reaction score
- 275
- Location
- California
- Vehicle(s)
- 2020 Jeep Gladiator Rubicon
- Occupation
- Self Employeed
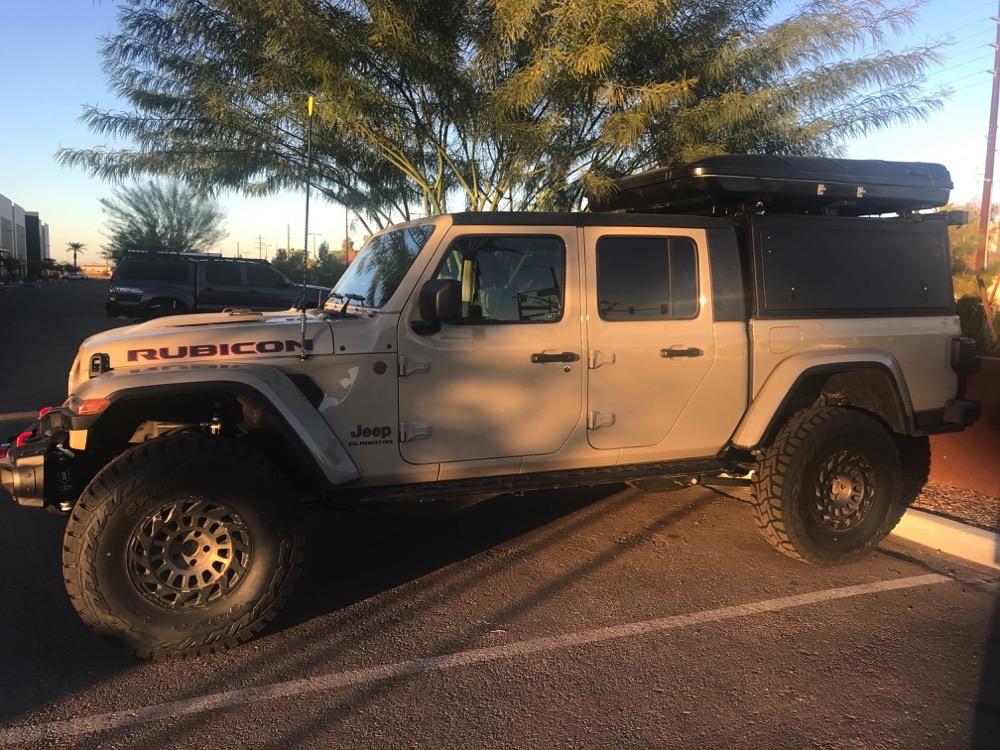
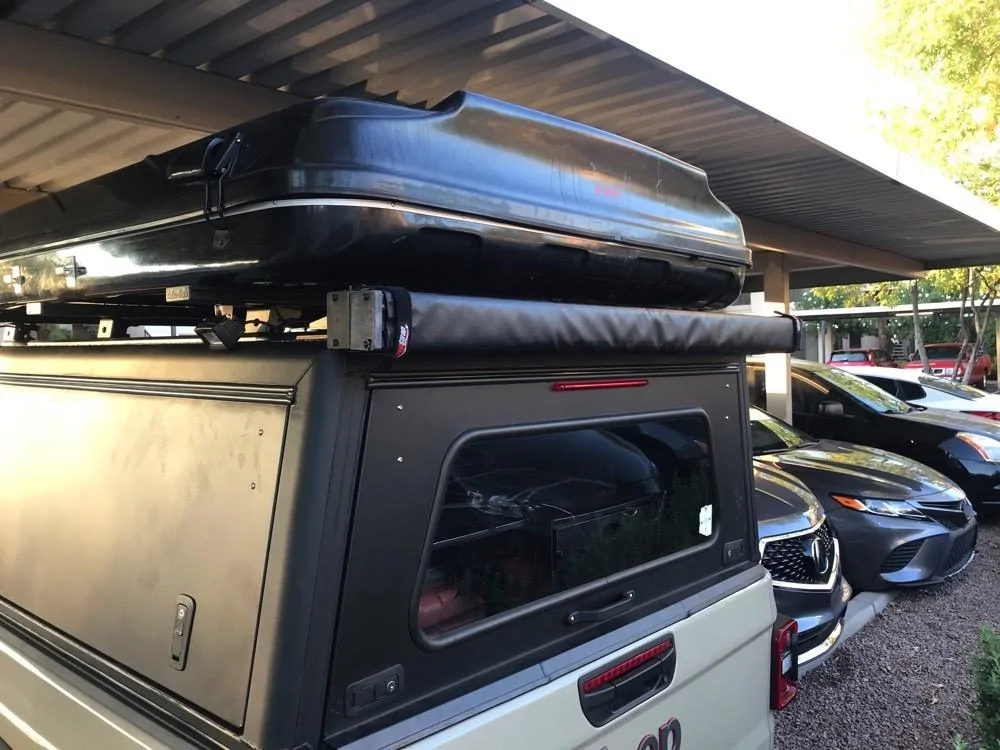
That looks very clean and functional.Finally got the last major bits of my overlanding build finished yesterday so I'll throw in:
2020 JTR with just about every stock option available. 2.5” Icon lift with custom rear springs for all the added weight. 37” Toyo R/T’s on Black Rhino Madness Wheels:

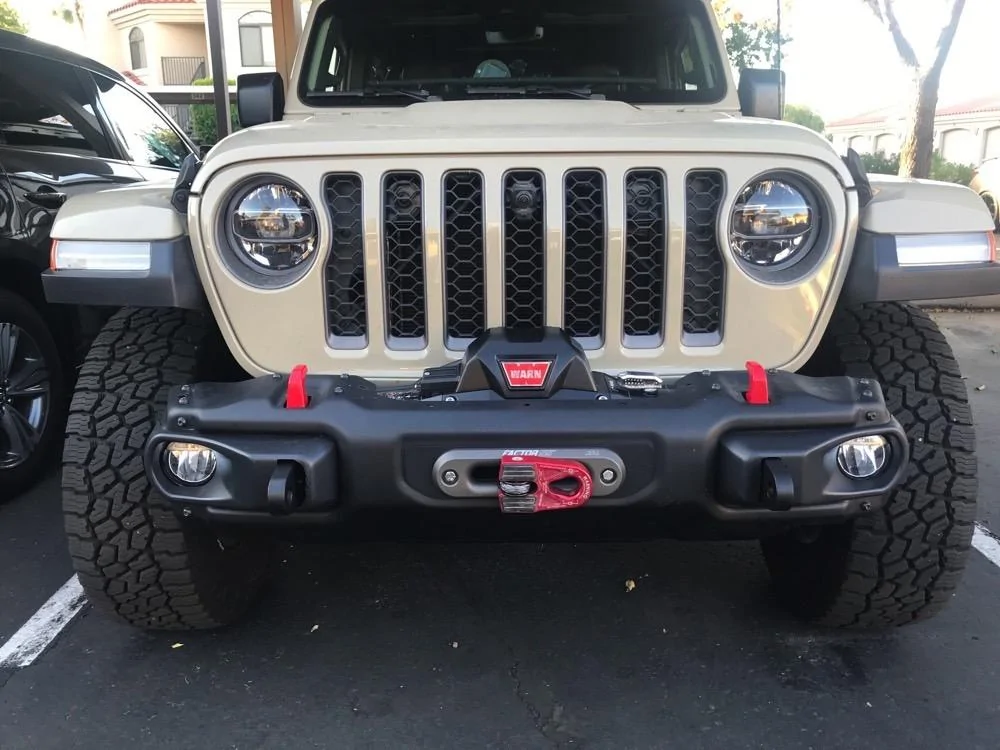
Slightly modified factory steel bumper. Removed side wings, installed Warn Winch, added FrogFab shackle mounts
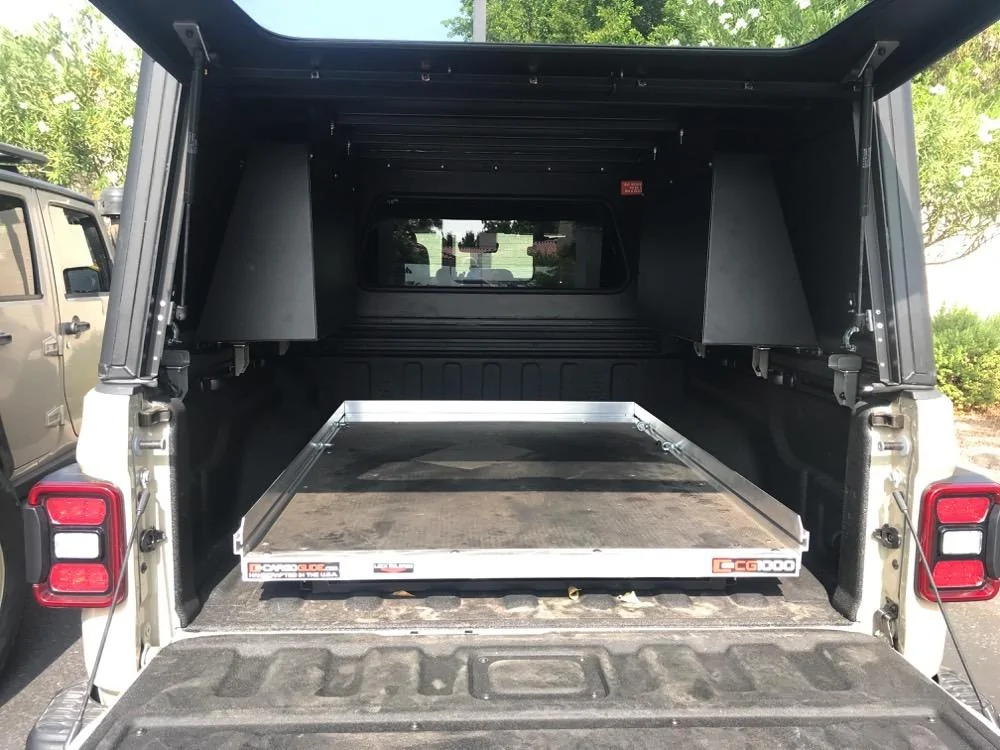
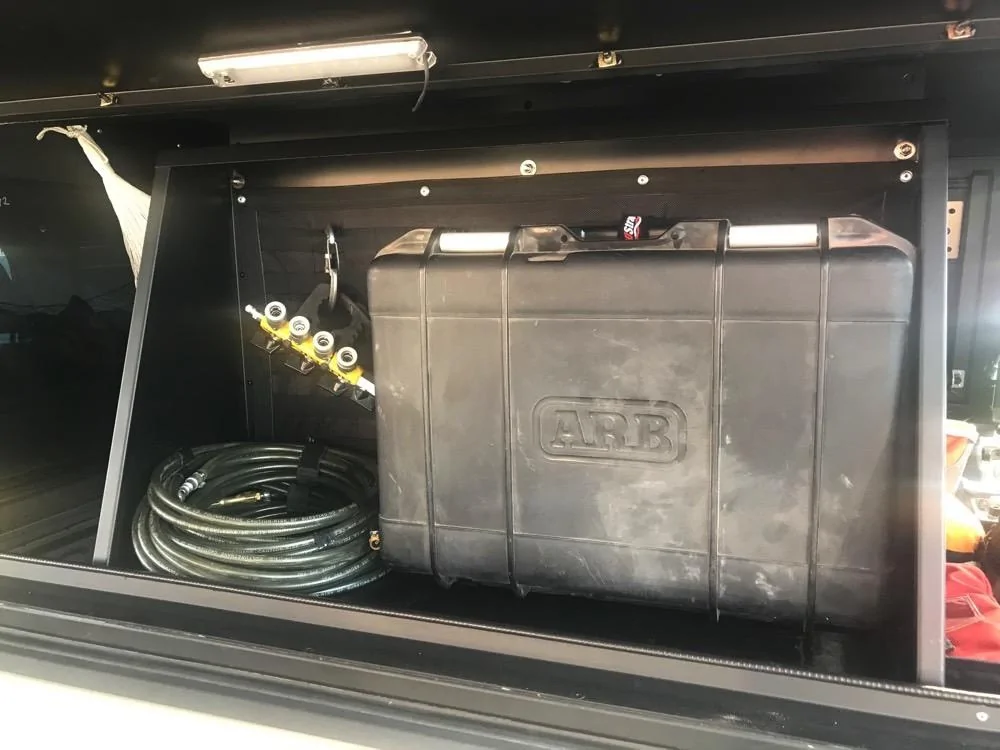
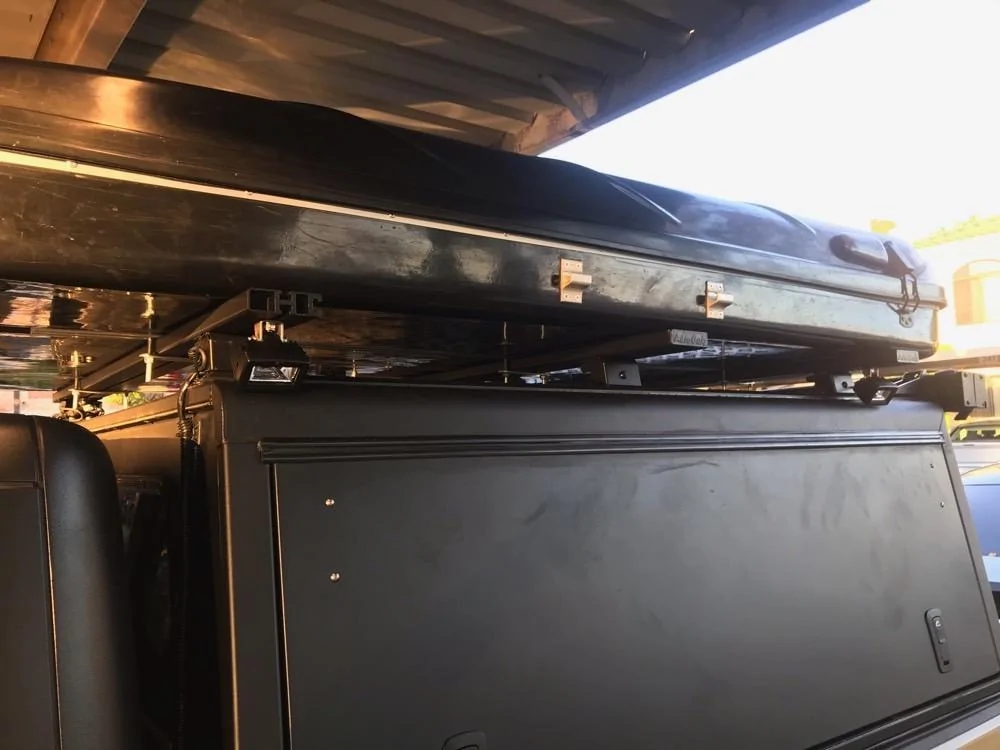
Added Alu-Cab Canopy and cargo slide
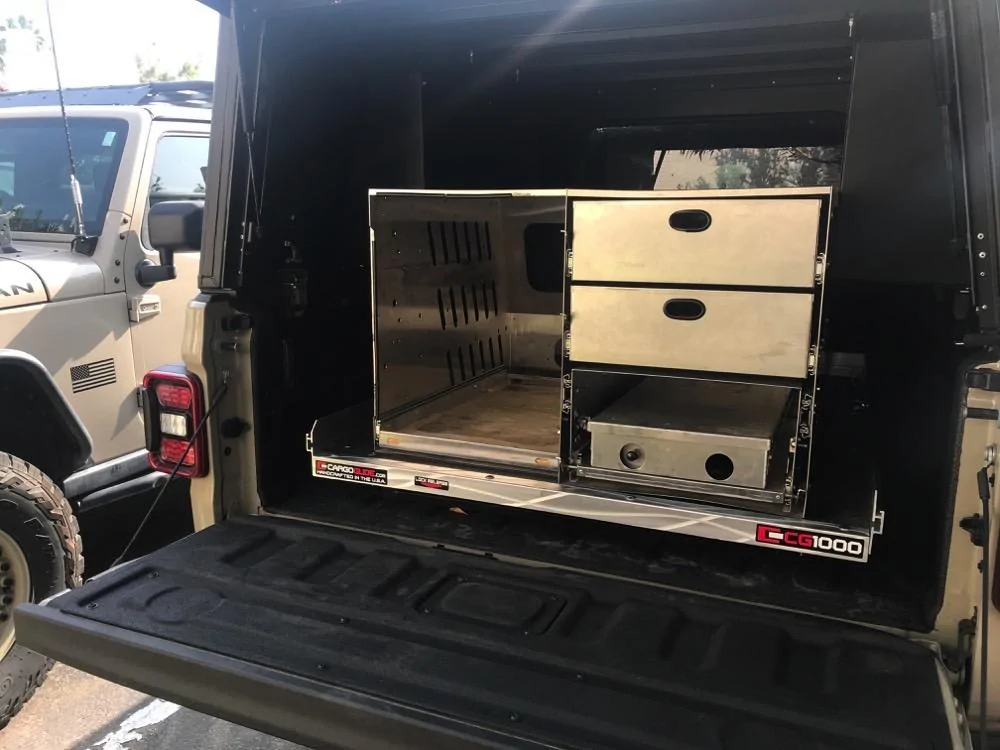
Mounted the Trail Kitchen (overlandkitchen.com) that came out of my JKUR
Driver's side cupboard filled with air equipment (haven't decided whether I want to mount the ARB dual compressor yet)
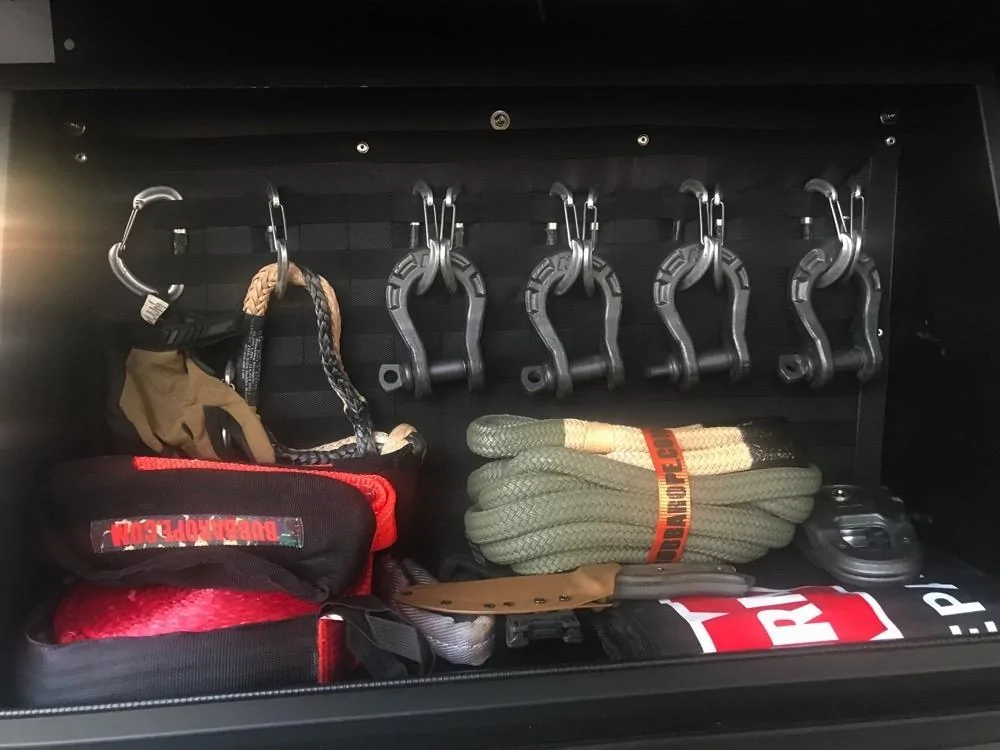
Passenger side cupboard has recovery gear
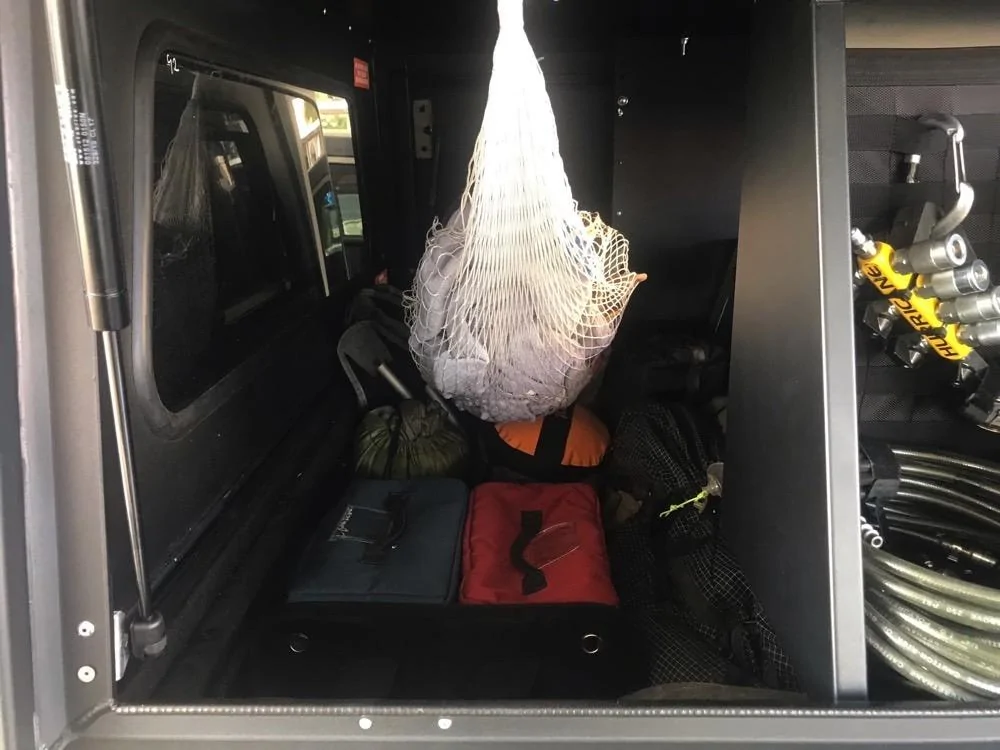
Storage cubes in the forward section of the cargo slide with chairs, water, etc. accessible forward of the cupboards. Not pictured is the Waterport that I just mounted on the Trail Rail
Added some perimeter lighting on both sides contolled by a Trigger 4 Plus that allows us to control lighting in the shell and perimeter from inside the RTT.
James Baroud RTT and Awning
There's a bunch of other minor details but those are the big nuggets.
Not a lot left that I want to do. Probably rock lights to complete the perimeter lighting theme.

ExitLeft
Well-Known Member
- Joined
- Sep 5, 2018
- Threads
- 6
- Messages
- 88
- Reaction score
- 45
- Location
- Philly ‘burbs
- Vehicle(s)
- 2020 Gladiator Overland
Looks good! How was the disassembly of the rear bumper to get to the bezel? That thread you linked to said it was a nightmare so they just cut the plastic. I’d rather use the correct bezel. I just ordered the parts...any tips? ThanksThanks. I'm happy with it.
I used the part #'s that forum member DHP listed in this thread:
https://www.jeepgladiatorforum.com/...senger-side-tow-hook-panel.32362/#post-551798
Sponsored
punk'n
Well-Known Member
- Joined
- Jul 10, 2020
- Threads
- 4
- Messages
- 563
- Reaction score
- 1,156
- Location
- East Coast
- Vehicle(s)
- R.I.P '20 Overland (totaled) Welcome home '21 Rubi
Like the thread mentions, it is a PIA. There is a youtube video that shows some of it, but not the part I really needed (he gets down and dirty into the bumper but never actually shows you when he is removing the old plastic bezel. Just shows the new one in place). He did help in that he shows you only have to partially disassemble the bumper and then focus on the one side. Lots of clips, nuts and push tabs.Looks good! How was the disassembly of the rear bumper to get to the bezel? That thread you linked to said it was a nightmare so they just cut the plastic. I’d rather use the correct bezel. I just ordered the parts...any tips? Thanks
Here's the Youtube video I am referring to:
One thing he mentions is at 4:14 where he talks about one bolt holding the large metal plate in place. He cut the metal tab the bolt is threaded into to be able to pivot the metal plate out of place and to get access below. I did not have to cut that metal tab (I saw no way to fix it without full bumper disassembly). I was still able to pivot the metal plate and have it rotate over the plastic part of the bumper by going gently. So, when I (easily) swung it back in place when I was finished, no harm, no foul.
Anyway, my main problem was: to actually install the new $5 plastic bezel in place, I ended up having to use an air body saw to cut the old $5 bezel up (while in place). That let me deform it and pop it out. The issue I had was getting to the mounting clips on the one edge to free them up. I couldn't reach them with any tool (and I have a lot) to do it. Somehow, he got the old one off because he shows it out in the video and on the bench but doesn't show how he did it. Maybe my clips were just stubborn. If you have the same issue, study the new part and you can see where the tabs mount. (If you cut your old one out do so VERY CAREFULLY to not cut into the actual bumper cover. I did the bulk cuts with the body saw and then finished with a razor knife so I would have more control.)
Overall, it wasn't too horrible. I've had much, much worse vehicle projects. But, it was a pain. So set some time aside for it. Trim tools are your friend for this job.
(It actually took me longer to fab up that front light bar, but that was fun too.)
Anyway, good luck when you try it ?
Commodus
Well-Known Member
- First Name
- Buck
- Joined
- Aug 11, 2019
- Threads
- 22
- Messages
- 662
- Reaction score
- 719
- Location
- San Diego, Ca.
- Vehicle(s)
- Hydro Blue Gladiator, BMW X3
- Occupation
- Retired
- Vehicle Showcase
- 2
I installed my rock hard front control arm skids today, holding off on my Rusty's till the paint cures. I installed the driver side first, no problems. Then wet to the drivers side, first had to remove the fad skid to get a socket on the nut, then fought with that, really tight. Then like you, could not get the bolt back in due to axle shift, had to get my son to rock the truck back and forth enough to line up the control arm. Lesson learned, not everything is as easy as it should be for a bolt on.I agree, it’s irritating having to fit all these parts that are supposed to be bolt on... but there’s nothing else like these on the market. Tbh opening the holes wasn’t too terrible, I hated lining up the LCA bolts though!
ExitLeft
Well-Known Member
- Joined
- Sep 5, 2018
- Threads
- 6
- Messages
- 88
- Reaction score
- 45
- Location
- Philly ‘burbs
- Vehicle(s)
- 2020 Gladiator Overland
Wow....thanks for the detailed info! Maybe I’ll just cut a hole in it after all. LOLLike the thread mentions, it is a PIA. There is a youtube video that shows some of it, but not the part I really needed (he gets down and dirty into the bumper but never actually shows you when he is removing the old plastic bezel. Just shows the new one in place). He did help in that he shows you only have to partially disassemble the bumper and then focus on the one side. Lots of clips, nuts and push tabs.
Here's the Youtube video I am referring to:
One thing he mentions is at 4:14 where he talks about one bolt holding the large metal plate in place. He cut the metal tab the bolt is threaded into to be able to pivot the metal plate out of place and to get access below. I did not have to cut that metal tab (I saw no way to fix it without full bumper disassembly). I was still able to pivot the metal plate and have it rotate over the plastic part of the bumper by going gently. So, when I (easily) swung it back in place when I was finished, no harm, no foul.
Anyway, my main problem was: to actually install the new $5 plastic bezel in place, I ended up having to use an air body saw to cut the old $5 bezel up (while in place). That let me deform it and pop it out. The issue I had was getting to the mounting clips on the one edge to free them up. I couldn't reach them with any tool (and I have a lot) to do it. Somehow, he got the old one off because he shows it out in the video and on the bench but doesn't show how he did it. Maybe my clips were just stubborn. If you have the same issue, study the new part and you can see where the tabs mount. (If you cut your old one out do so VERY CAREFULLY to not cut into the actual bumper cover. I did the bulk cuts with the body saw and then finished with a razor knife so I would have more control.)
Overall, it wasn't too horrible. I've had much, much worse vehicle projects. But, it was a pain. So set some time aside for it. Trim tools are your friend for this job.
(It actually took me longer to fab up that front light bar, but that was fun too.)
Anyway, good luck when you try it ?
ill probably try to disassemble everything when the weather warms up. My Glady won’t fit in my garage.
awesome info. Thanks
Jdyowa
Well-Known Member
- First Name
- Jeff
- Joined
- Dec 23, 2019
- Threads
- 3
- Messages
- 311
- Reaction score
- 588
- Location
- Lakeland, Florida
- Vehicle(s)
- Gladiator overland
- Occupation
- Manager
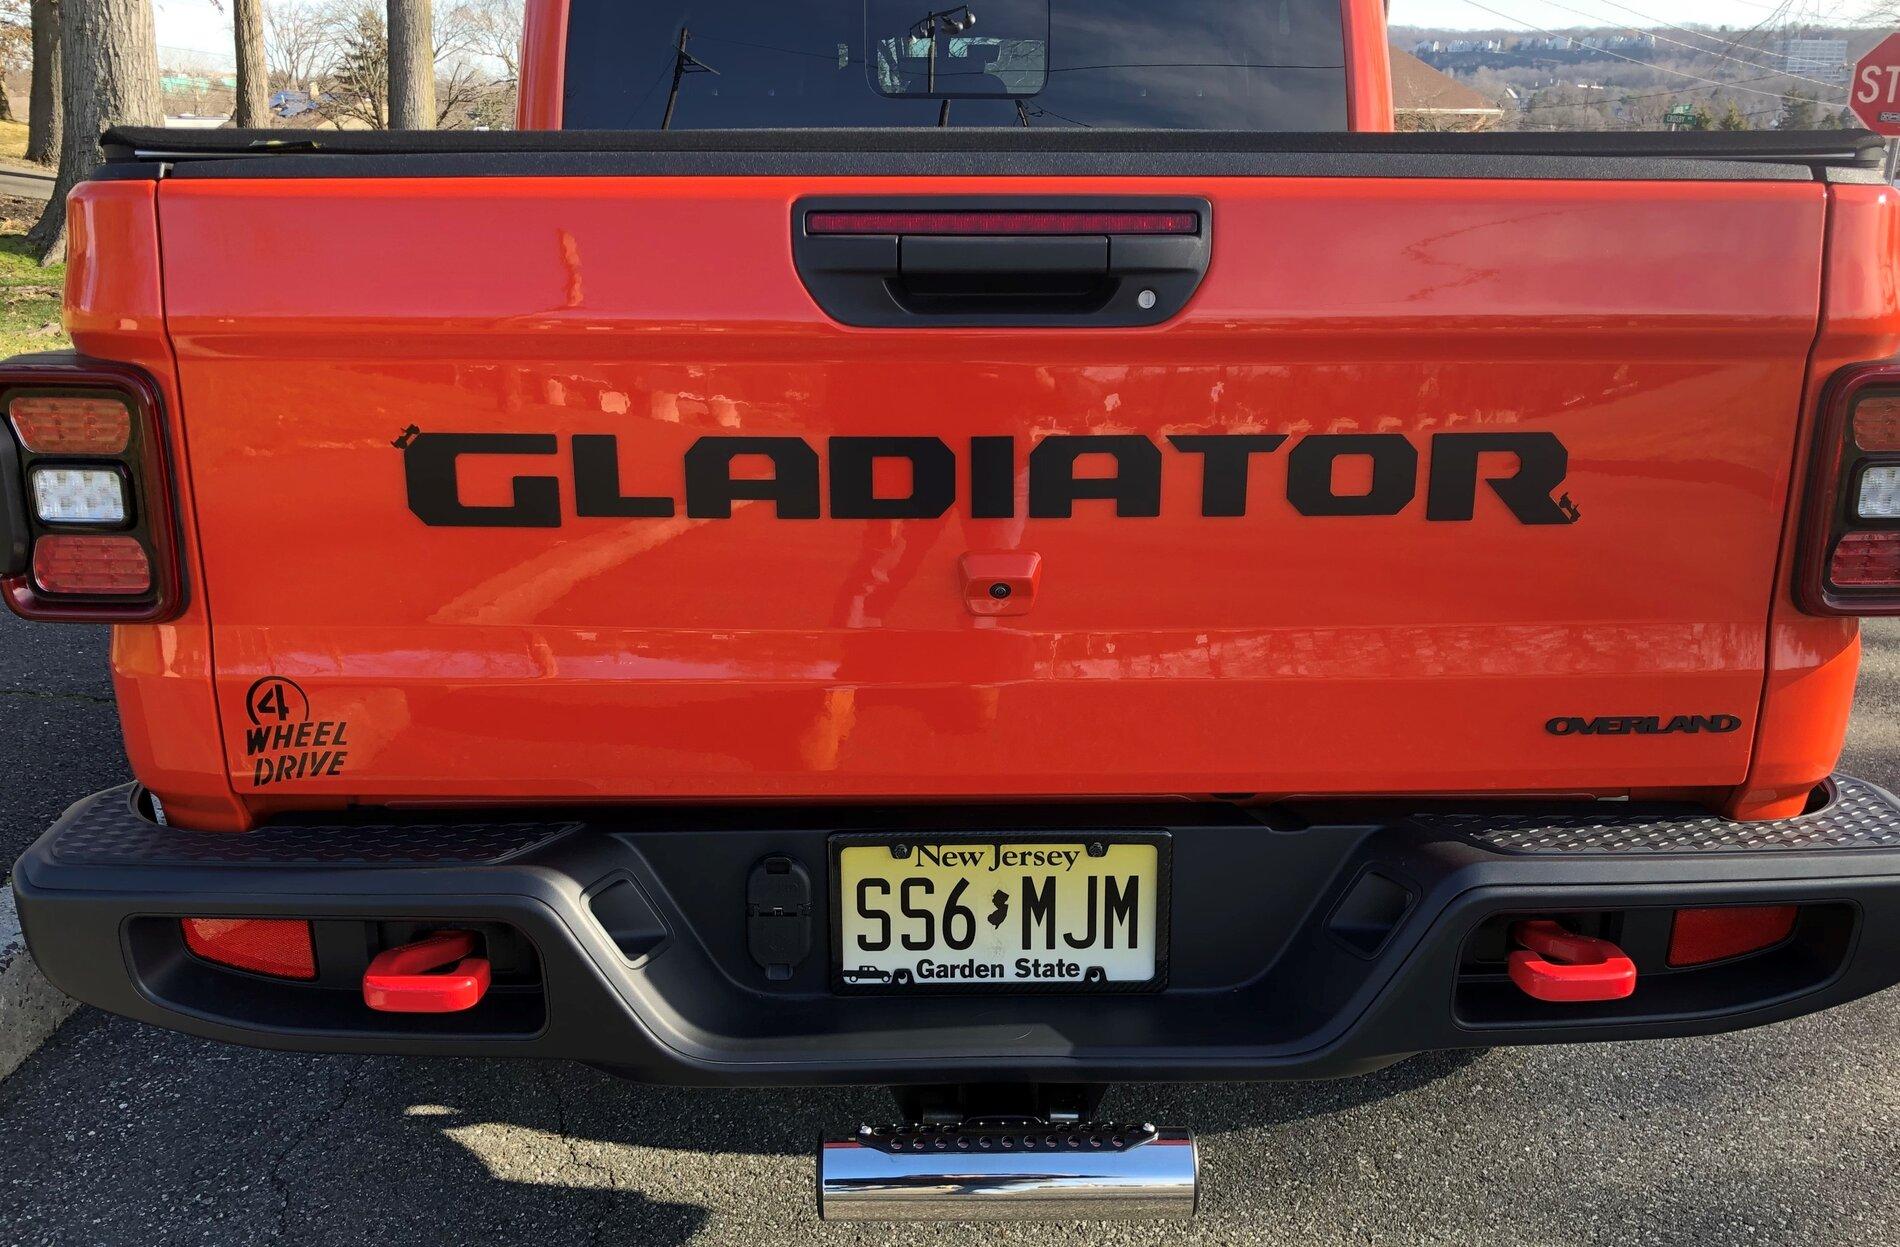
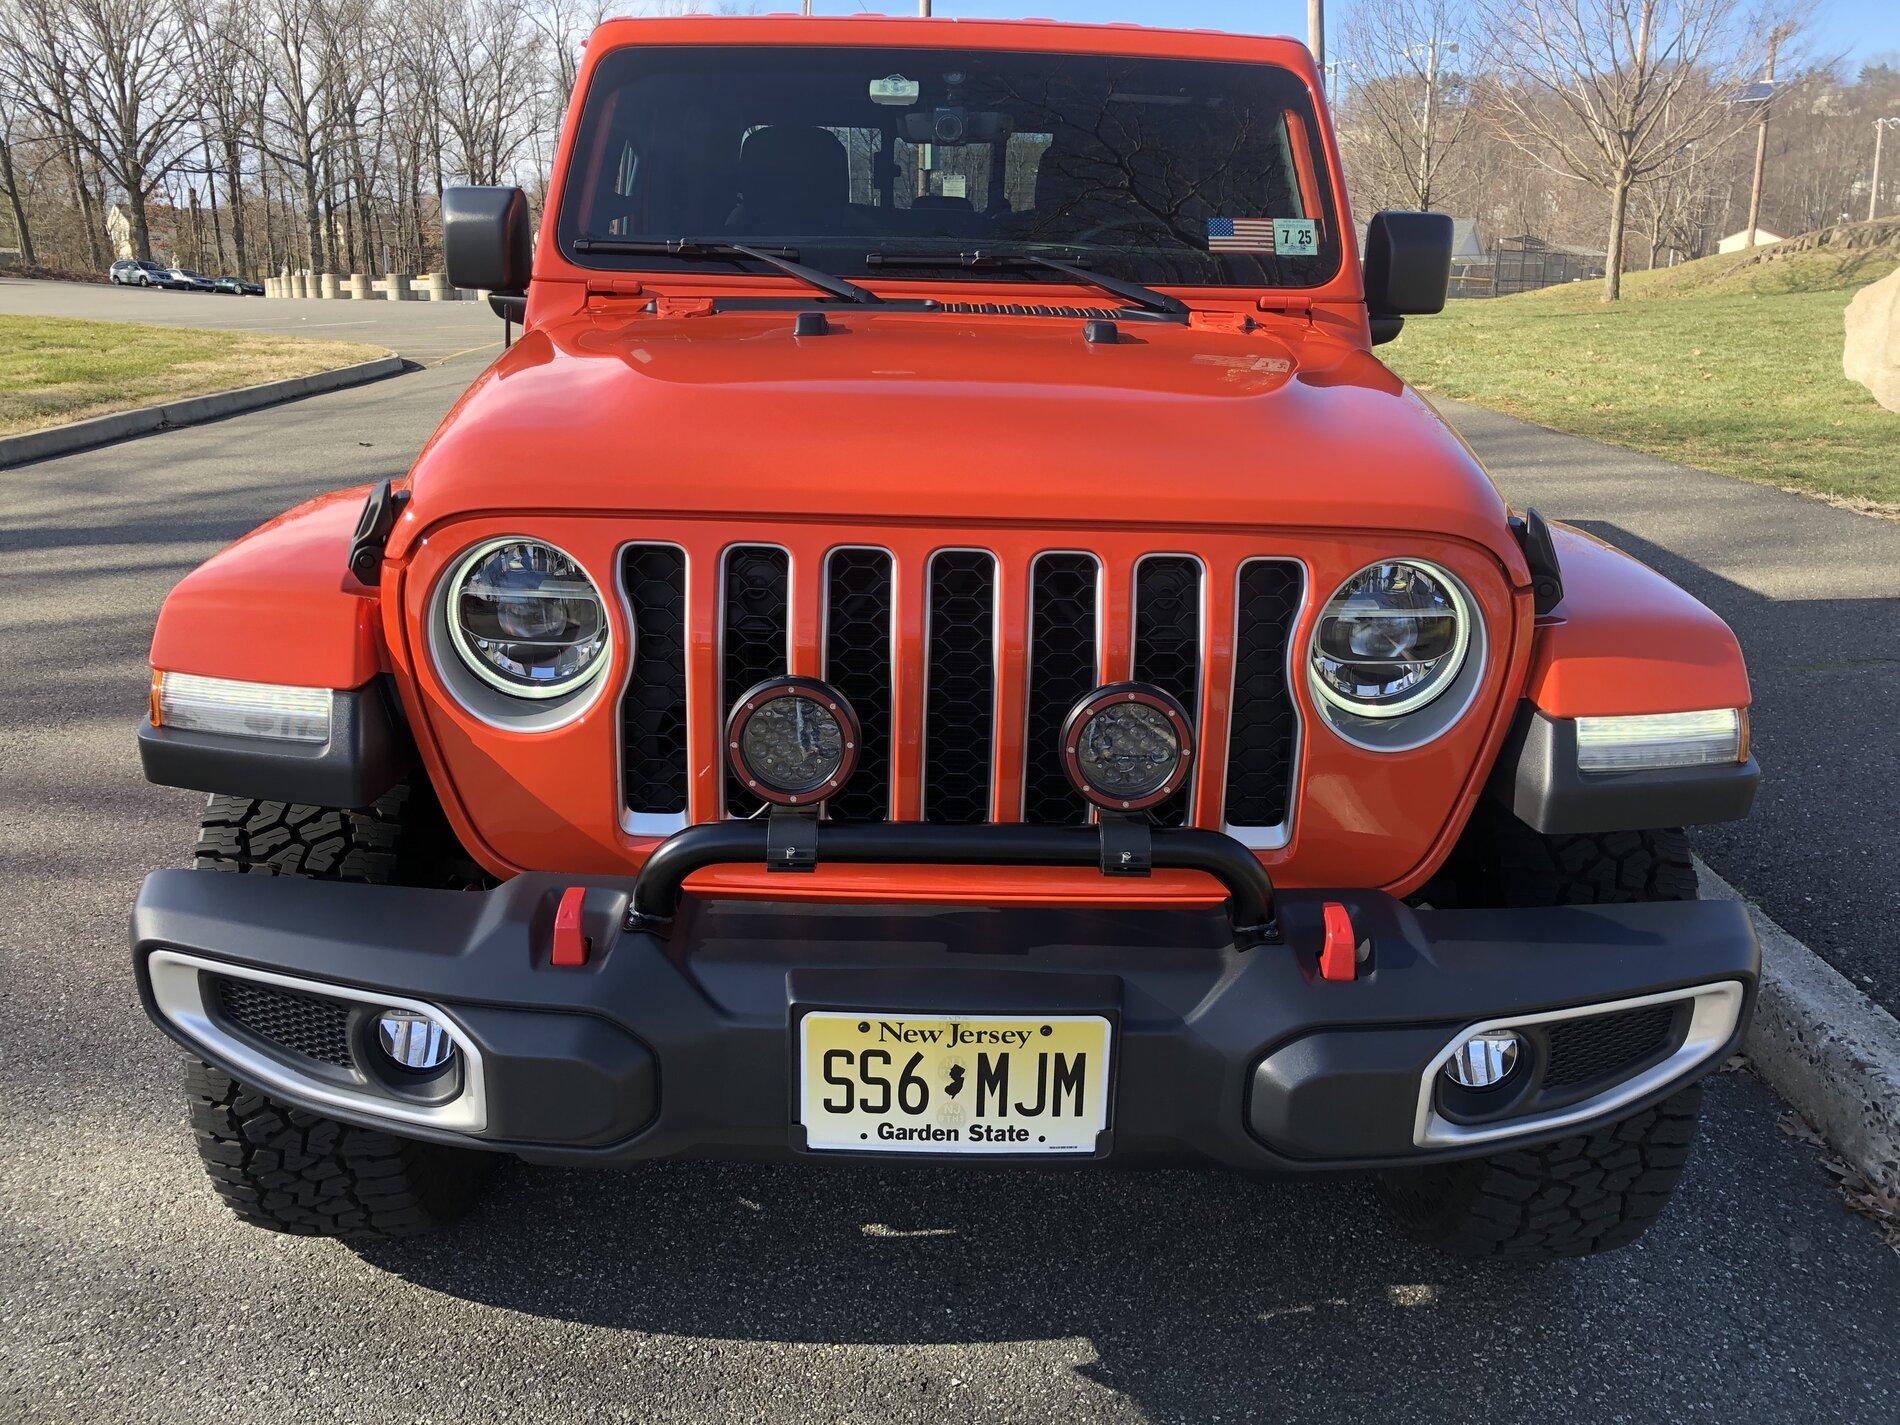
Whered you get the overland emblem?This week I did some more small things.... added a 2nd rear tow hook (with factory cut out) and then painted the hooks front and rear. Then a 4 wheel drive decal and a black raised "OVERLAND" emblem.
I also made a small bar (out of some old motorcycle exhaust pipe bends we had laying around) to mount some lights on the front for my factory Overland bumper.


punk'n
Well-Known Member
- Joined
- Jul 10, 2020
- Threads
- 4
- Messages
- 563
- Reaction score
- 1,156
- Location
- East Coast
- Vehicle(s)
- R.I.P '20 Overland (totaled) Welcome home '21 Rubi
Motobadge:Whered you get the overland emblem?
https://motobadge.com/collections/custom-badges/products/345-hemi-badge
Sponsored
Trlr8tdd
Well-Known Member
Installed the N-Fab steps today, not the greatest fit. The company said they would do “something “ for me. Pax side wasn’t too bad but the drivers side forward mount was about 15 degrees off, had to perform surgery to get the pinch weld seams to line up. I’ll post pics when it’s daylight
Chinman
Well-Known Member
Cut it and if you’re not happy then try the bezel. You won’t be out anything.Like the thread mentions, it is a PIA. There is a youtube video that shows some of it, but not the part I really needed (he gets down and dirty into the bumper but never actually shows you when he is removing the old plastic bezel. Just shows the new one in place). He did help in that he shows you only have to partially disassemble the bumper and then focus on the one side. Lots of clips, nuts and push tabs.
Here's the Youtube video I am referring to:
One thing he mentions is at 4:14 where he talks about one bolt holding the large metal plate in place. He cut the metal tab the bolt is threaded into to be able to pivot the metal plate out of place and to get access below. I did not have to cut that metal tab (I saw no way to fix it without full bumper disassembly). I was still able to pivot the metal plate and have it rotate over the plastic part of the bumper by going gently. So, when I (easily) swung it back in place when I was finished, no harm, no foul.
Anyway, my main problem was: to actually install the new $5 plastic bezel in place, I ended up having to use an air body saw to cut the old $5 bezel up (while in place). That let me deform it and pop it out. The issue I had was getting to the mounting clips on the one edge to free them up. I couldn't reach them with any tool (and I have a lot) to do it. Somehow, he got the old one off because he shows it out in the video and on the bench but doesn't show how he did it. Maybe my clips were just stubborn. If you have the same issue, study the new part and you can see where the tabs mount. (If you cut your old one out do so VERY CAREFULLY to not cut into the actual bumper cover. I did the bulk cuts with the body saw and then finished with a razor knife so I would have more control.)
Overall, it wasn't too horrible. I've had much, much worse vehicle projects. But, it was a pain. So set some time aside for it. Trim tools are your friend for this job.
(It actually took me longer to fab up that front light bar, but that was fun too.)
Anyway, good luck when you try it ?
![Jeep Gladiator What did you do TO your Gladiator today? [ADMIN WARNING: NO POLITICS, NO GUN TALK] 0FD21A25-50EC-4020-83DB-F7567375A15B](https://cdn.jeepgladiatorforum.com/attachments/126/126012-b0e9b0f18a9c1025a9095d733c70f551.jpeg)
ExitLeft
Well-Known Member
- Joined
- Sep 5, 2018
- Threads
- 6
- Messages
- 88
- Reaction score
- 45
- Location
- Philly ‘burbs
- Vehicle(s)
- 2020 Gladiator Overland
Good idea....Might be time to bust out the Dremel. Nice cut btw.Cut it and if you’re not happy then try the bezel. You won’t be out anything.
punk'n
Well-Known Member
- Joined
- Jul 10, 2020
- Threads
- 4
- Messages
- 563
- Reaction score
- 1,156
- Location
- East Coast
- Vehicle(s)
- R.I.P '20 Overland (totaled) Welcome home '21 Rubi
I'm very anal with my vehicles. So, I knew I wouldn't be able to look at it every day if I just cut it since it wouldn't look OEM. Especially on a brand new truck when I knew ahead of time that it was doable (although a pain).Cut it and if you’re not happy then try the bezel. You won’t be out anything.
Jdyowa
Well-Known Member
- First Name
- Jeff
- Joined
- Dec 23, 2019
- Threads
- 3
- Messages
- 311
- Reaction score
- 588
- Location
- Lakeland, Florida
- Vehicle(s)
- Gladiator overland
- Occupation
- Manager
Thank you!
Sponsored
Similar threads
- Replies
- 102
- Views
- 10,060
- Replies
- 307
- Views
- 50,588

- Replies
- 3,881
- Views
- 359,008