Sponsored
OP
OP
PJZ
Well-Known Member
- First Name
- Patrick
- Joined
- Dec 16, 2021
- Threads
- 13
- Messages
- 333
- Reaction score
- 477
- Location
- SoCal - The Valley
- Vehicle(s)
- 2022 JTRD AEV370
- Build Thread
- Link
- Thread starter
- #17
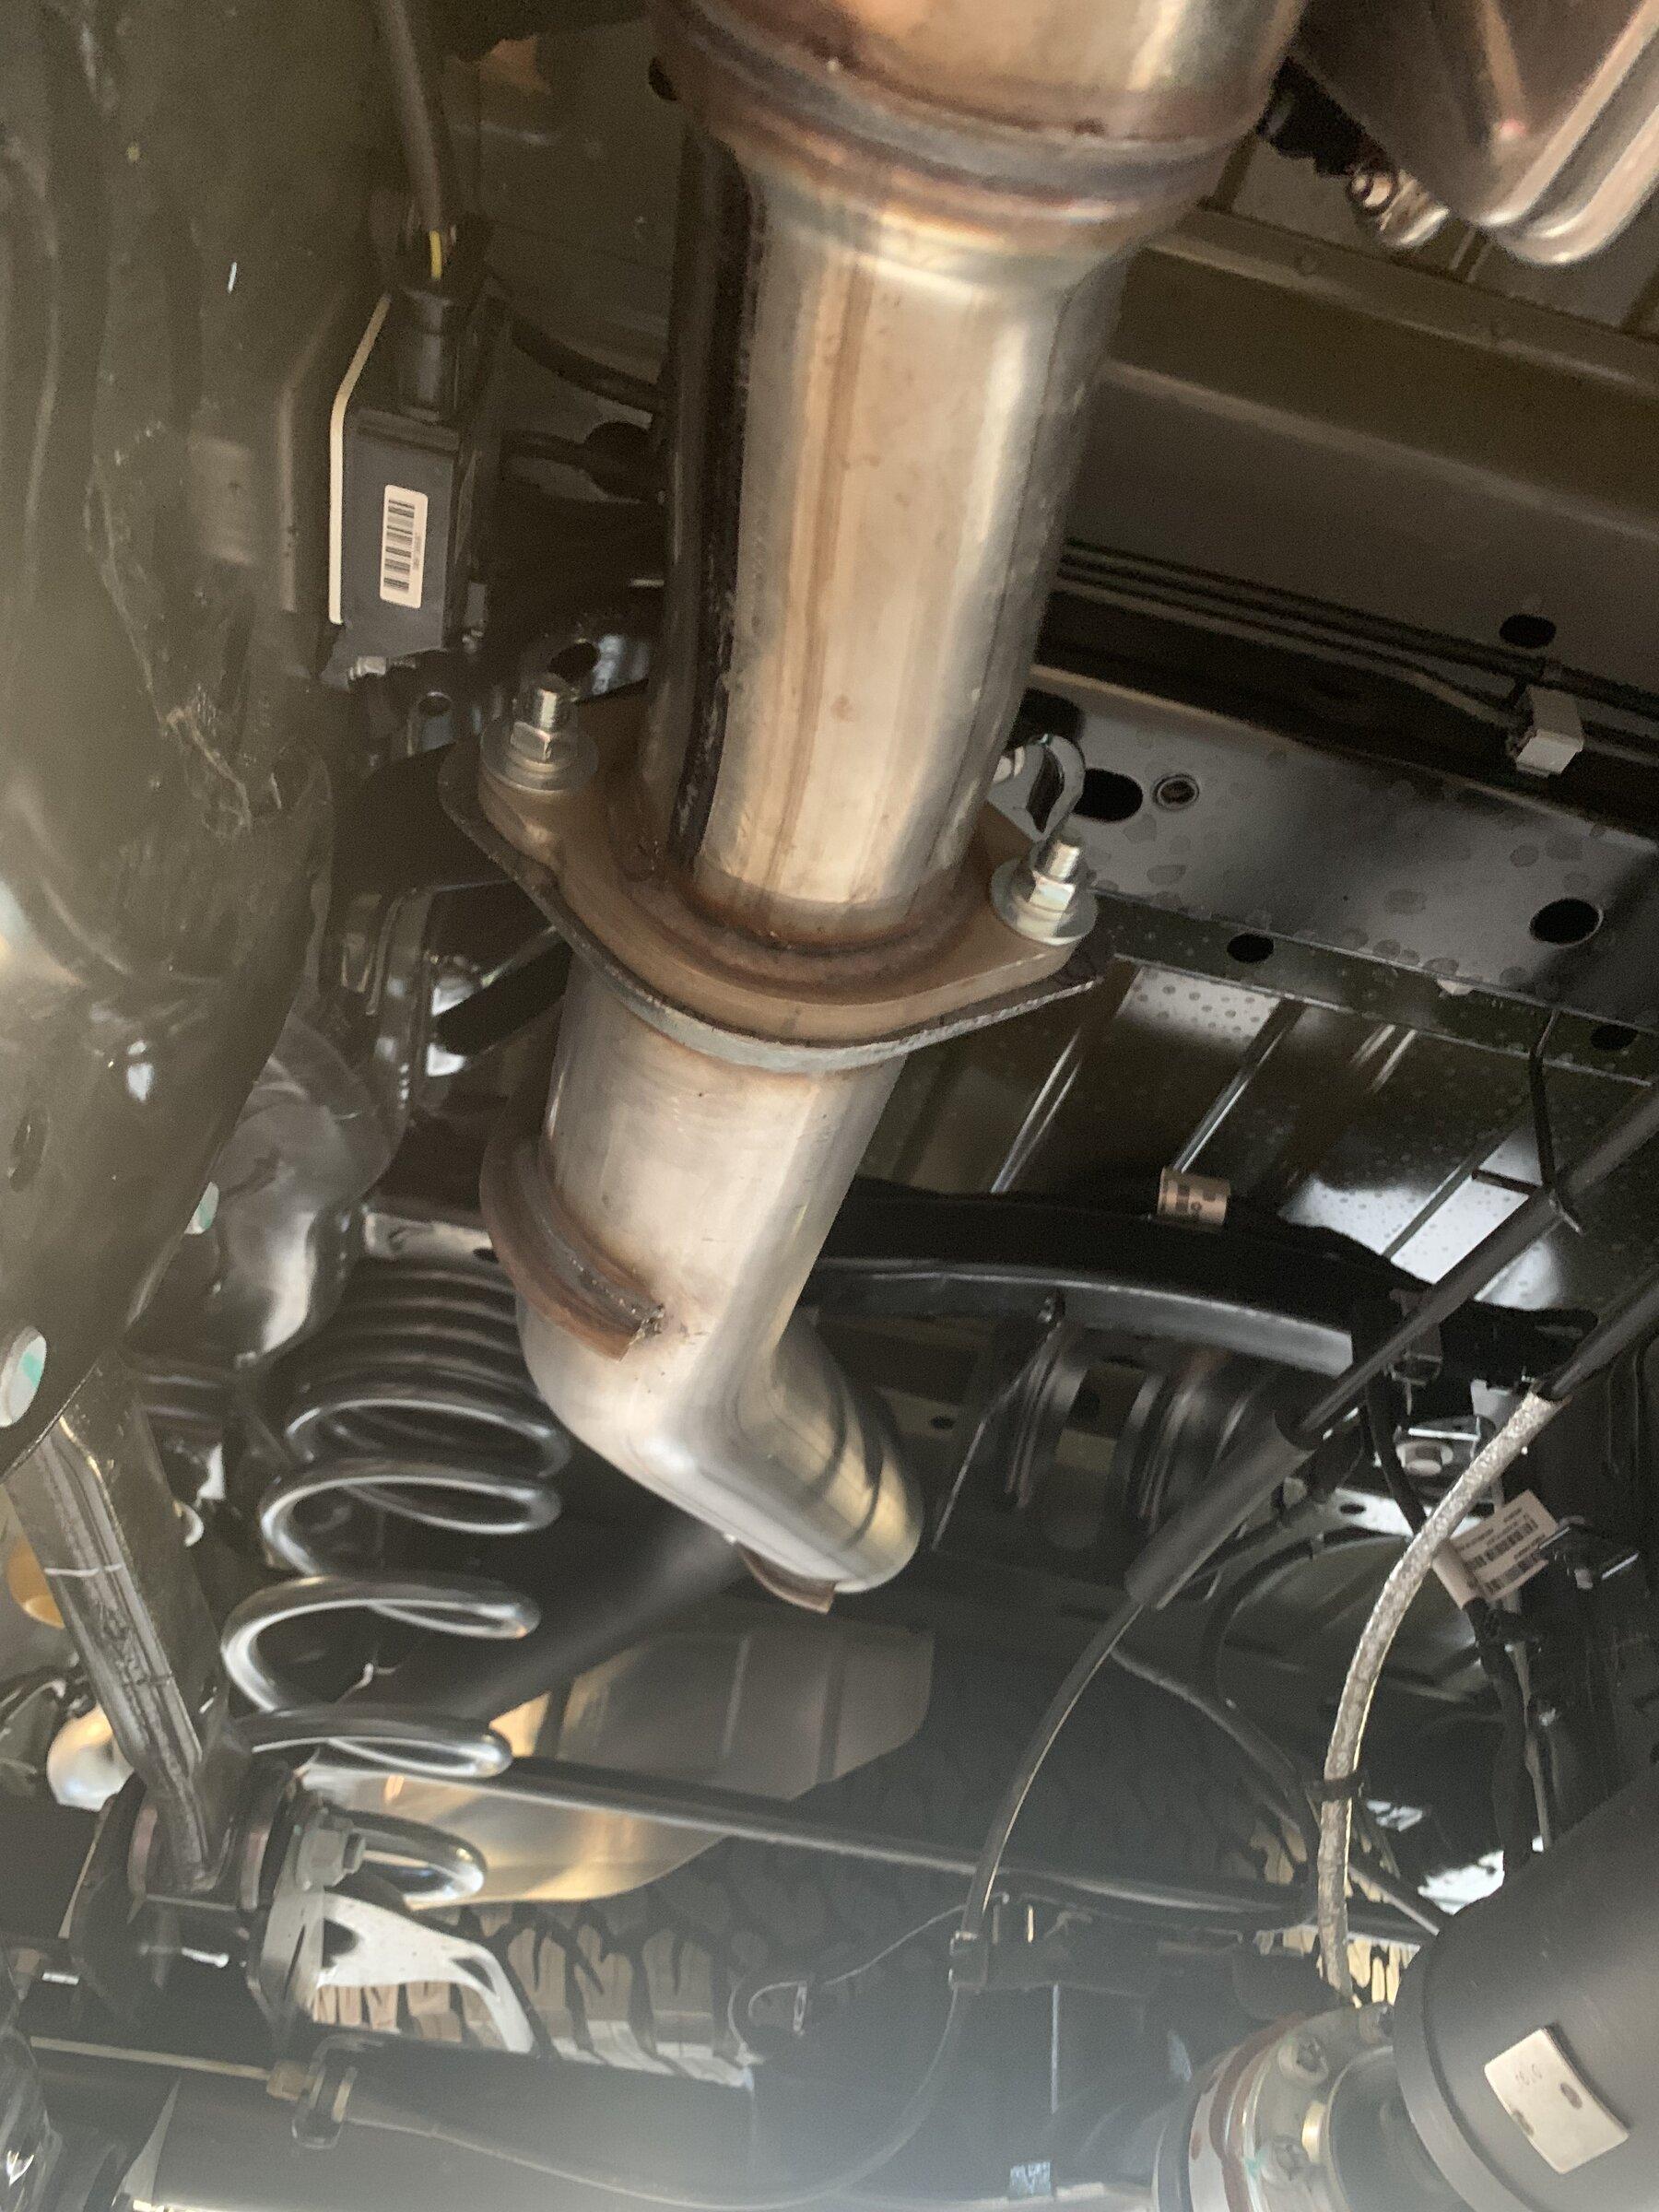
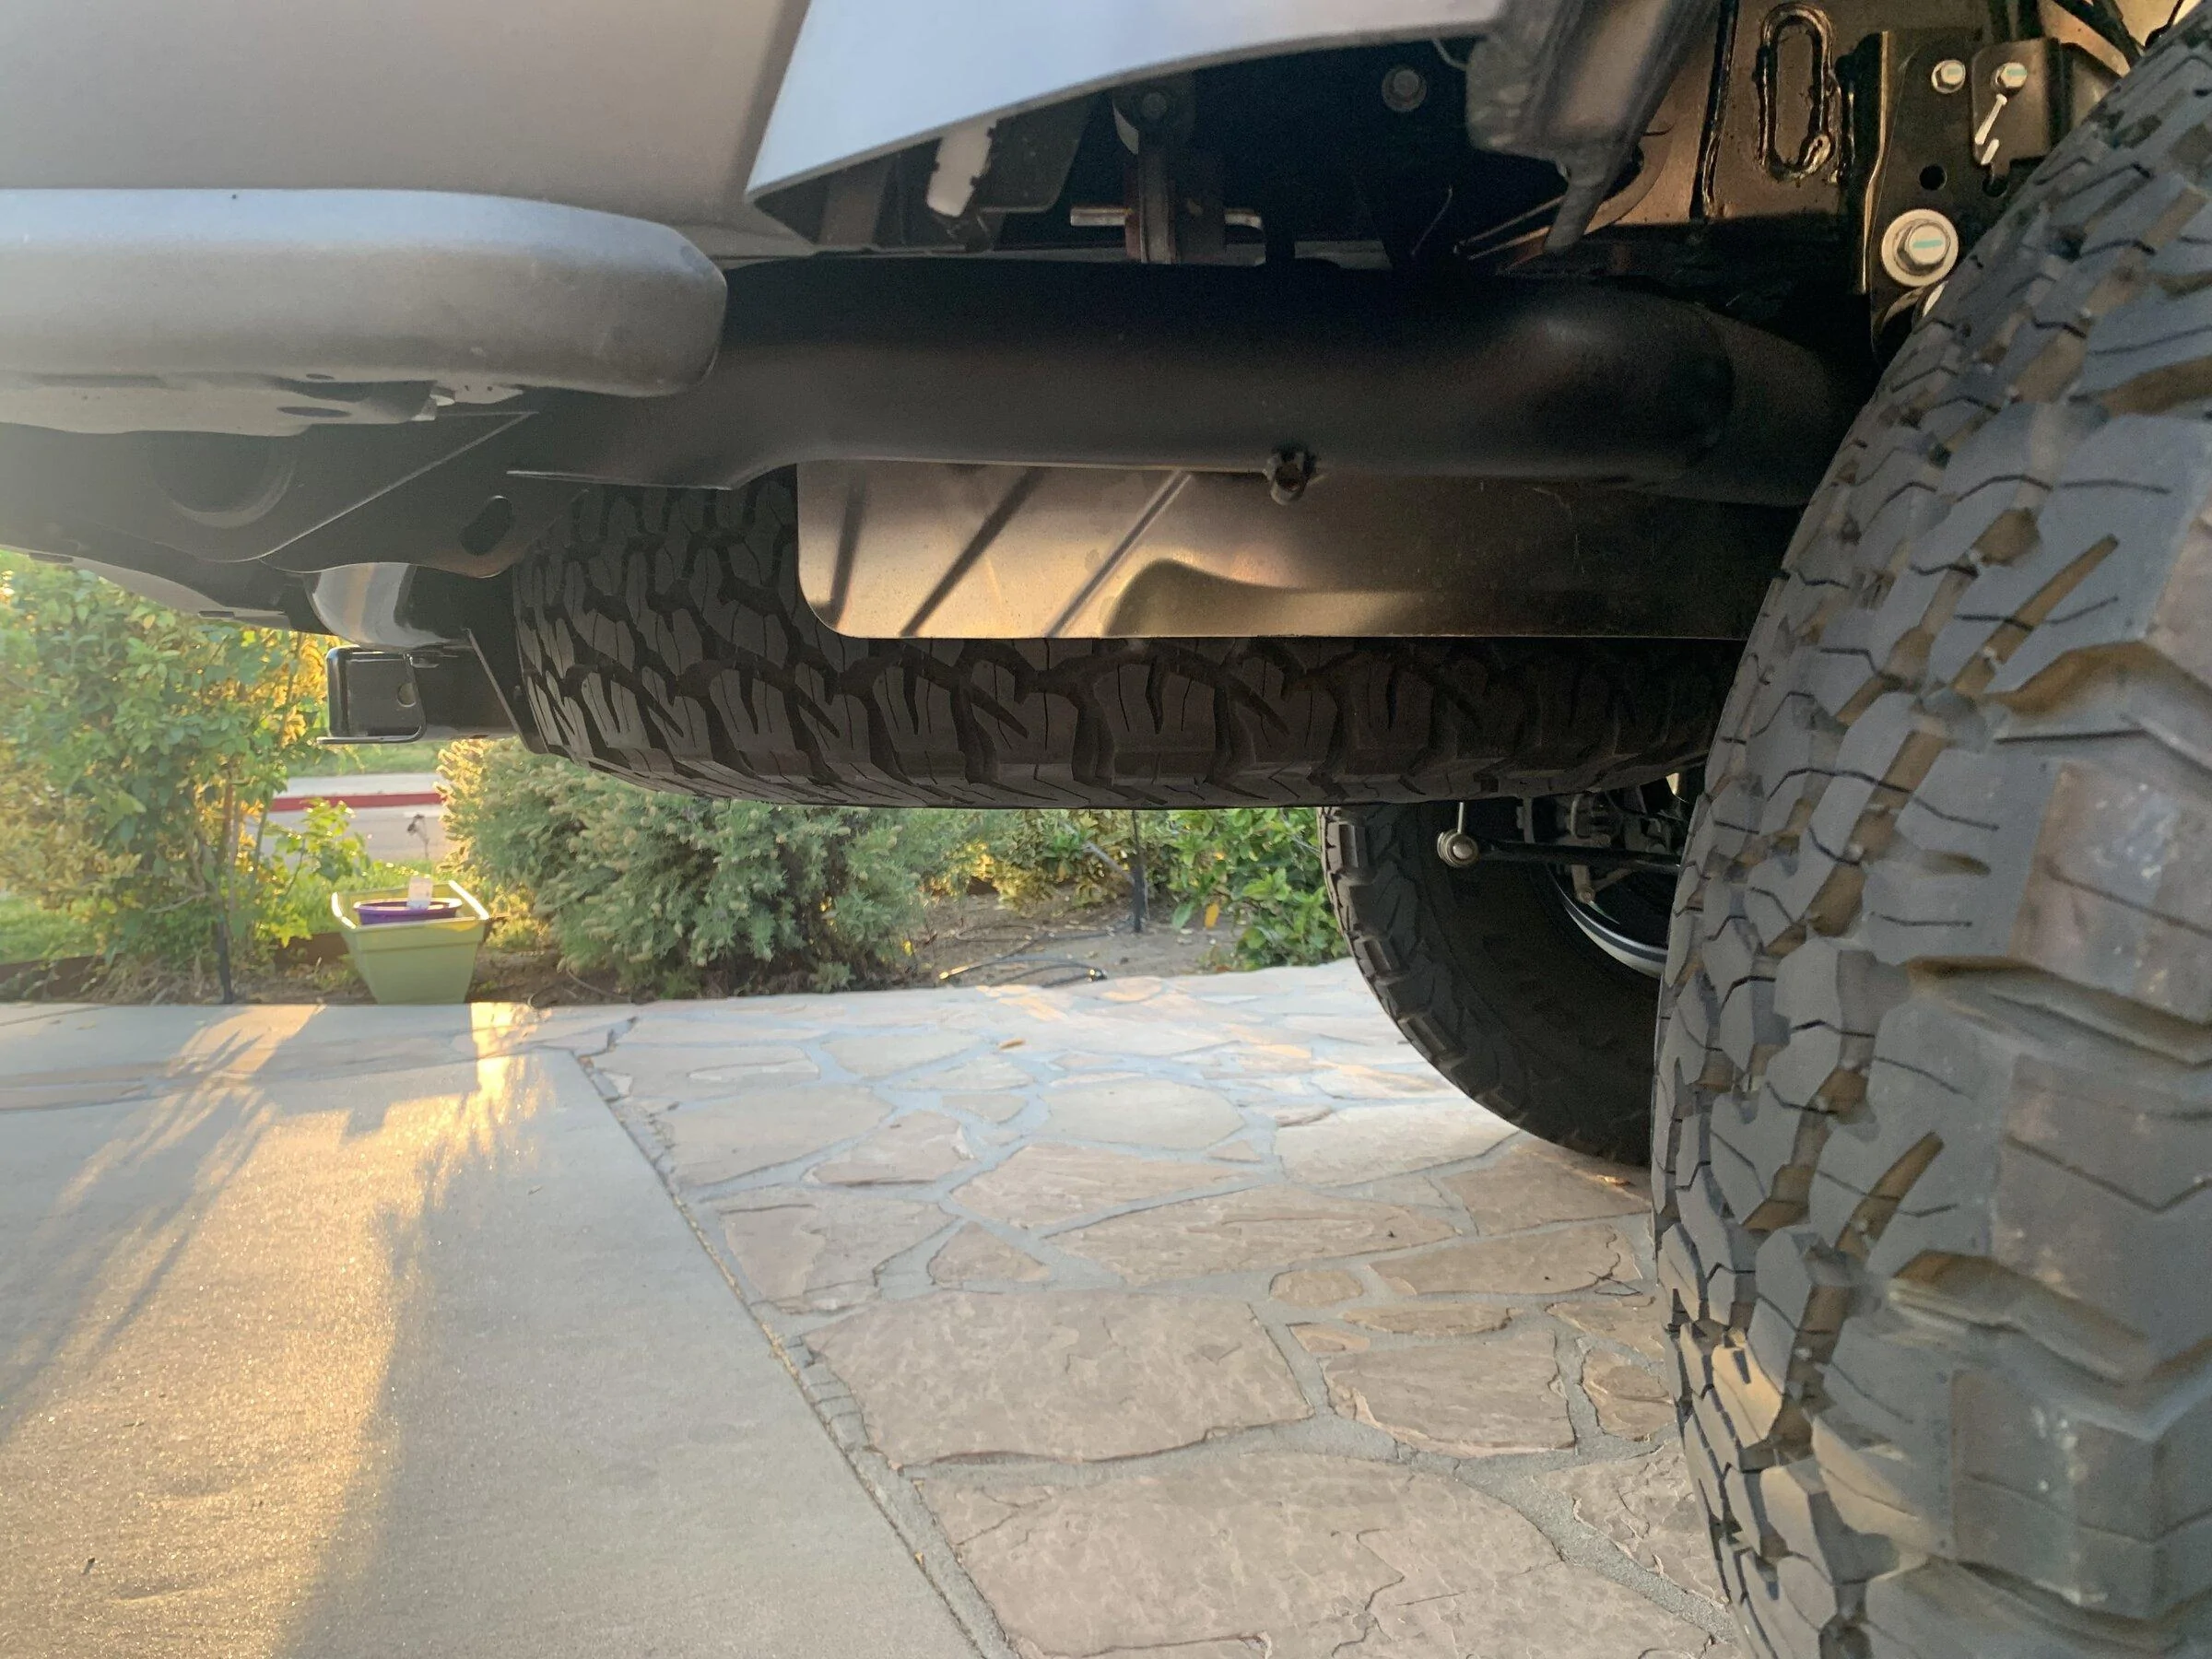
MBRP straight pipe exhaust install after work tonight. Read somewhere on here to take the bolt out of the trackbar and you can remove the exhaust without cutting. That worked fine especially with a lift - might be some finagling without. Torque for the trackbar bolt is 115lbs to save you some googling.
As others have said there is literally no difference in sound whatsoever. Essentially dropped 35lbs give or take so I can add it back in with lots of other stuff. Gets rid of that rear muffler that will probably get damaged anyway. Painted the back piece black.


As others have said there is literally no difference in sound whatsoever. Essentially dropped 35lbs give or take so I can add it back in with lots of other stuff. Gets rid of that rear muffler that will probably get damaged anyway. Painted the back piece black.

snoshoe
Active Member
- Joined
- Jun 28, 2019
- Threads
- 2
- Messages
- 44
- Reaction score
- 24
- Location
- Indianapolis
- Vehicle(s)
- 2017 JKUS
That looks great tucked up there out of harm's way.
Black paint was they way to go...manifold (high heat) paint?
Any seat-of-the-pants difference?
35 lbs lost? That means you get to add more stuff in the bed - perfect!
Black paint was they way to go...manifold (high heat) paint?
Any seat-of-the-pants difference?
35 lbs lost? That means you get to add more stuff in the bed - perfect!
OP
OP
PJZ
Well-Known Member
- First Name
- Patrick
- Joined
- Dec 16, 2021
- Threads
- 13
- Messages
- 333
- Reaction score
- 477
- Location
- SoCal - The Valley
- Vehicle(s)
- 2022 JTRD AEV370
- Build Thread
- Link
- Thread starter
- #19
Thanks!That looks great tucked up there out of harm's way.
Black paint was they way to go...manifold (high heat) paint?
Any seat-of-the-pants difference?
35 lbs lost? That means you get to add more stuff in the bed - perfect!
High heat wrinkle coat - will see if it holds up.
Only drove around the block and couldn't tell. Going to get a CAI soon and hopefully the two will make some difference.
-35 probably still hasn't made a dent with the Smartcap added, but it is something. At least will offset the control arm skids going on next.
OP
OP
PJZ
Well-Known Member
- First Name
- Patrick
- Joined
- Dec 16, 2021
- Threads
- 13
- Messages
- 333
- Reaction score
- 477
- Location
- SoCal - The Valley
- Vehicle(s)
- 2022 JTRD AEV370
- Build Thread
- Link
- Thread starter
- #20
Buying out of state-
Some notes on buying out of state for our California residents.
Not knowing the process was stressful! The dealer (Cummins in Georgia) assured me they do this all the time with no problems, but no one could really tell me how it worked in detail.
I had the truck shipped from AEV and didn't have any miles on when it arrived - that will be relevant below.
Here is what I know now:
Probably missed some small things here and there. Shoot me a message if I can share any more detail that would be helpful.
Some notes on buying out of state for our California residents.
Not knowing the process was stressful! The dealer (Cummins in Georgia) assured me they do this all the time with no problems, but no one could really tell me how it worked in detail.
I had the truck shipped from AEV and didn't have any miles on when it arrived - that will be relevant below.
Here is what I know now:
- The dealer will send taxes and fees via to the DMV closest to your home.
- If you prefer another DMV location better tell them because they just use your address.
- Worked out fine, but would not have been the location I would have picked.
- The dealer does not register the car for you.
- This was the biggest misunderstanding of the process and caused the most stress.
- Knowing now it is 100% fine, not knowing made it a pain.
- Also, my credit union would not do the loan for out of state unless I could show the California registration at purchase. Ended up in a long drawn out chicken/egg discussion between me, bank and dealer. Gave up and used dealer financing that was seamless and easy.
- Took 4-5 days after we finished finance for the dealer's title registration person to get it all done and overnight it to the DMV.
- If your Jeep is shipped to you make sure they send or attach a temp tag from the dealer/home state so you are able to legally drive around and get everything done.
- You have to get your new 50 state legal car smog checked.
- if you didn't drive to pick up your new jeep it will be possible that your smog computers will not be active.
- There are some threads on here about the process to activate the computers.
- it was a little bit of a hassle and delayed my registration process as it was the only thing that couldn't get done quickly.
- Note - diesels will pass smog with any 2 computers not active - don't need all computers active to pass. This is on the CARB website and how it went for me finally.
- If buying a truck they are all considered commercial in CA and you have to get it weighed and a form filled out at the scale with the VIN on it. They knew what to do at the scale.
- At the DMV I got lucky and they were amazingly helpful.
- There were a lot of out of state packets at the DMV so it was helpful to have the Fedex verification that it arrived as the check in person was hesitant to let me get a place in line not knowing if the packet was there.
- Dealer was pretty accurate on fees, but not exact. Expect a few more dollars possibly. I had to pay an additional $100.
- Believe you have 20 days to get it all done so don't dilly dally.
- You can go back for an extension if you have challenges with the smog check.
Probably missed some small things here and there. Shoot me a message if I can share any more detail that would be helpful.
Sponsored
OP
OP
PJZ
Well-Known Member
- First Name
- Patrick
- Joined
- Dec 16, 2021
- Threads
- 13
- Messages
- 333
- Reaction score
- 477
- Location
- SoCal - The Valley
- Vehicle(s)
- 2022 JTRD AEV370
- Build Thread
- Link
- Thread starter
- #21
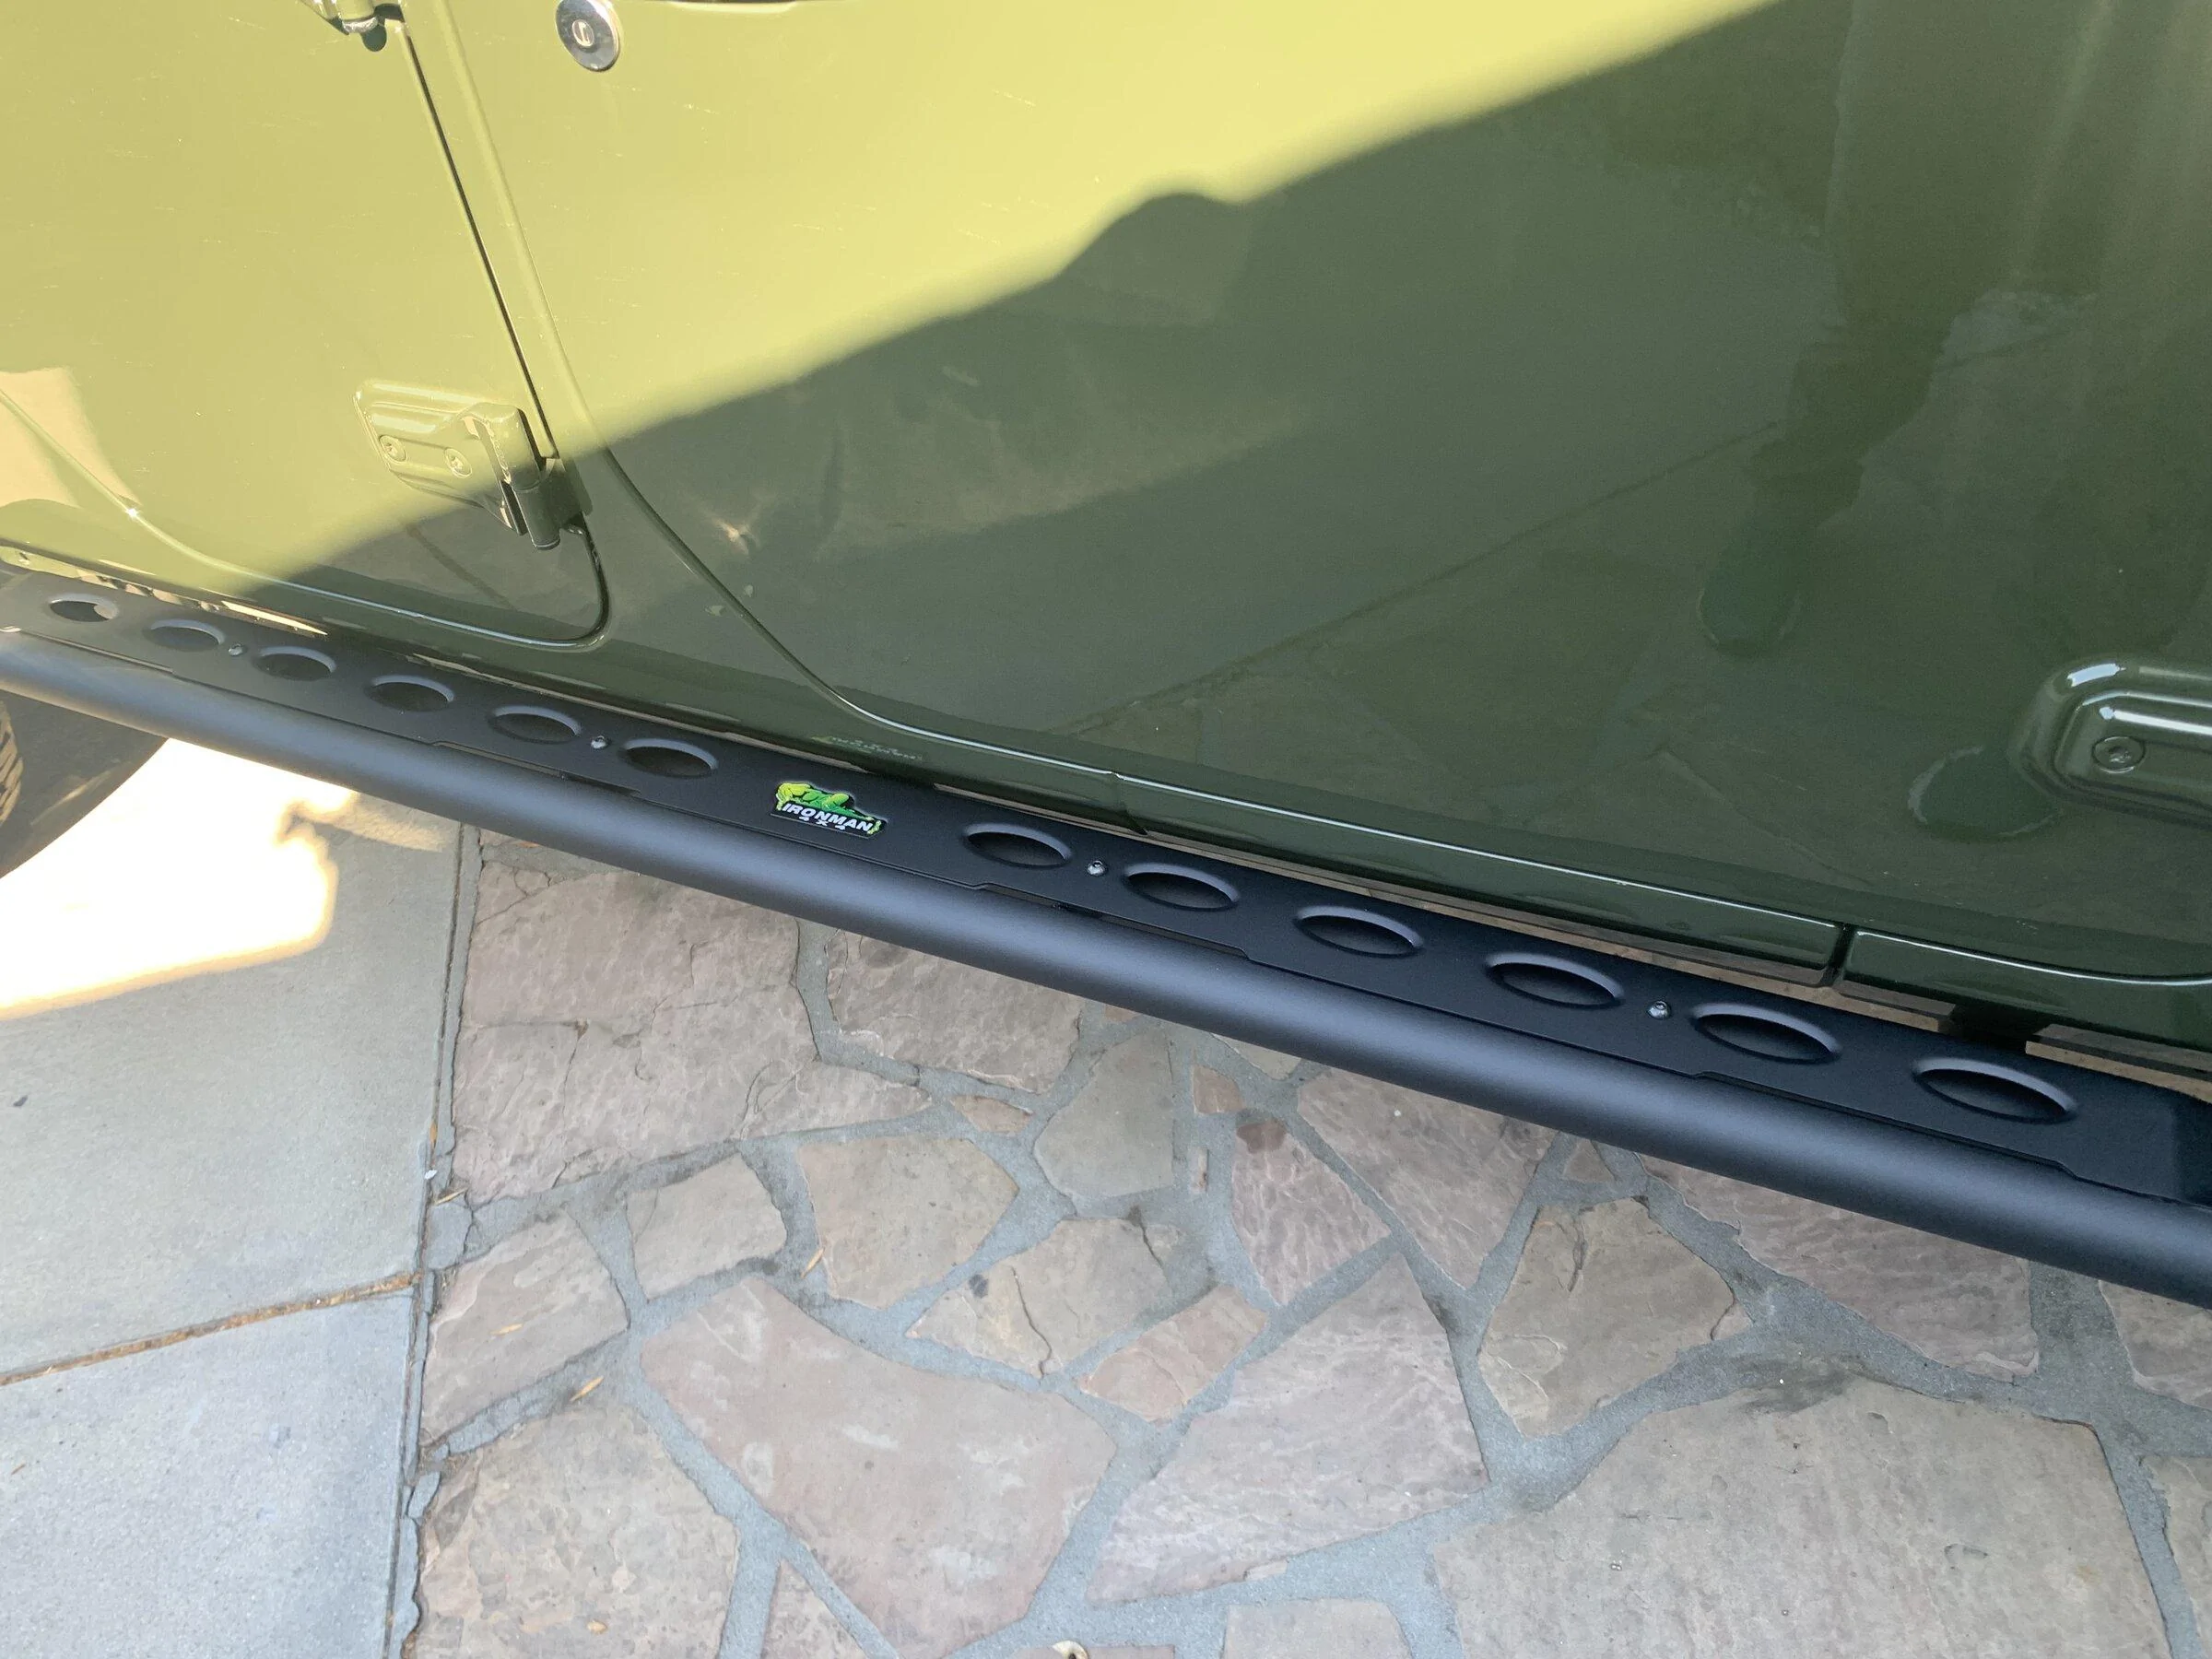
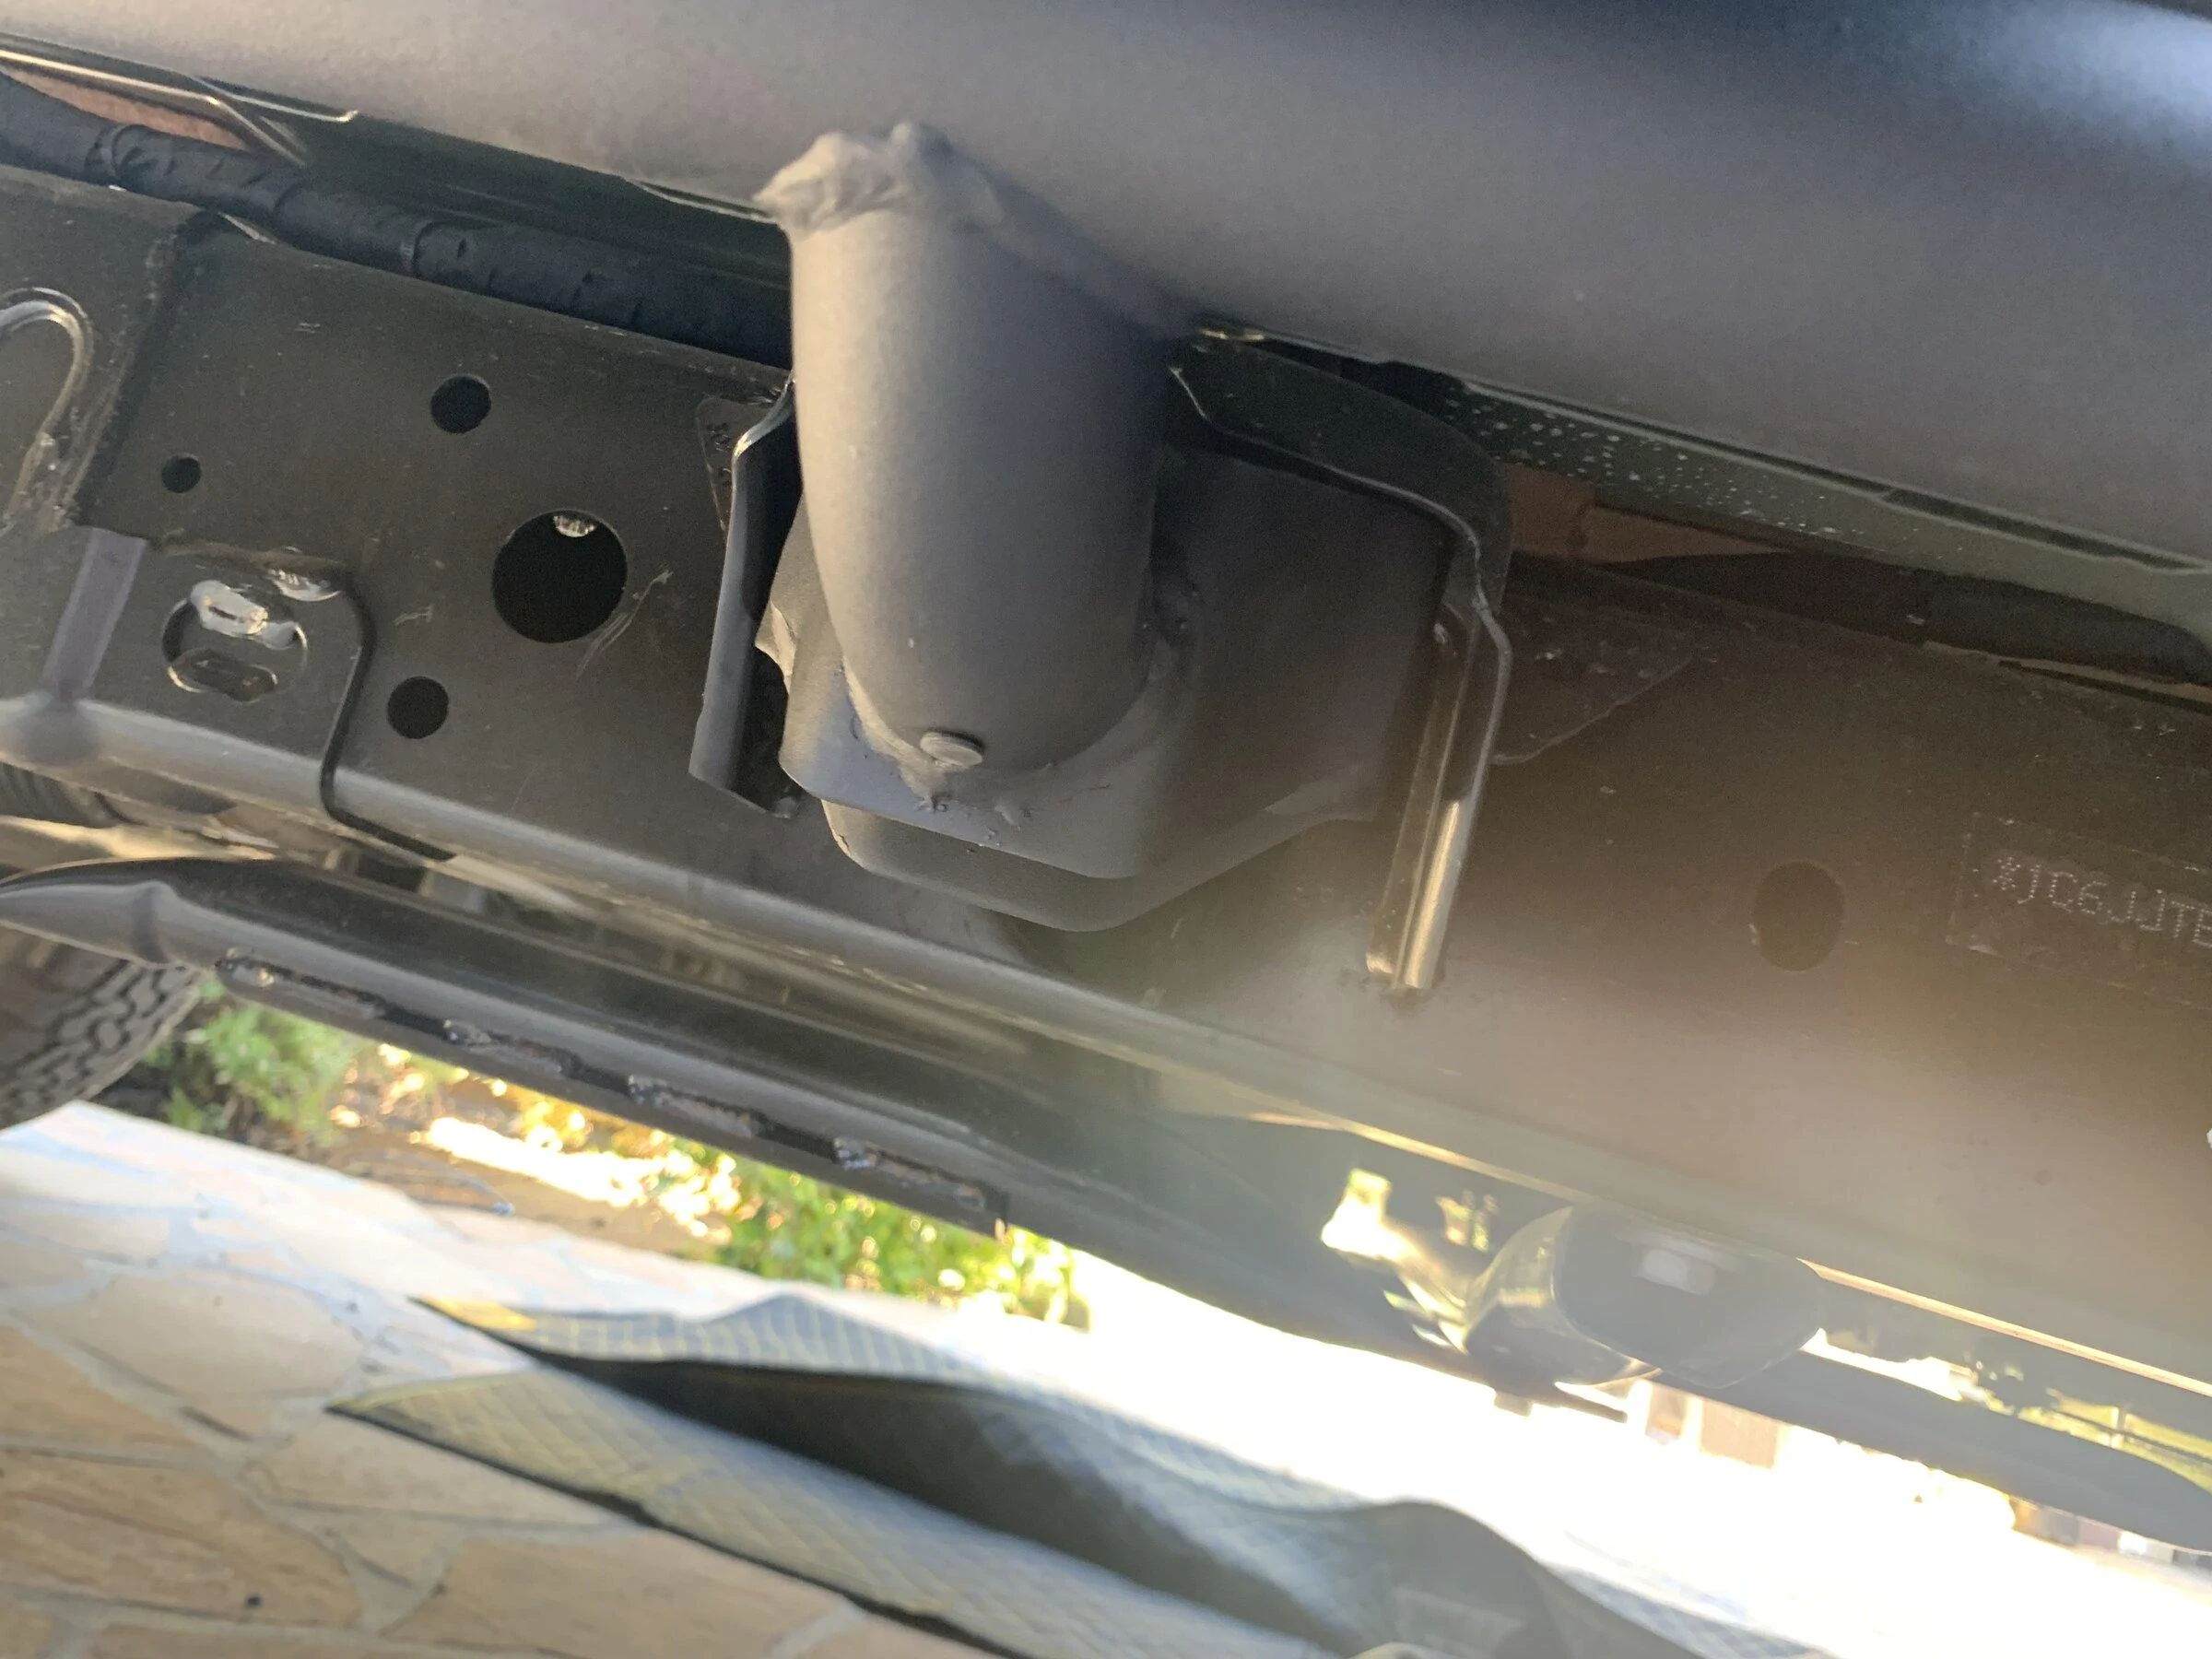
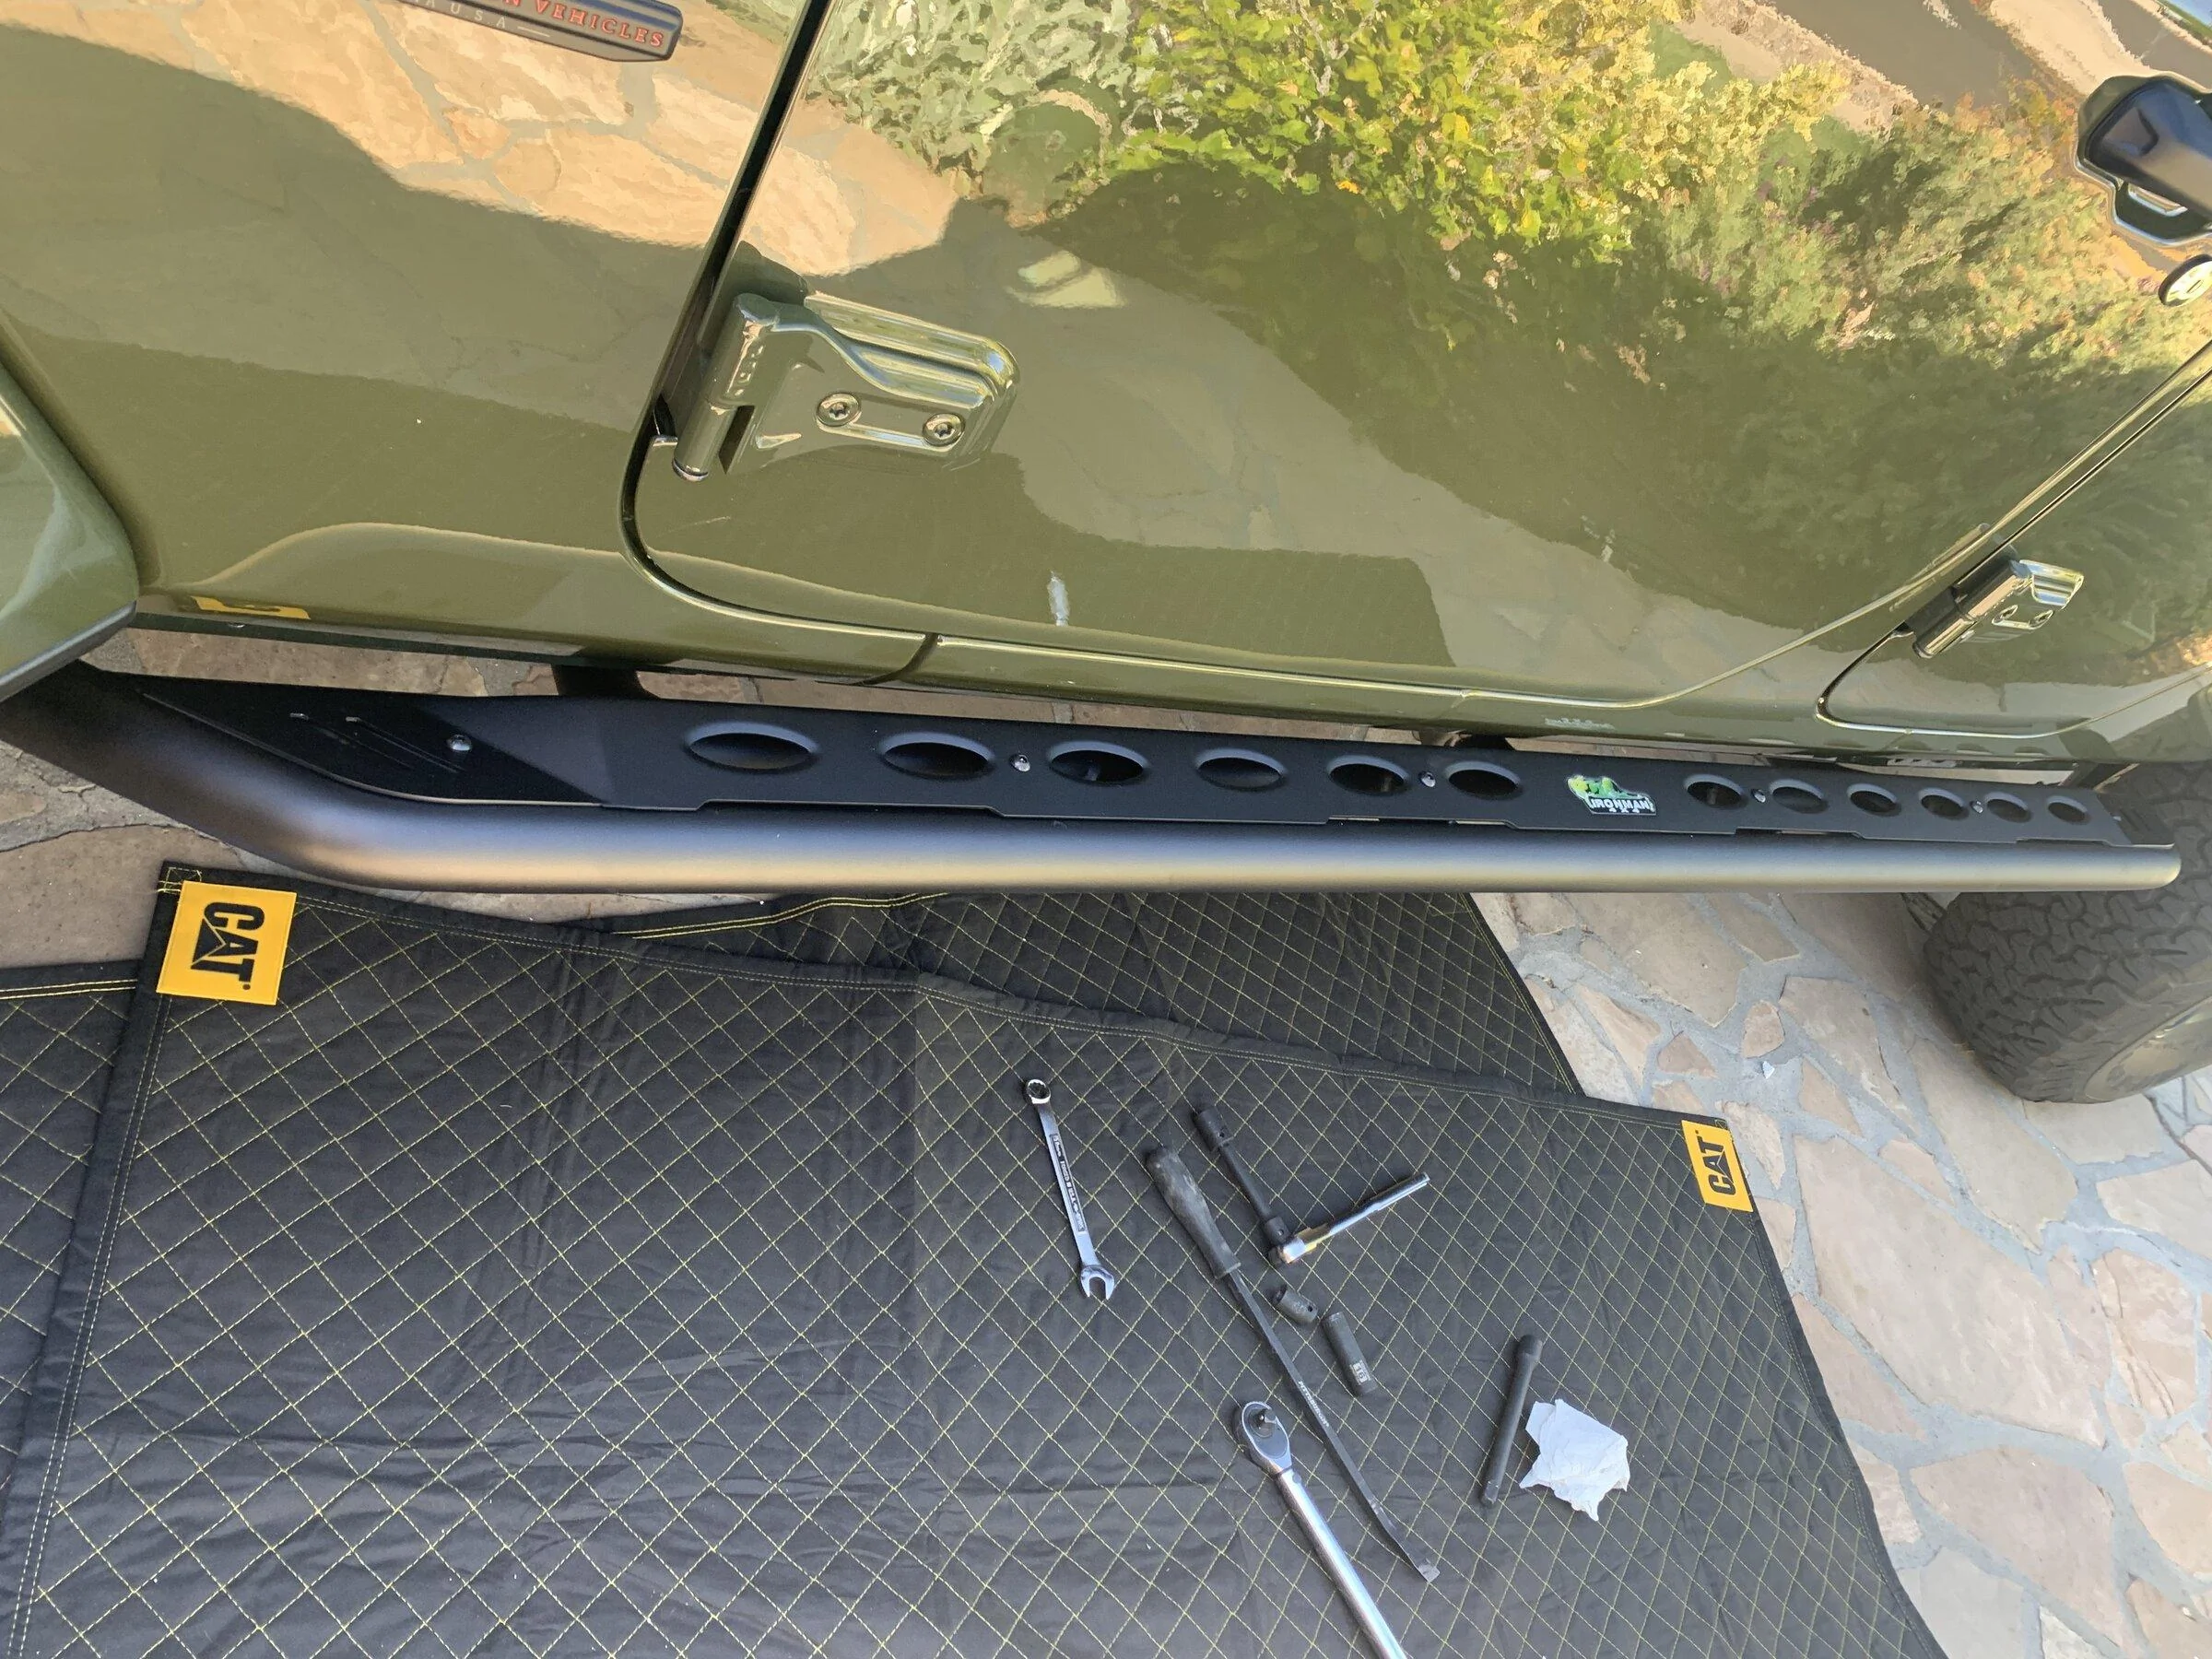
Ironman Raid Series Sliders install
Ended up getting these sliders/steps. So many choices it can be info overload.
Not a hard core rock crawler and didn't need some of the over the top sliders.
Really wish LOD had the destroyer sliders for the JT - would have been the number one choice.
https://ironman4x4america.com/raid-series-rock-rails-side-steps-suited-for-jeep-gladiator-jt/
These are frame mount. One thread said they were frame and body, that is not accurate.
You use the frame mount for the body, but don't attach anything to the body itself.
I would say these are comparable to any of the other budget sliders out there. Finish does look a bit better than some of the smittybilt stuff I have seen.
Good:
- Were on sale for MOAB week.
- Shipping is flat rate of $100, but the bill of lading was much more than that so it was a bargain.
- Look good and mounted up rock solid (will test that soon and find out)
- Finish is well done.
- They don't hang low.
- Instructions are comically insufficient and weren't in the box! Had to download
- The exploded parts view is the most useful part.
- Instructions and video for JL online say to loosen the center body mount bolt.
- this was sketchy and I didn't like it all when doing the passenger side.
- that bolt is only loosened to make room to get the slider into the bracket mount.
- Was able to mount the drivers side without loosening it at all, was tight but it worked.
- Try to do it without loosening that bolt.
- On the drivers side you should loosen/lower the gas tank skid.
- not in any instructions and is a challenge solo.
- you can do it, use all appendages and a pry bar to lower the edge of the skid and slide the slider underneath. If you feel like a monkey fing a football you are doing it right!
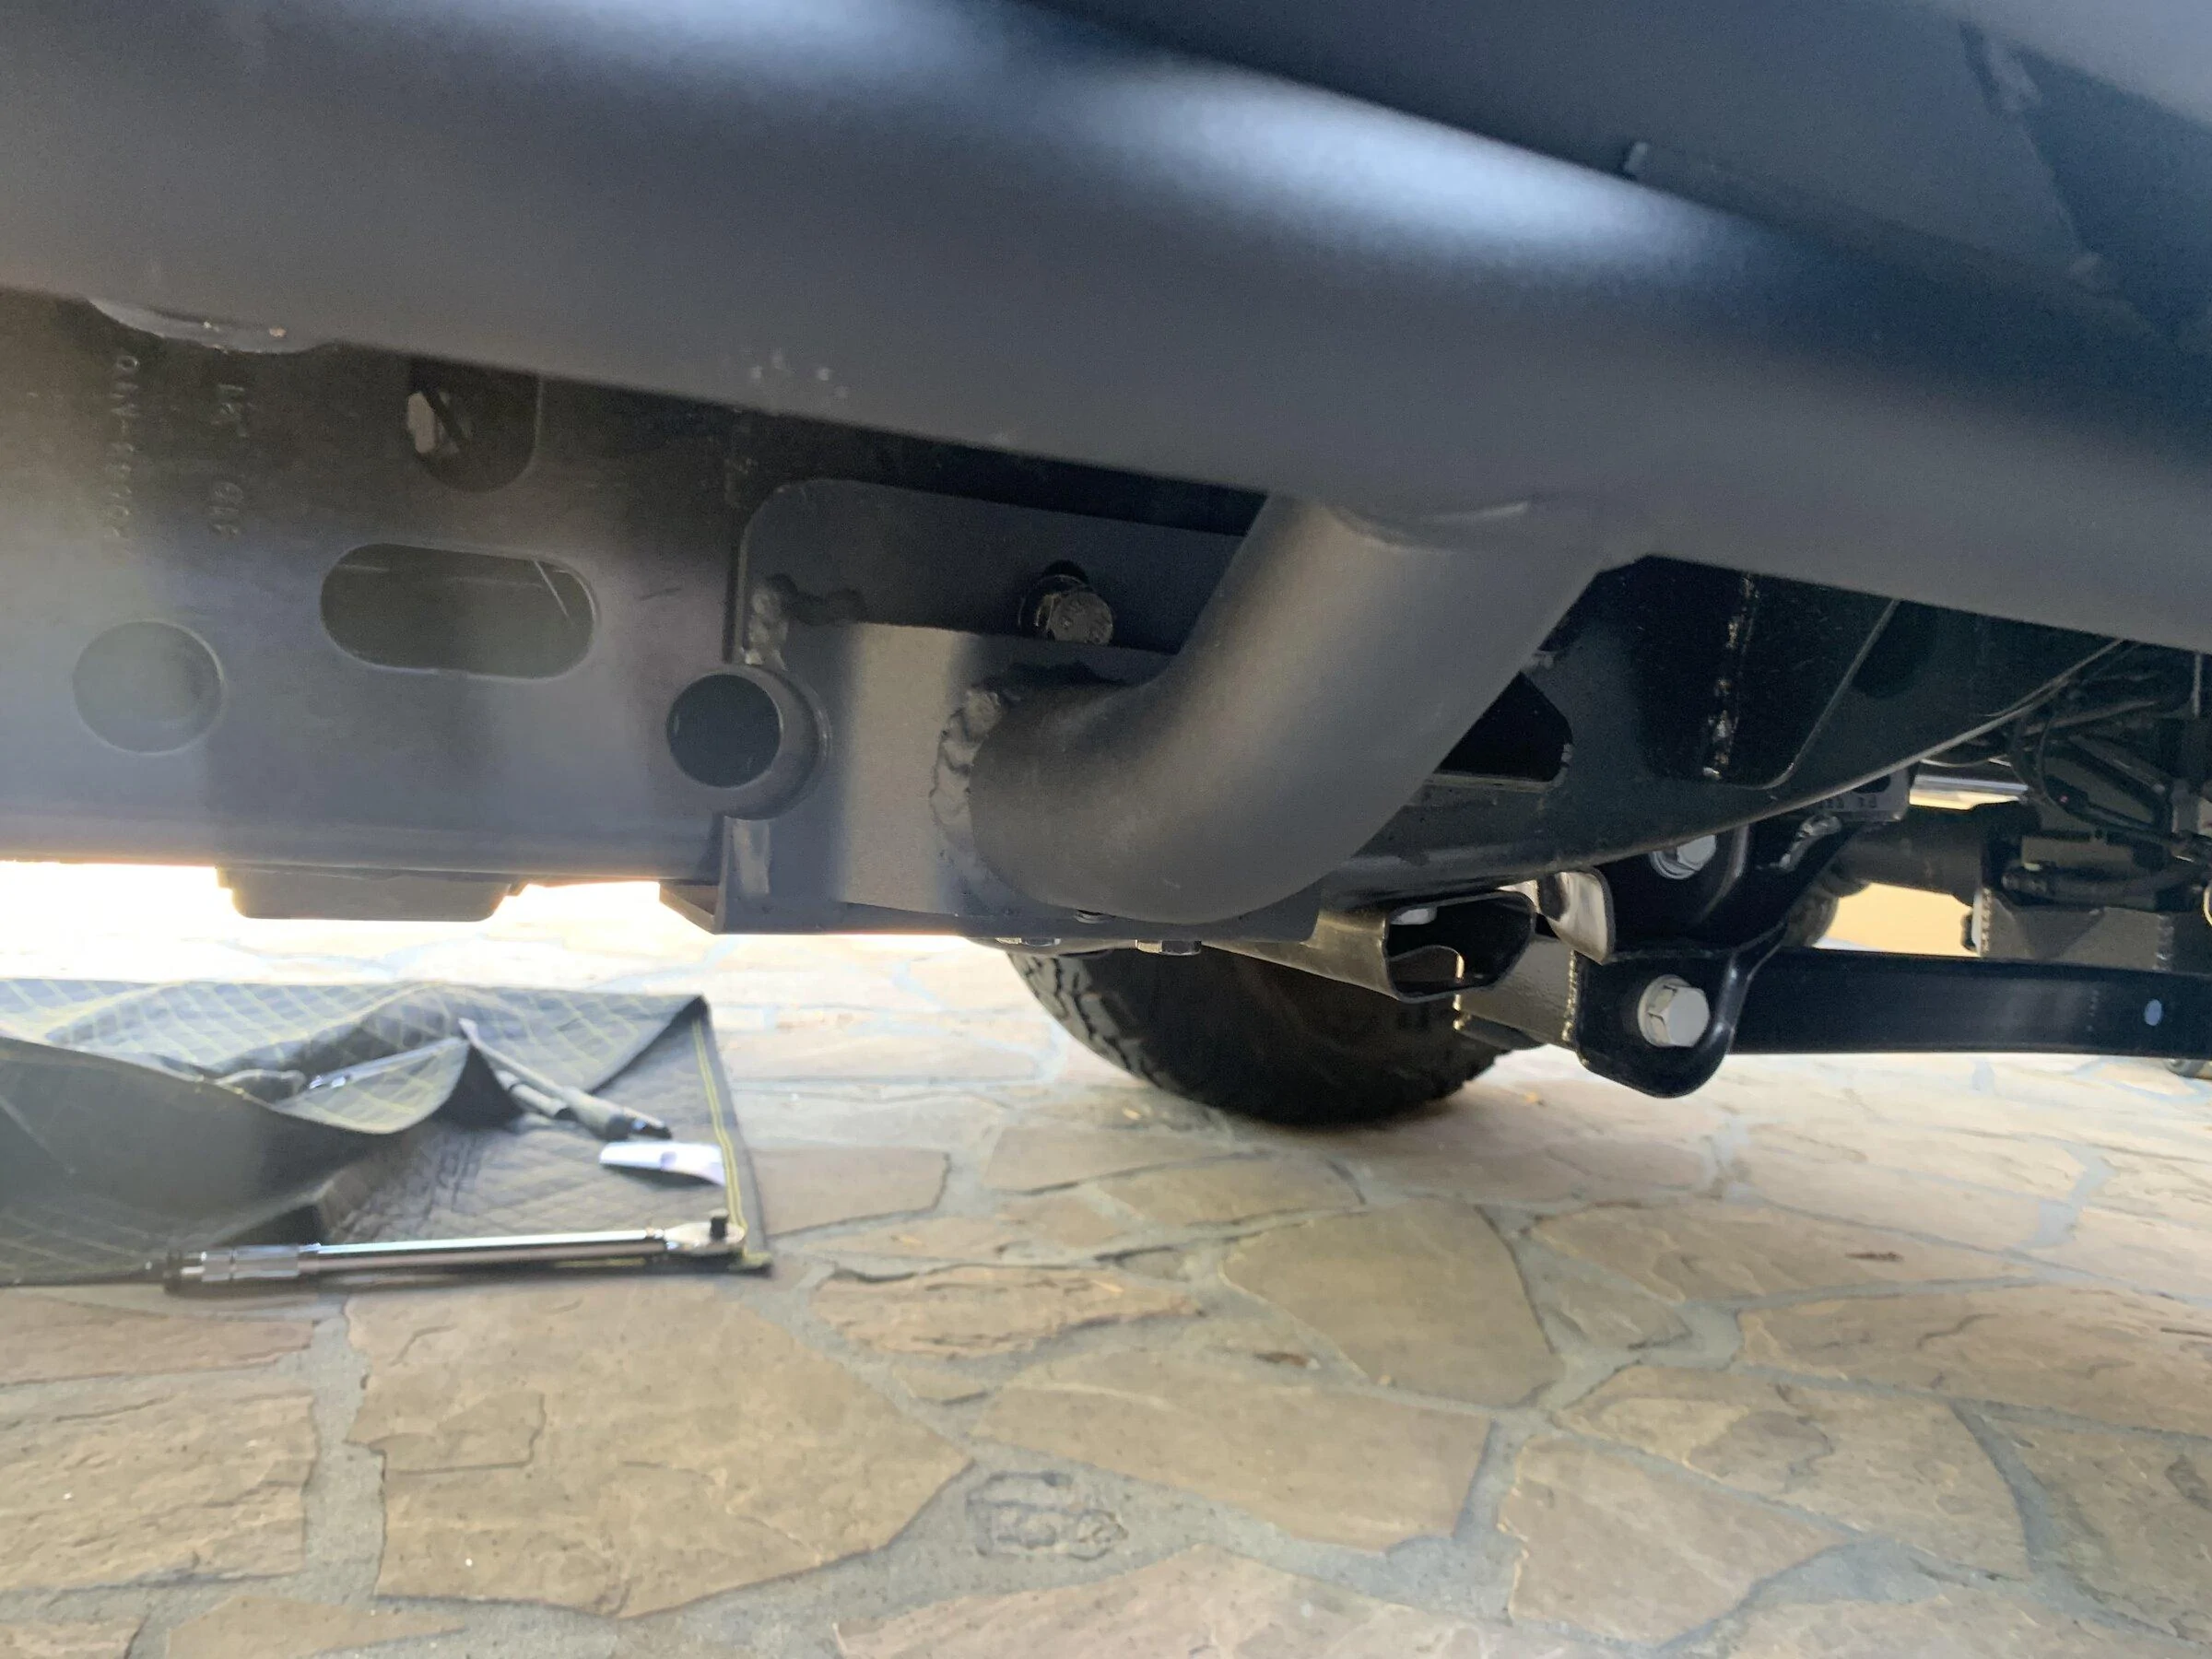
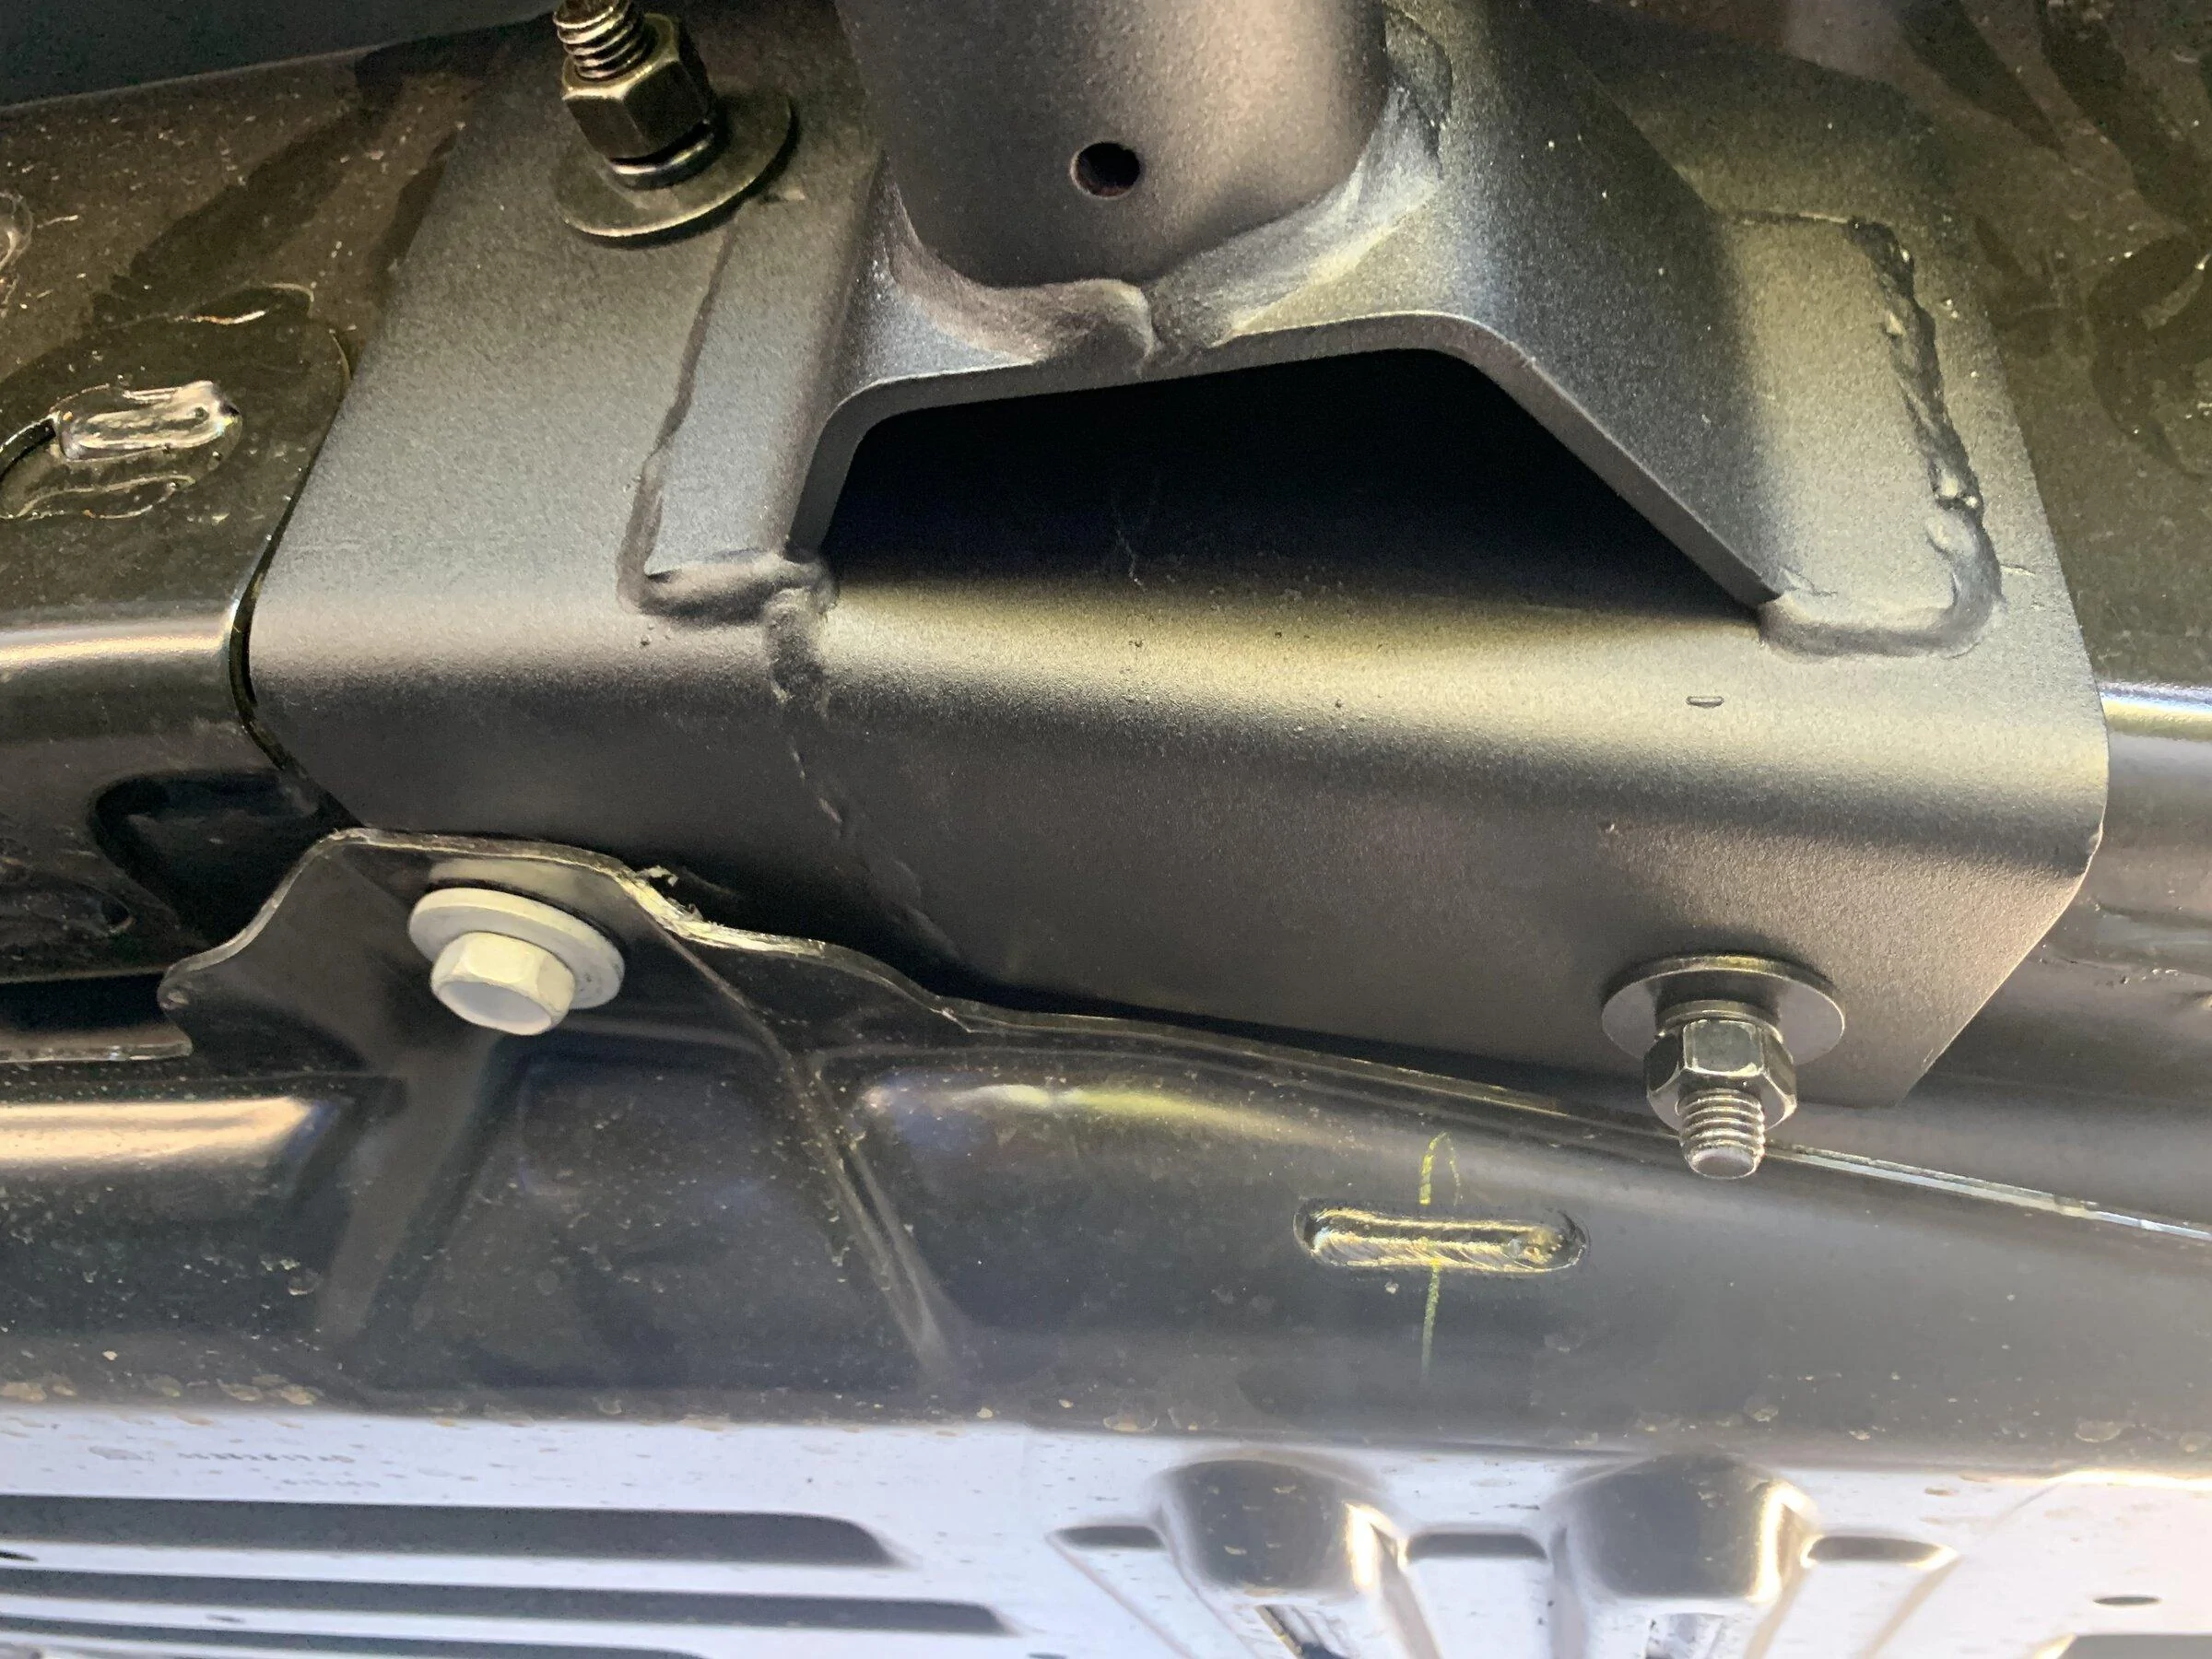
- They honestly should use this as the rearmost lower bolt on the mount.
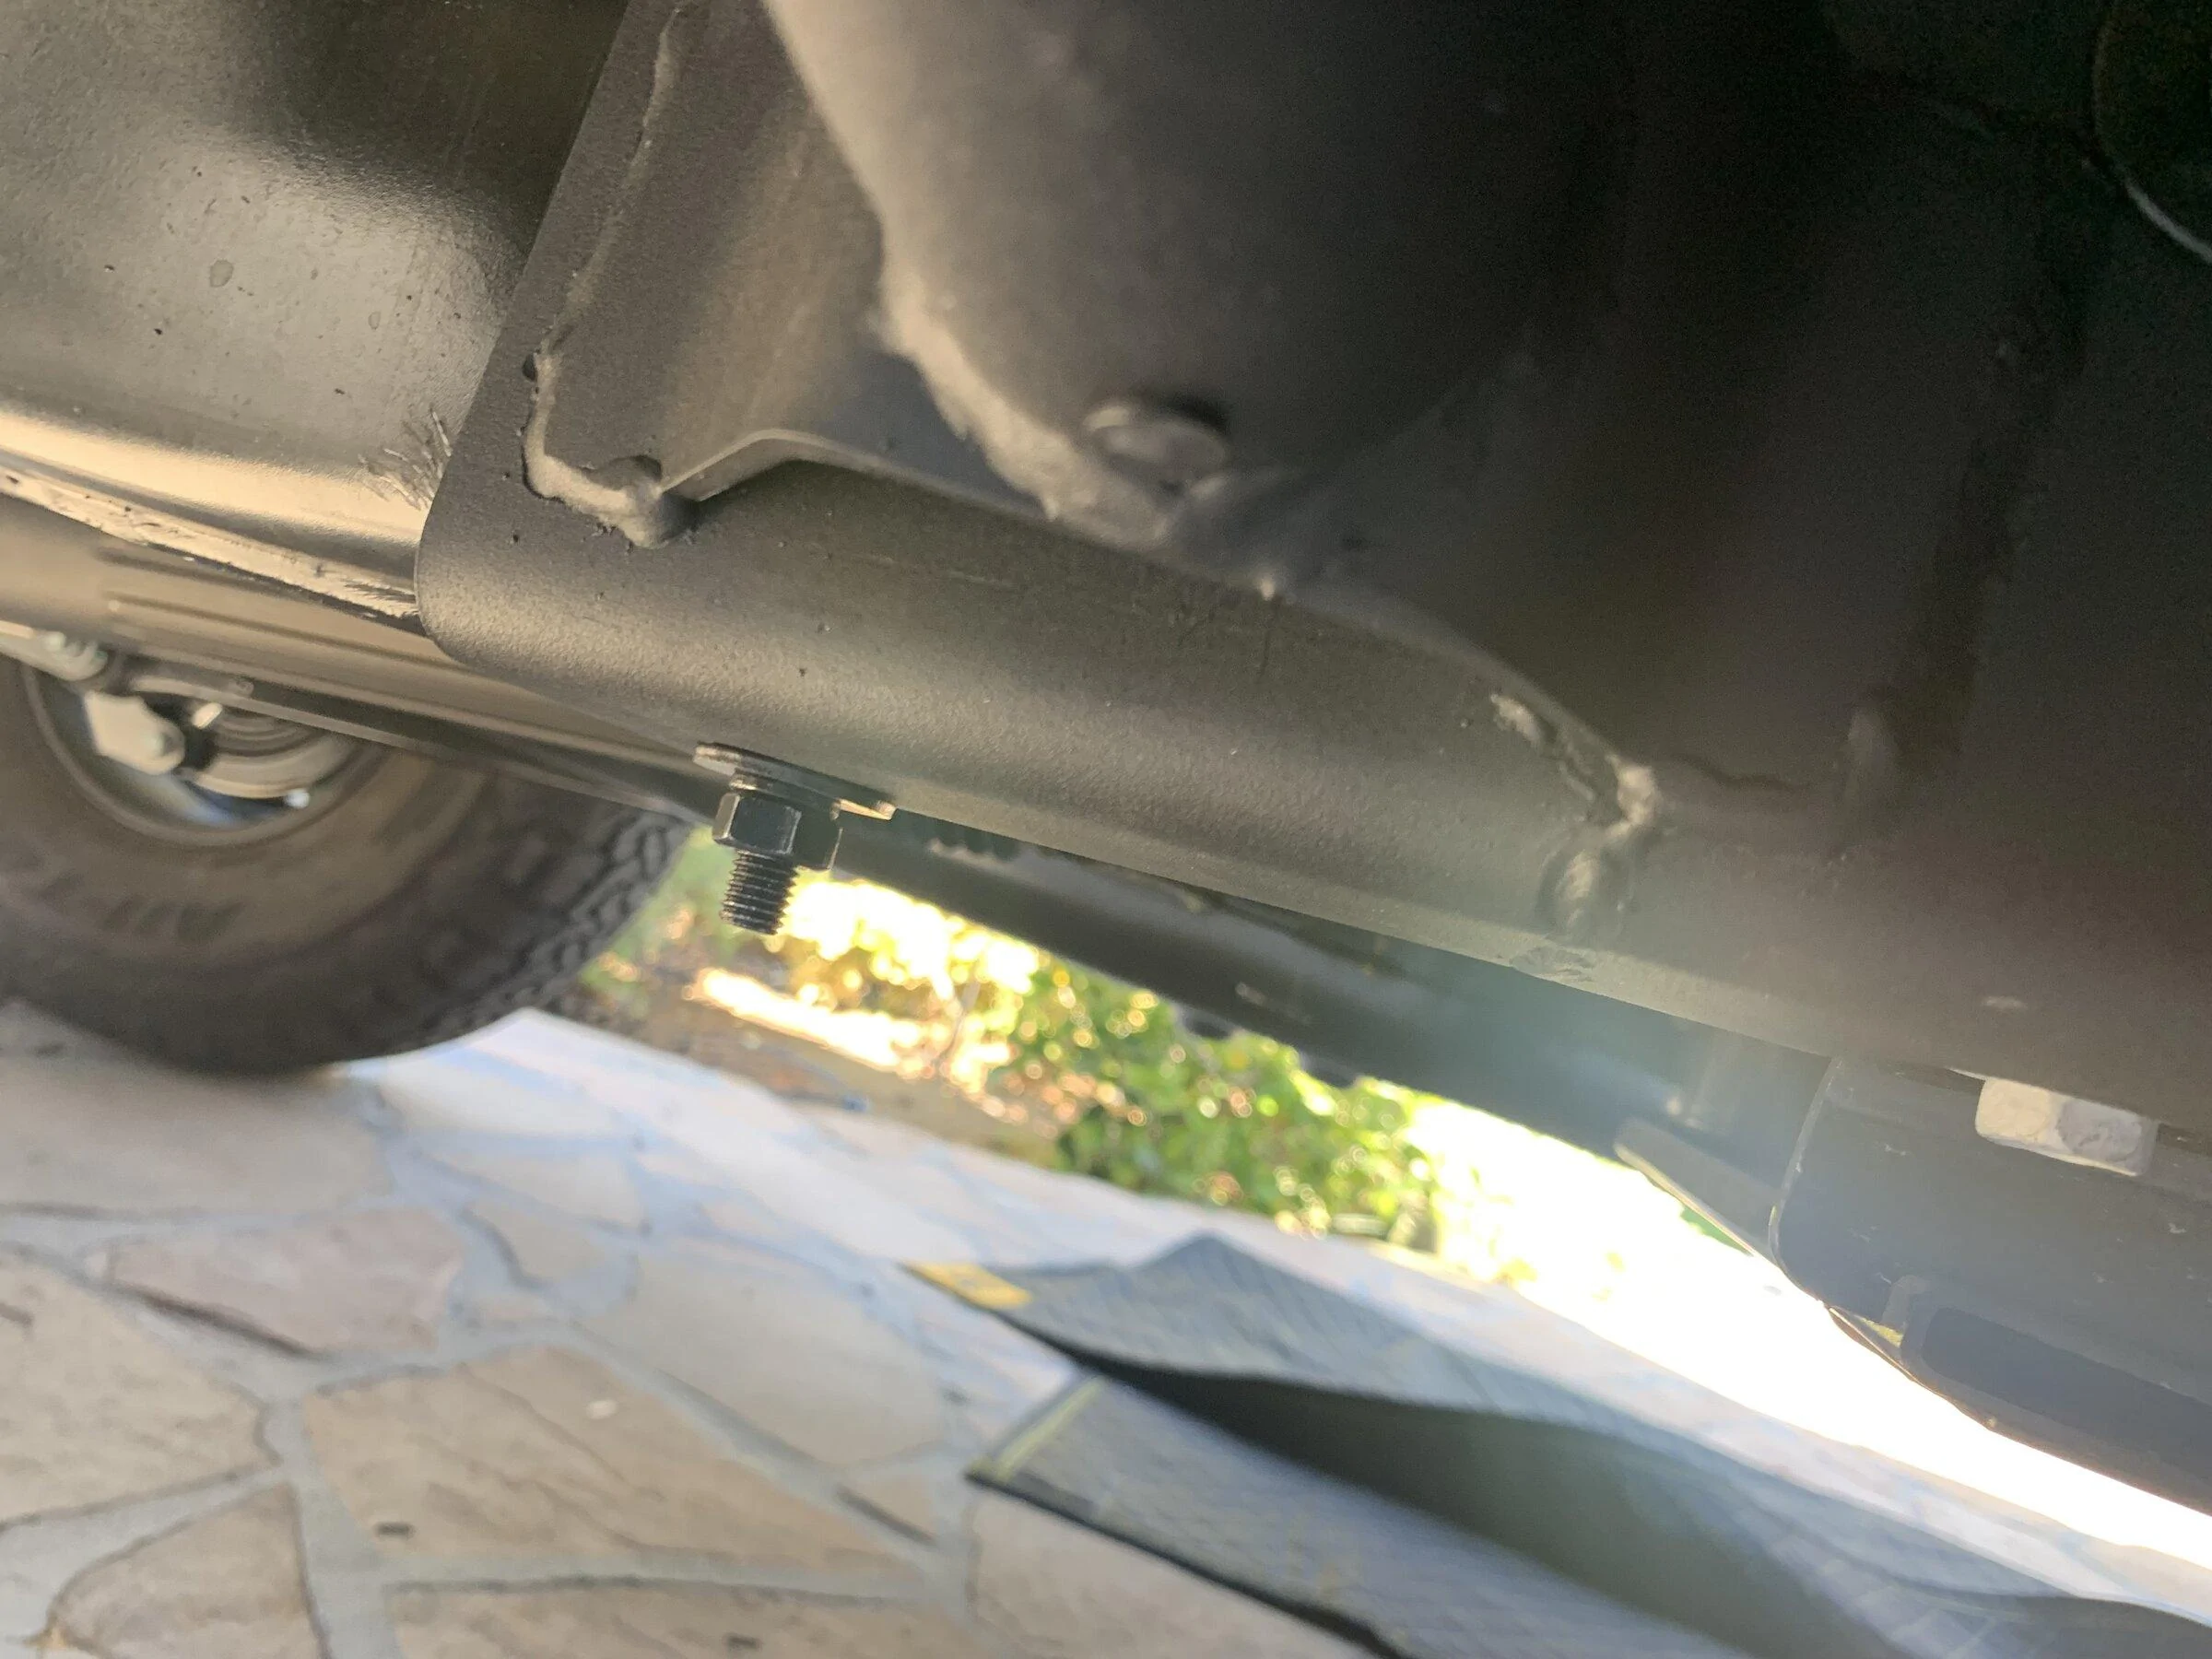
- On both the passenger and driver side there is a bolt that hangs down - see pics.
- so dumb and will surely get sheared off one day.
- Will try to make up some solution to that or just let it get smashed, plenty of other bolts to sacrifice this one.

Last edited:
snoshoe
Active Member
- Joined
- Jun 28, 2019
- Threads
- 2
- Messages
- 44
- Reaction score
- 24
- Location
- Indianapolis
- Vehicle(s)
- 2017 JKUS
Those sliders look great - tucked up there nicely.
Looks like they stick out far enough to stop some of the spray and rocks from the tires that chip the door hinges, too.
Great install write-up!
Looks like they stick out far enough to stop some of the spray and rocks from the tires that chip the door hinges, too.
Great install write-up!
OP
OP
PJZ
Well-Known Member
- First Name
- Patrick
- Joined
- Dec 16, 2021
- Threads
- 13
- Messages
- 333
- Reaction score
- 477
- Location
- SoCal - The Valley
- Vehicle(s)
- 2022 JTRD AEV370
- Build Thread
- Link
- Thread starter
- #23
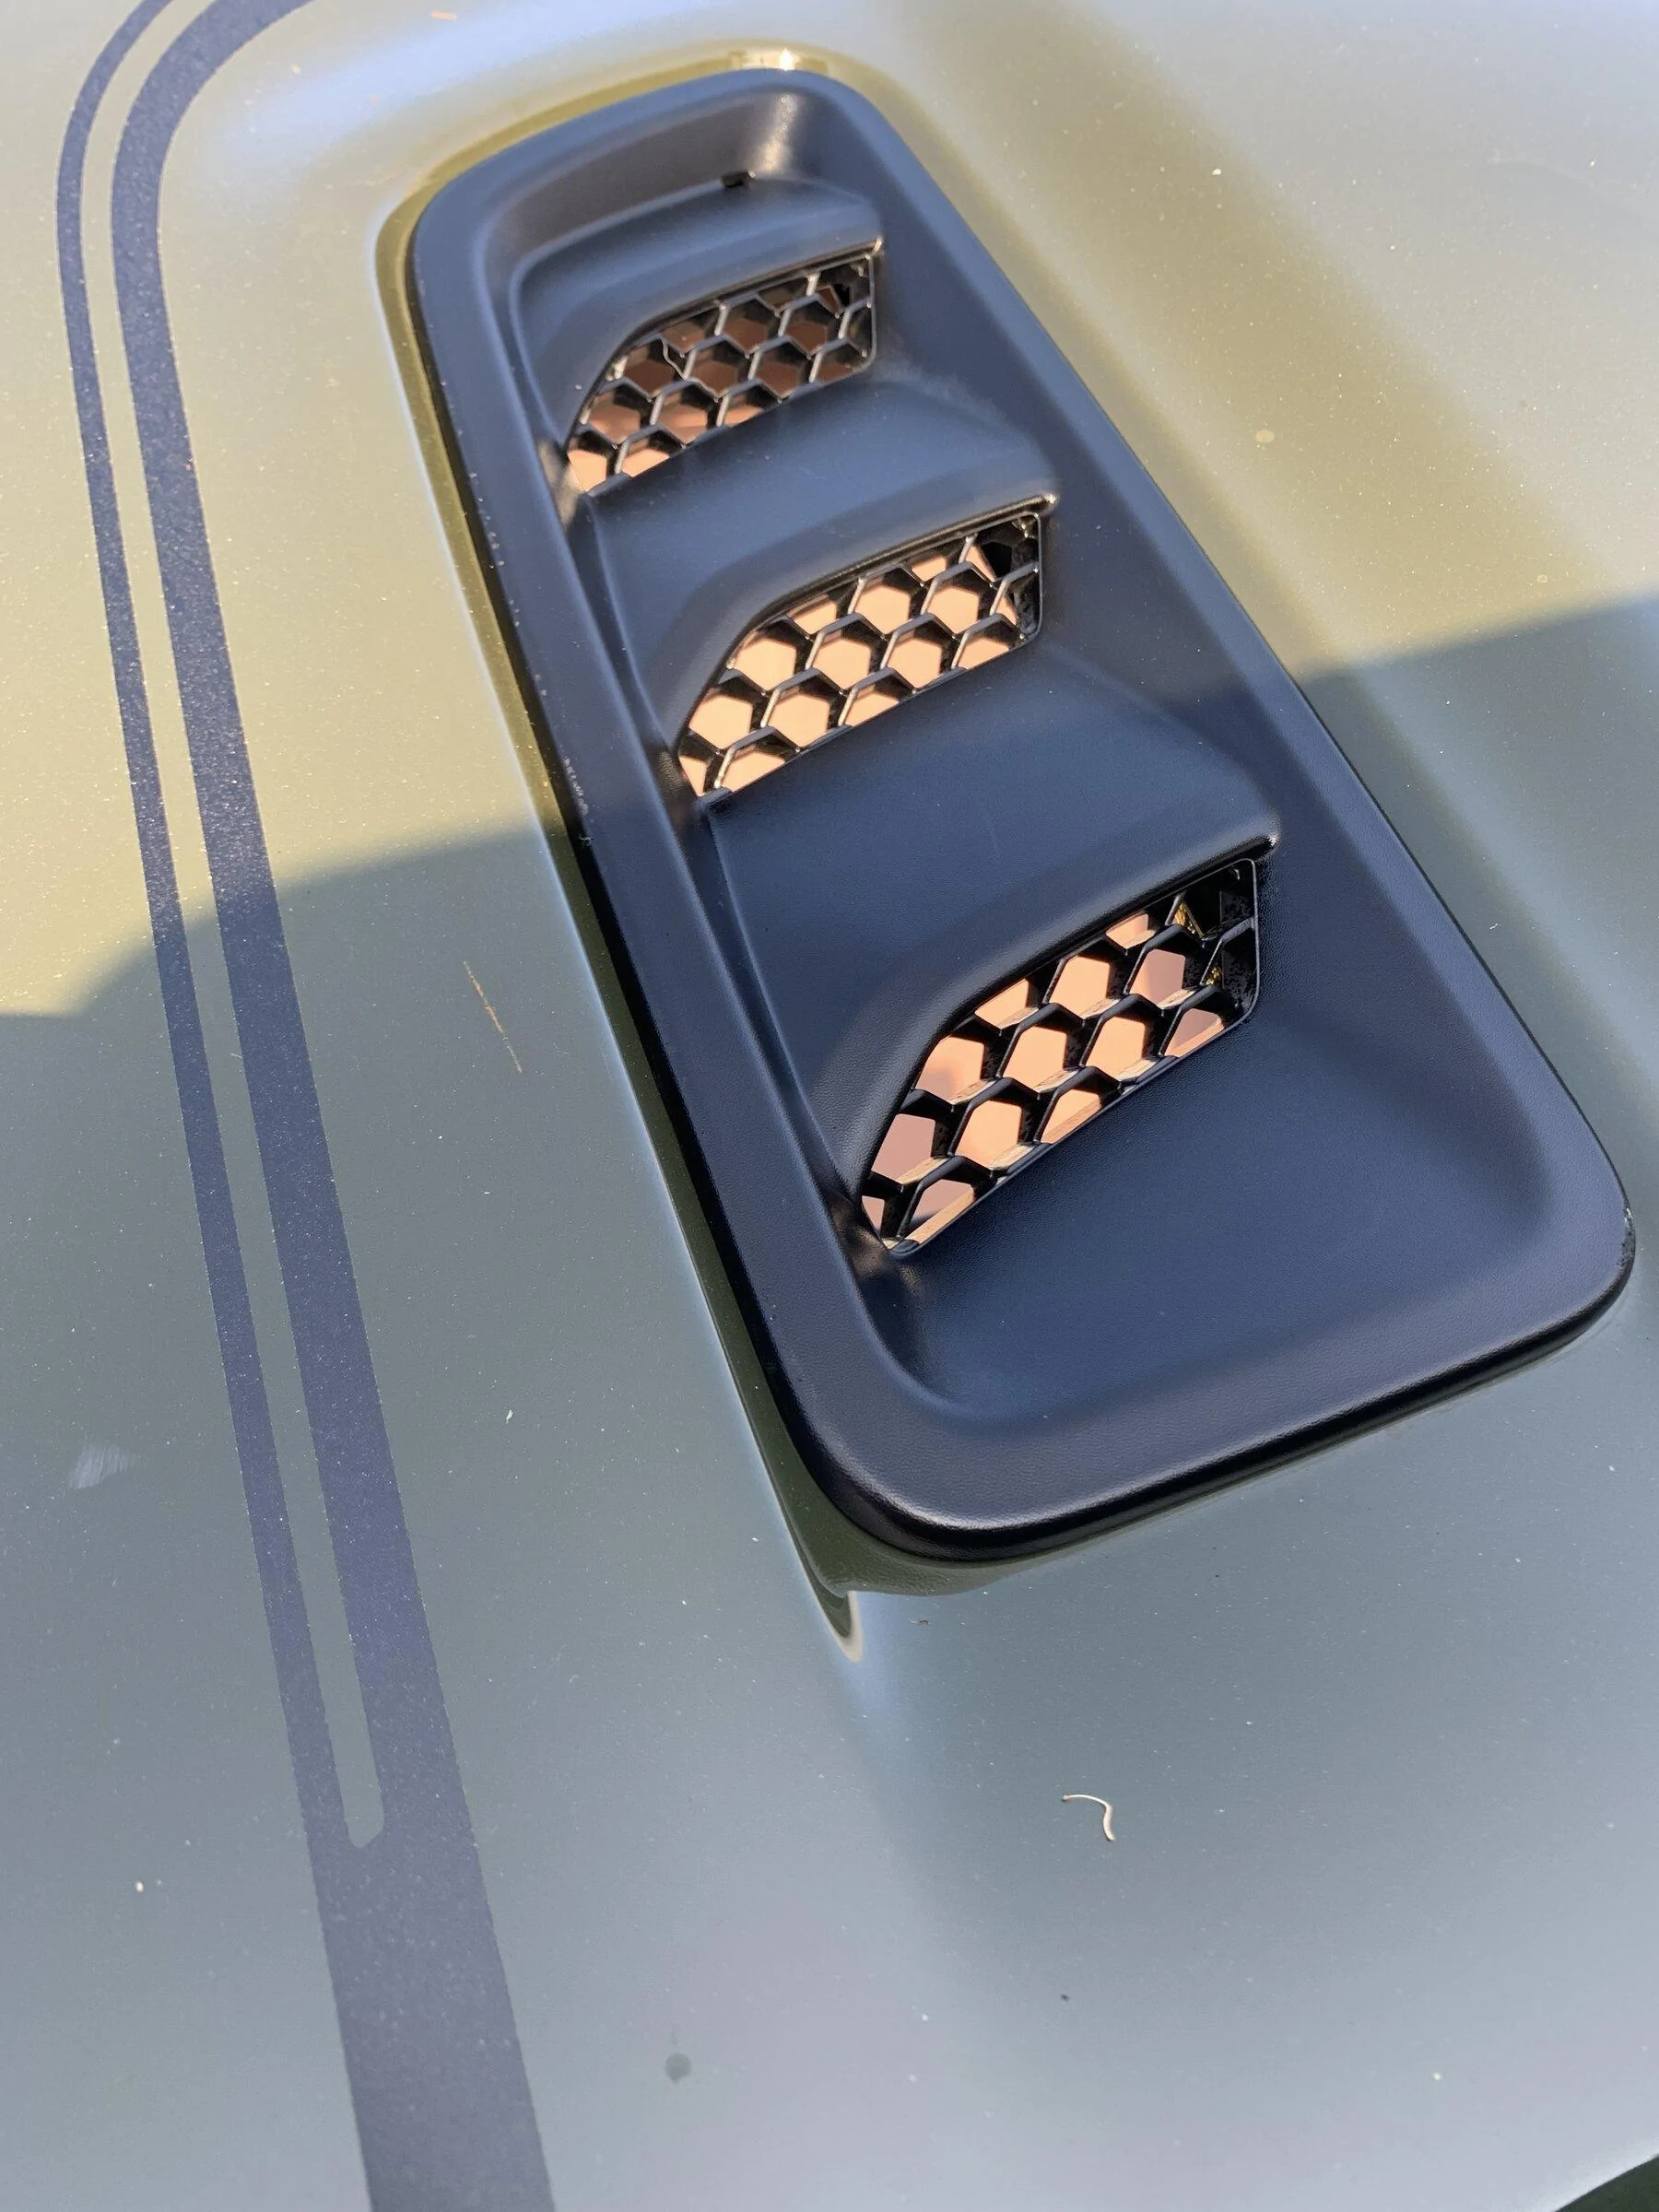
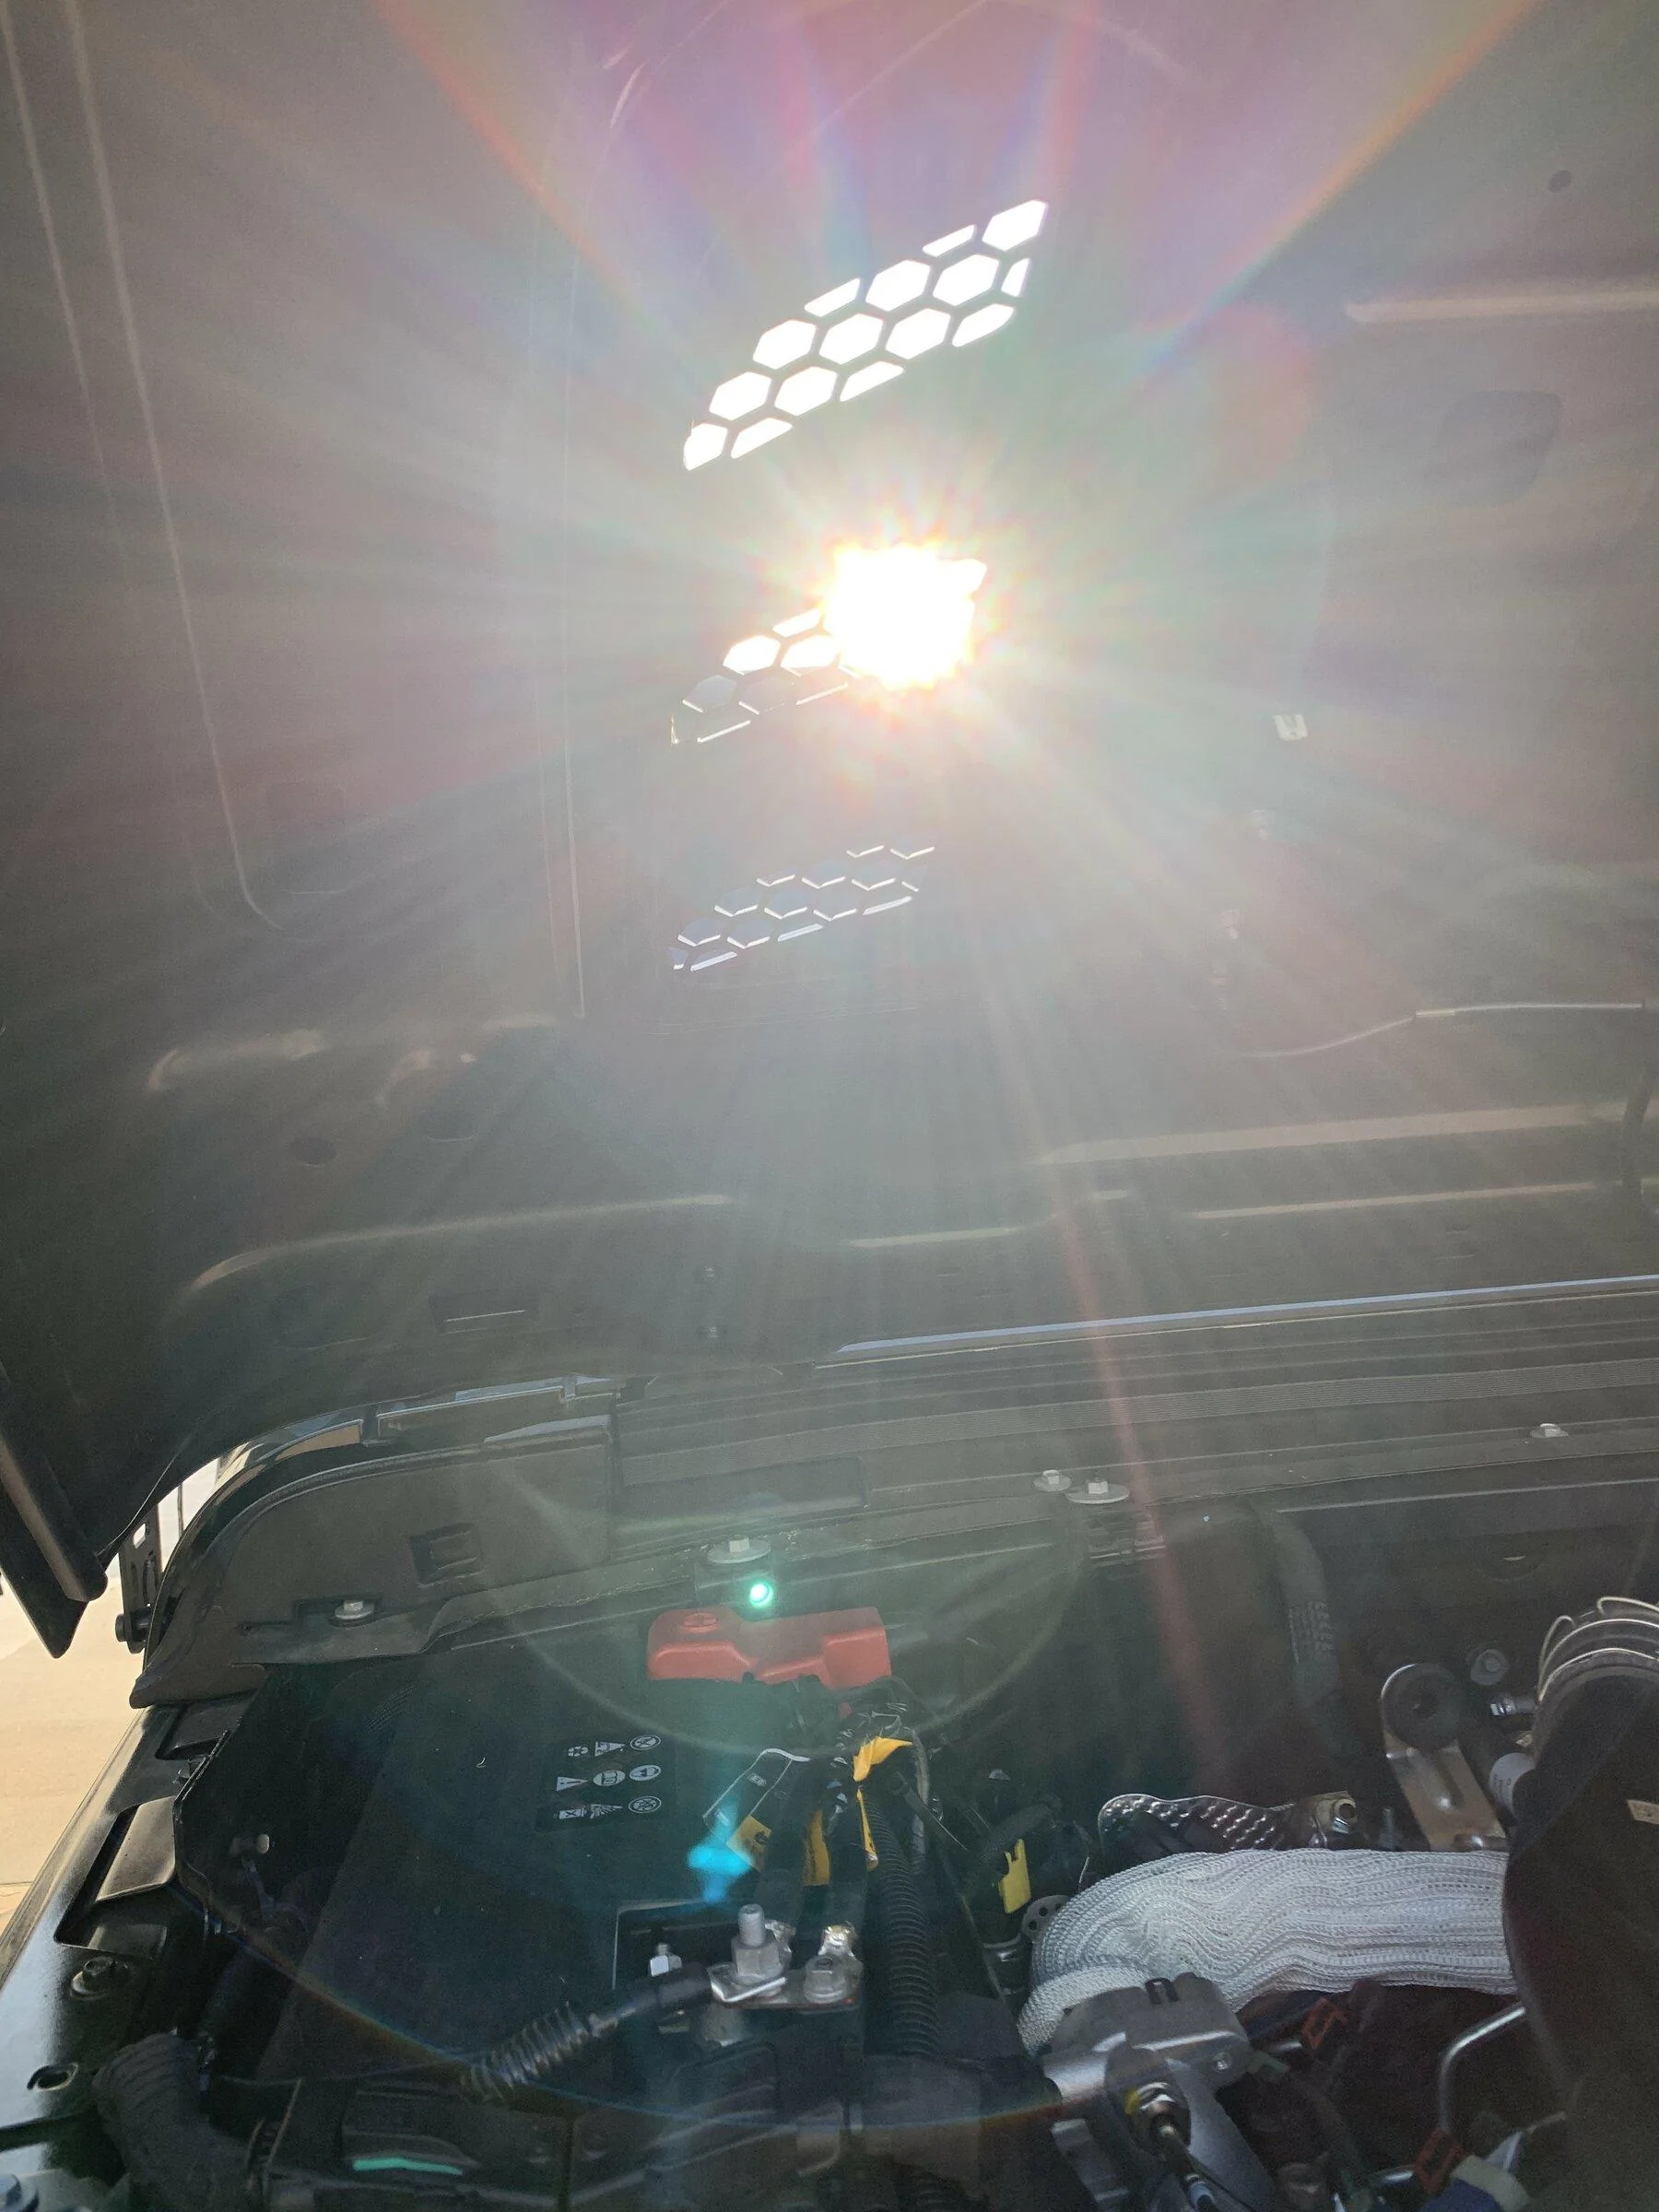
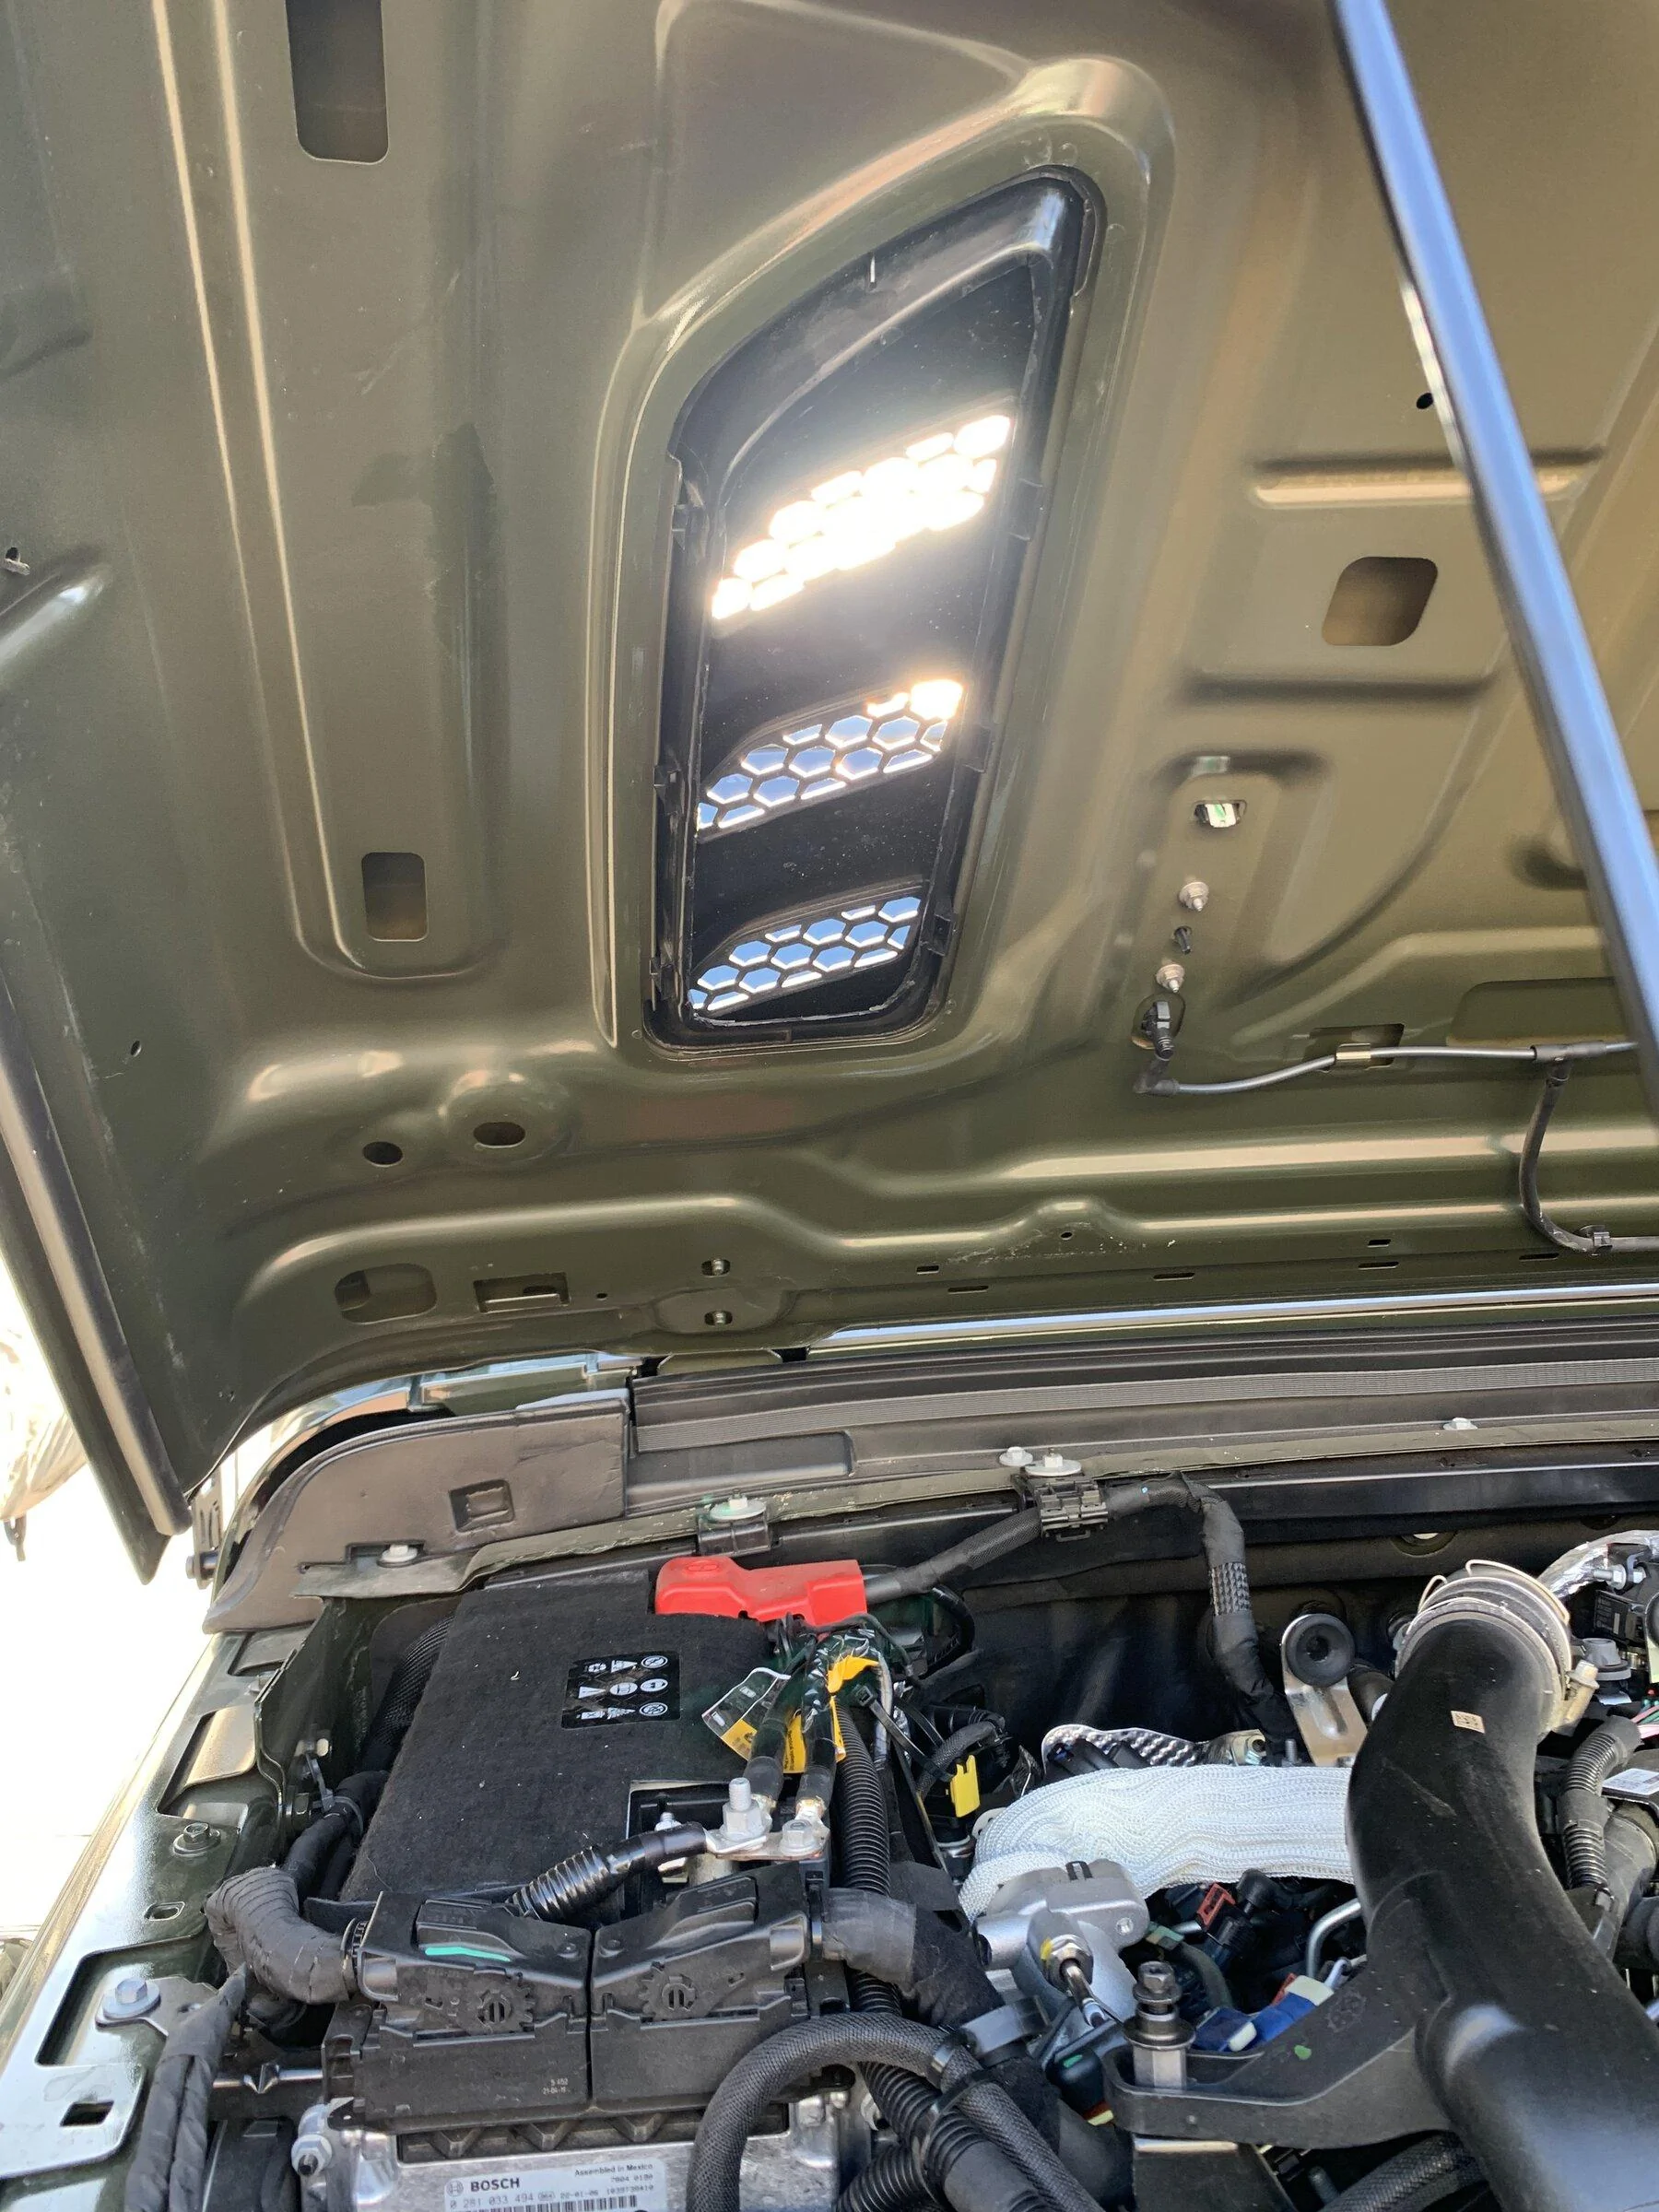
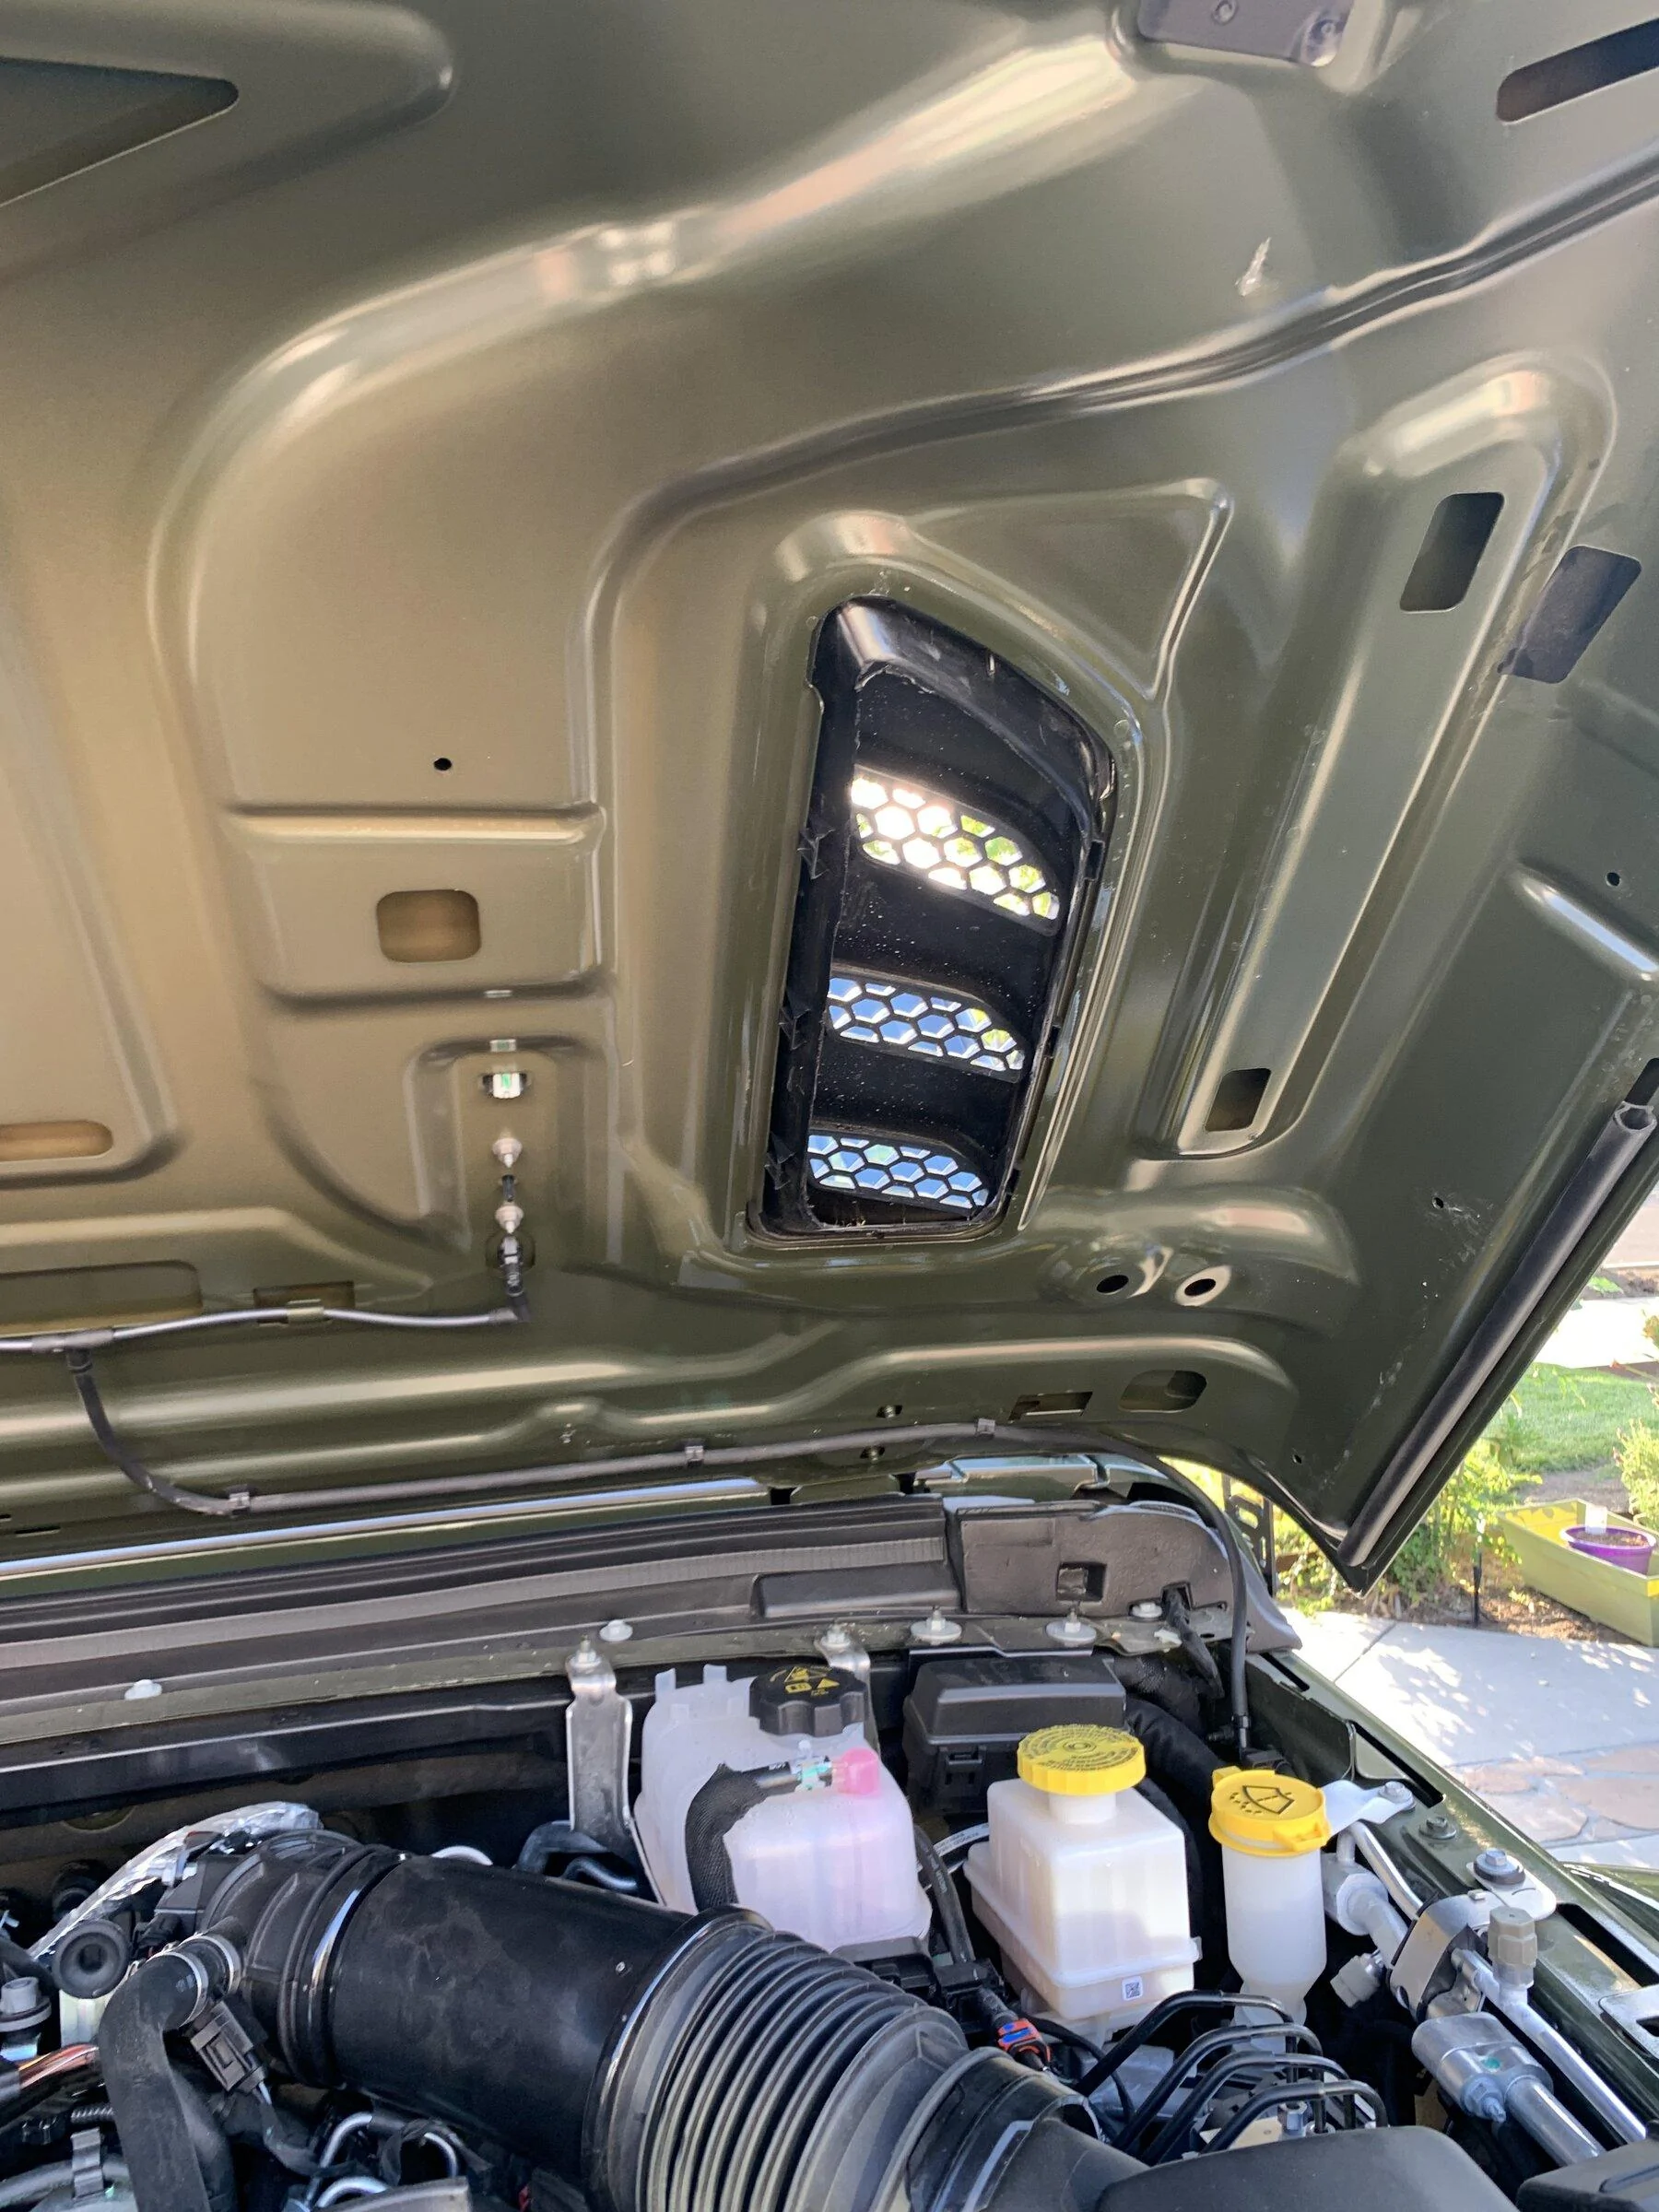
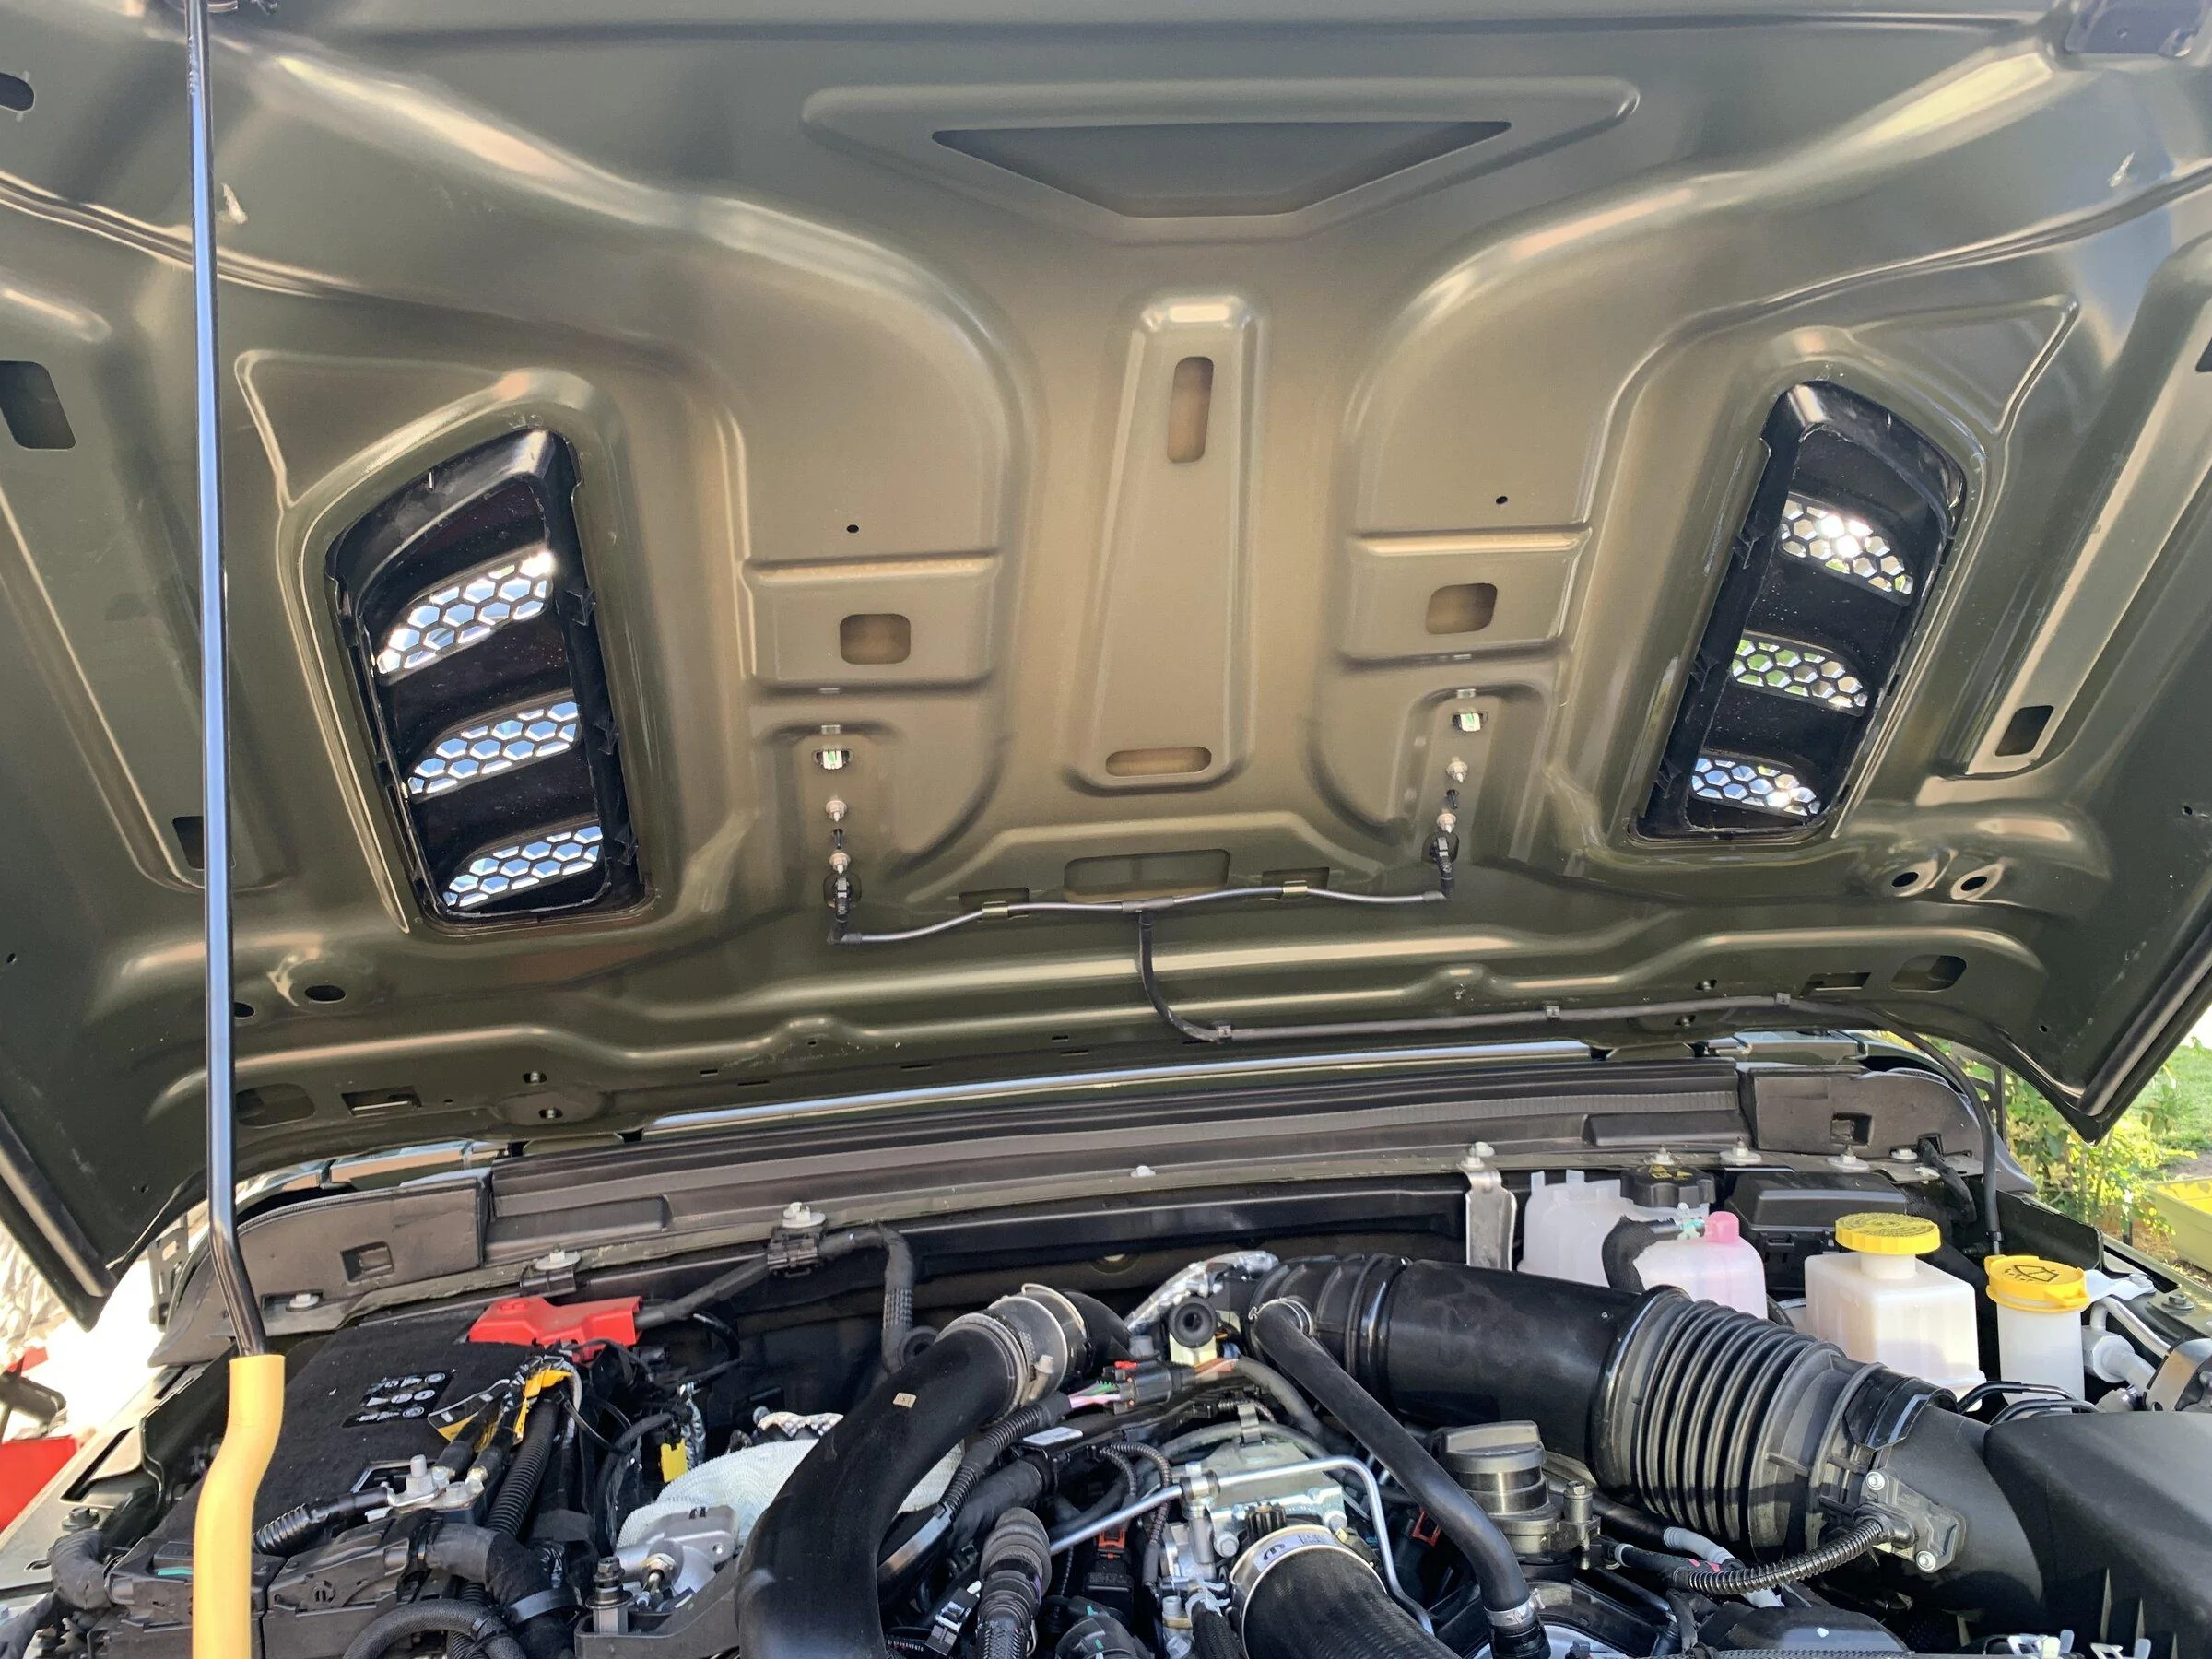
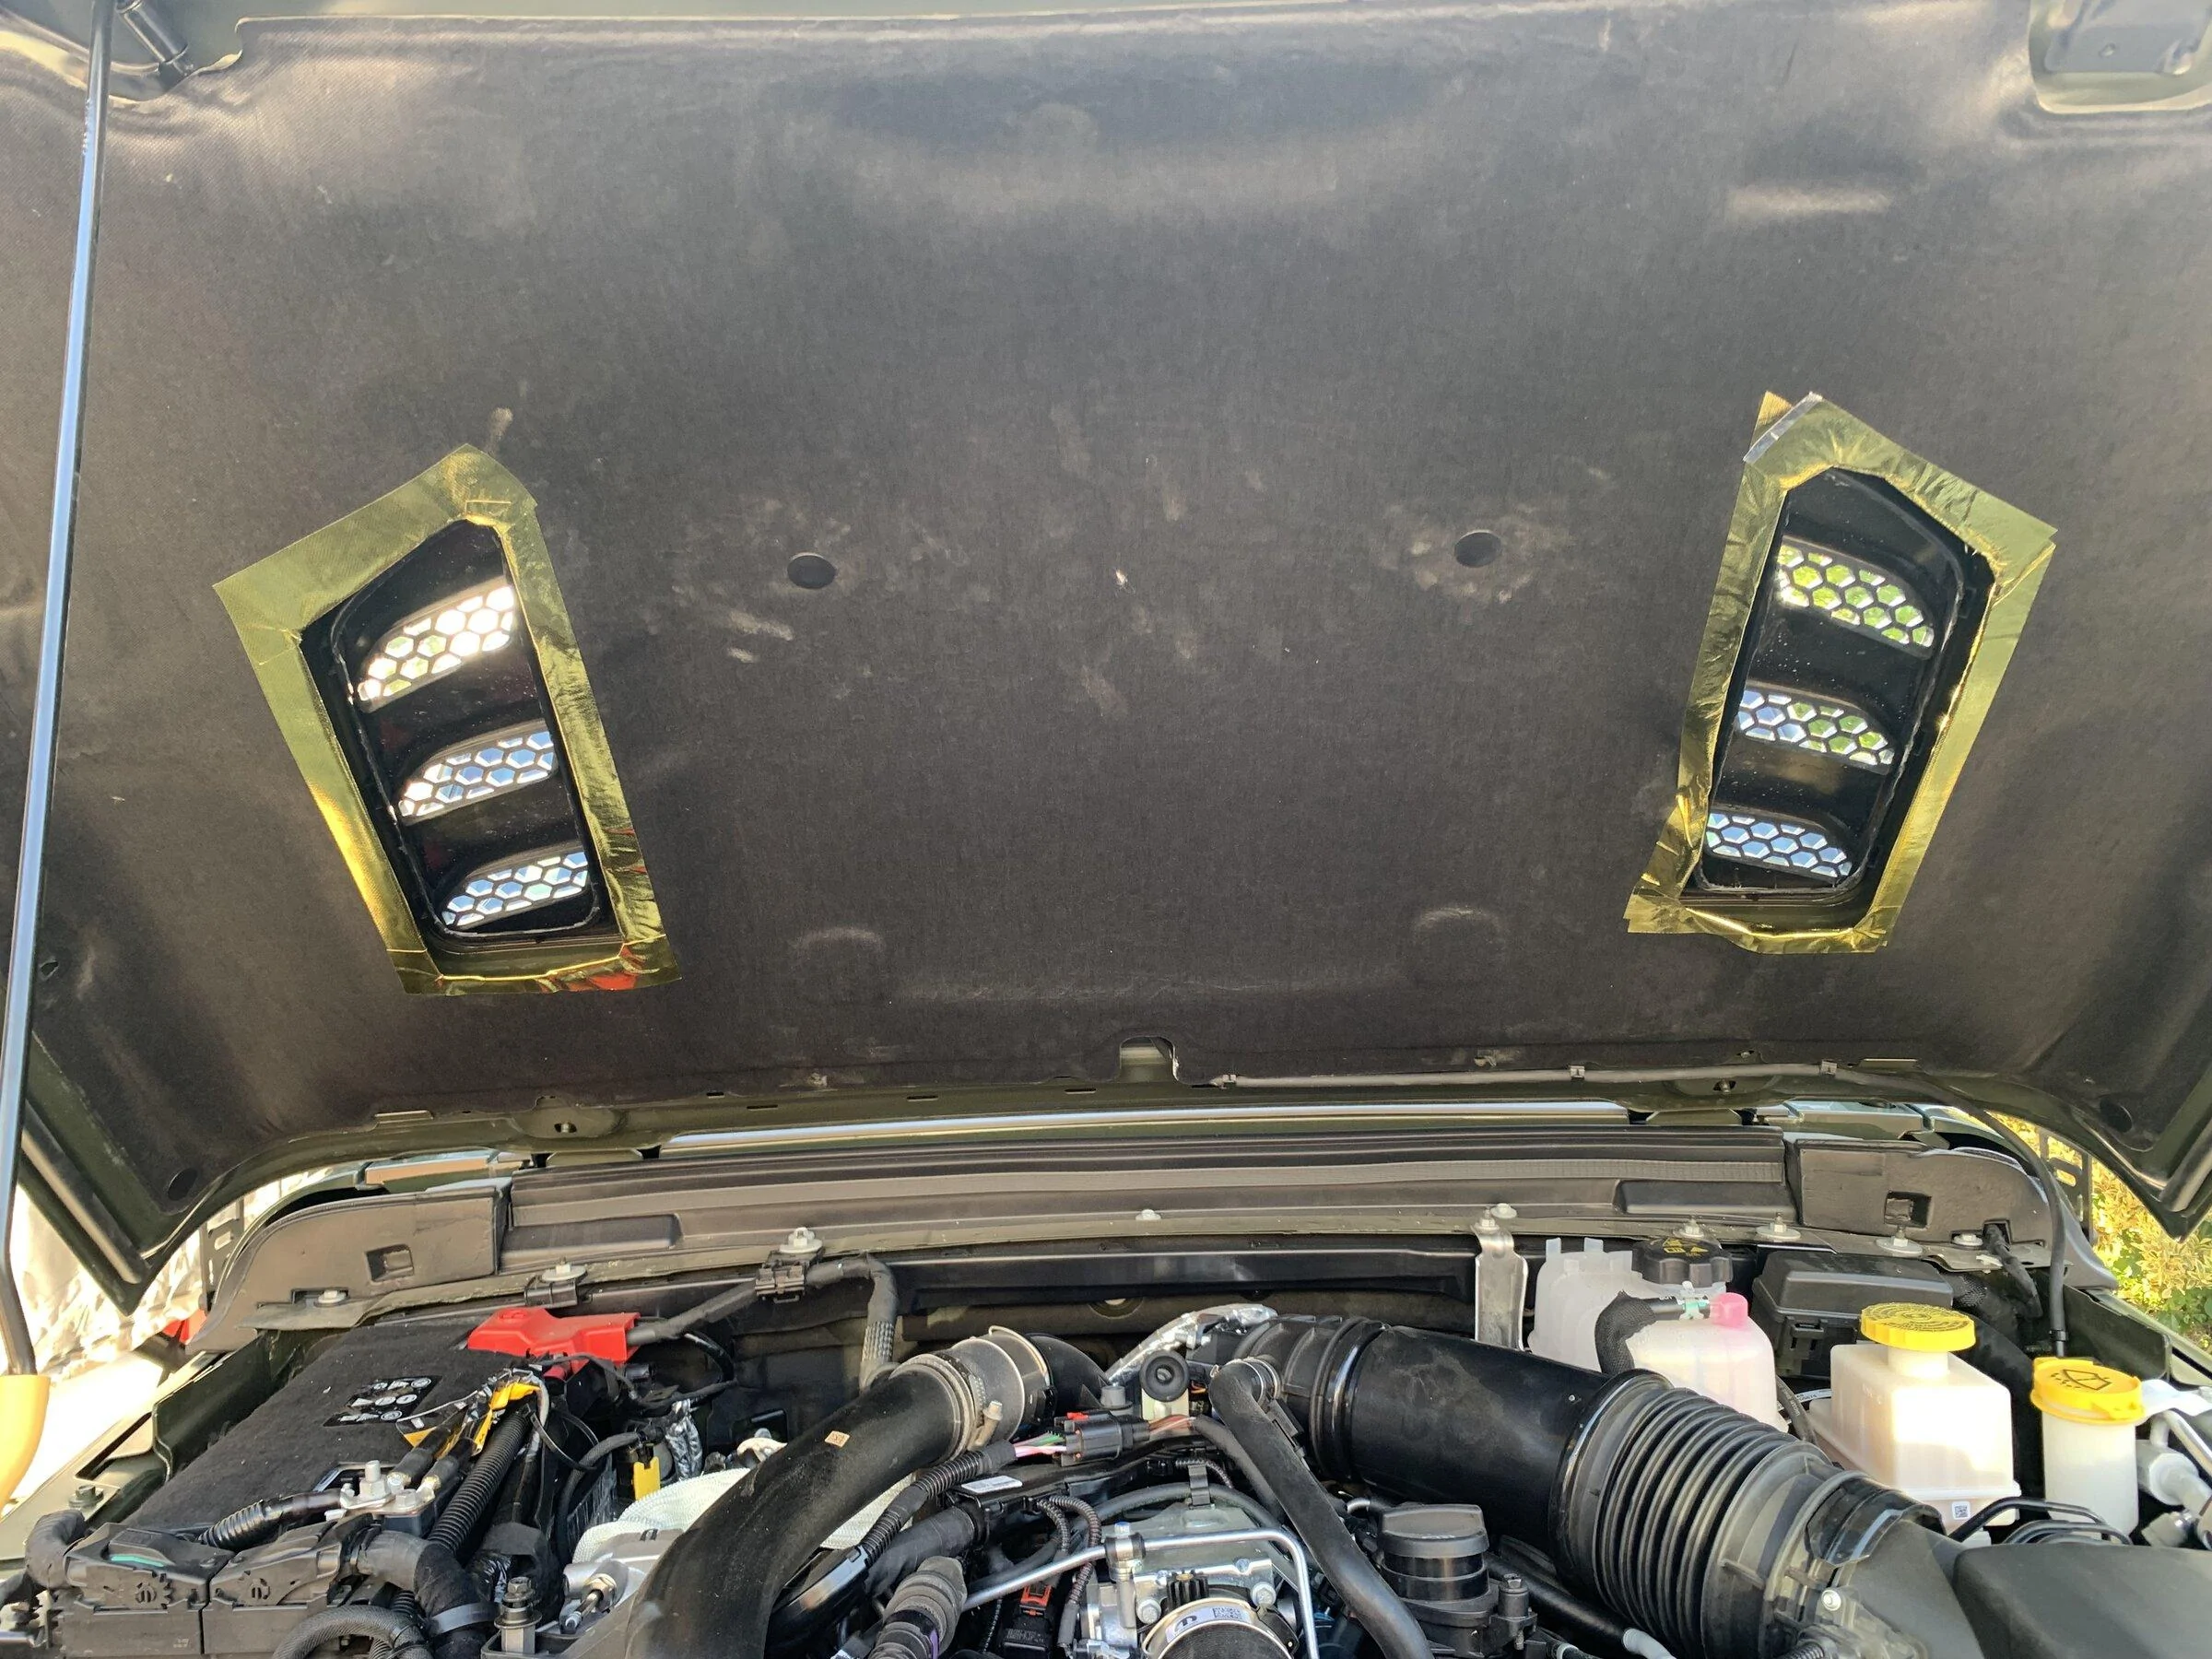
Quick after work project - cut out the stock hood vents to get some extra air flow. Took maybe 30 mins or so. Super easy with the Dremel.
NC_Overland
Well-Known Member
- First Name
- John
- Joined
- Feb 21, 2020
- Threads
- 18
- Messages
- 3,364
- Reaction score
- 4,133
- Location
- Raleigh, NC
- Vehicle(s)
- 2020 JT Overland
I’d never buy that diesel, but I’m super jealous of your AEV Jeep. It’s always been a dream of mine.
OP
OP
PJZ
Well-Known Member
- First Name
- Patrick
- Joined
- Dec 16, 2021
- Threads
- 13
- Messages
- 333
- Reaction score
- 477
- Location
- SoCal - The Valley
- Vehicle(s)
- 2022 JTRD AEV370
- Build Thread
- Link
- Thread starter
- #25
Same for me -this is a bucket list truck. Jury is out on the diesel since it is so new. It sure does drive nice though. The 4.56s make the 37s feel like it is a stock set up.
Sponsored
OP
OP
PJZ
Well-Known Member
- First Name
- Patrick
- Joined
- Dec 16, 2021
- Threads
- 13
- Messages
- 333
- Reaction score
- 477
- Location
- SoCal - The Valley
- Vehicle(s)
- 2022 JTRD AEV370
- Build Thread
- Link
- Thread starter
- #26
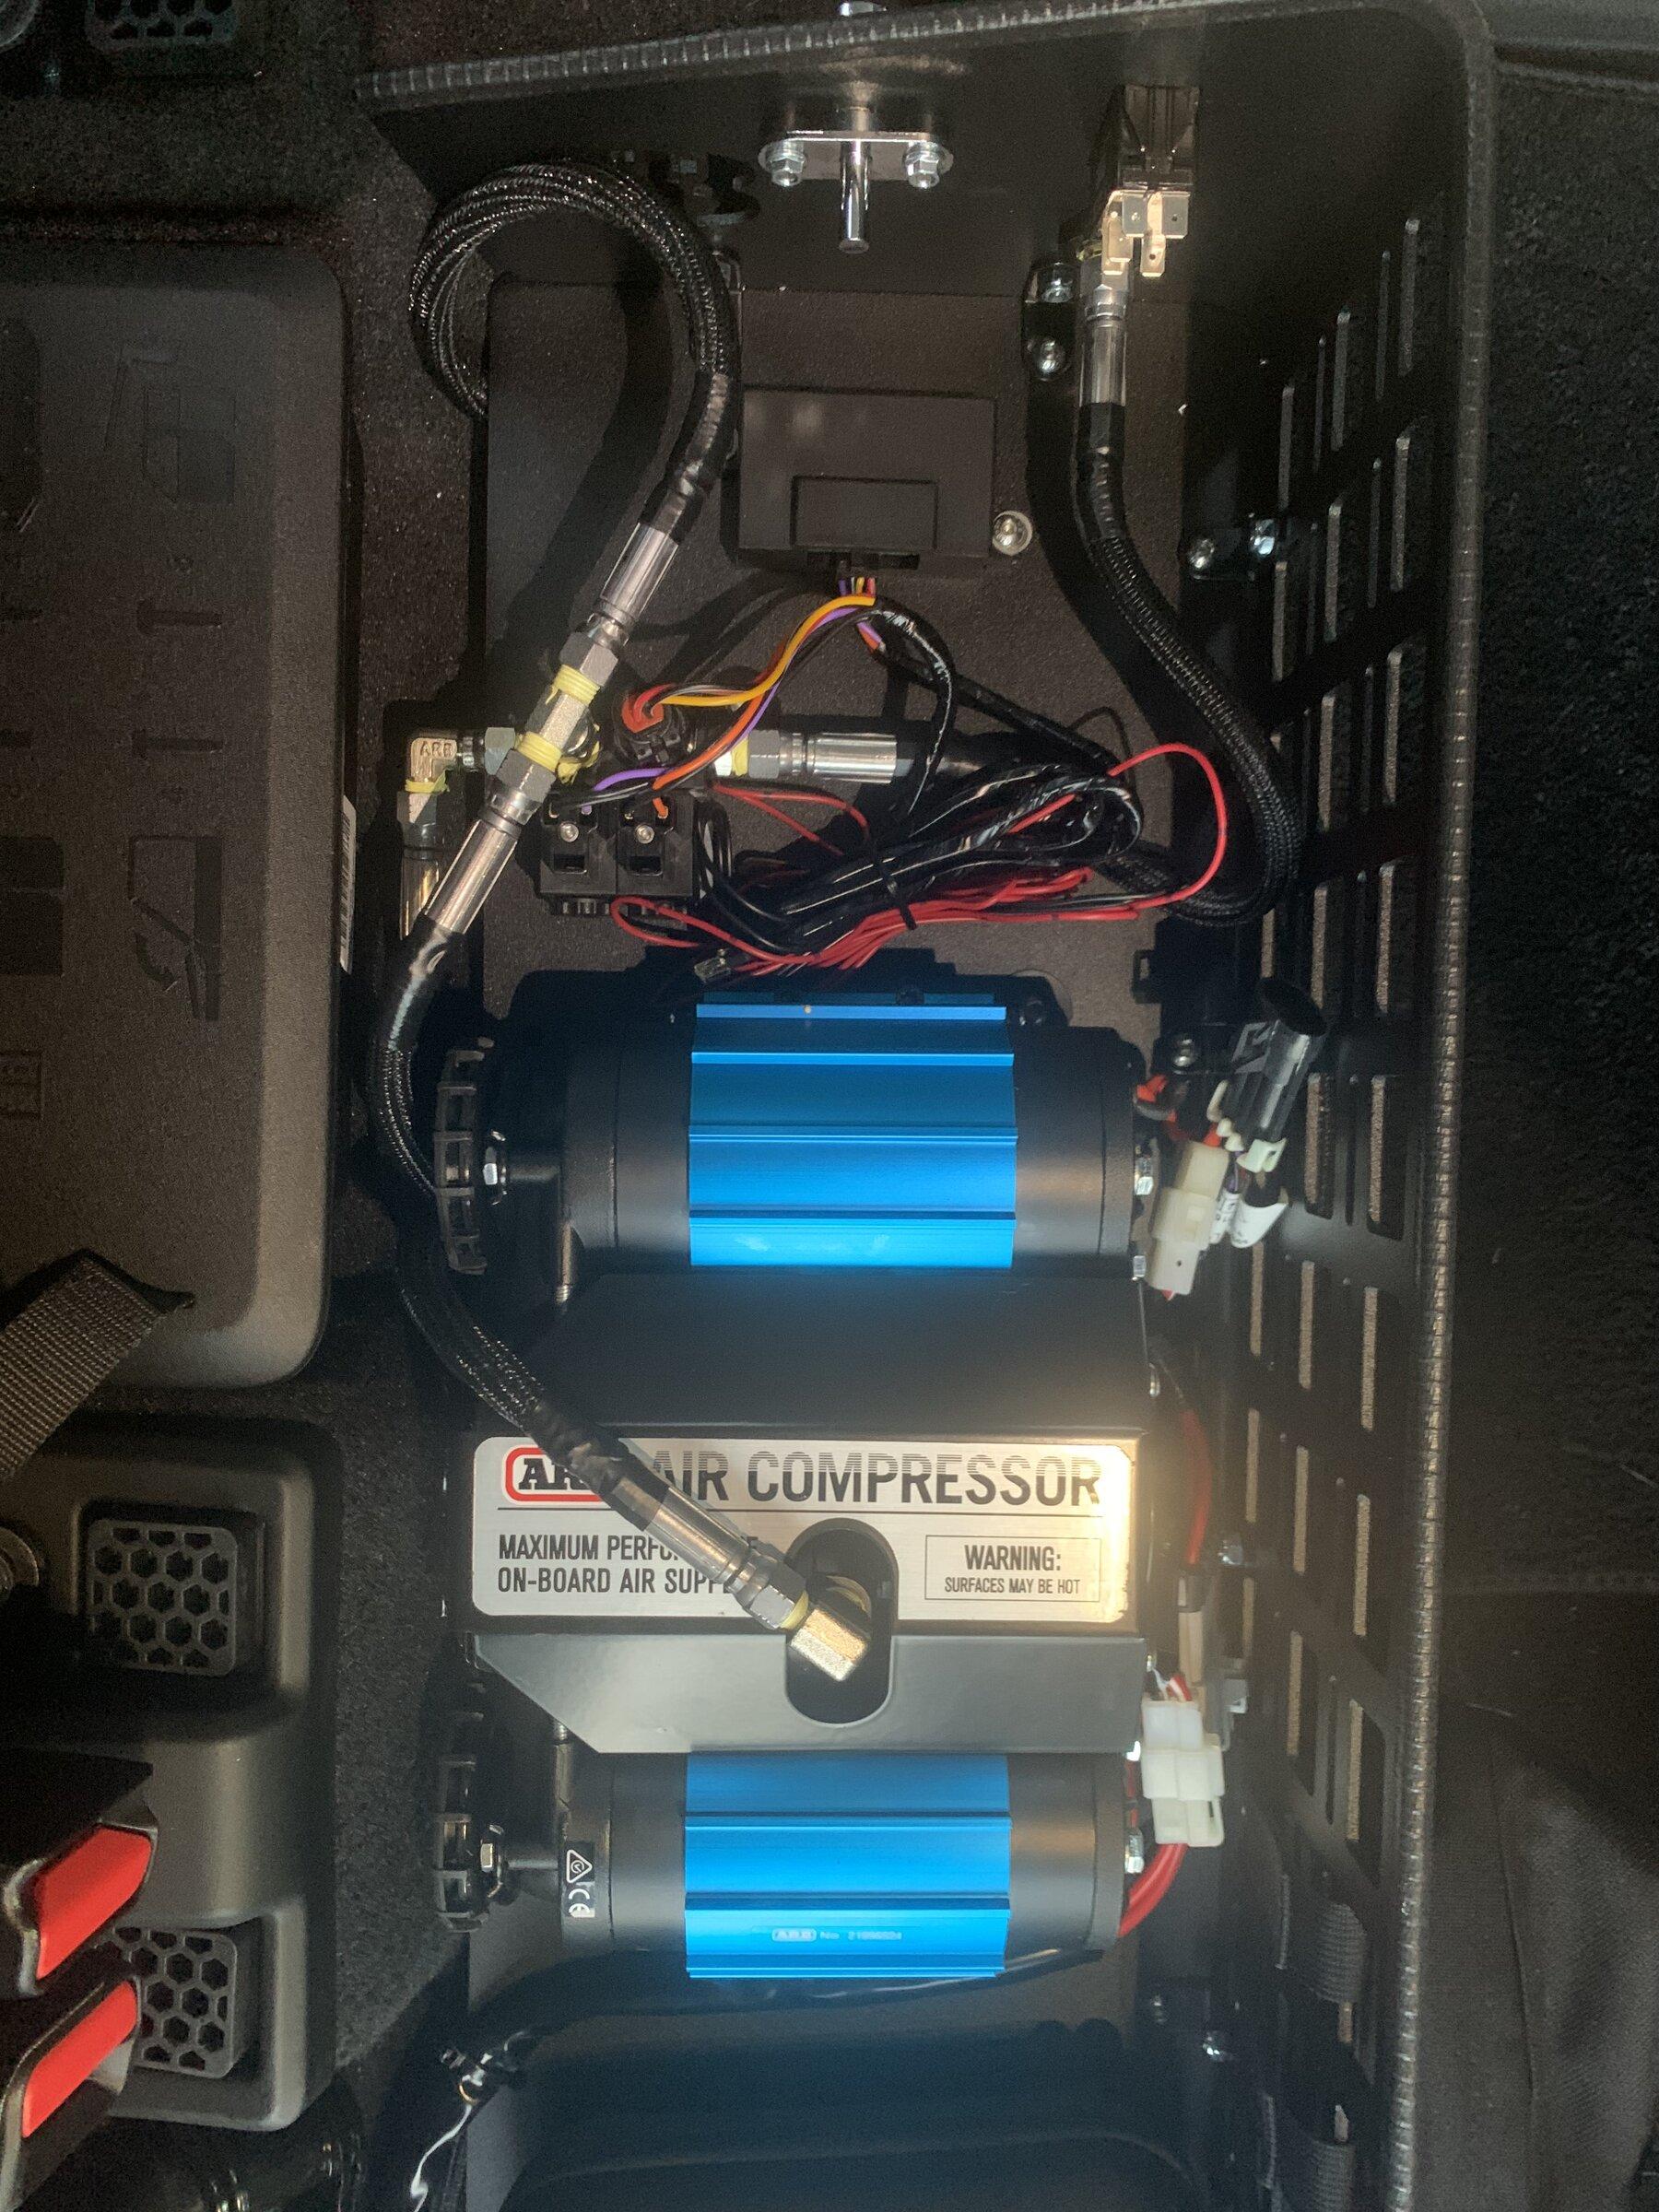
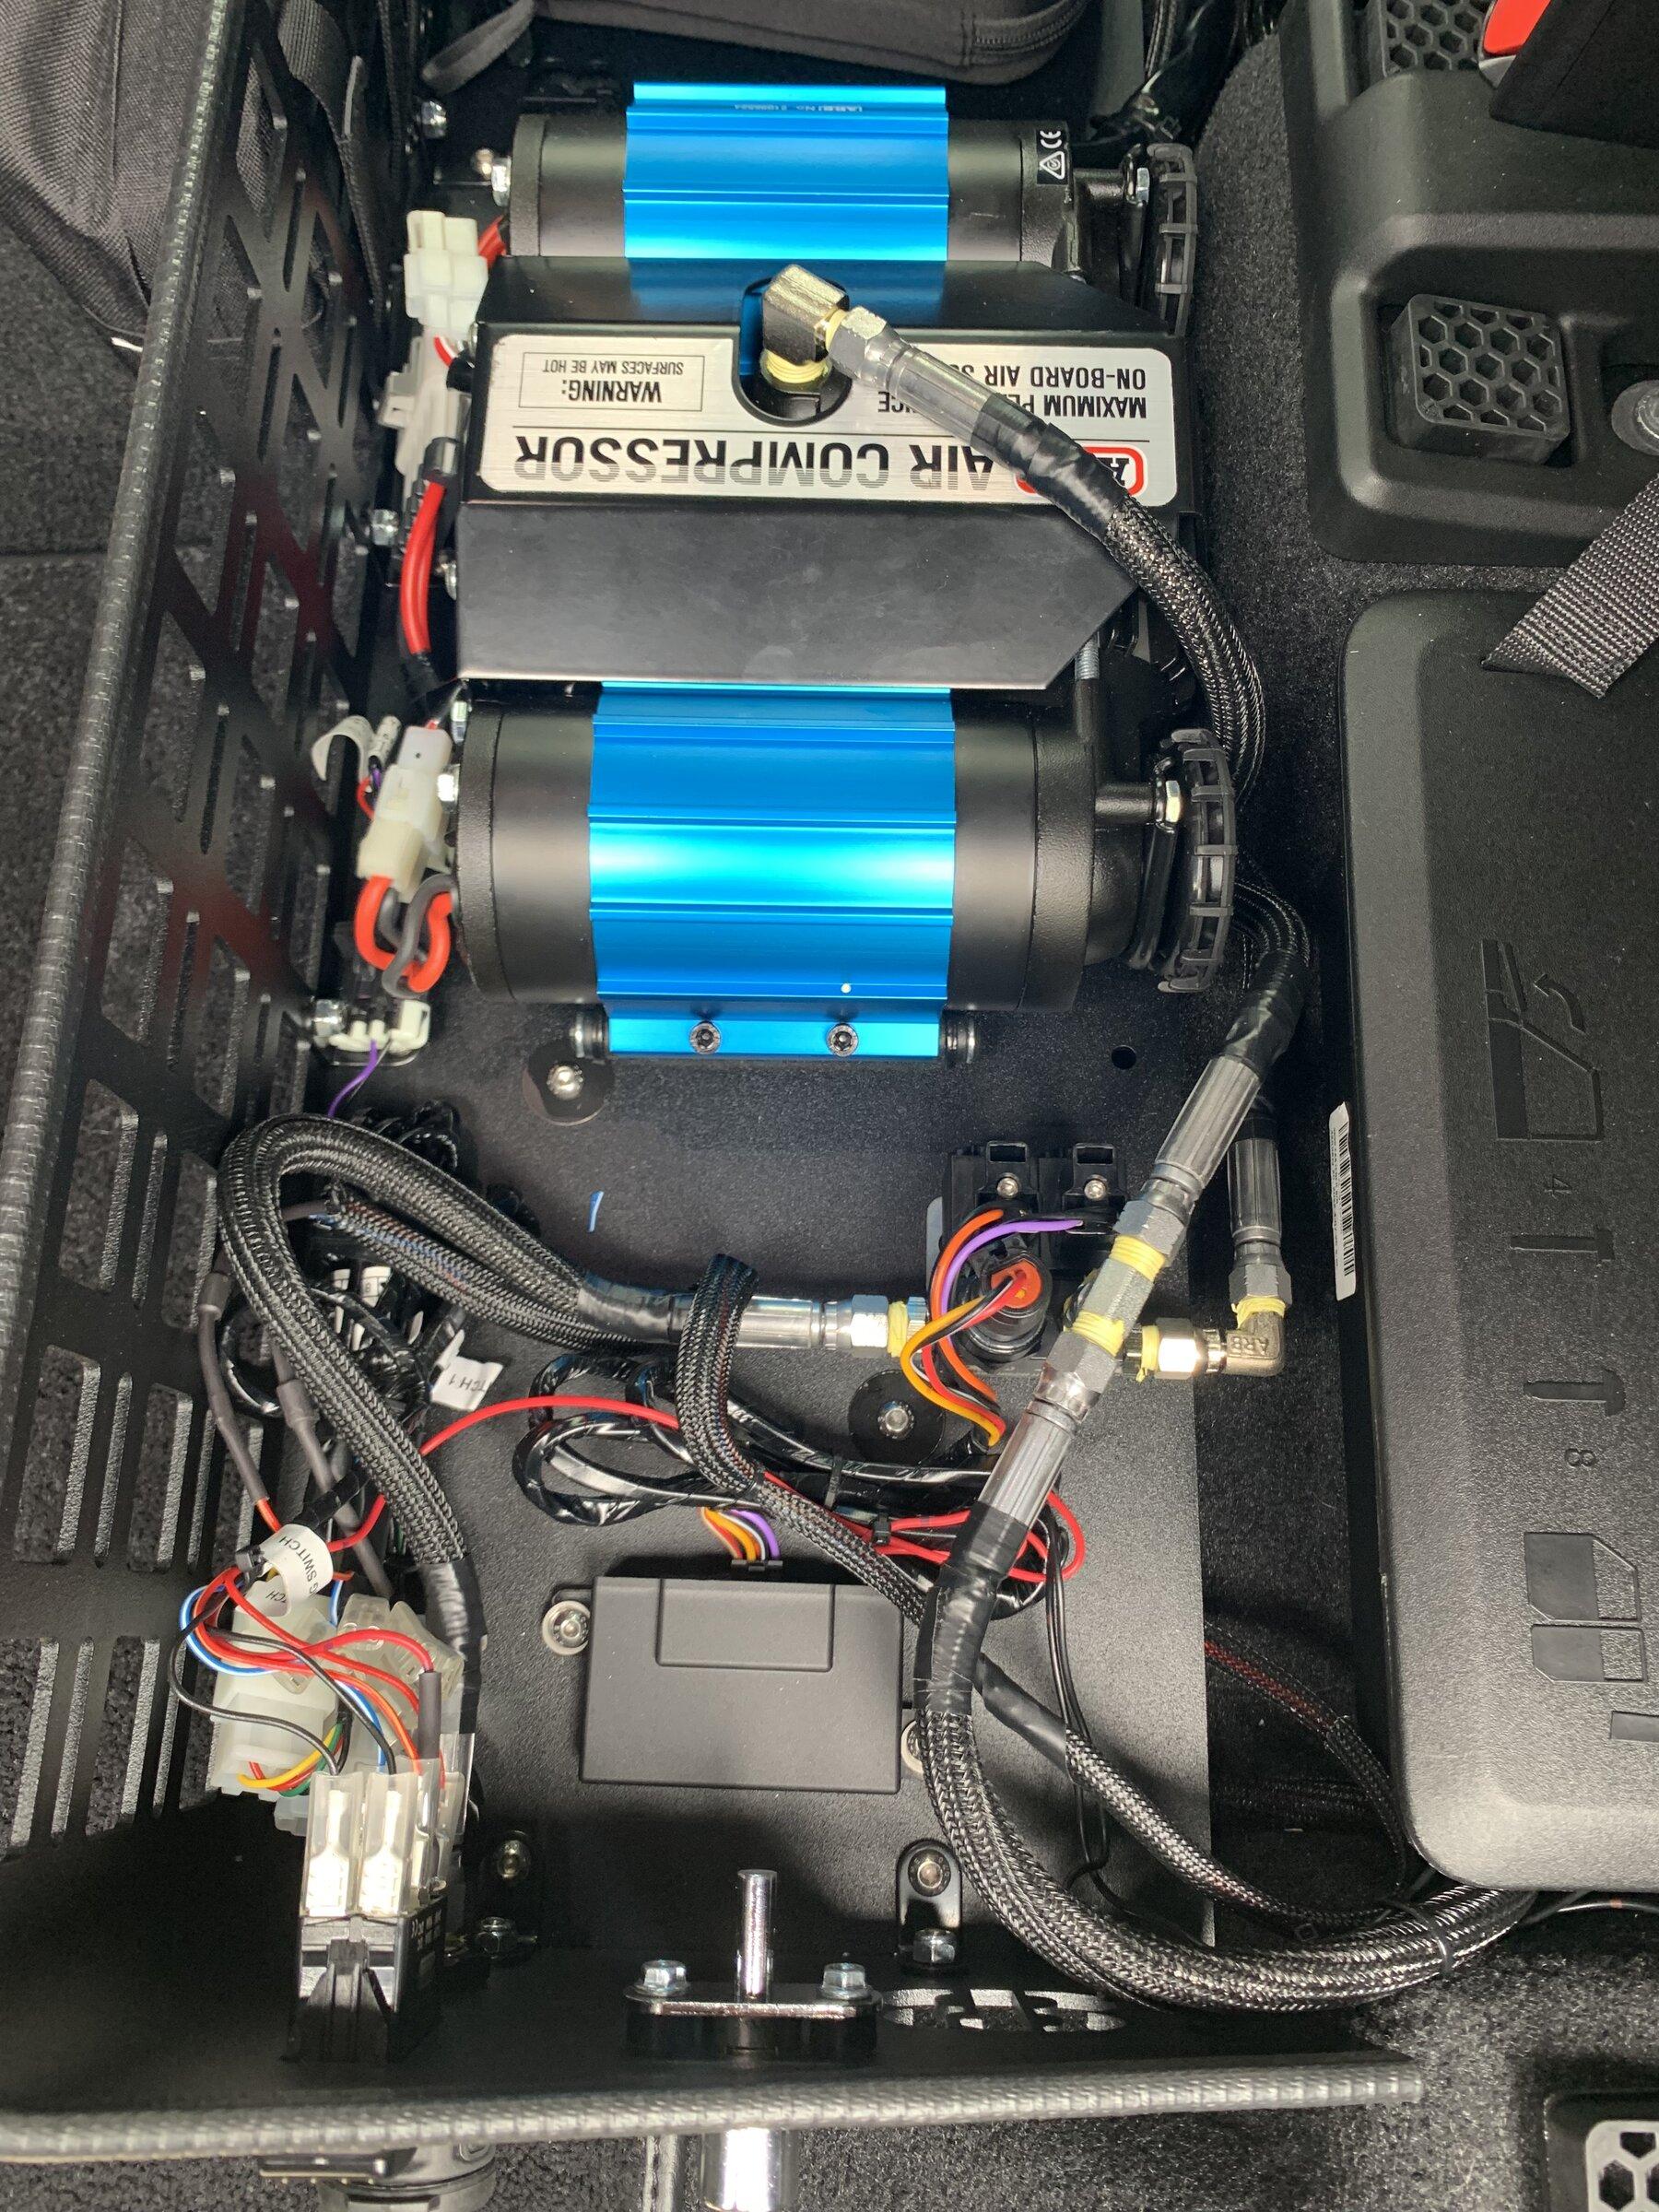
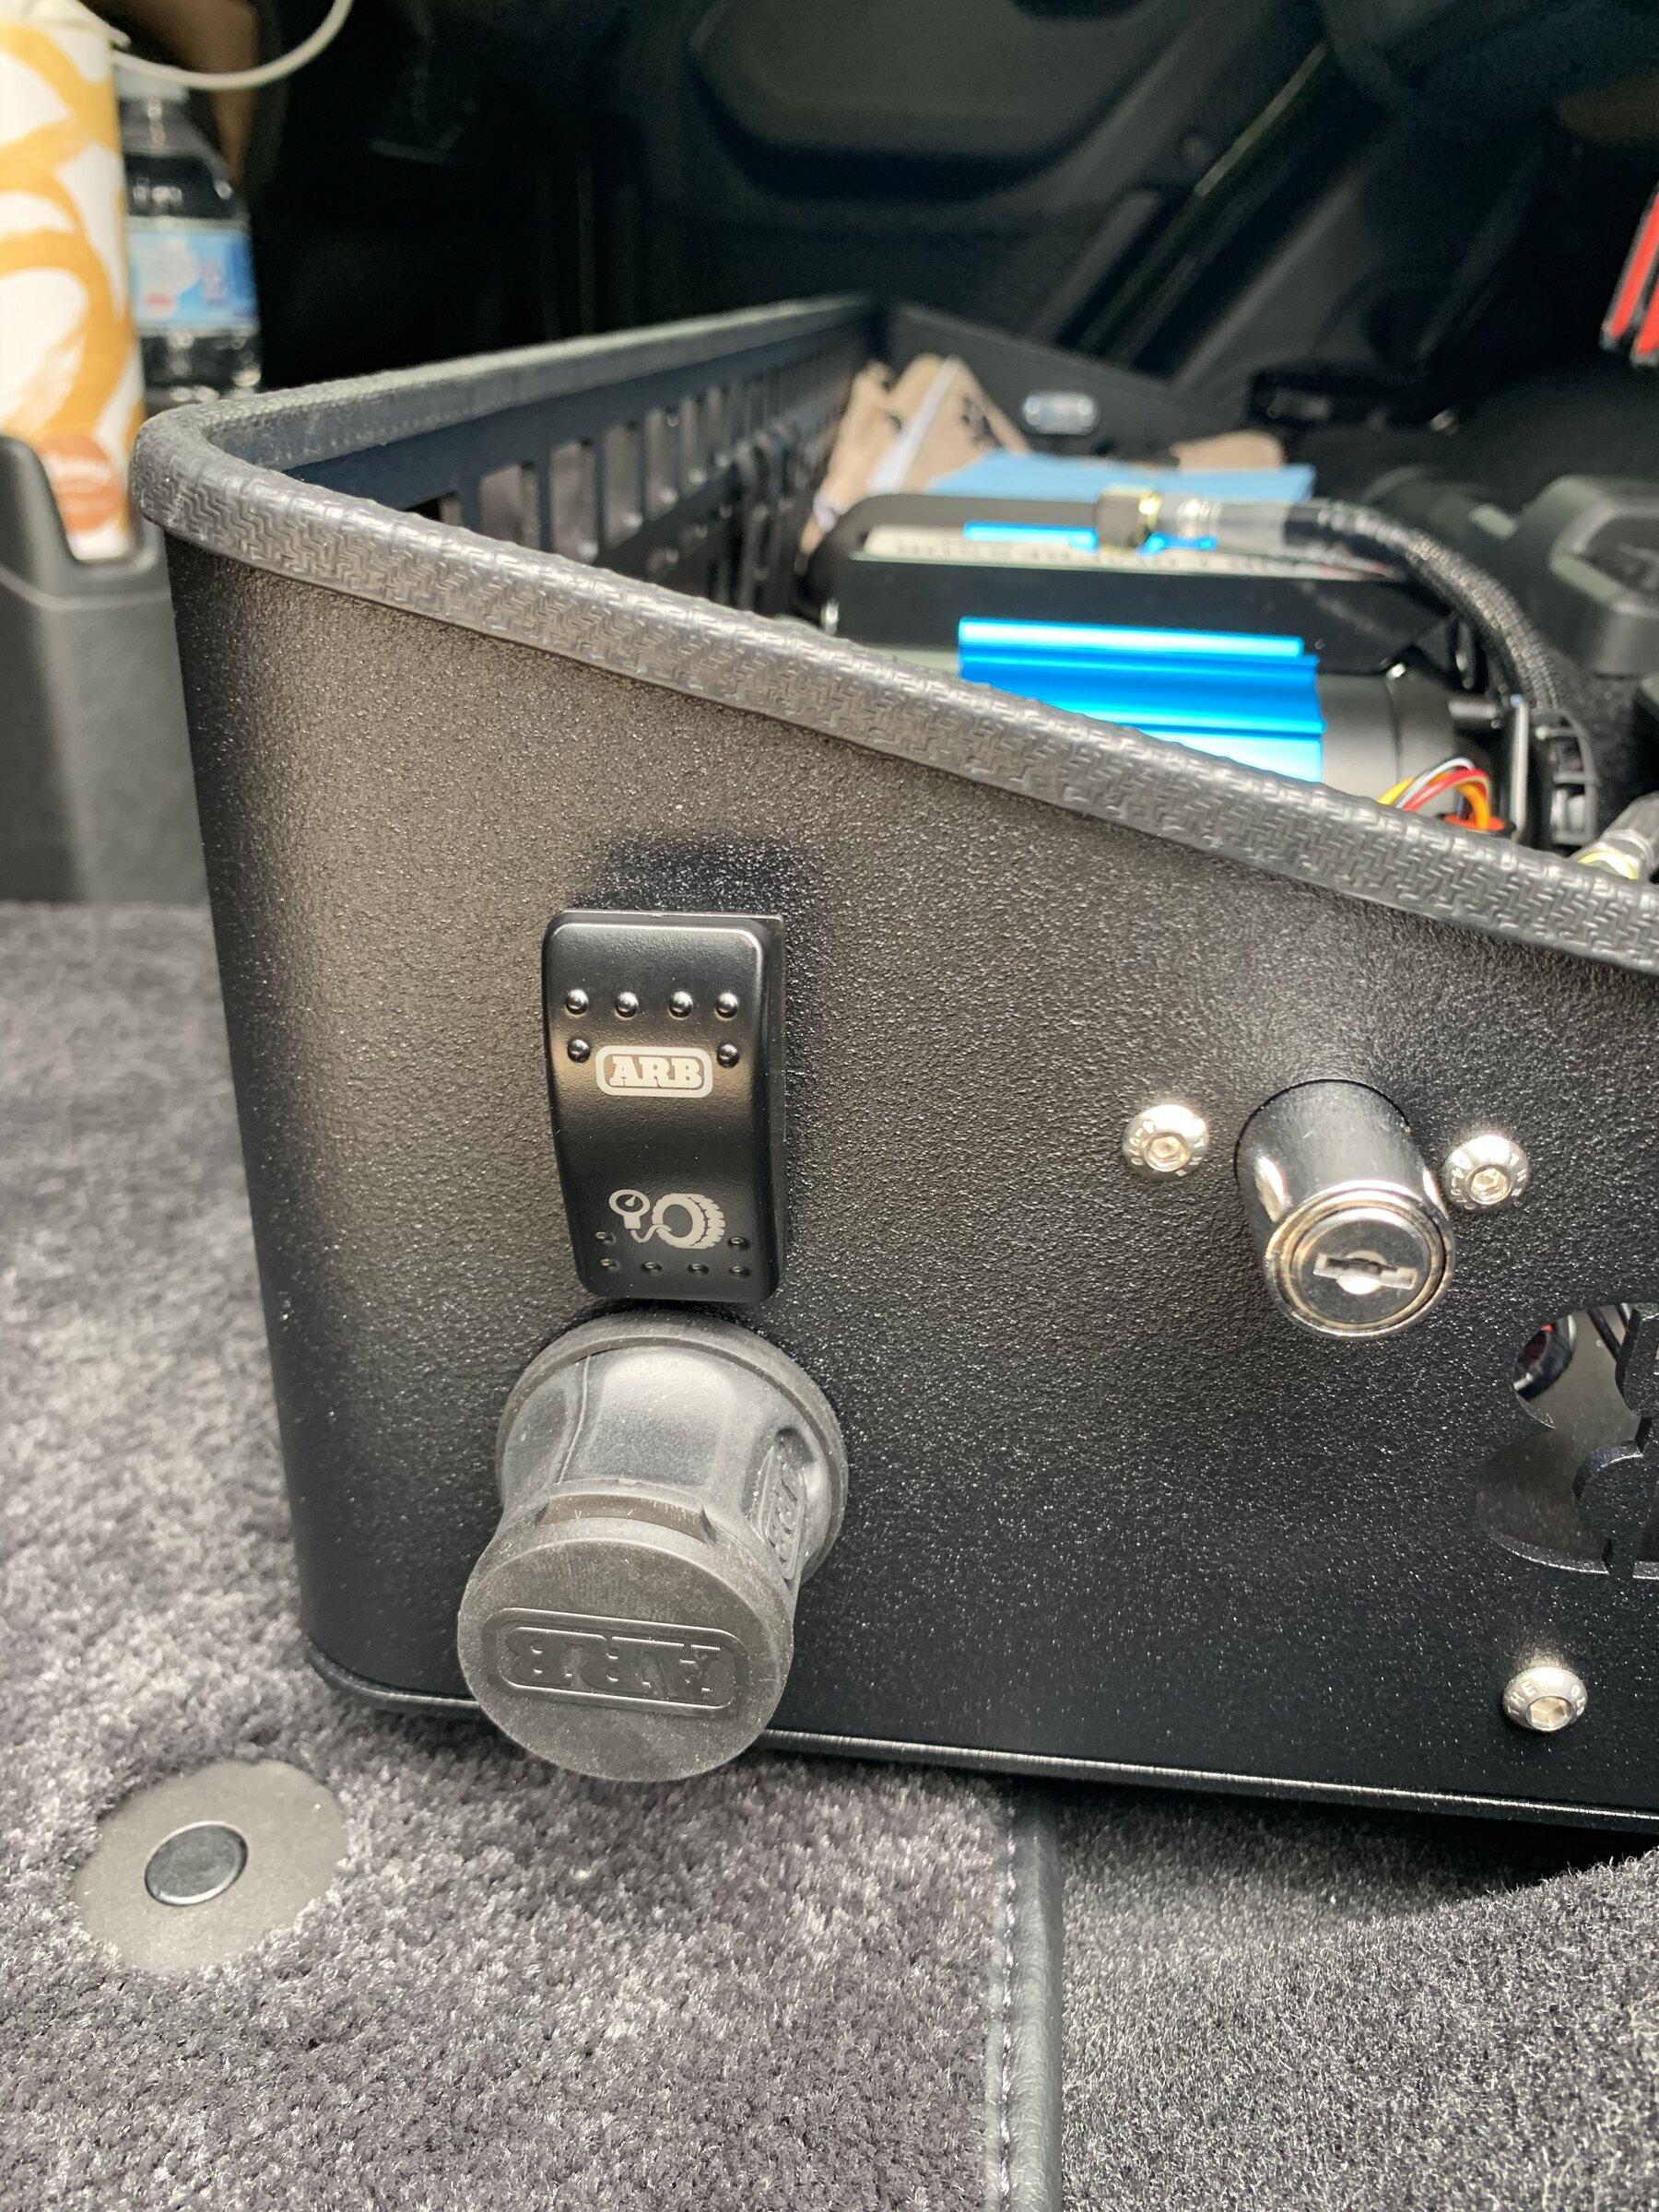
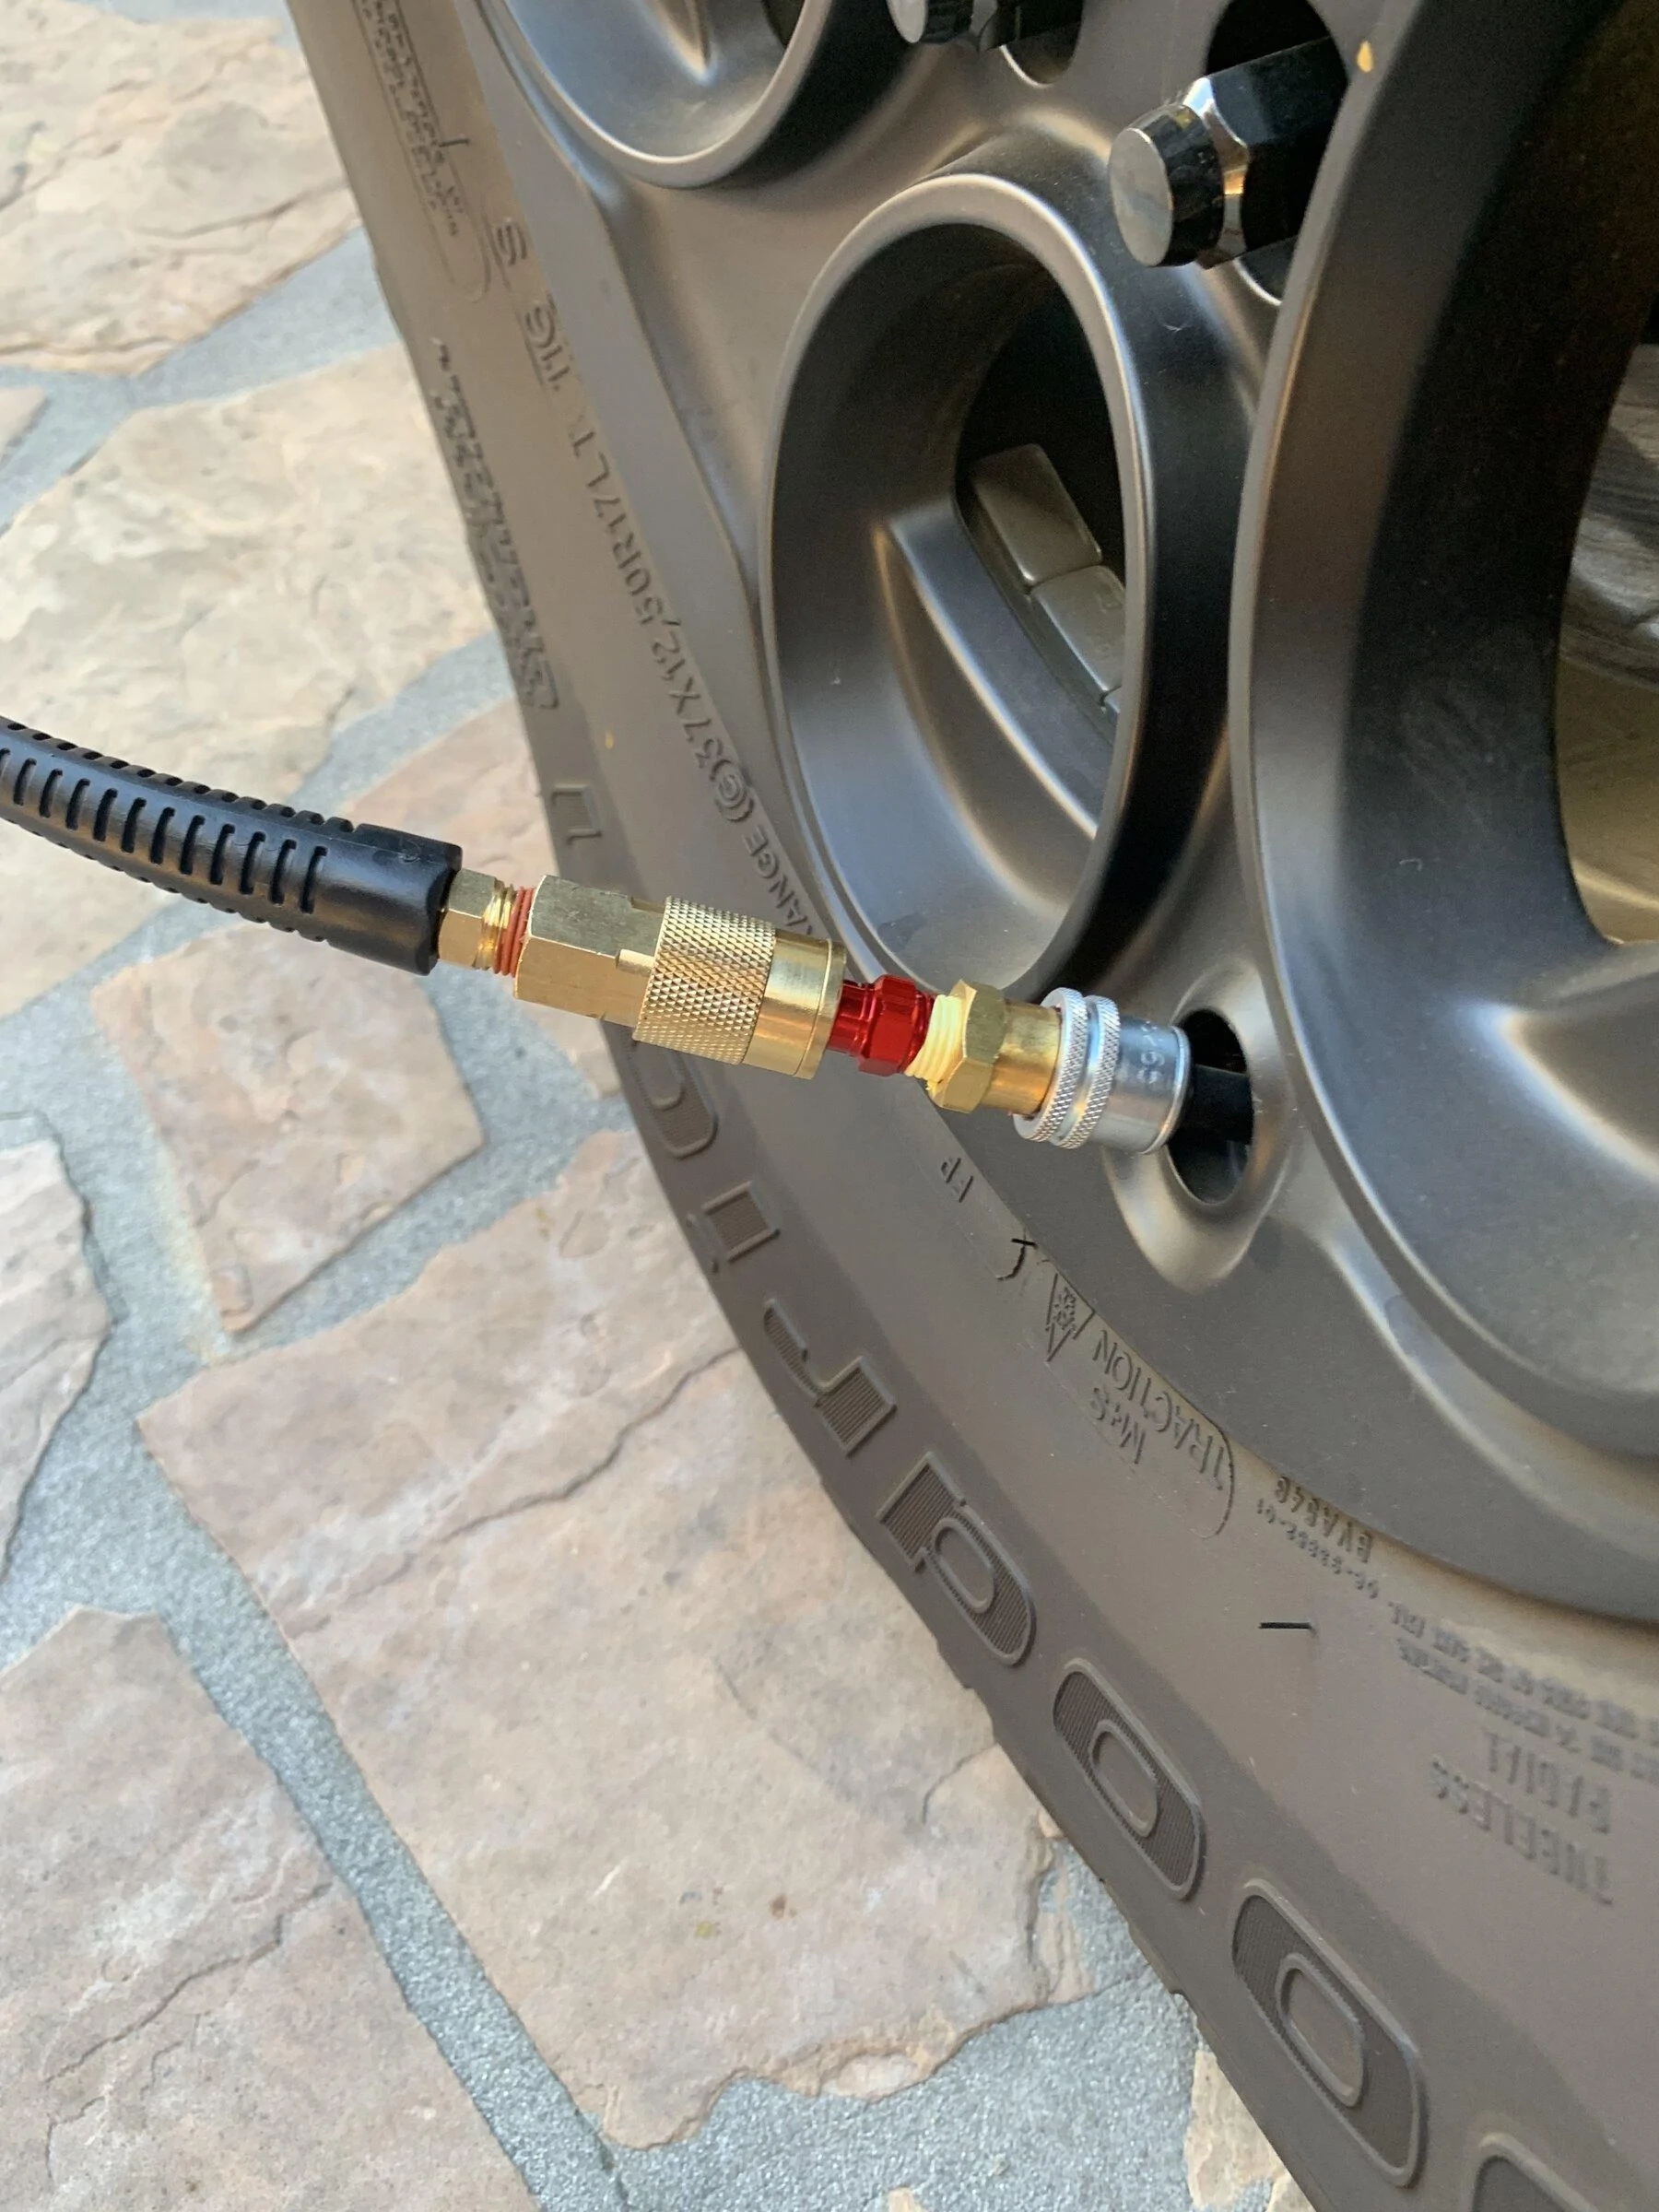
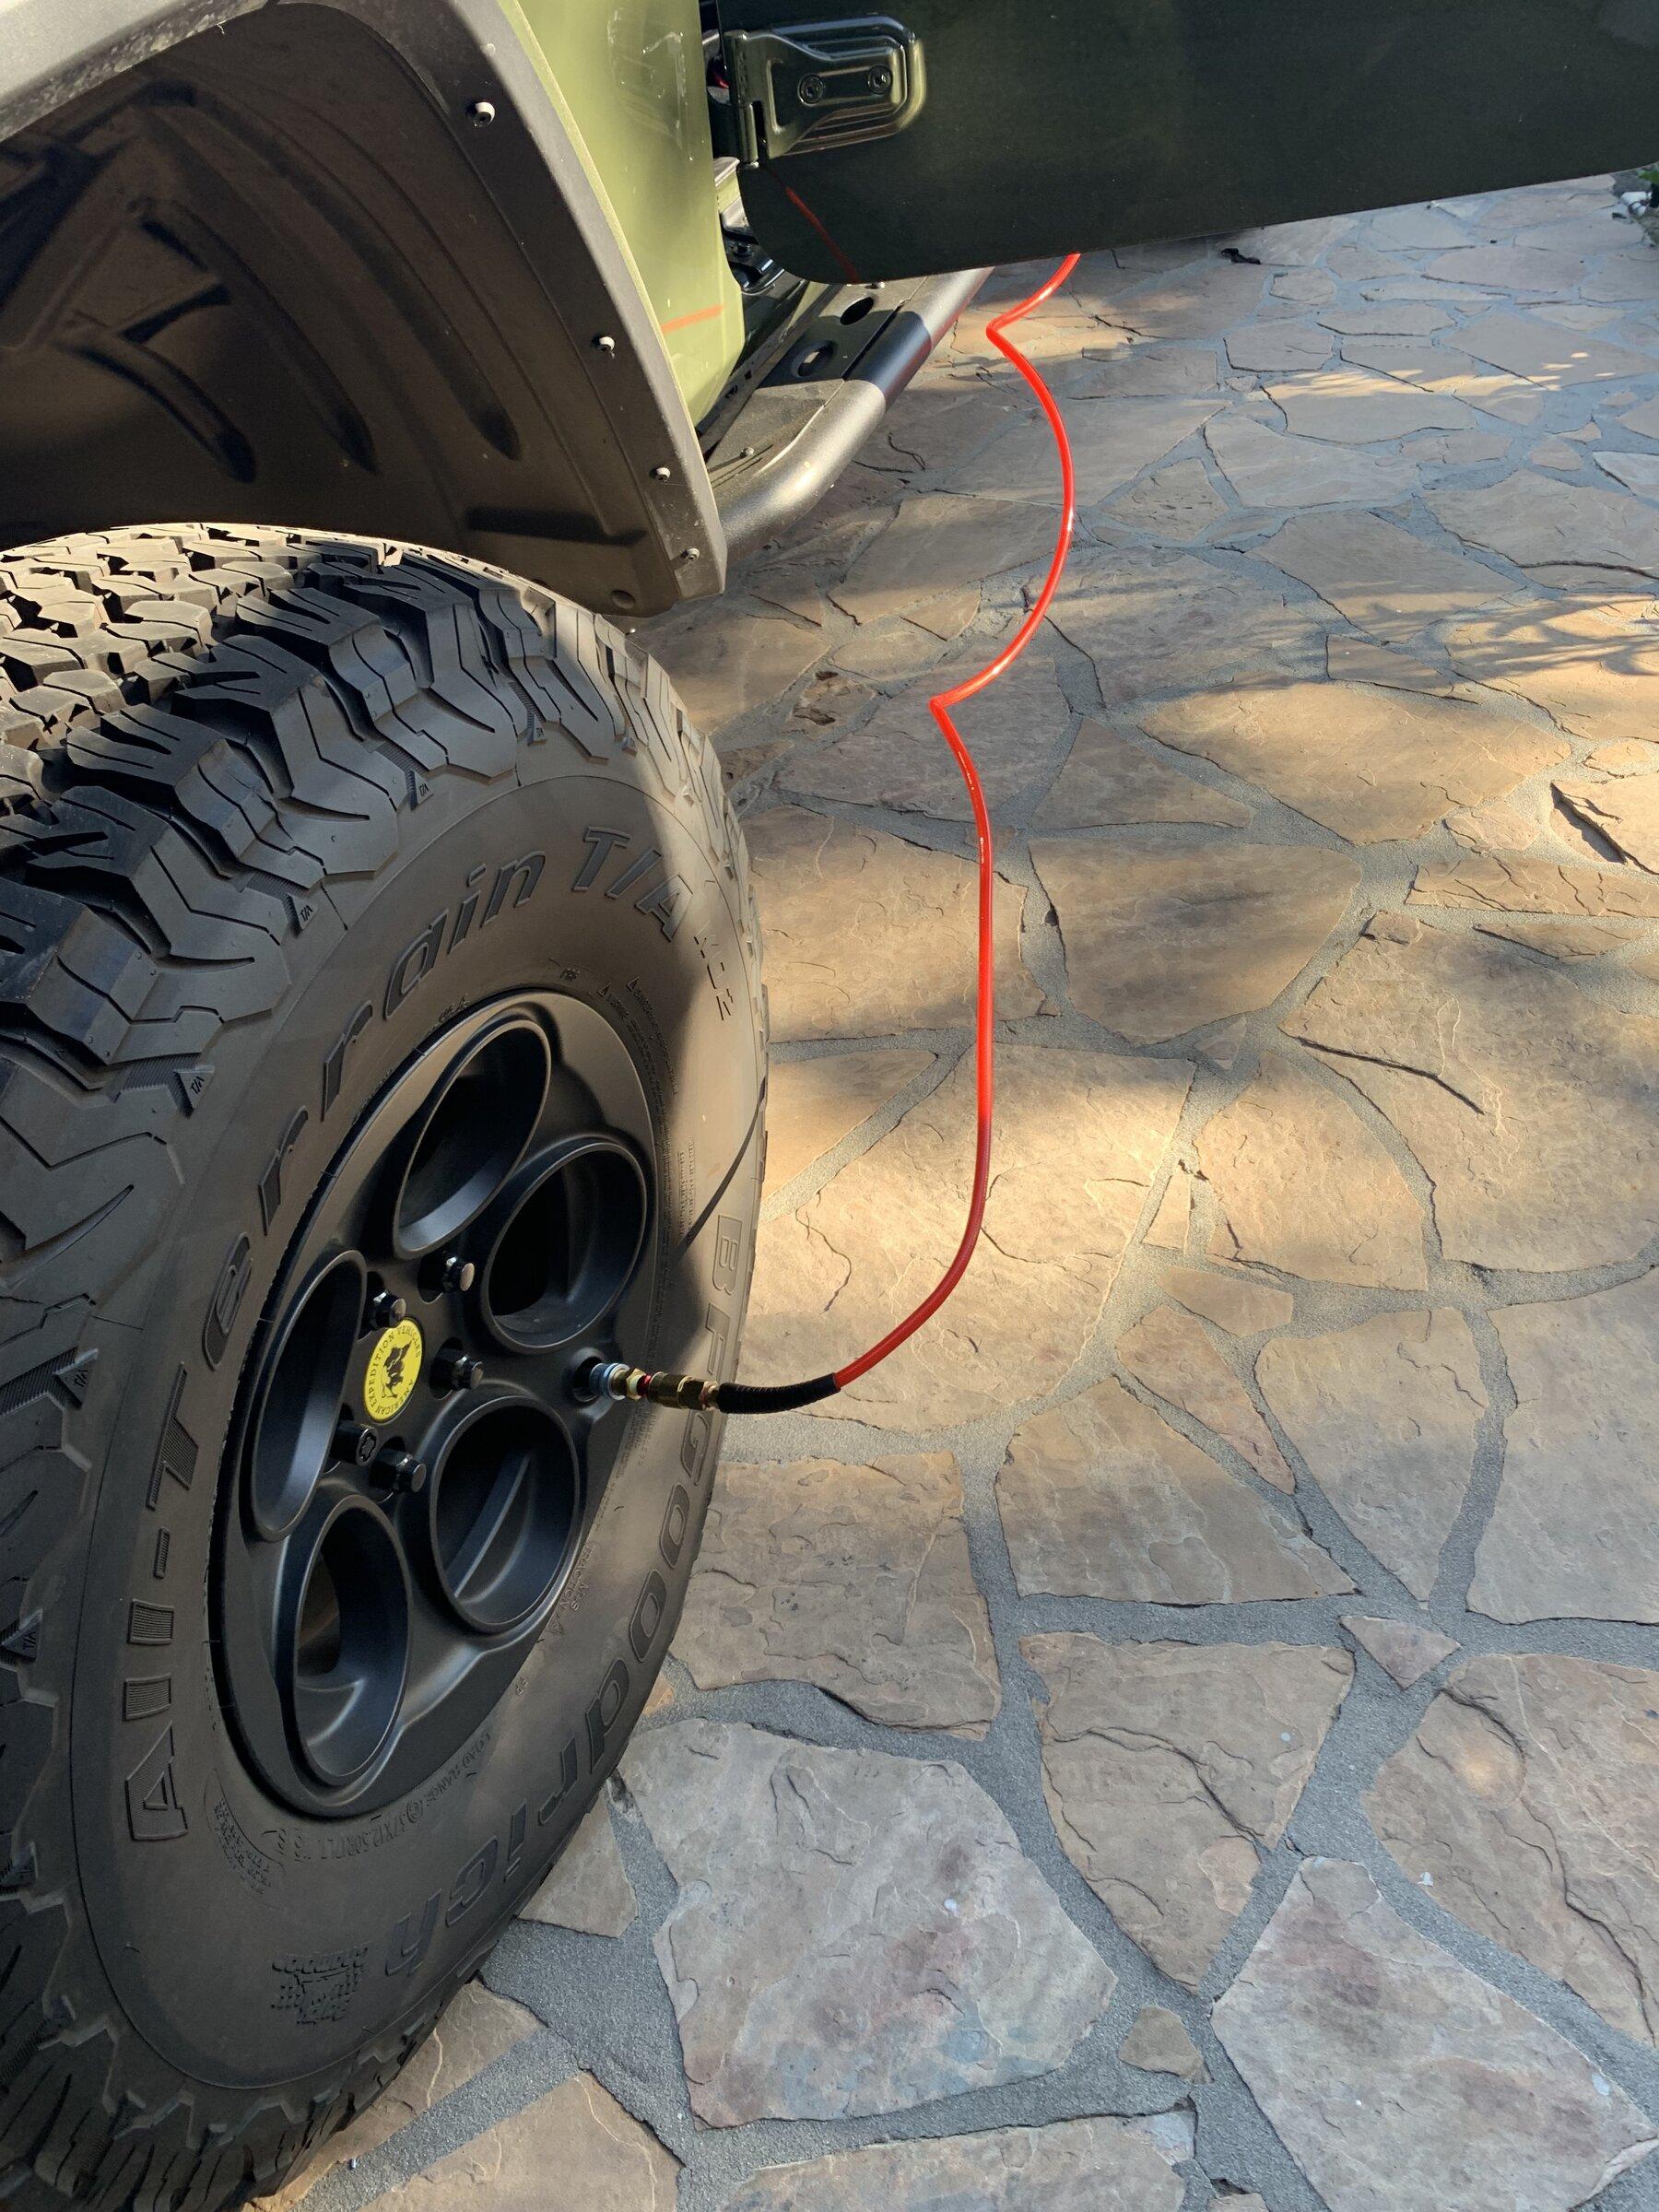
Finally got all the pieces together and installed an ARB Twin compressor under the rear seat.
Shout out to Jeremy @813 Fabrication & Design . Great customer service and a great product.
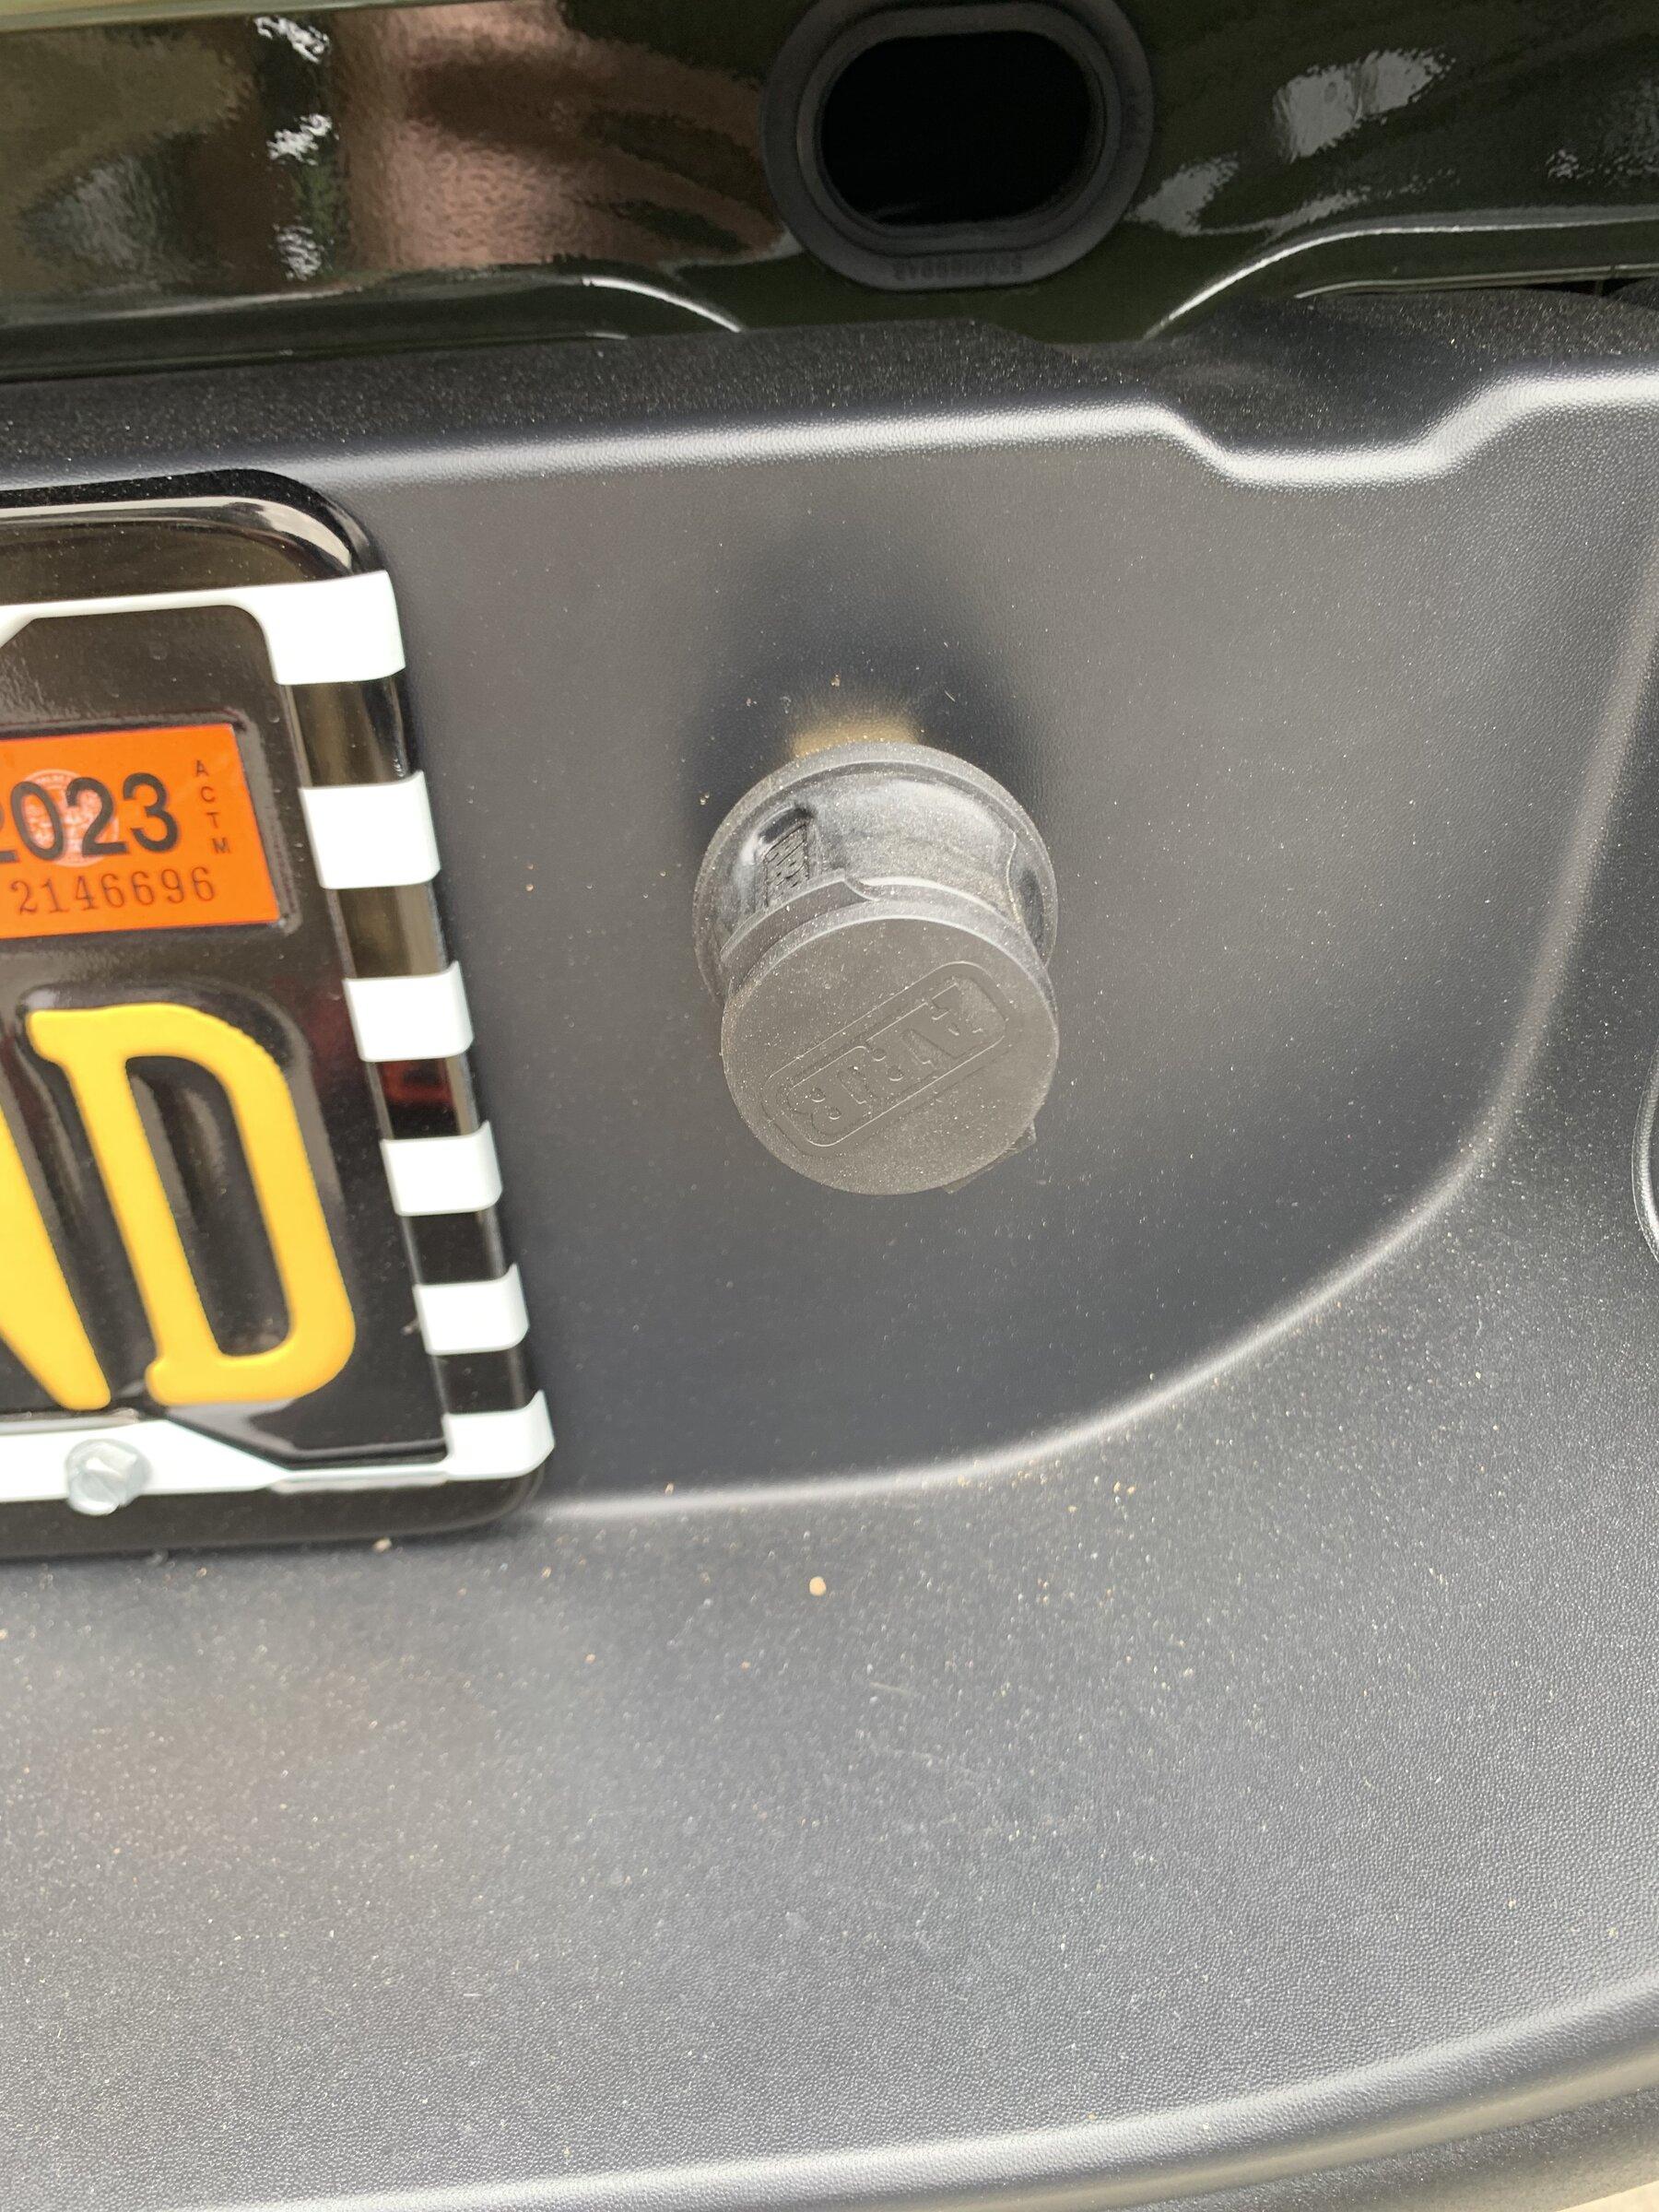
The set up has a coupling on each side of the bin and I added one in the rear bumper. The rear was overkill but I had the parts from when the plan was to add it to the JK. Used the rear seat bin with solid bottom and Molle face. Thought that would vent the heat from the compressor better. The 813 bin has all the holes and cut outs for switches as well as a blanking plate for the one you dont use.
https://www.813fabrication.com/product-page/under-seat-bin-full-molle-front-and-base
https://www.amazon.com/dp/B08P3Y1KFM?psc=1&ref=ppx_yo2ov_dt_b_product_details
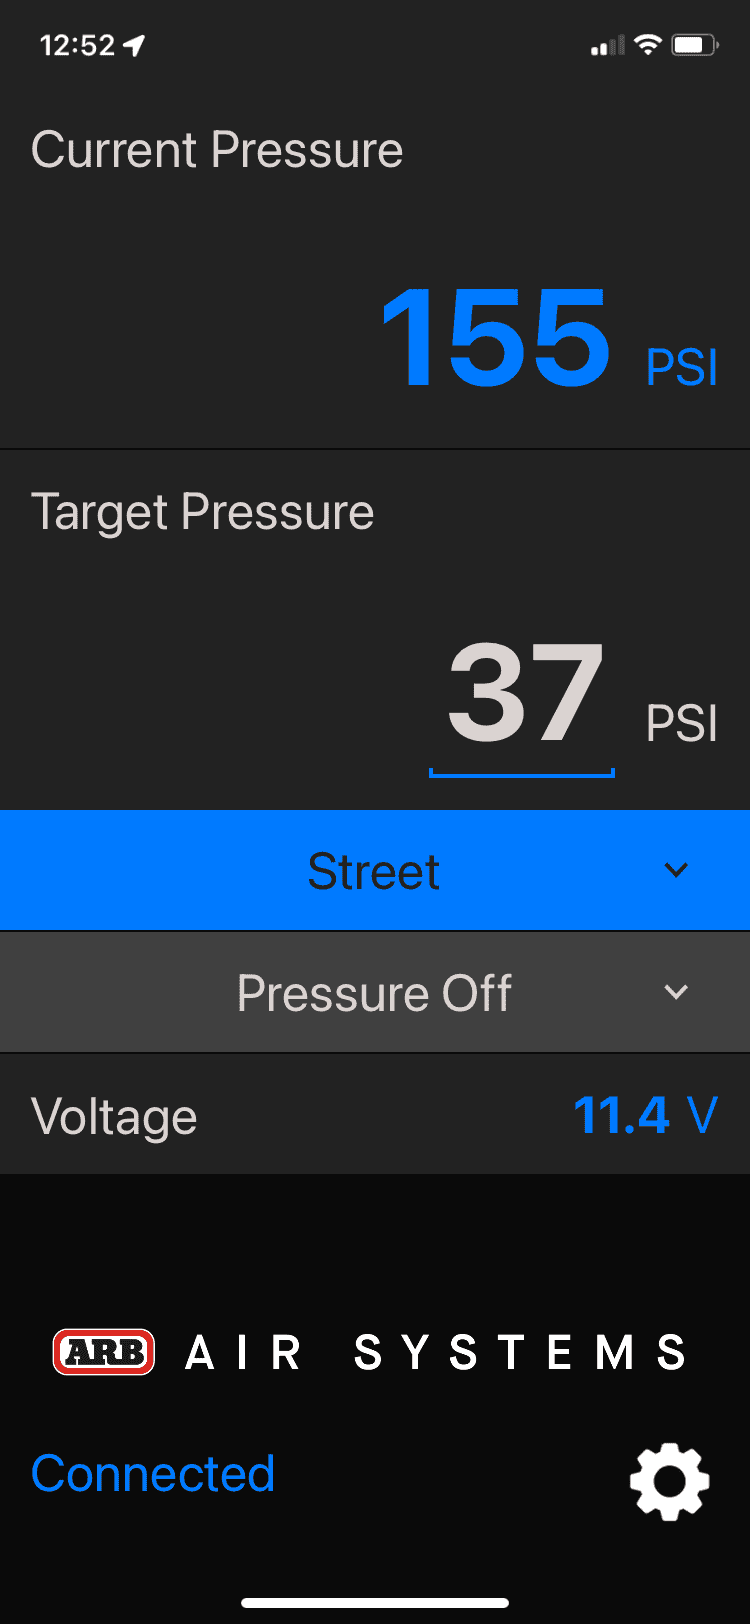
Added the ARB Pressure Control System. This is the bluetooth one independent of the Linx system. Decided I really didnt need all that the Linx had even though it would be a cool addition.
https://www.amazon.com/dp/B08P3Y1KFM?psc=1&ref=ppx_yo2ov_dt_b_product_details
Used the extension harness to get power to the rear seat. Dont think this harness would get you to the bed of the truck.
https://www.amazon.com/dp/B07MJHX6SL?psc=1&ref=ppx_yo2ov_dt_b_product_details
Initial test was good. Aired down to 15 then back up. Not super fast on air down, but I went and did some other stuff while the computer was doing its thing. My phone buzzed when done. Going to test it with two tires at once when my extra hose gets here.
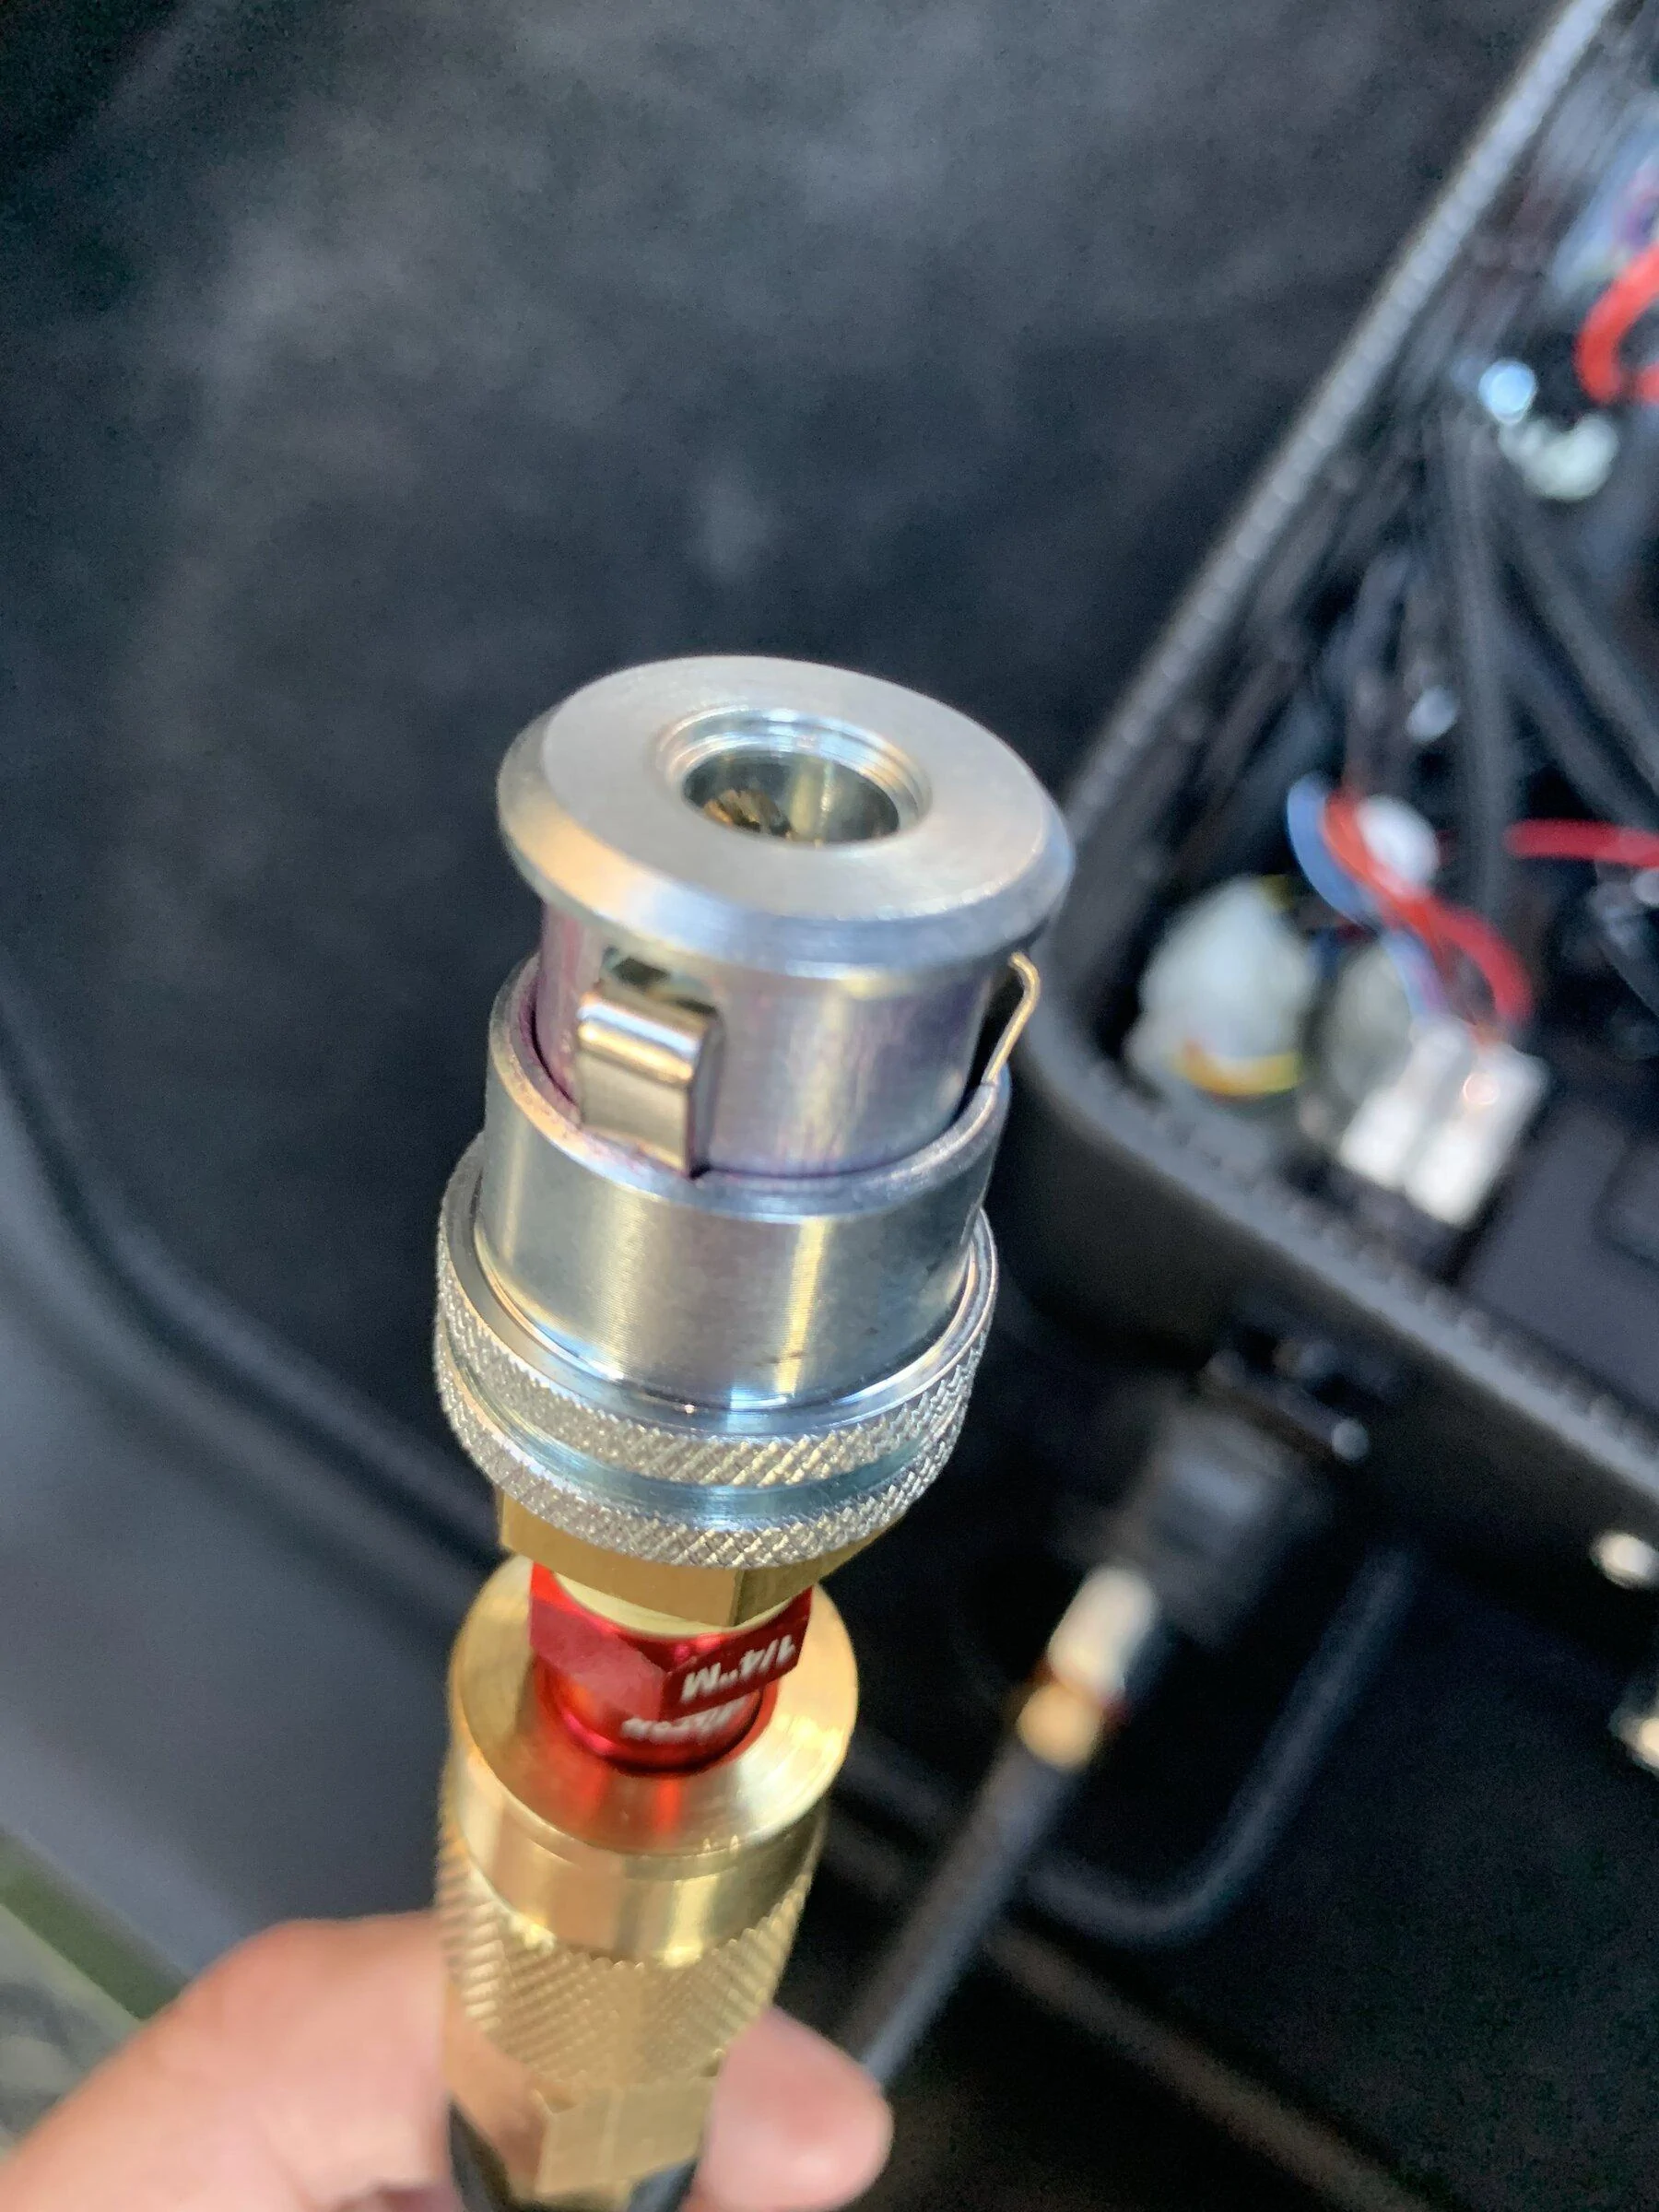
Tips would be to draw out the planned install and order all the little parts. Used a combination of Northridge and Summit Racing (who has a lot of ARB stuff) to get everything. The Pressure control system uses 1/8 BSPT fittings. You can get an adapter that goes up to the ARB hose standard JIC04. Used a bulkhead fitting to mount in the rear bumper - link above. There are ARB adapters to go from 1/4 NPT to the JIC04 hose.
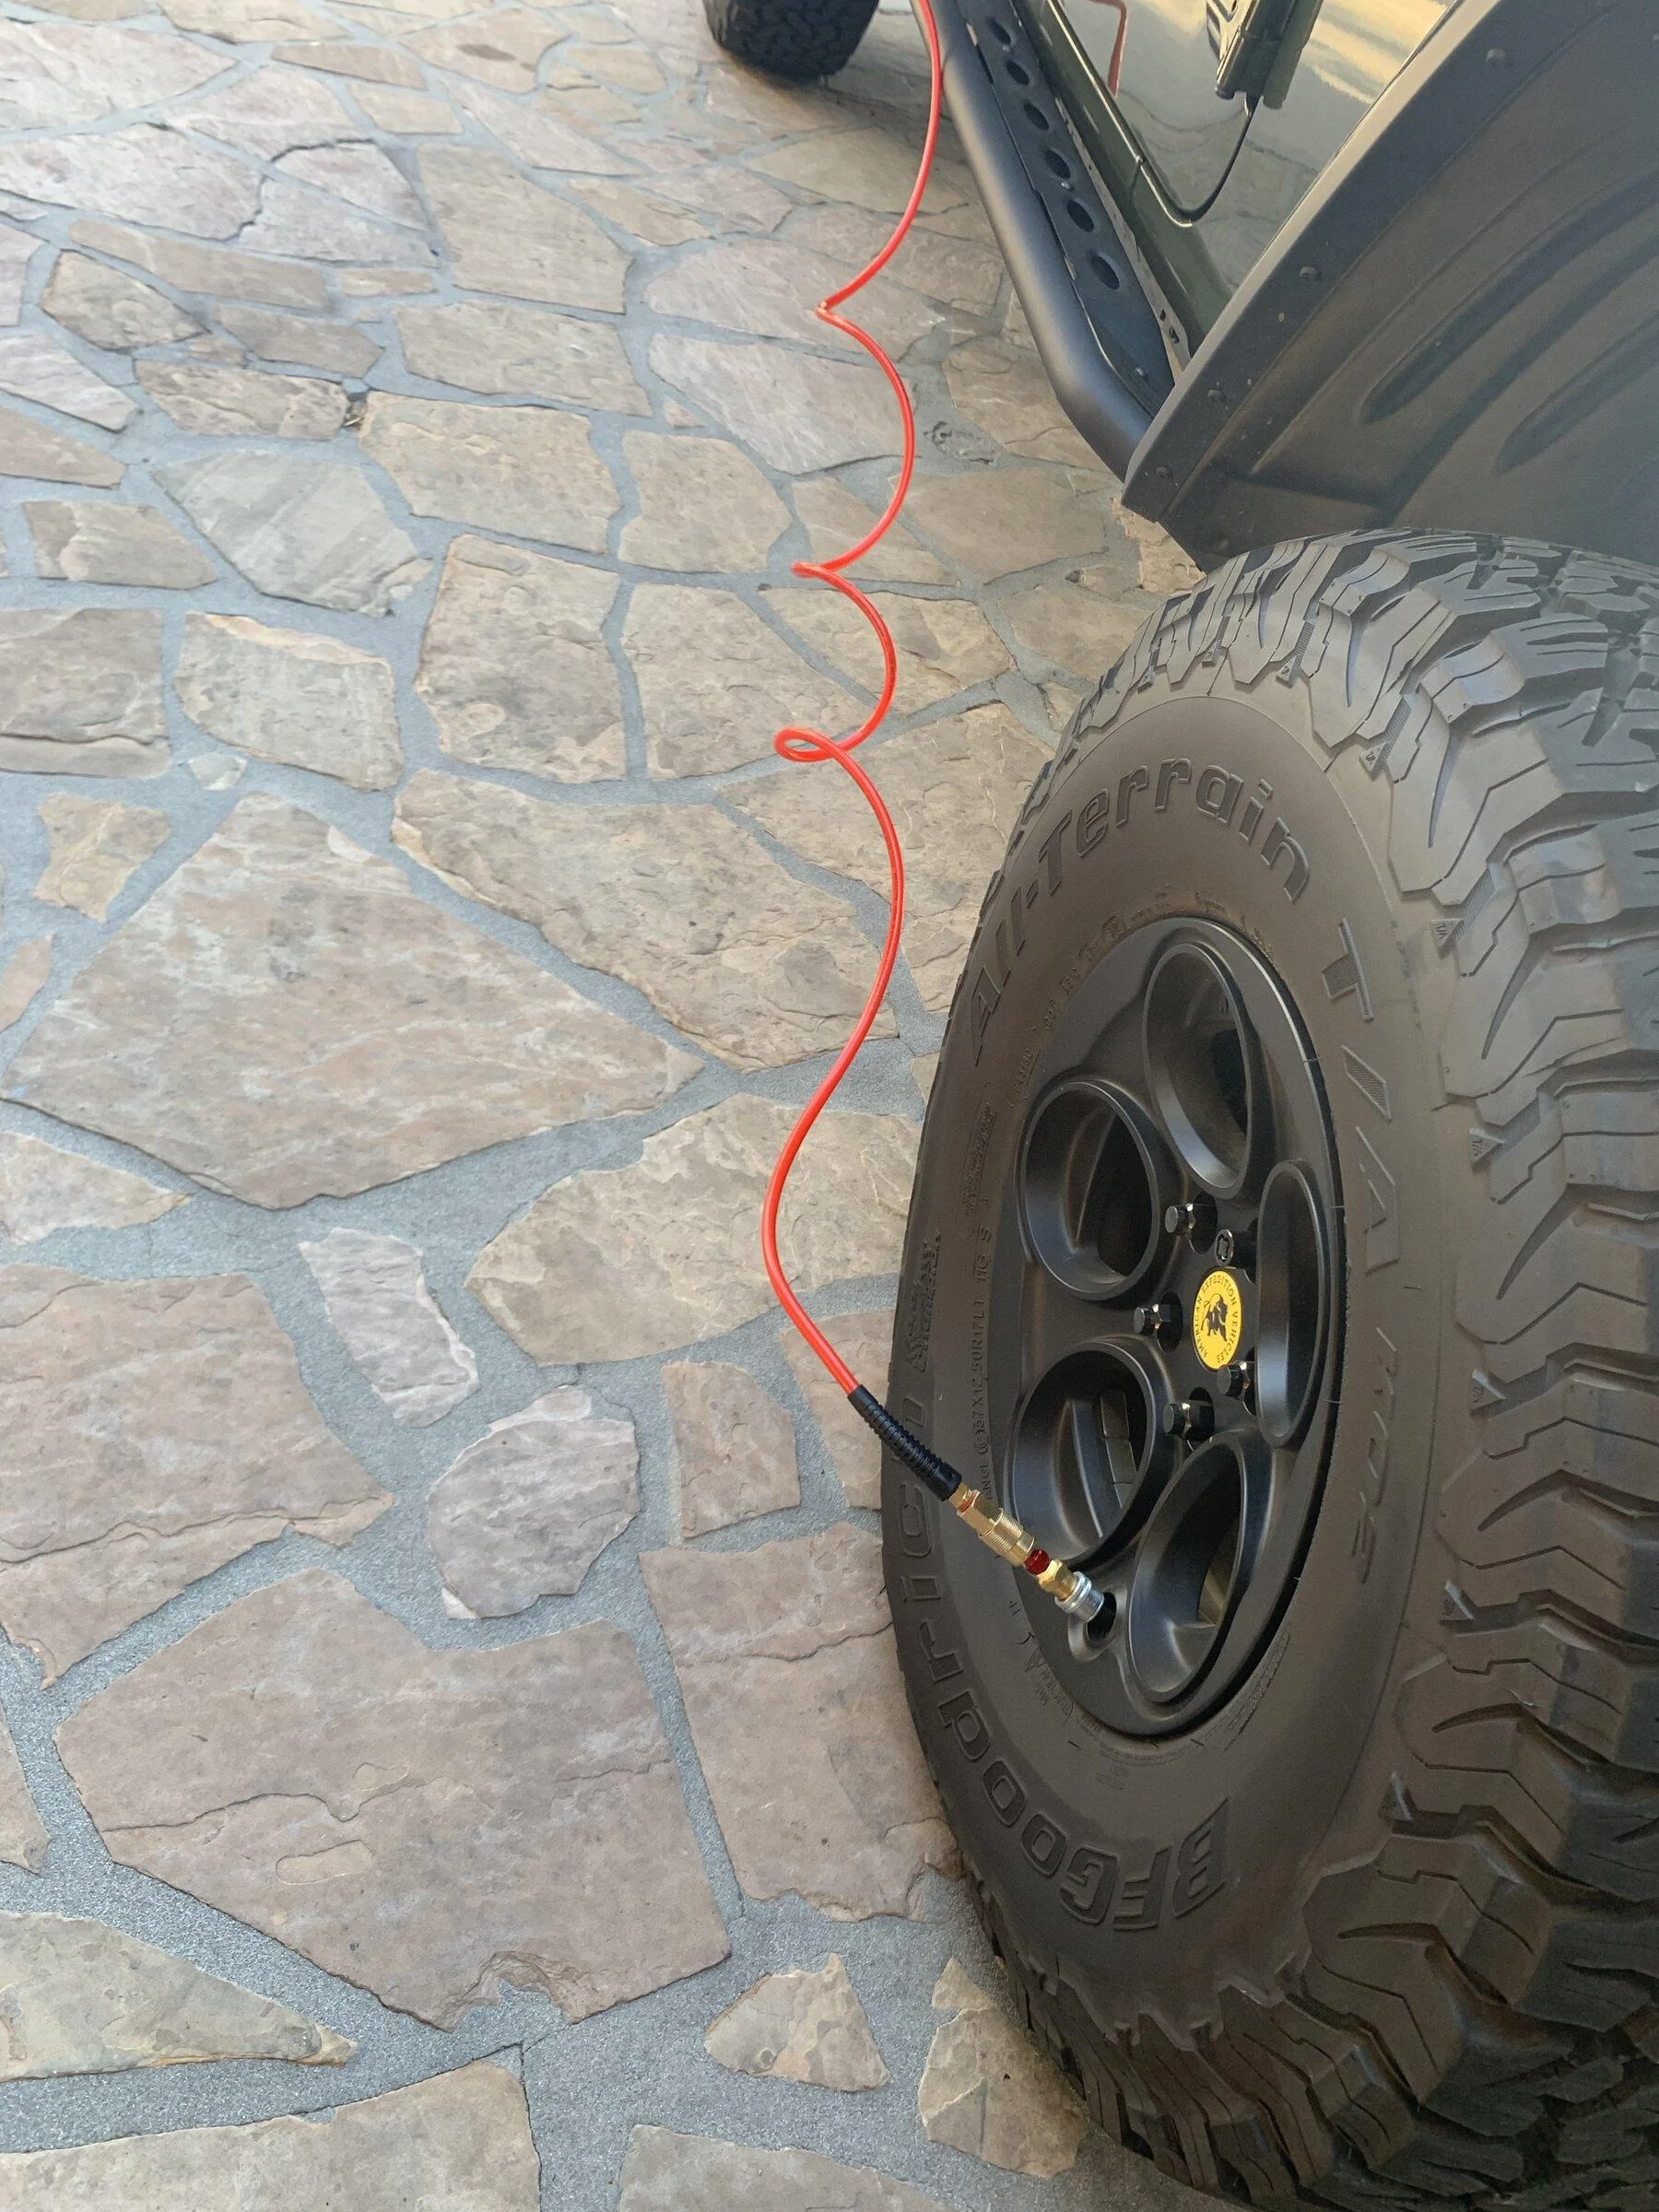
Update: Got a couple 10 ft coil hoses and Haltec air chucks. System works great deflating and inflating two tires at once. As noted before the deflate is a little slow, but it's all automatic. Inflate is pretty fast doing two at once.
Another update 10-2022: Have had the chance to use this set up a few times now. Quirks noticed - first two tires (doing two at a time) seem to come out very uneven - one tire will be 4-5 psi higher than the other. Thought it might be differing hose lengths on the hard plumbing. However, the second two come out identical each time. Also, the ARB psi rating is off - when airing down it is higher by 2-3 psi from the setting and when airing up also higher by 4-5 psi. Its odd, but consistent enough that I just change the app settings to account for the variance.
Big plus for a twin compressor - my buddy used my old VIAR portable when out last weekend. Was able to air up nearly 6 - 37's with the ARB (all of mine and 2 of his) compared to 2 - 37's that he did with the VIAR. These twin compressors are very fast.

Shout out to Jeremy @813 Fabrication & Design . Great customer service and a great product.
The set up has a coupling on each side of the bin and I added one in the rear bumper. The rear was overkill but I had the parts from when the plan was to add it to the JK. Used the rear seat bin with solid bottom and Molle face. Thought that would vent the heat from the compressor better. The 813 bin has all the holes and cut outs for switches as well as a blanking plate for the one you dont use.
https://www.813fabrication.com/product-page/under-seat-bin-full-molle-front-and-base
https://www.amazon.com/dp/B08P3Y1KFM?psc=1&ref=ppx_yo2ov_dt_b_product_details
Added the ARB Pressure Control System. This is the bluetooth one independent of the Linx system. Decided I really didnt need all that the Linx had even though it would be a cool addition.
https://www.amazon.com/dp/B08P3Y1KFM?psc=1&ref=ppx_yo2ov_dt_b_product_details
Used the extension harness to get power to the rear seat. Dont think this harness would get you to the bed of the truck.
https://www.amazon.com/dp/B07MJHX6SL?psc=1&ref=ppx_yo2ov_dt_b_product_details
Initial test was good. Aired down to 15 then back up. Not super fast on air down, but I went and did some other stuff while the computer was doing its thing. My phone buzzed when done. Going to test it with two tires at once when my extra hose gets here.
Tips would be to draw out the planned install and order all the little parts. Used a combination of Northridge and Summit Racing (who has a lot of ARB stuff) to get everything. The Pressure control system uses 1/8 BSPT fittings. You can get an adapter that goes up to the ARB hose standard JIC04. Used a bulkhead fitting to mount in the rear bumper - link above. There are ARB adapters to go from 1/4 NPT to the JIC04 hose.
Update: Got a couple 10 ft coil hoses and Haltec air chucks. System works great deflating and inflating two tires at once. As noted before the deflate is a little slow, but it's all automatic. Inflate is pretty fast doing two at once.
Another update 10-2022: Have had the chance to use this set up a few times now. Quirks noticed - first two tires (doing two at a time) seem to come out very uneven - one tire will be 4-5 psi higher than the other. Thought it might be differing hose lengths on the hard plumbing. However, the second two come out identical each time. Also, the ARB psi rating is off - when airing down it is higher by 2-3 psi from the setting and when airing up also higher by 4-5 psi. Its odd, but consistent enough that I just change the app settings to account for the variance.
Big plus for a twin compressor - my buddy used my old VIAR portable when out last weekend. Was able to air up nearly 6 - 37's with the ARB (all of mine and 2 of his) compared to 2 - 37's that he did with the VIAR. These twin compressors are very fast.
Last edited:
OP
OP
PJZ
Well-Known Member
- First Name
- Patrick
- Joined
- Dec 16, 2021
- Threads
- 13
- Messages
- 333
- Reaction score
- 477
- Location
- SoCal - The Valley
- Vehicle(s)
- 2022 JTRD AEV370
- Build Thread
- Link
- Thread starter
- #27
Hood lifts - why on earth dont Jeeps have these!
Took 20 mins to install these. They even have a flush bolt for the diesel specific bracket that would interfere with the arm when closing. All the years with the jk putting up the arm and then seeing how nice these lift struts are. Well worth the money.
https://www.amazon.com/dp/B084M42JXW?psc=1&ref=ppx_yo2ov_dt_b_product_details
Attachments
-
17.3 MB Views: 289
OP
OP
PJZ
Well-Known Member
- First Name
- Patrick
- Joined
- Dec 16, 2021
- Threads
- 13
- Messages
- 333
- Reaction score
- 477
- Location
- SoCal - The Valley
- Vehicle(s)
- 2022 JTRD AEV370
- Build Thread
- Link
- Thread starter
- #28
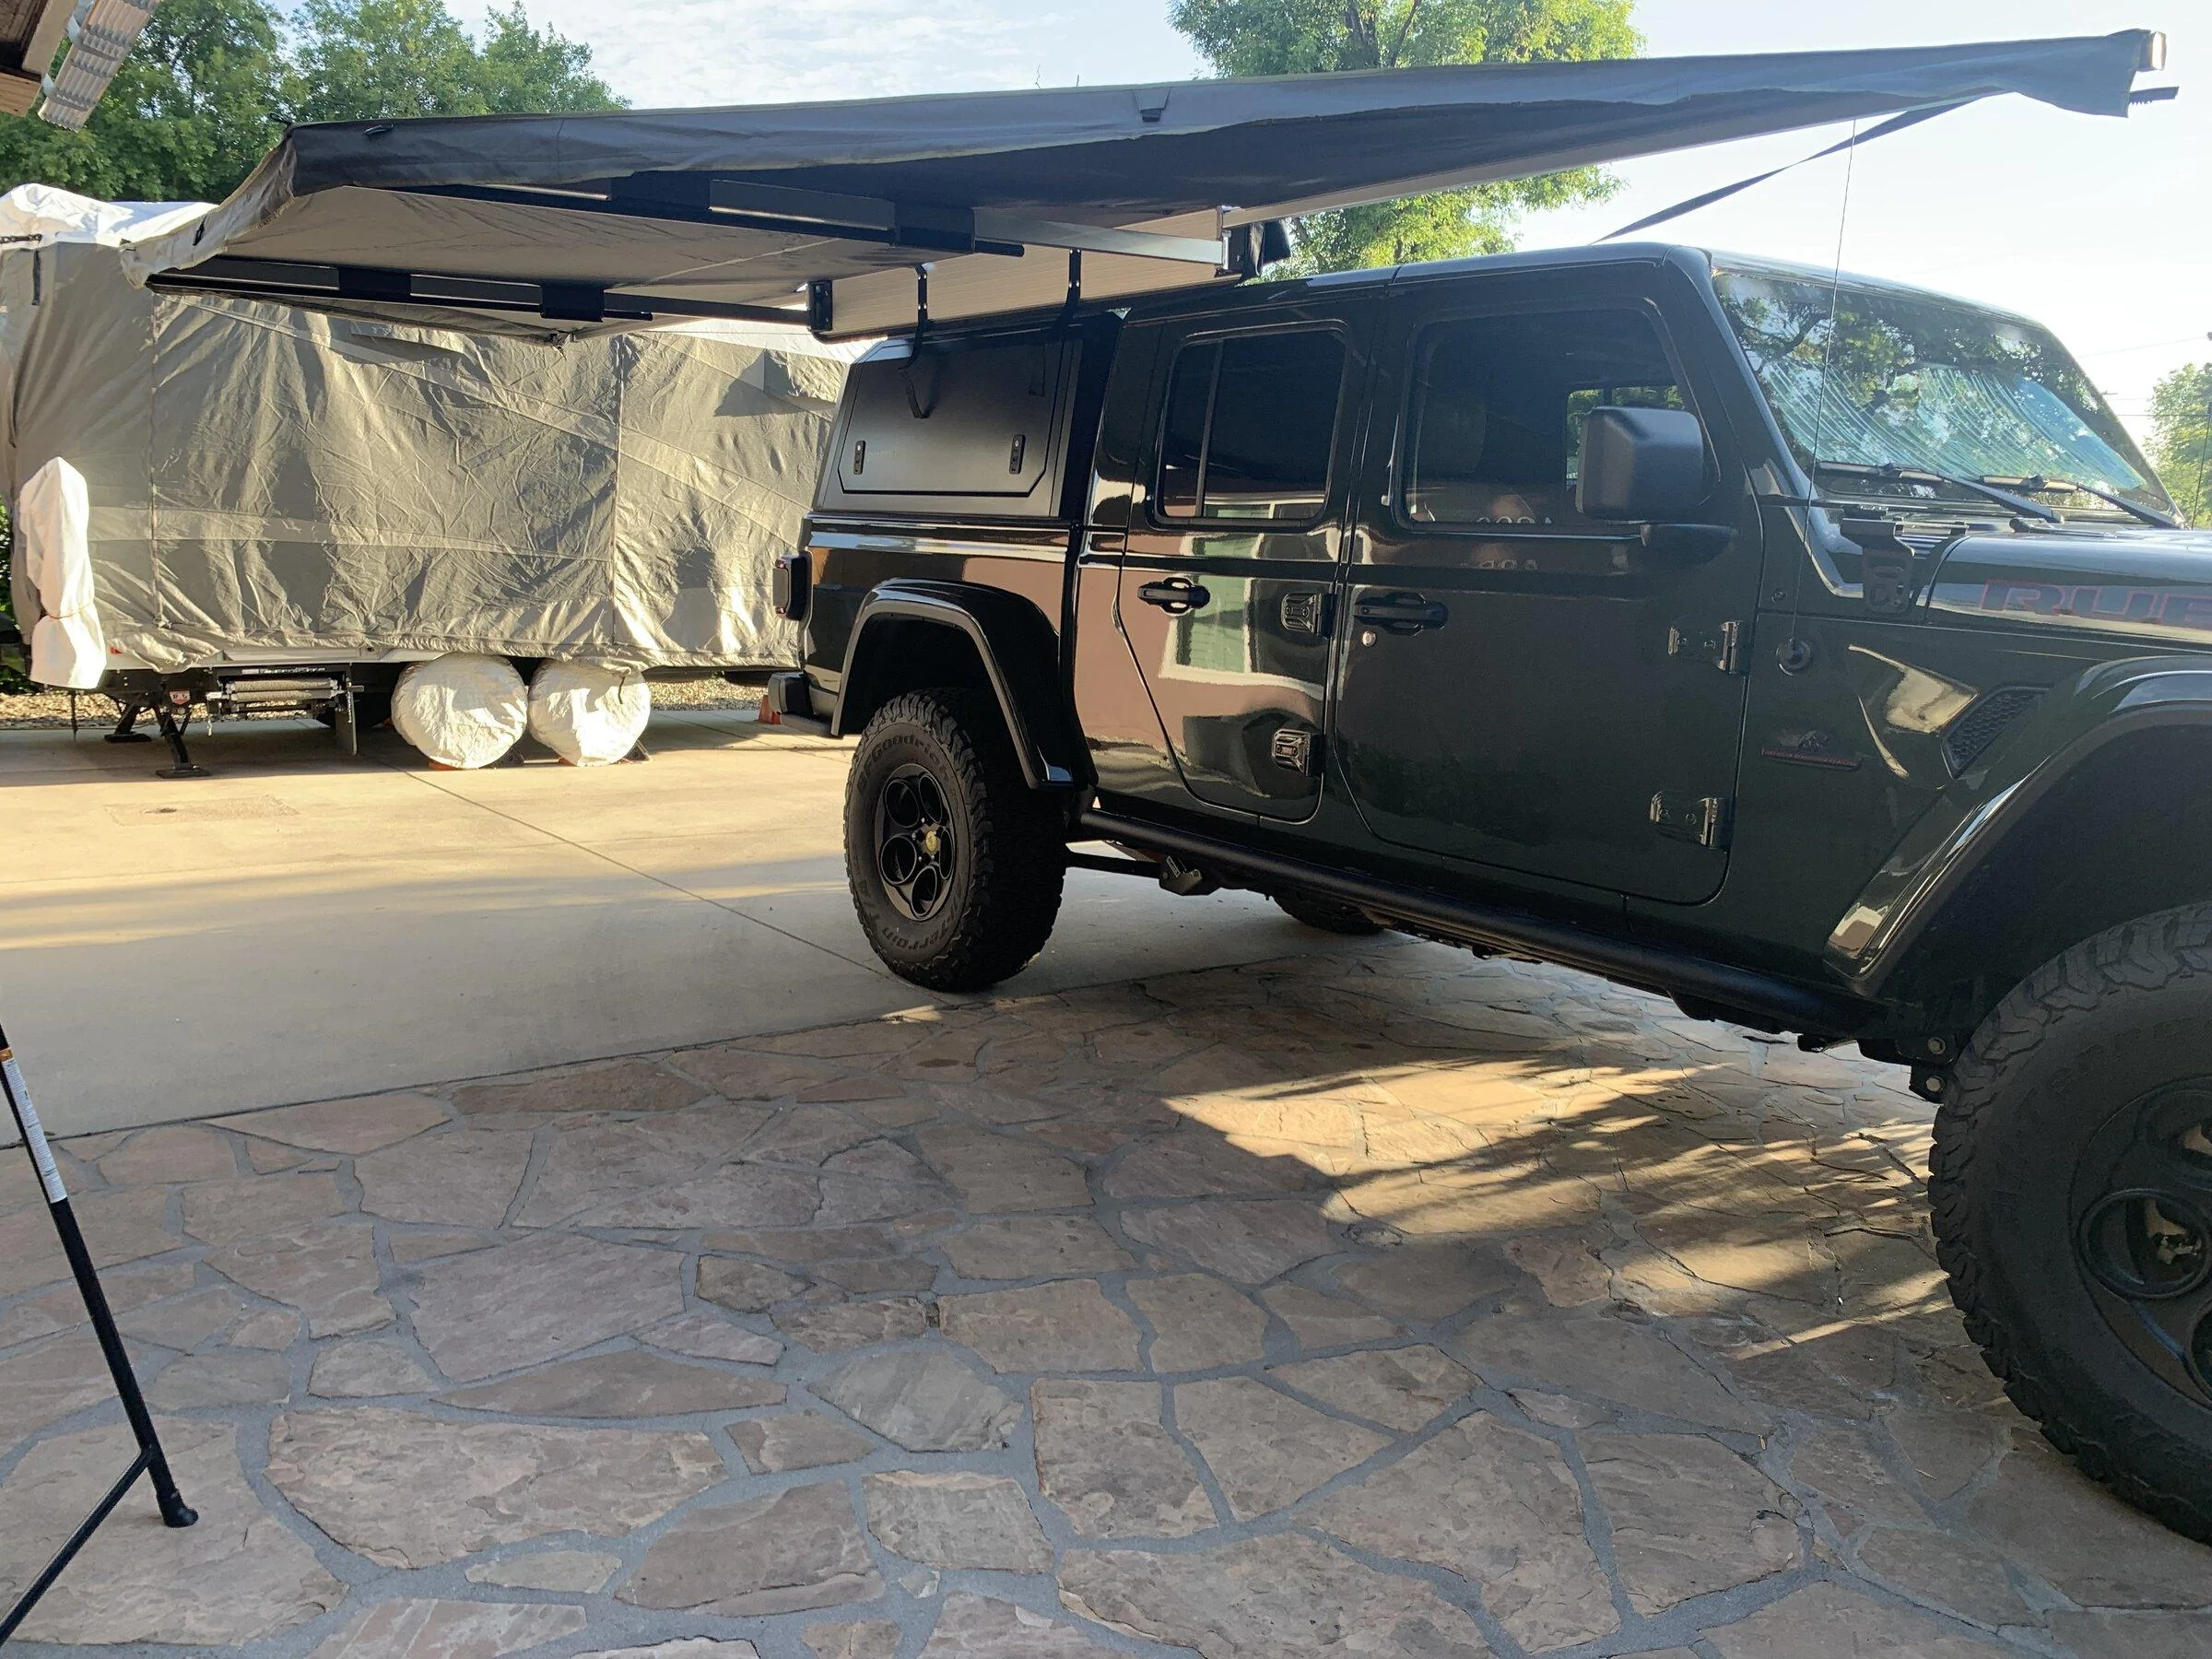
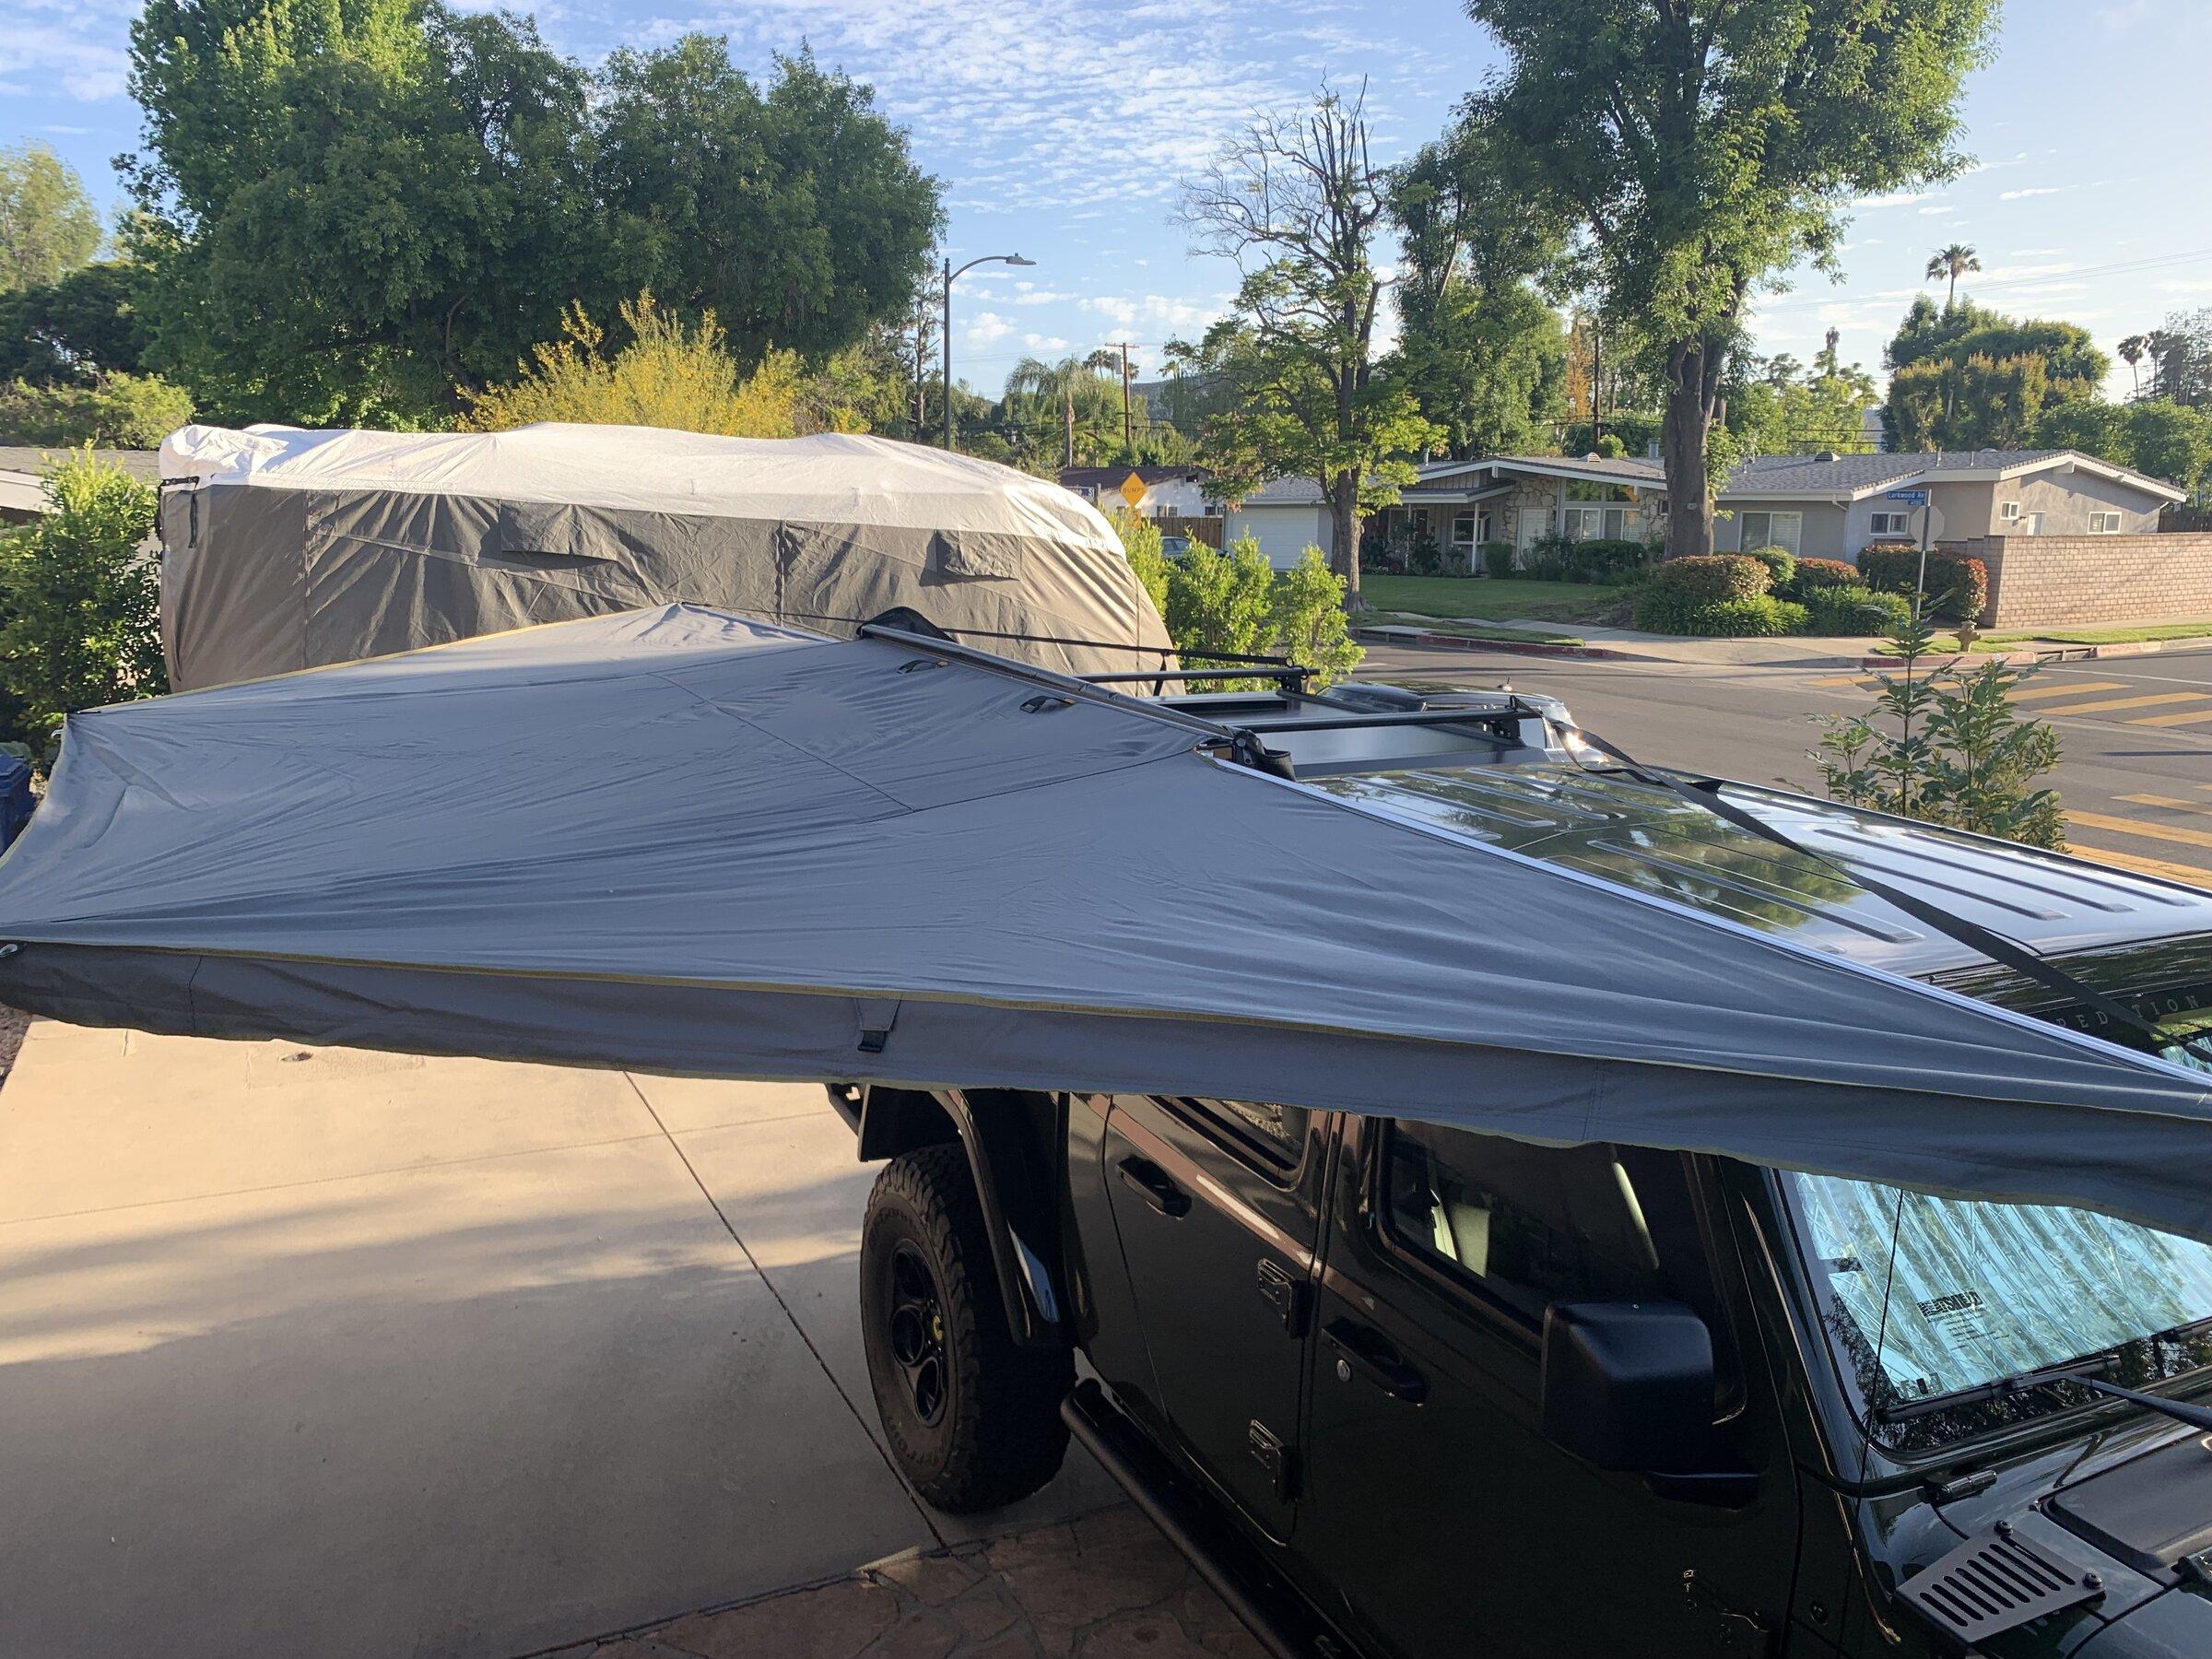
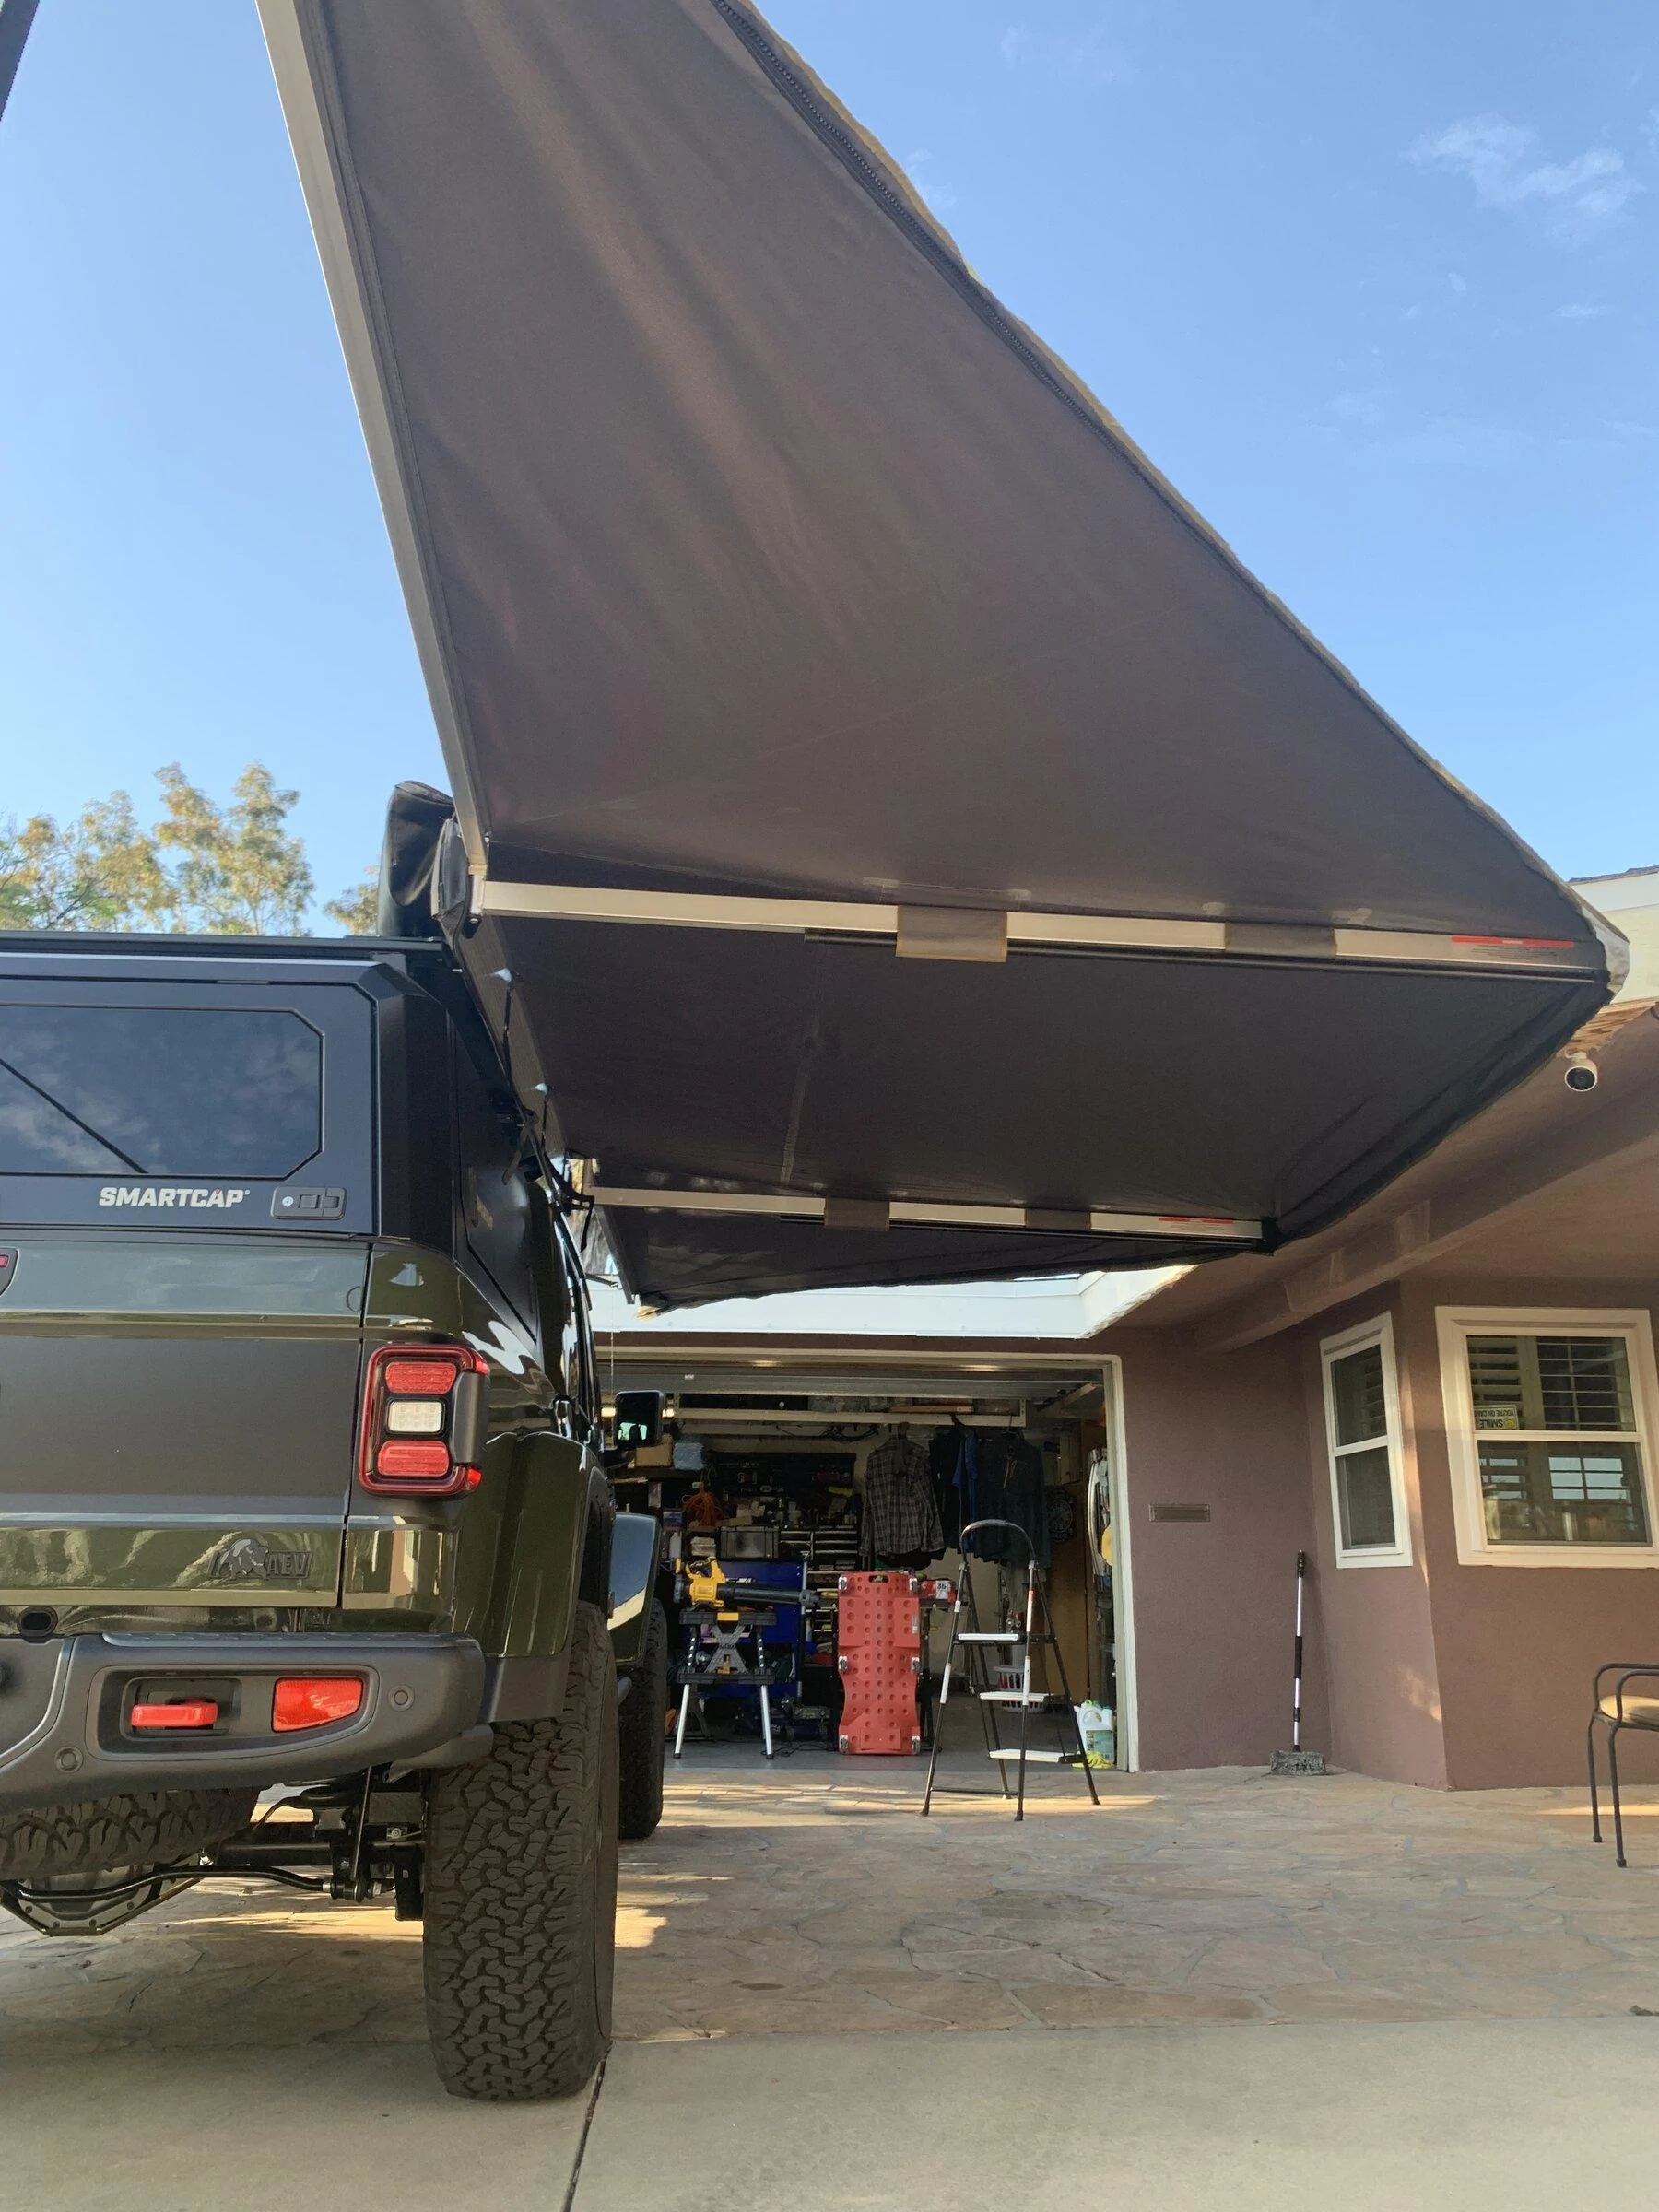
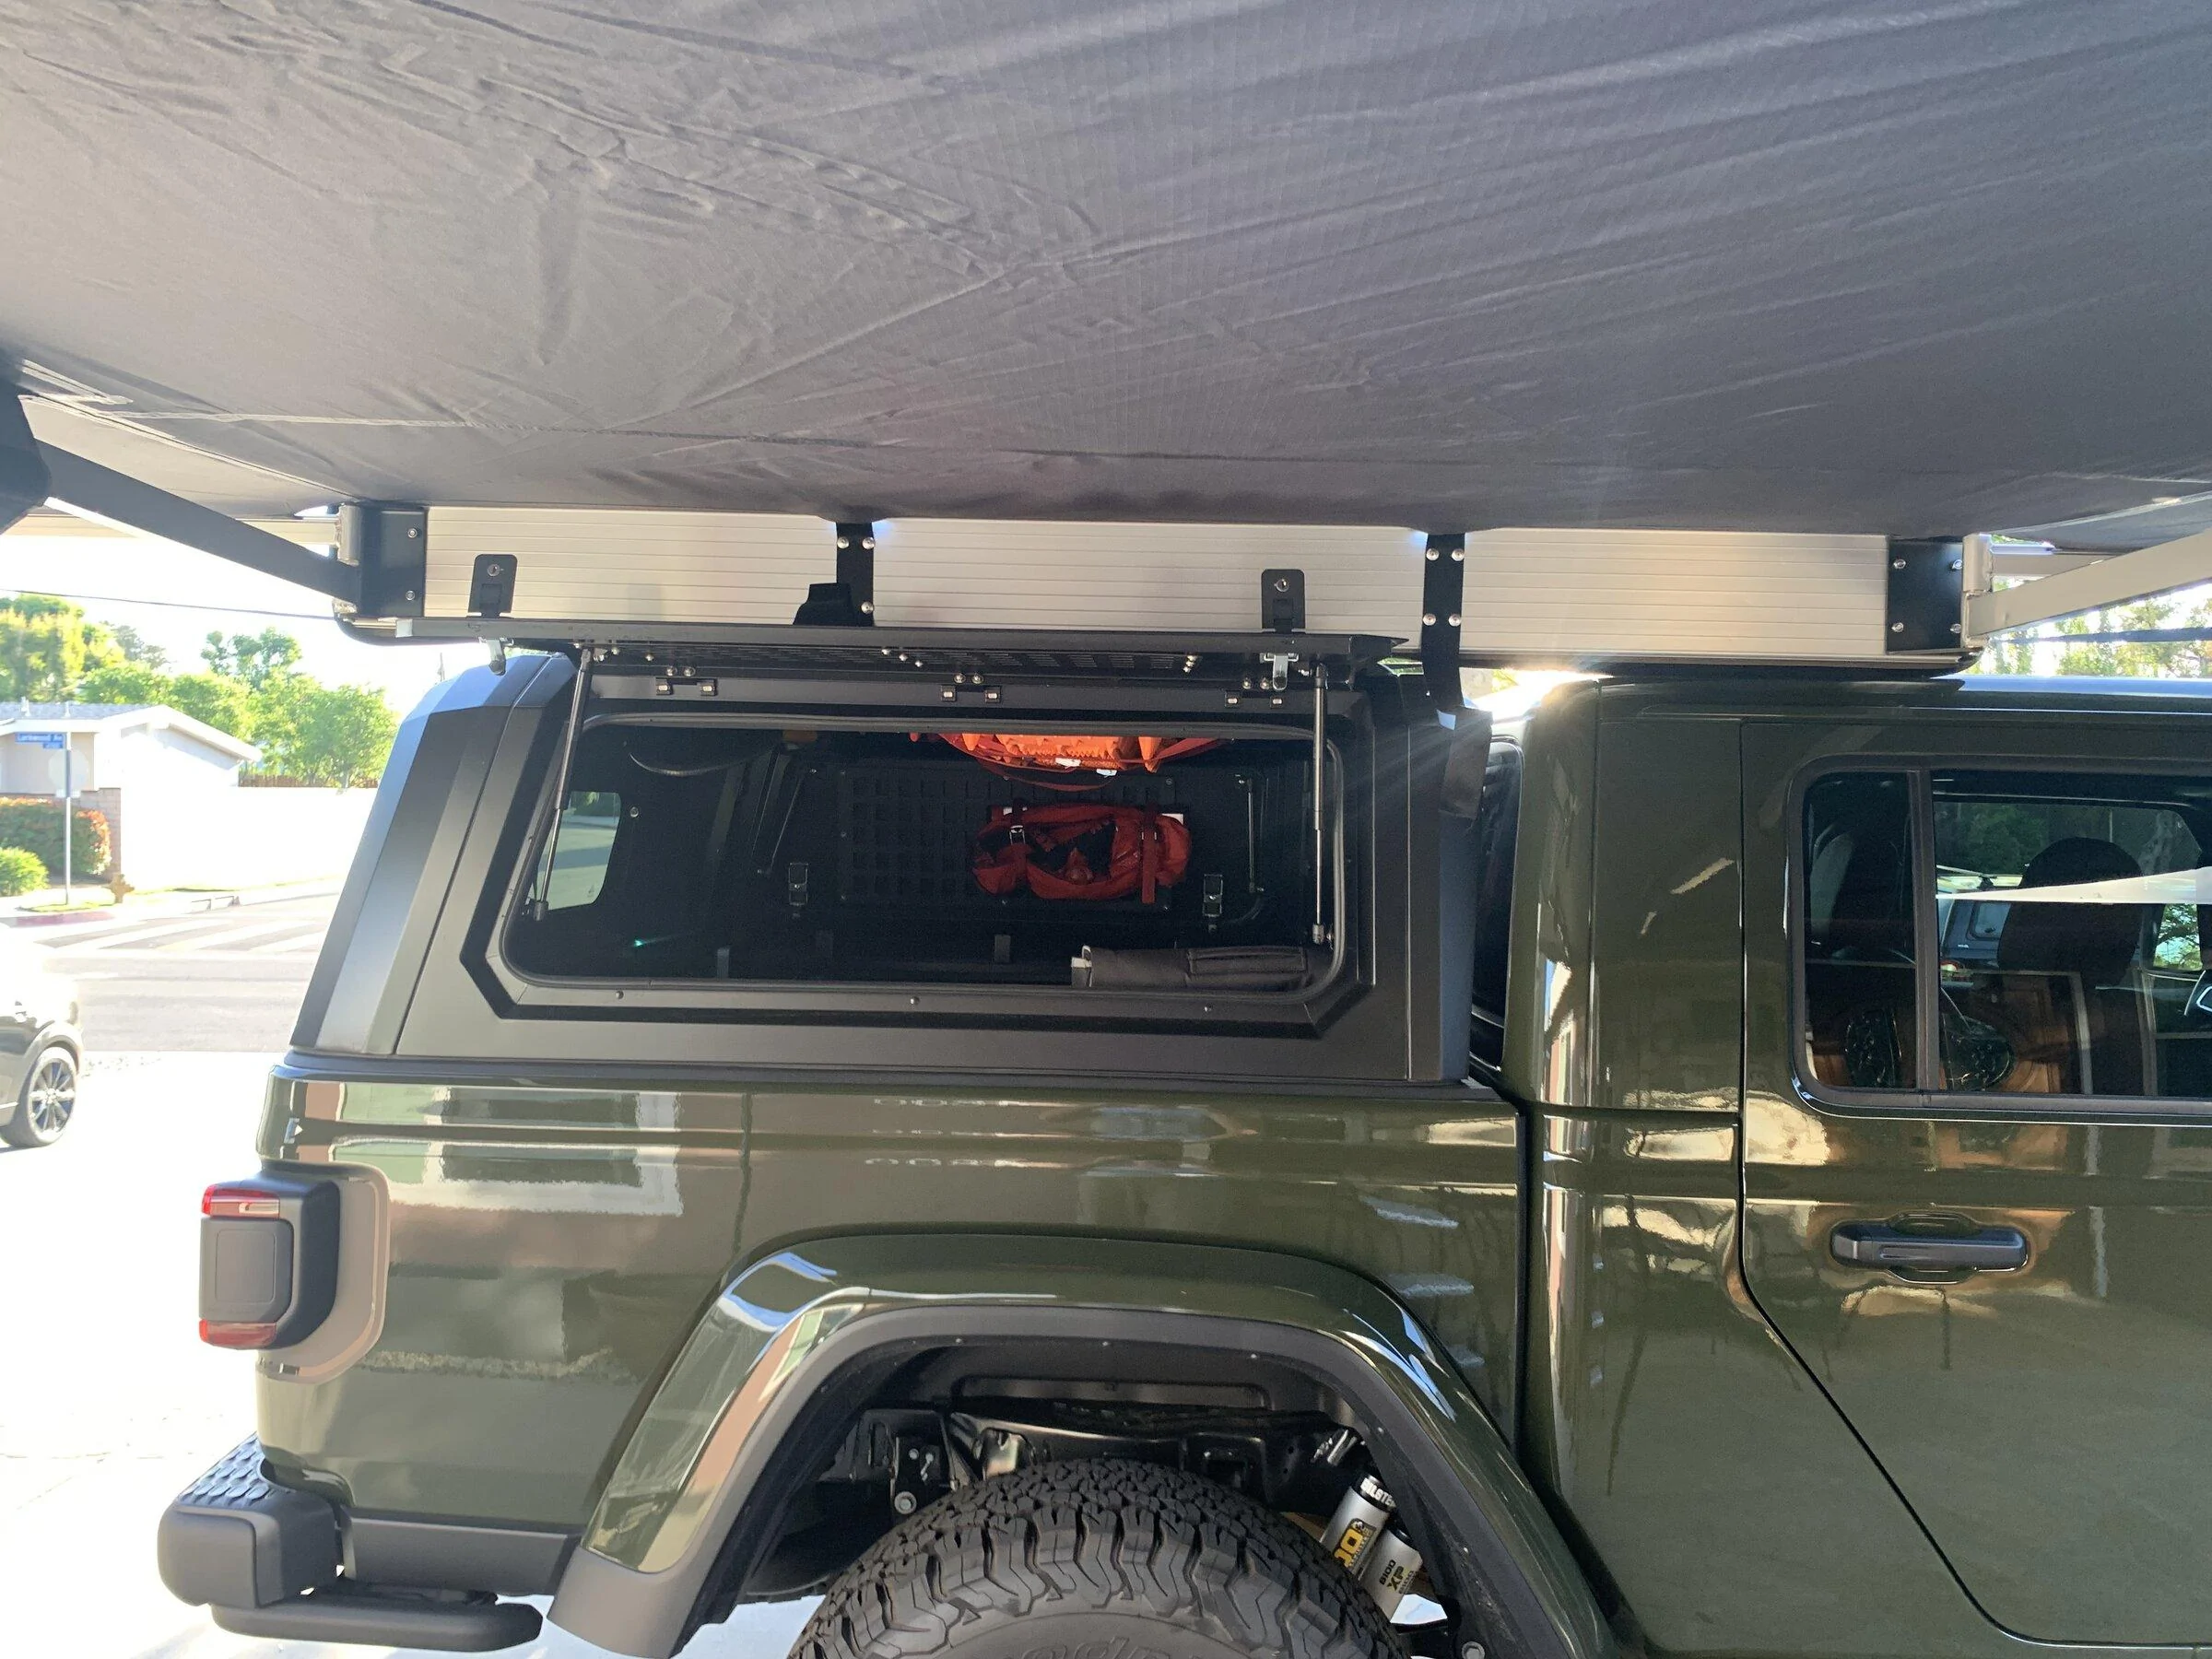
OVS Awning added. Had bought this for my Ram and it didnt get much use. It is pretty big and throws a lot of shade. You can use it without legs as long as it isn't too windy. There are two legs that drop down and you can anchor it if needed.
These are budget free standing awnings. As always you get what you pay for. The awning itself is decent. The cover is total crap. My friend has another version OVS and the whole cover sliced open on a tree while barely touching it. By comparison I have a smaller Rhino Rack batwing that has run into a lot of stuff and was in use for years. A little beaten up but still fully intact.
The Smartcap door opens about 90% with the awning on.
Be wary if you do buy an OVS awning. They sell them without mounting brackets. Got it from auto anything and it was "on sale" Turns out it was just the version w/o the brackets. OVS had good service when I called, but those brackets cost me another $100. That was zero savings over the regular price. My fault, lesson learned.
https://overlandvehiclesystems.com/...0-dark-gray-cover-with-black-cover-universal/
Last edited:
813 Fabrication & Design
Rock Sponsor (Level 1)
- First Name
- Jeremy
- Joined
- Dec 21, 2019
- Threads
- 51
- Messages
- 918
- Reaction score
- 1,322
- Location
- Louisville, KY
- Website
- www.813fabrication.com
- Vehicle(s)
- 2020 Jeep Gladiator Rubicon Launch Edition
The setup looks awesome!Finally got all the pieces together and installed an ARB Twin compressor under the rear seat.
Shout out to Jeremy @813 Fabrication & Design . Great customer service and a great product.
The set up has a coupling on each side of the bin and I added one in the rear bumper. The rear was overkill but I had the parts from when the plan was to add it to the JK. Used the rear seat bin with solid bottom and Molle face. Thought that would vent the heat from the compressor better. The 813 bin has all the holes and cut outs for switches as well as a blanking plate for the one you dont use.
https://www.813fabrication.com/product-page/under-seat-bin-full-molle-front-and-base
https://www.amazon.com/dp/B08P3Y1KFM?psc=1&ref=ppx_yo2ov_dt_b_product_details
Added the ARB Pressure Control System. This is the bluetooth one independent of the Linx system. Decided I really didnt need all that the Linx had even though it would be a cool addition.
https://www.amazon.com/dp/B08P3Y1KFM?psc=1&ref=ppx_yo2ov_dt_b_product_details
Used the extension harness to get power to the rear seat. Dont think this harness would get you to the bed of the truck.
https://www.amazon.com/dp/B07MJHX6SL?psc=1&ref=ppx_yo2ov_dt_b_product_details
Initial test was good. Aired down to 15 then back up. Not super fast on air down, but I went and did some other stuff while the computer was doing its thing. My phone buzzed when done. Going to test it with two tires at once when my extra hose gets here.
Tips would be to draw out the planned install and order all the little parts. Used a combination of Northridge and Summit Racing (who has a lot of ARB stuff) to get everything. The Pressure control system uses 1/8 BSPT fittings. You can get an adapter that goes up to the ARB hose standard JIC04. Used a bulkhead fitting to mount in the rear bumper - link above. There are ARB adapters to go from 1/4 NPT to the JIC04 hose.
OP
OP
PJZ
Well-Known Member
- First Name
- Patrick
- Joined
- Dec 16, 2021
- Threads
- 13
- Messages
- 333
- Reaction score
- 477
- Location
- SoCal - The Valley
- Vehicle(s)
- 2022 JTRD AEV370
- Build Thread
- Link
- Thread starter
- #30
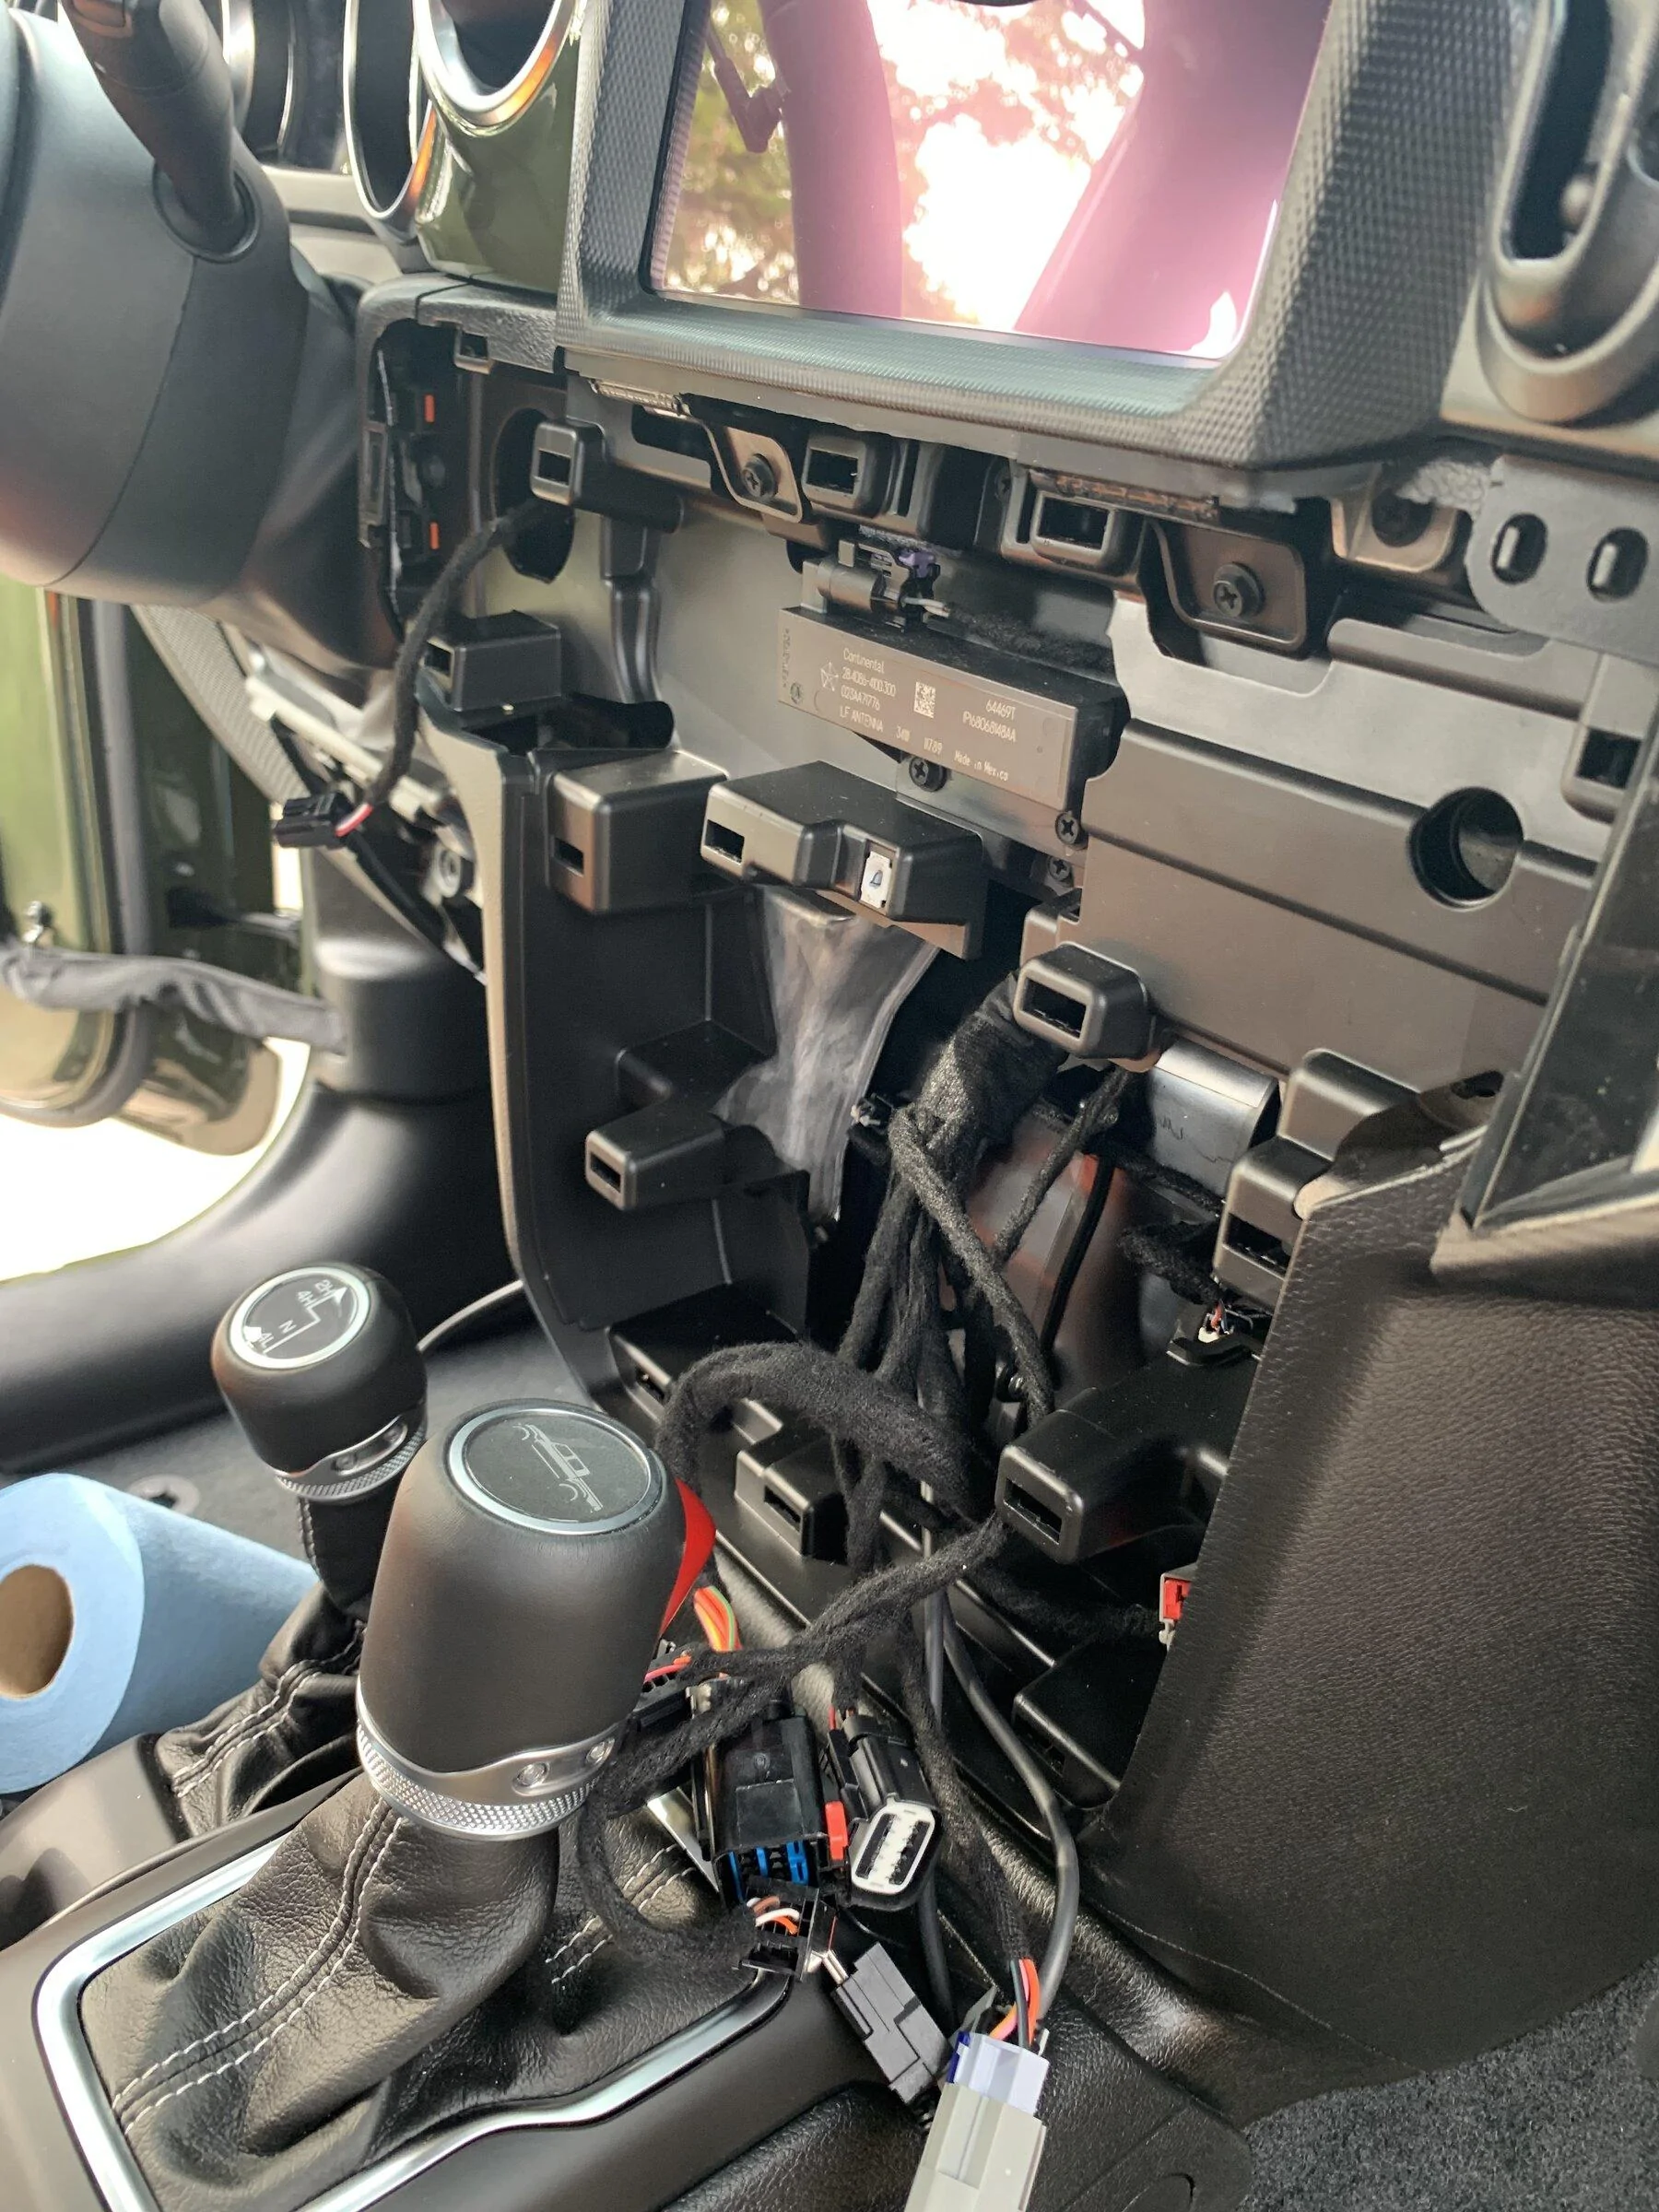
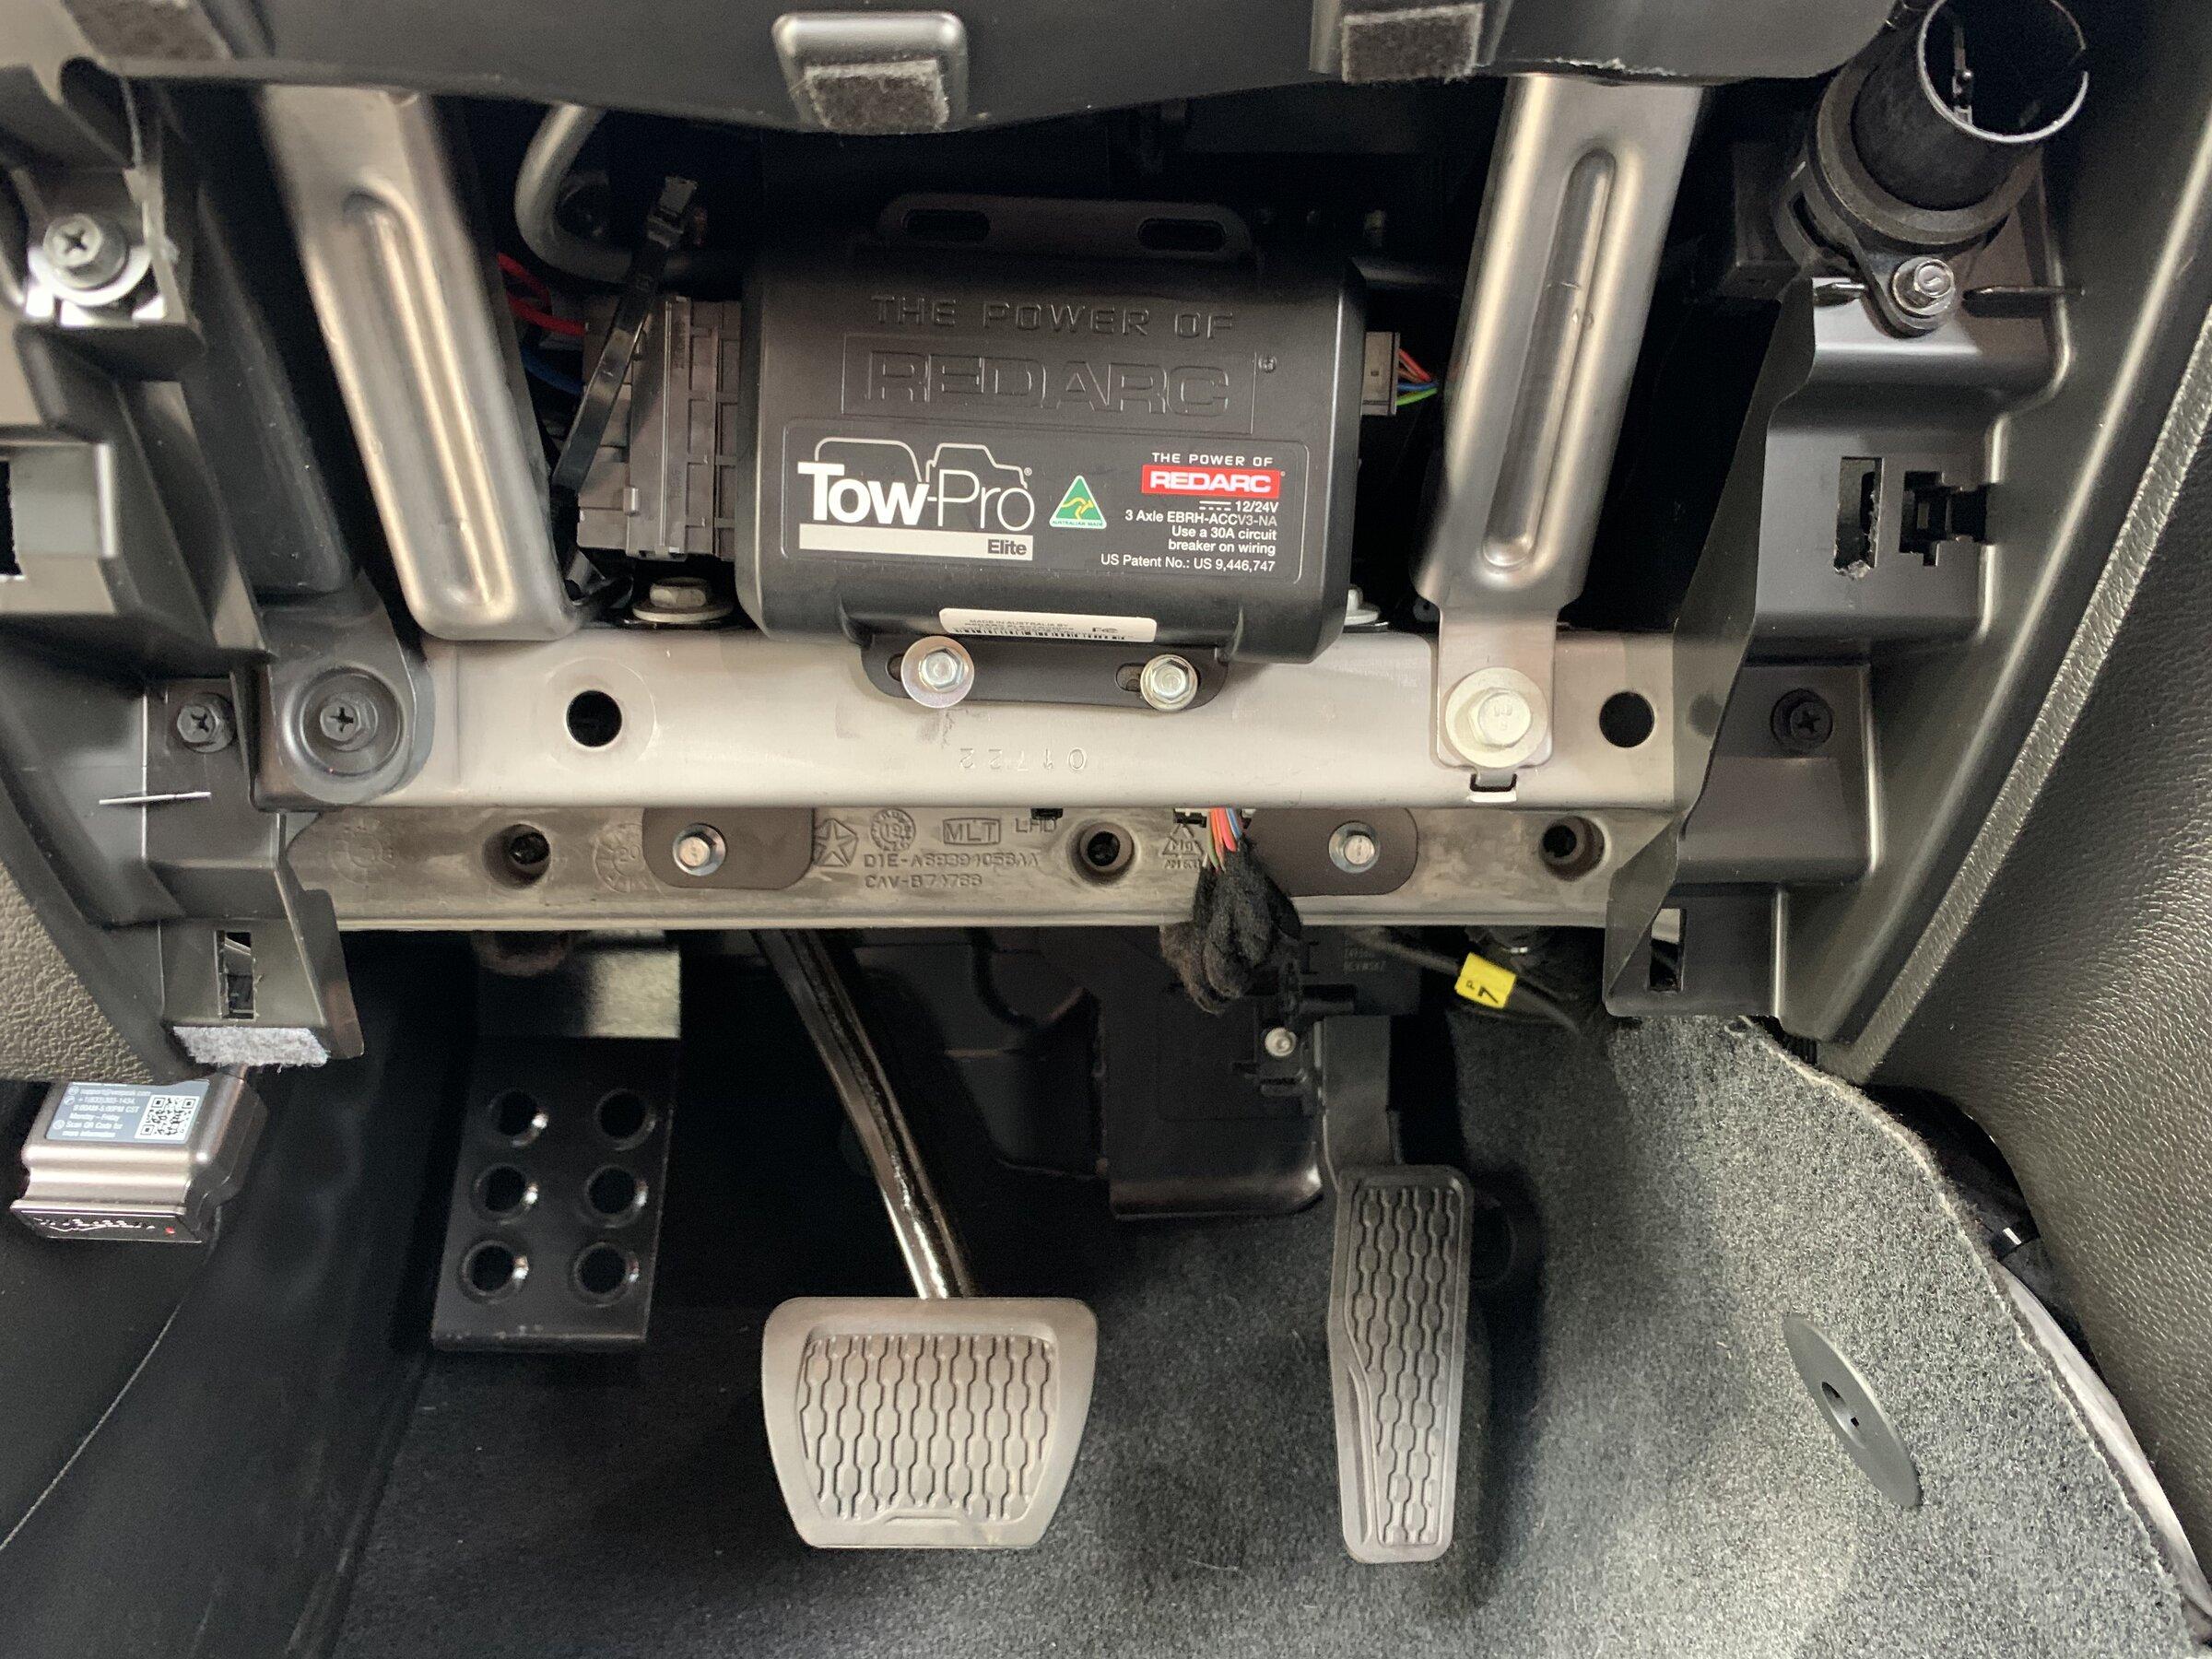
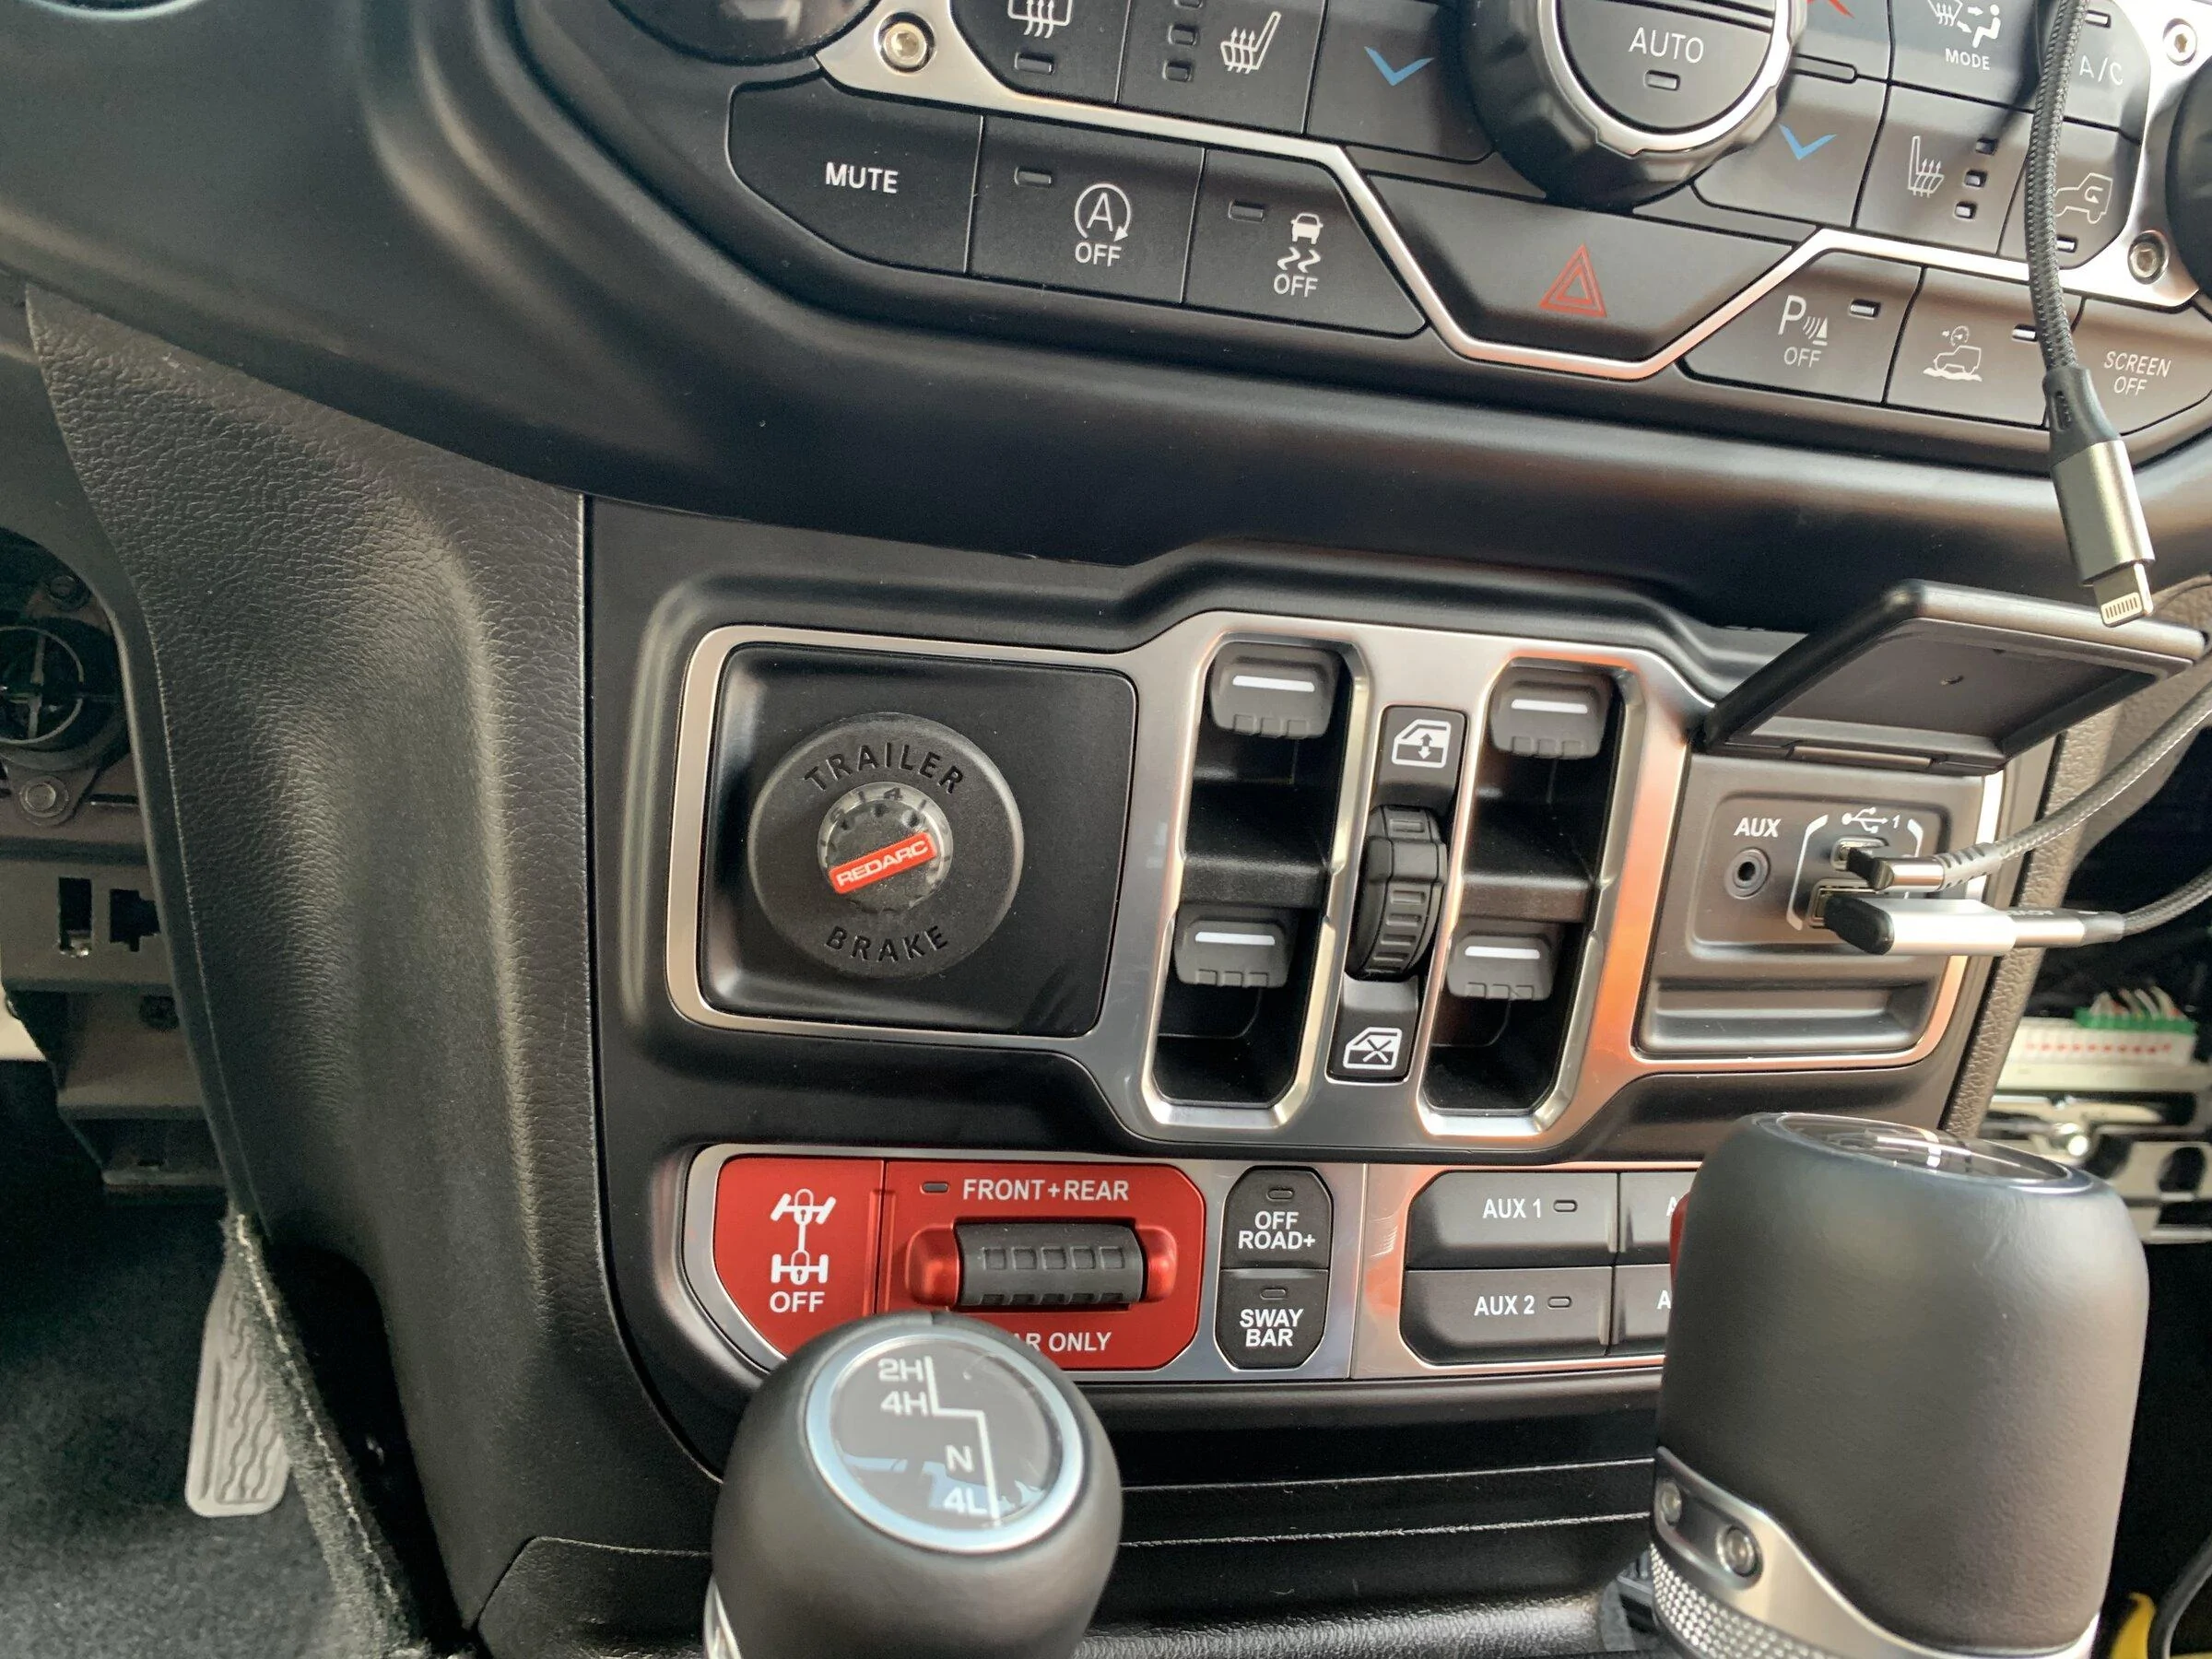
Redarc Trailer Brake controller installed today. Pretty straight forward. Got the plug and play connectors and controller from e-trailer. Also got the Stinger cig plug harness so I could add a remote 12 volt plug for GPS and trailer camera. Used a dual cig plug with long cord and ran it under the passenger seat. Can pull it out if needed or just plug in under the seat.
https://www.quadratec.com/p/stinger-offroad/accessory-power-t-harness-wrangler-jl-jk-ch-12pwrh
Used the Dorman 57450 tool to remove the cig plug. Was still a little work but imagine impossible without it. Probably could have just cut up the old one since there would be no plan to put it back in. Putting the control box under the steering wheel required some light trimming of the tabs in that kick panel.
Install looks very clean. Might hook up the trailer this weekend for a tow and brake test.
Updated:
Brake controller works excellent as expected from Redarc.
However, I used a Curt in line plug for a 5 flat harness to power my reverse lights in the bumper. With the Curt harness plugged in the brake controller would not register a trailer attached. Its easy to unplug so did that and plugged the stock end back into the bumper tow harness output. Everything worked fine after that. When done towing plugged the curt back in. A little bit of a hassle and might research a different option to power the additional backup LEDs.
Sponsored
Last edited: