813 Fabrication & Design
Rock Sponsor (Level 1)
- First Name
- Jeremy
- Joined
- Dec 21, 2019
- Threads
- 51
- Messages
- 918
- Reaction score
- 1,323
- Location
- Louisville, KY
- Website
- www.813fabrication.com
- Vehicle(s)
- 2020 Jeep Gladiator Rubicon Launch Edition
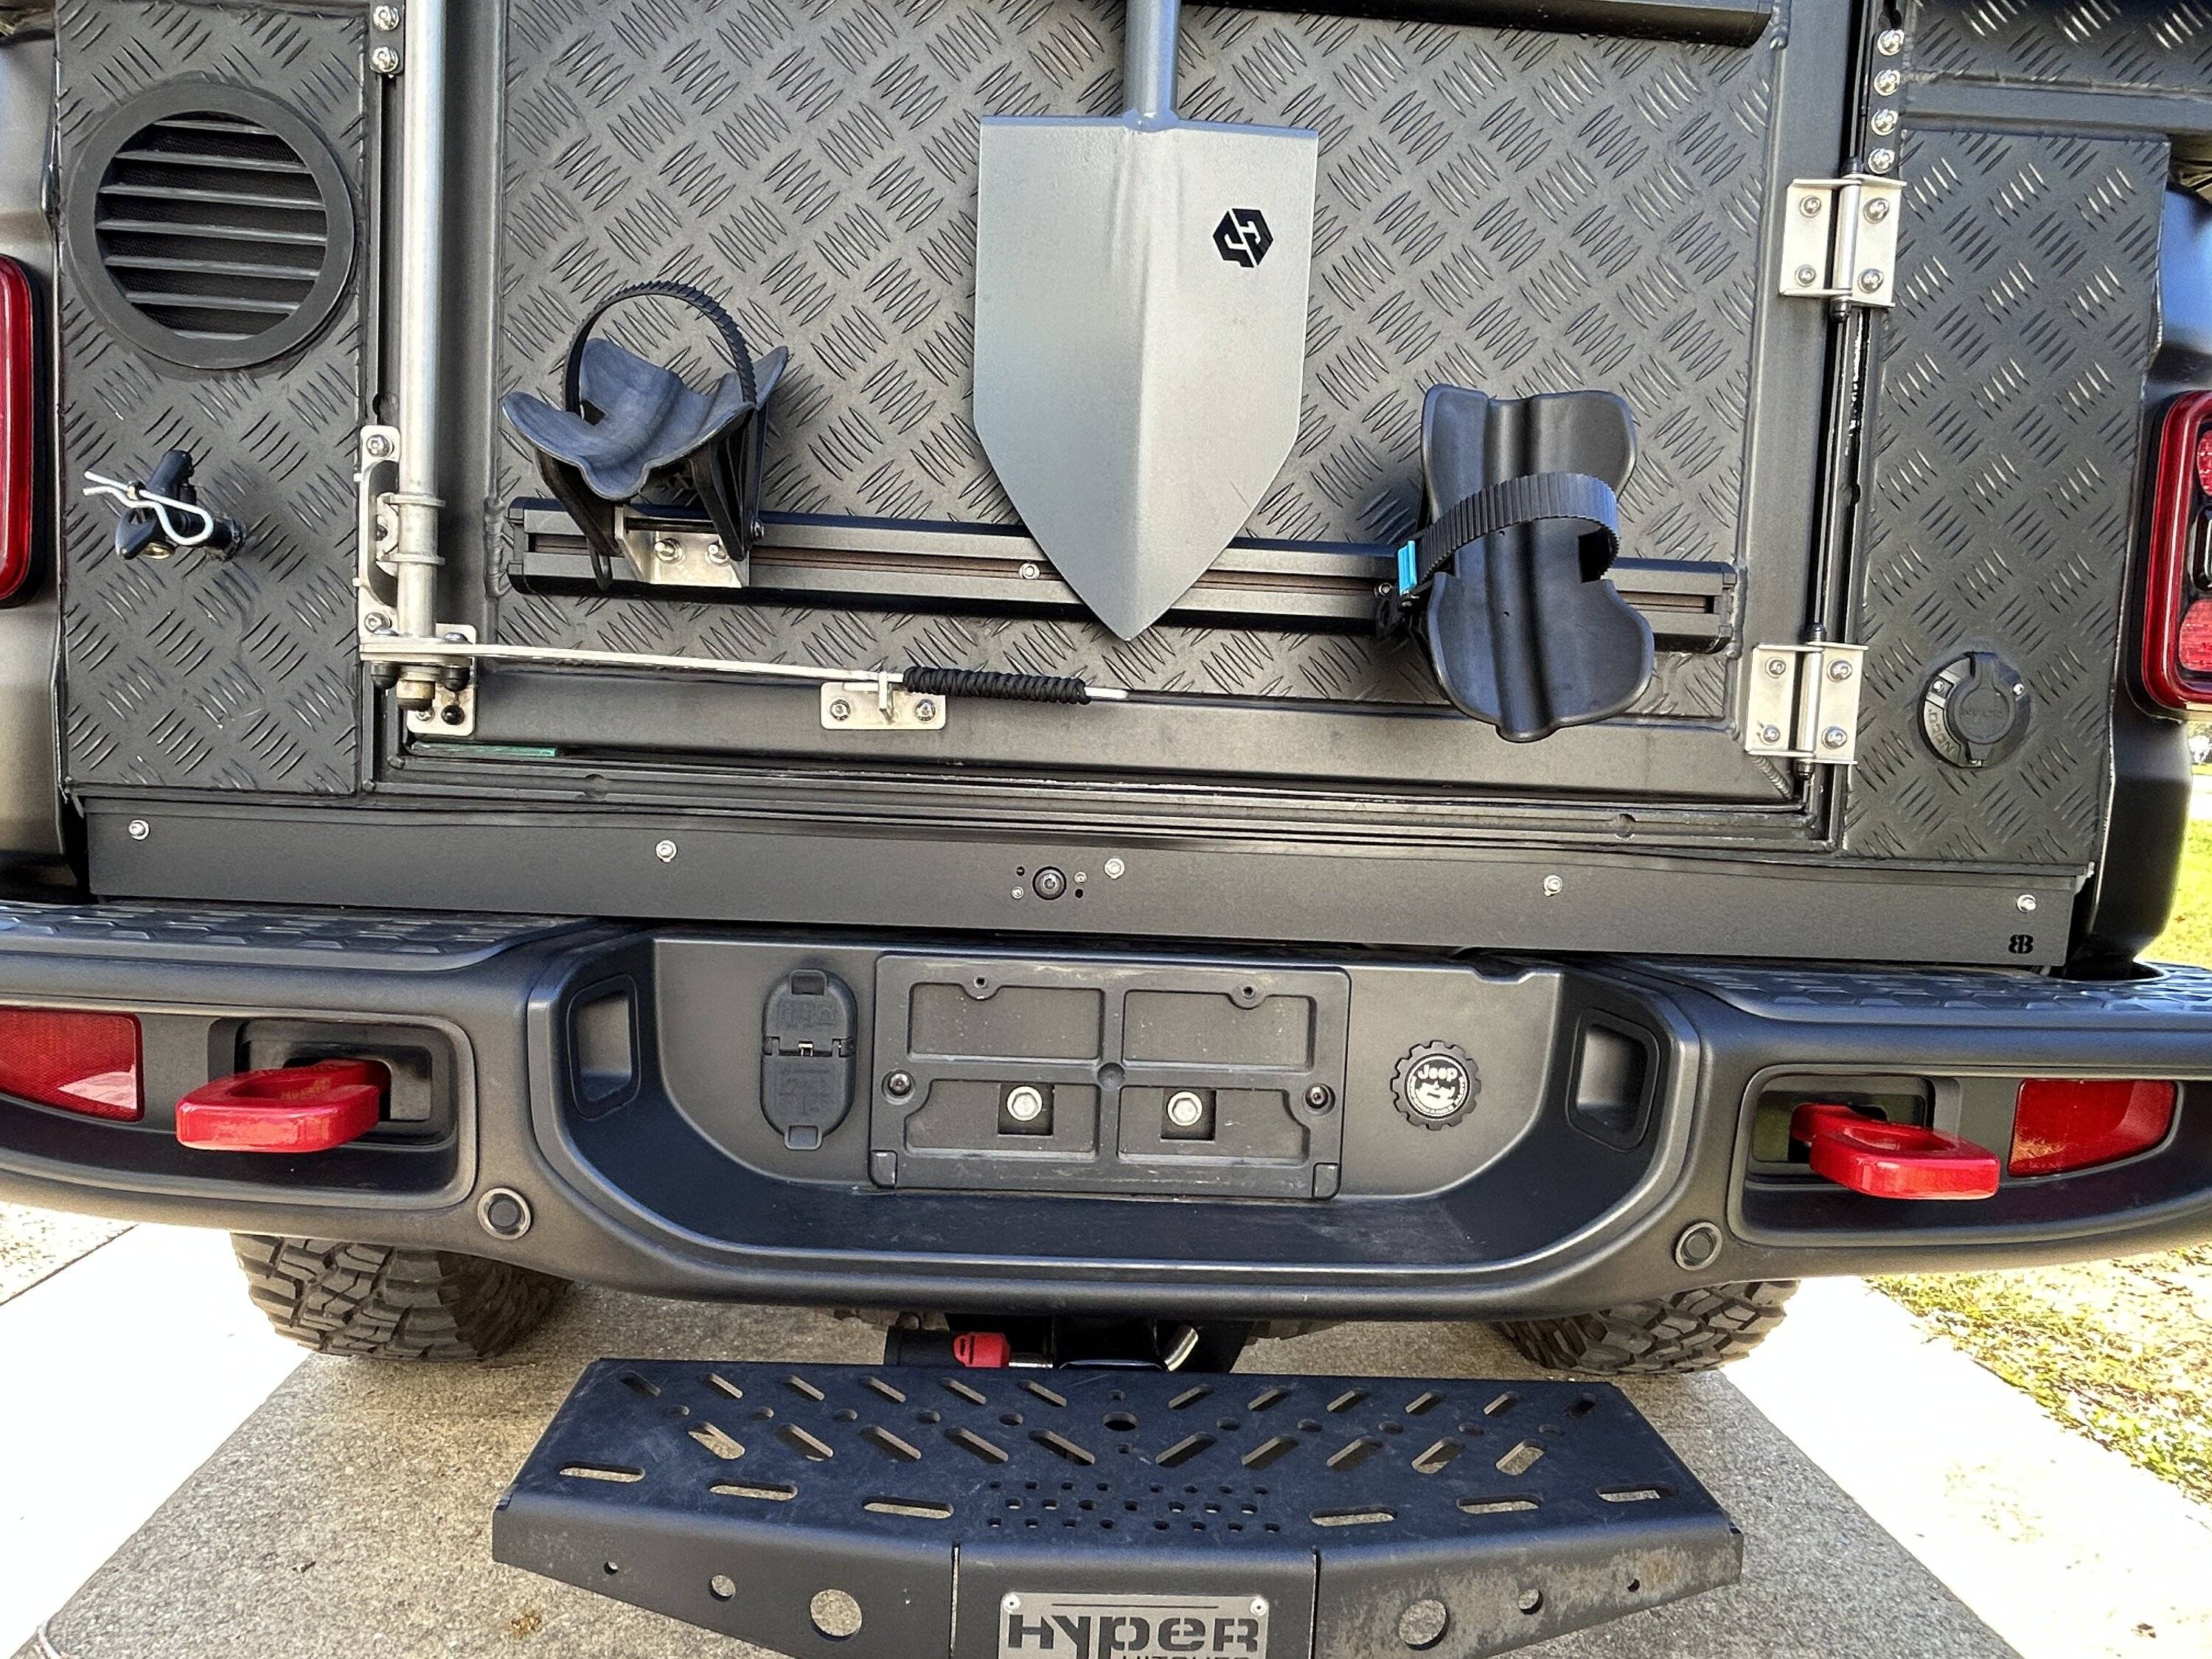
Very possible yes.Not having the truck here at the momemt, I can't check, but couldn't you drill another hole into the handle close to the pivot bold and secure that with a padlock?
The thing is, as soon as someone comes with an angle grinder, all bets are off anyways. It's probably also very likely that you could force the diminutive locks in the side doors with a screwdriver. If someone knows what they're doing, they are in. This isn't a hardened security shell. It would probably take me about 60 seconds with a cordless driver ...
Sponsored