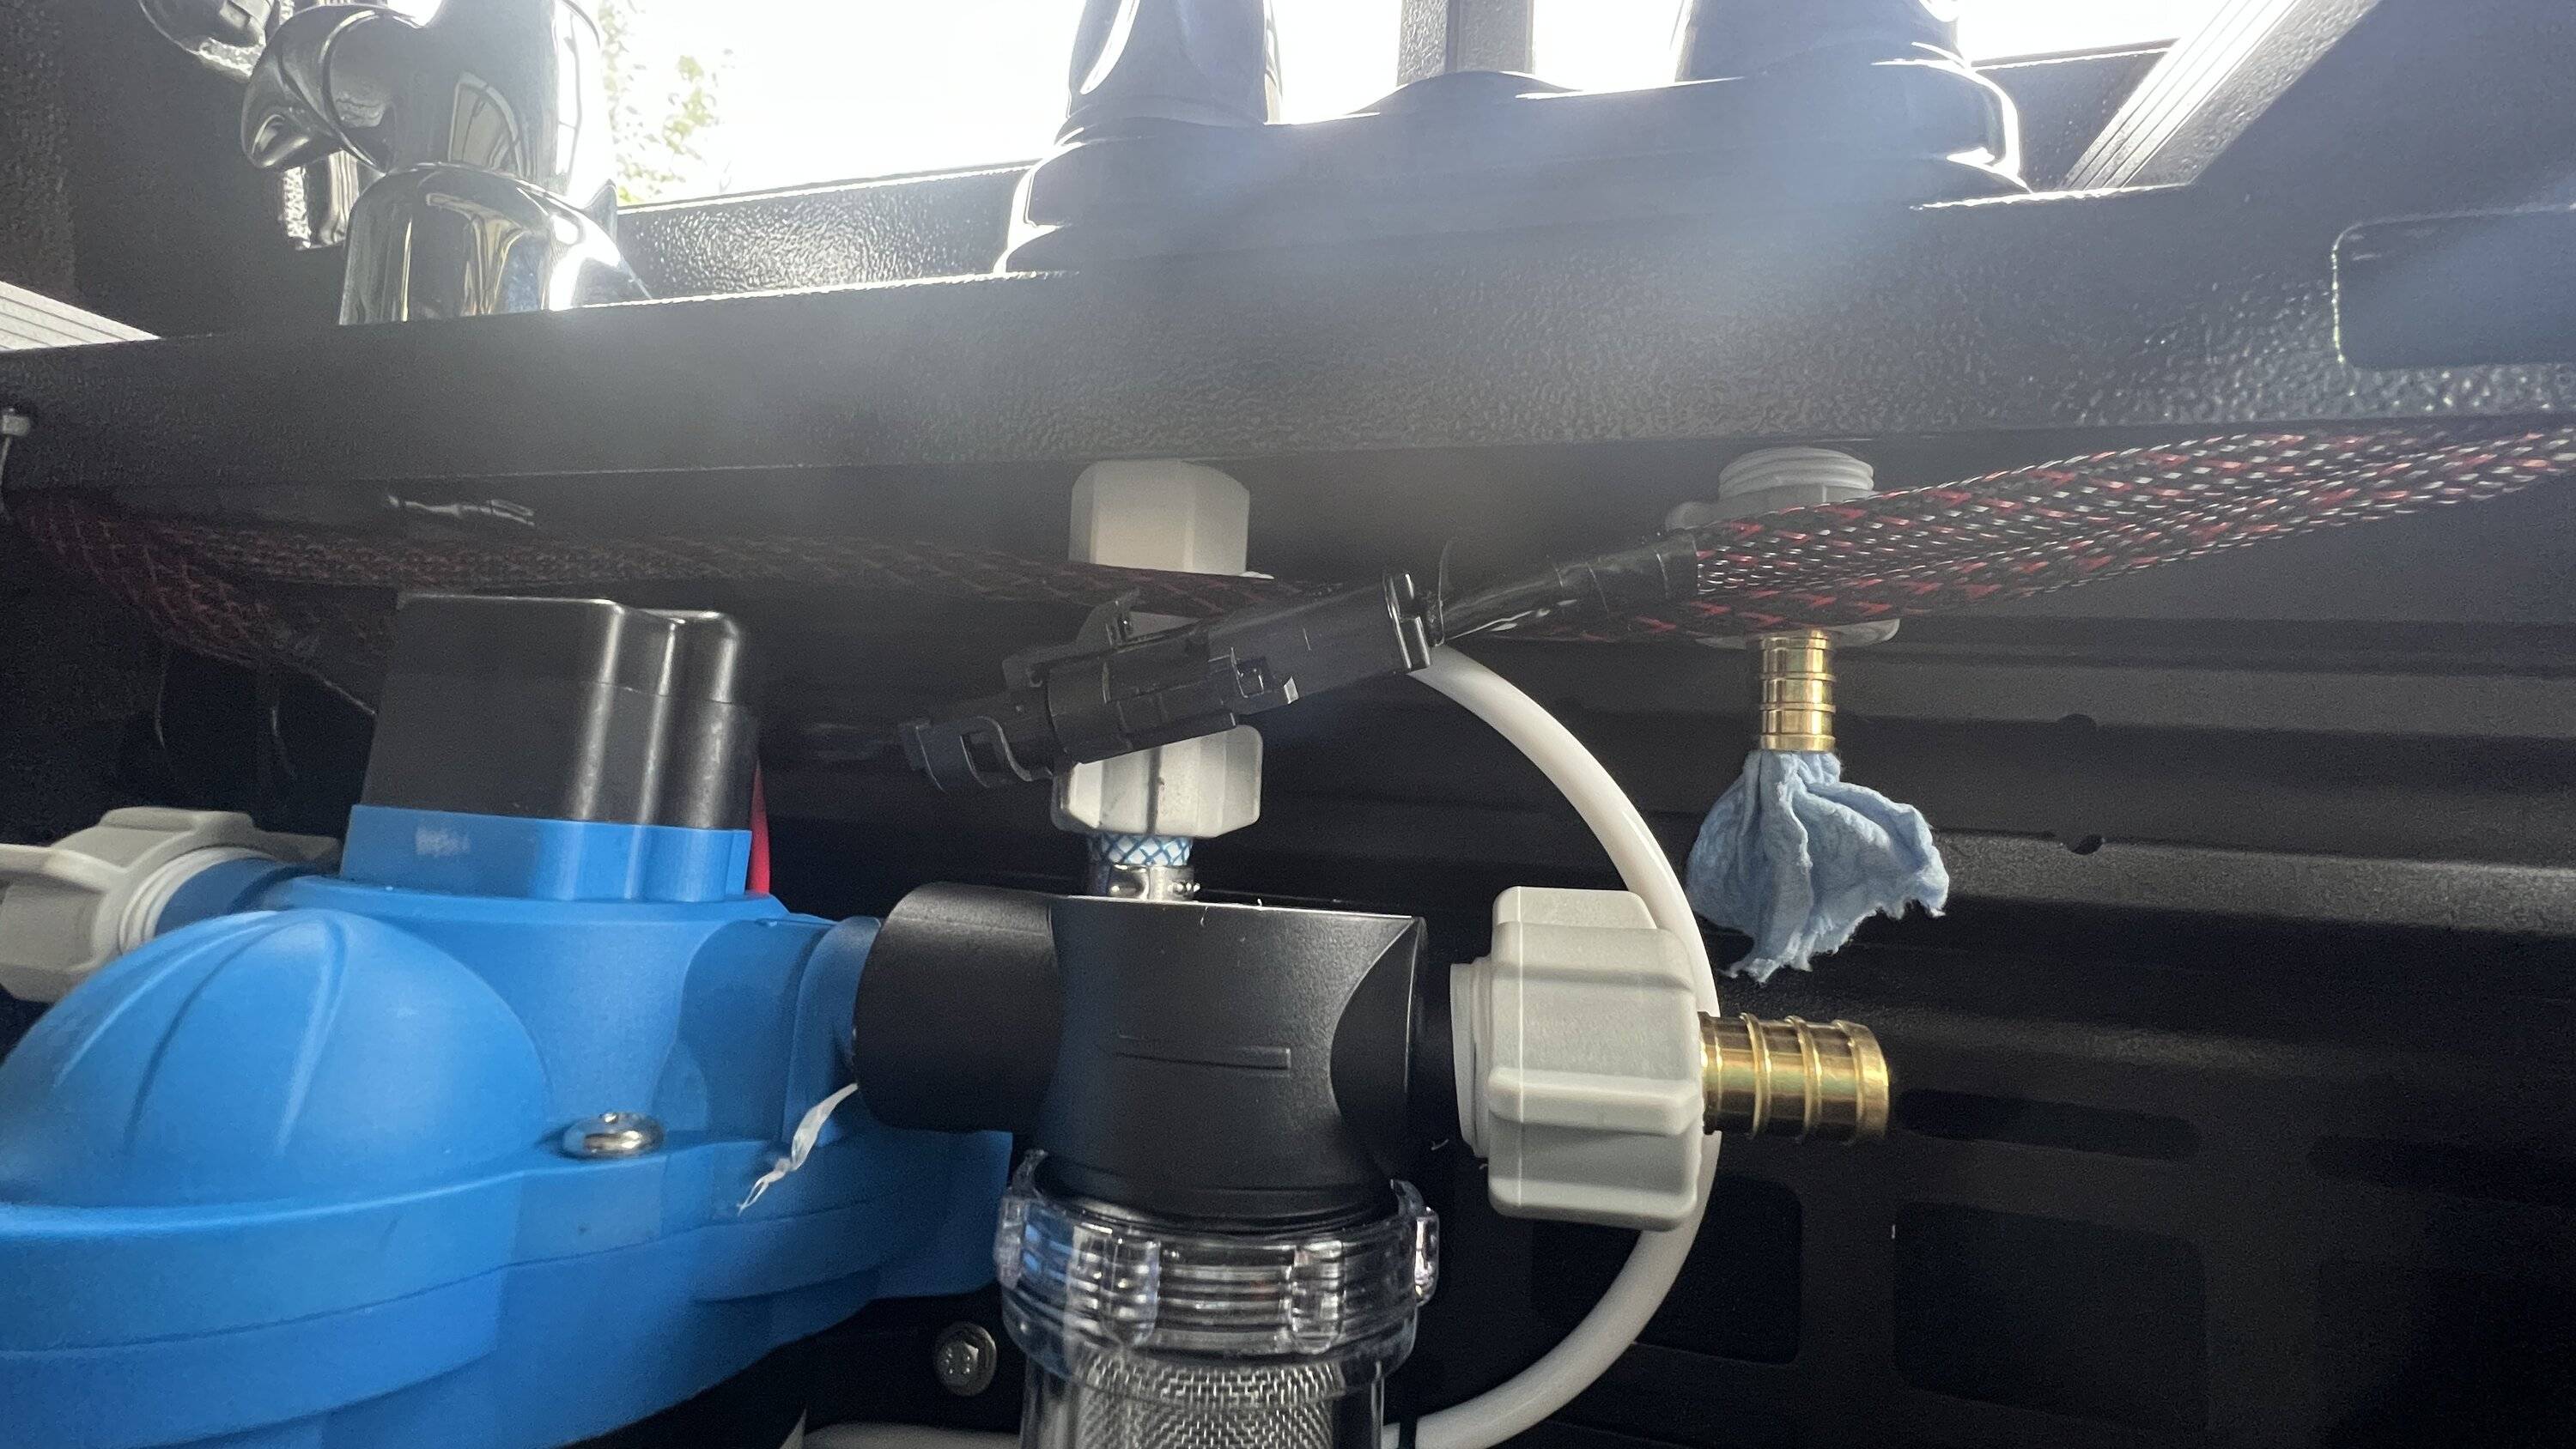
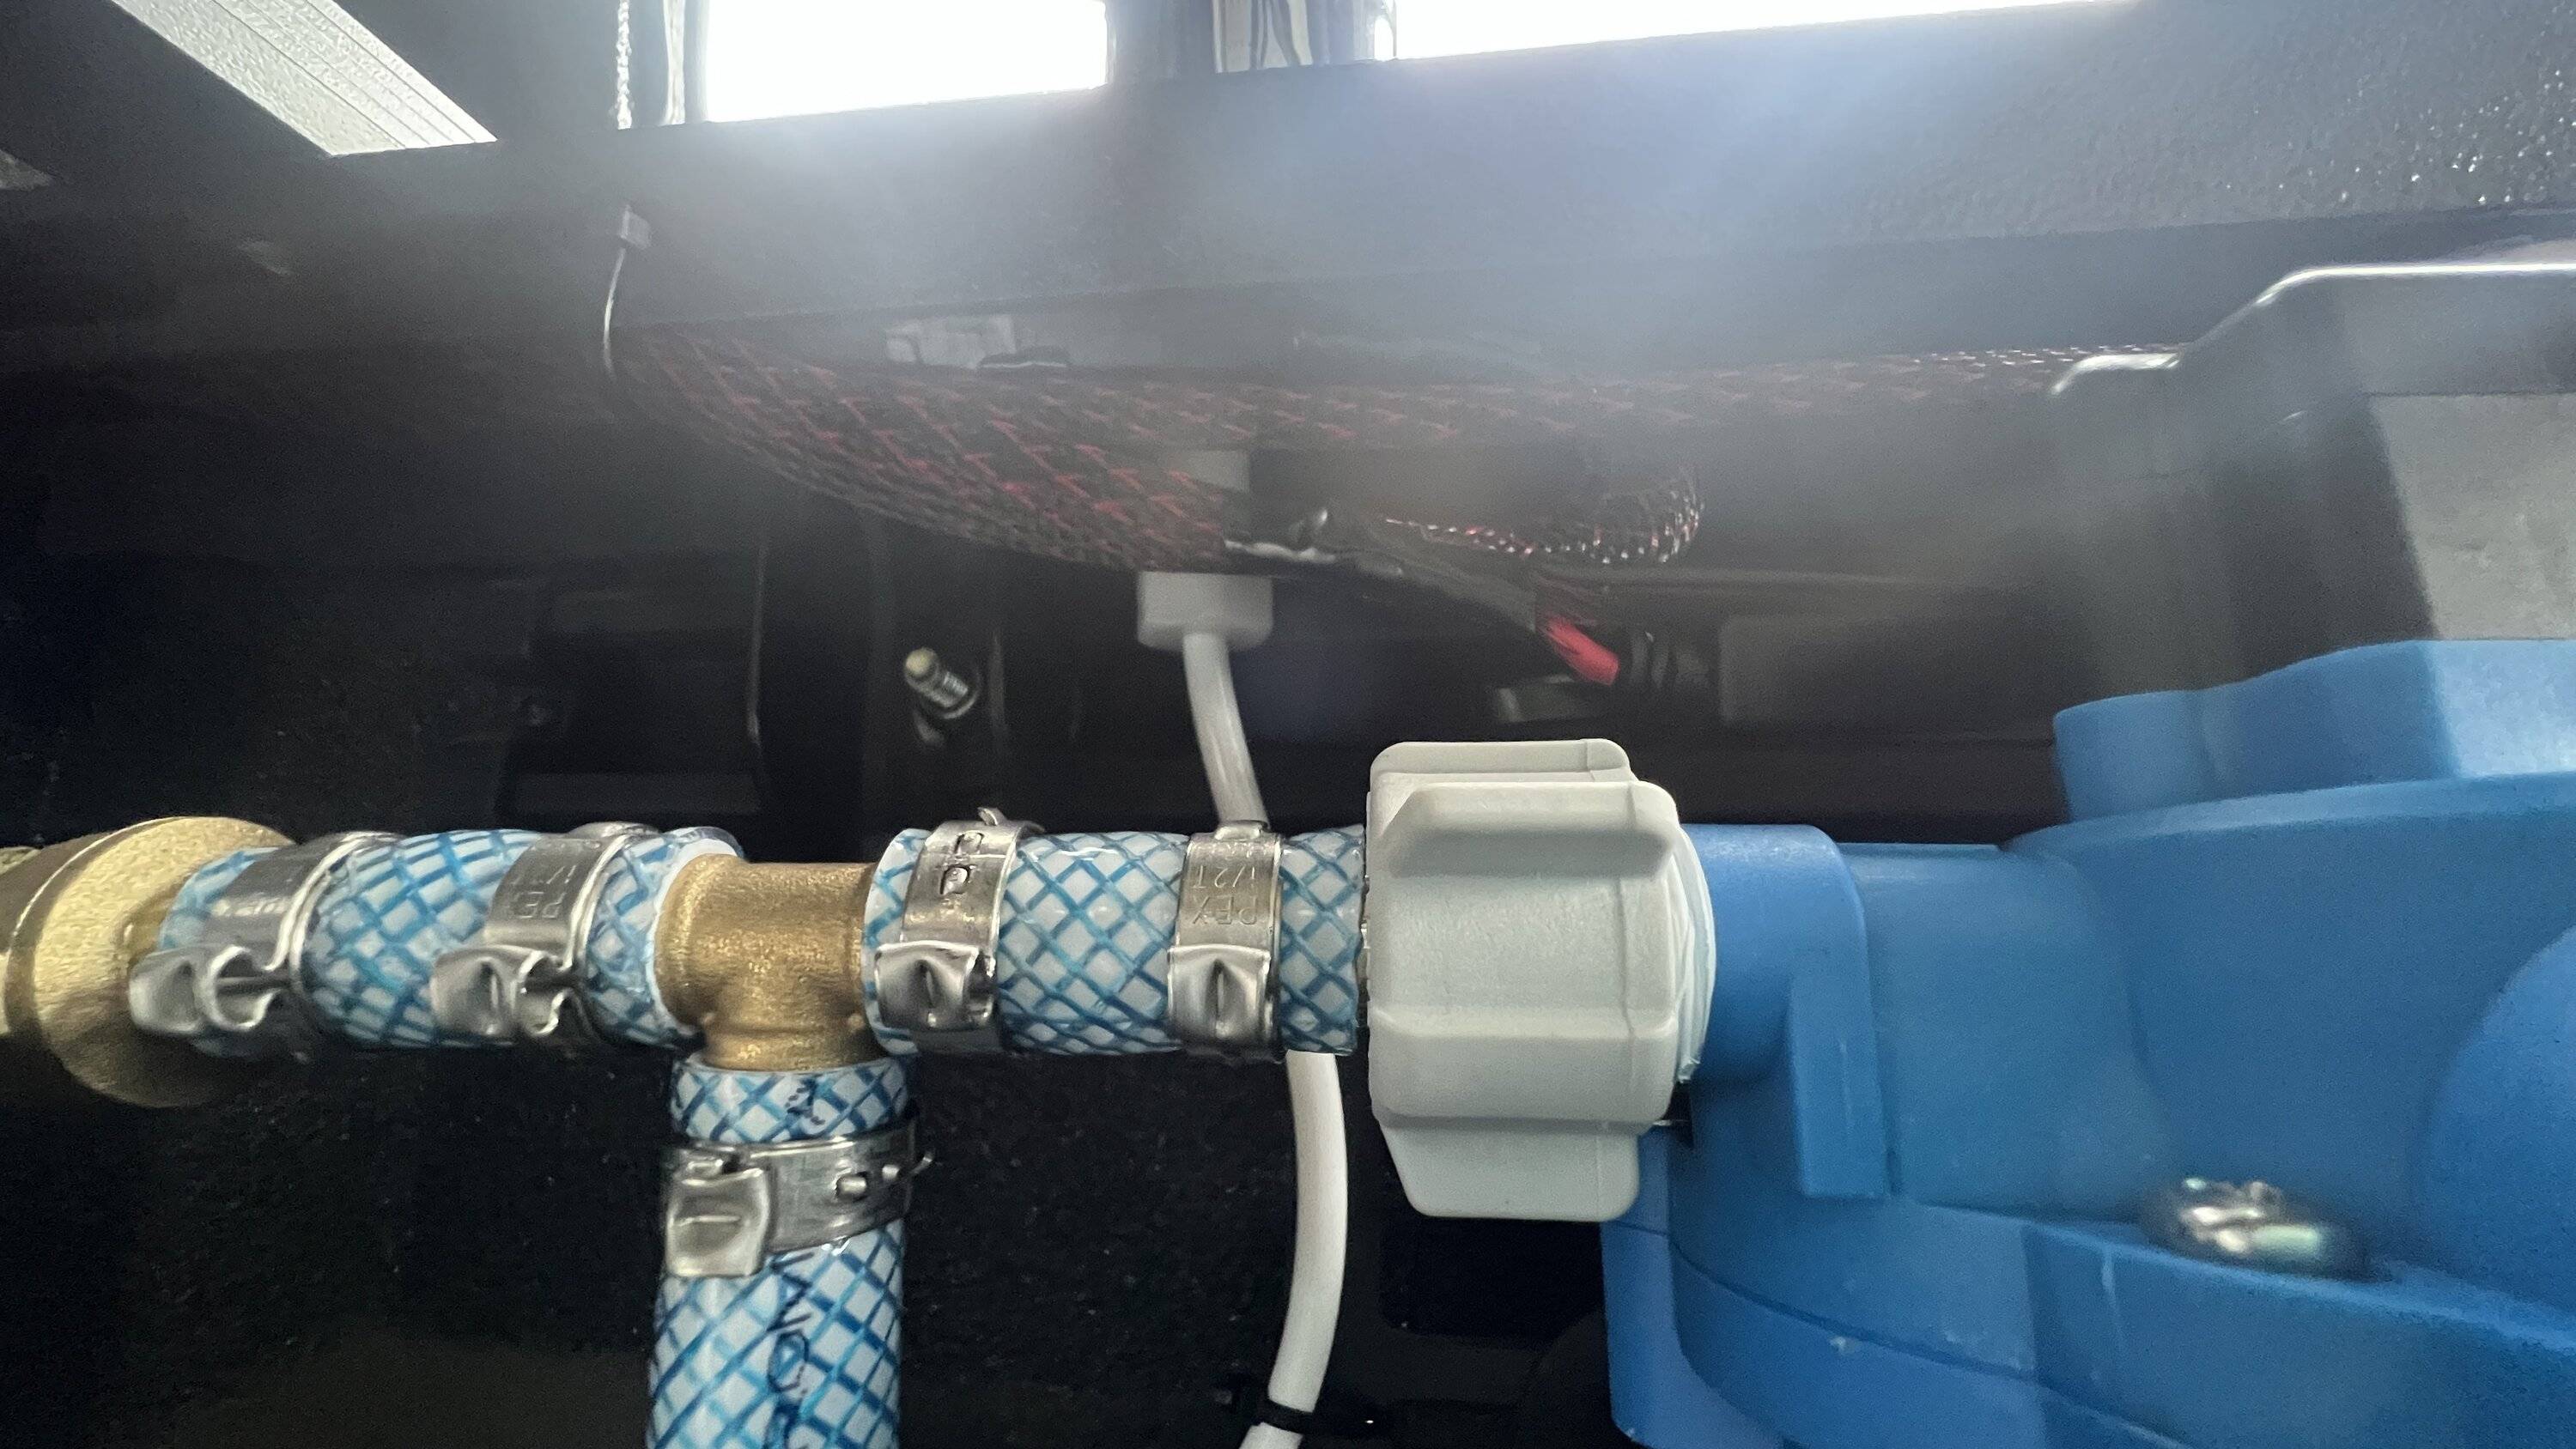
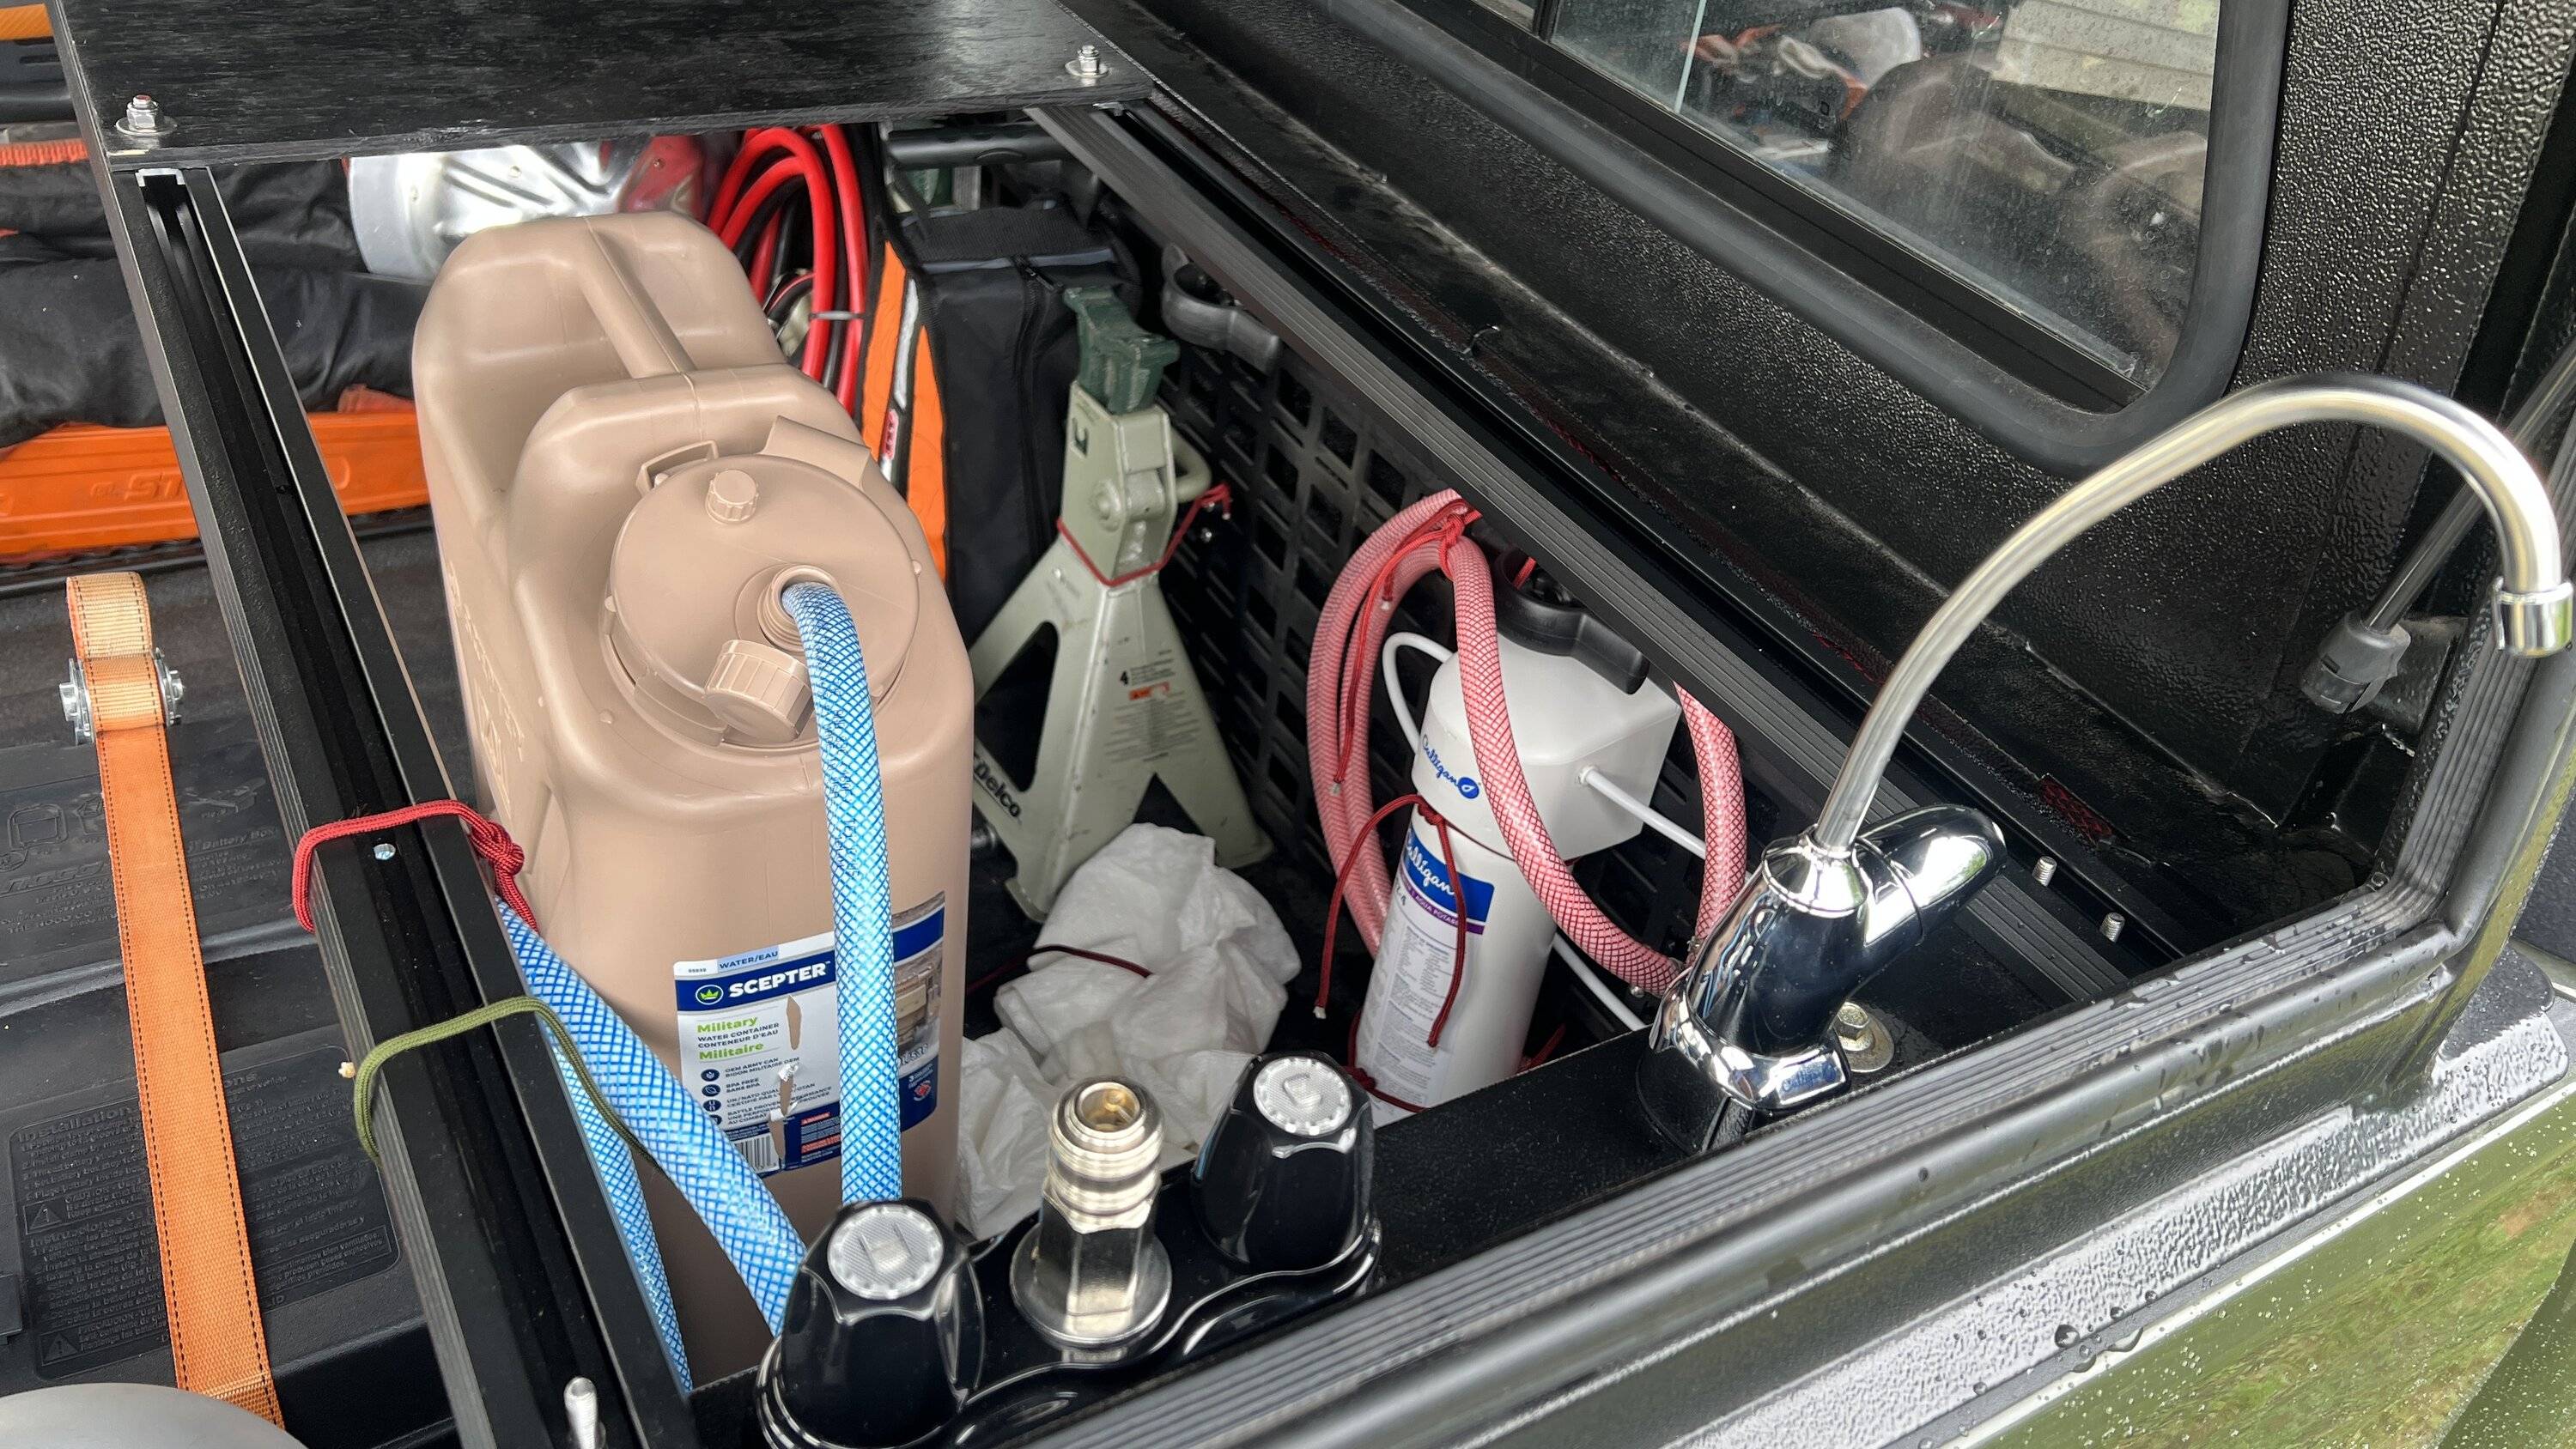
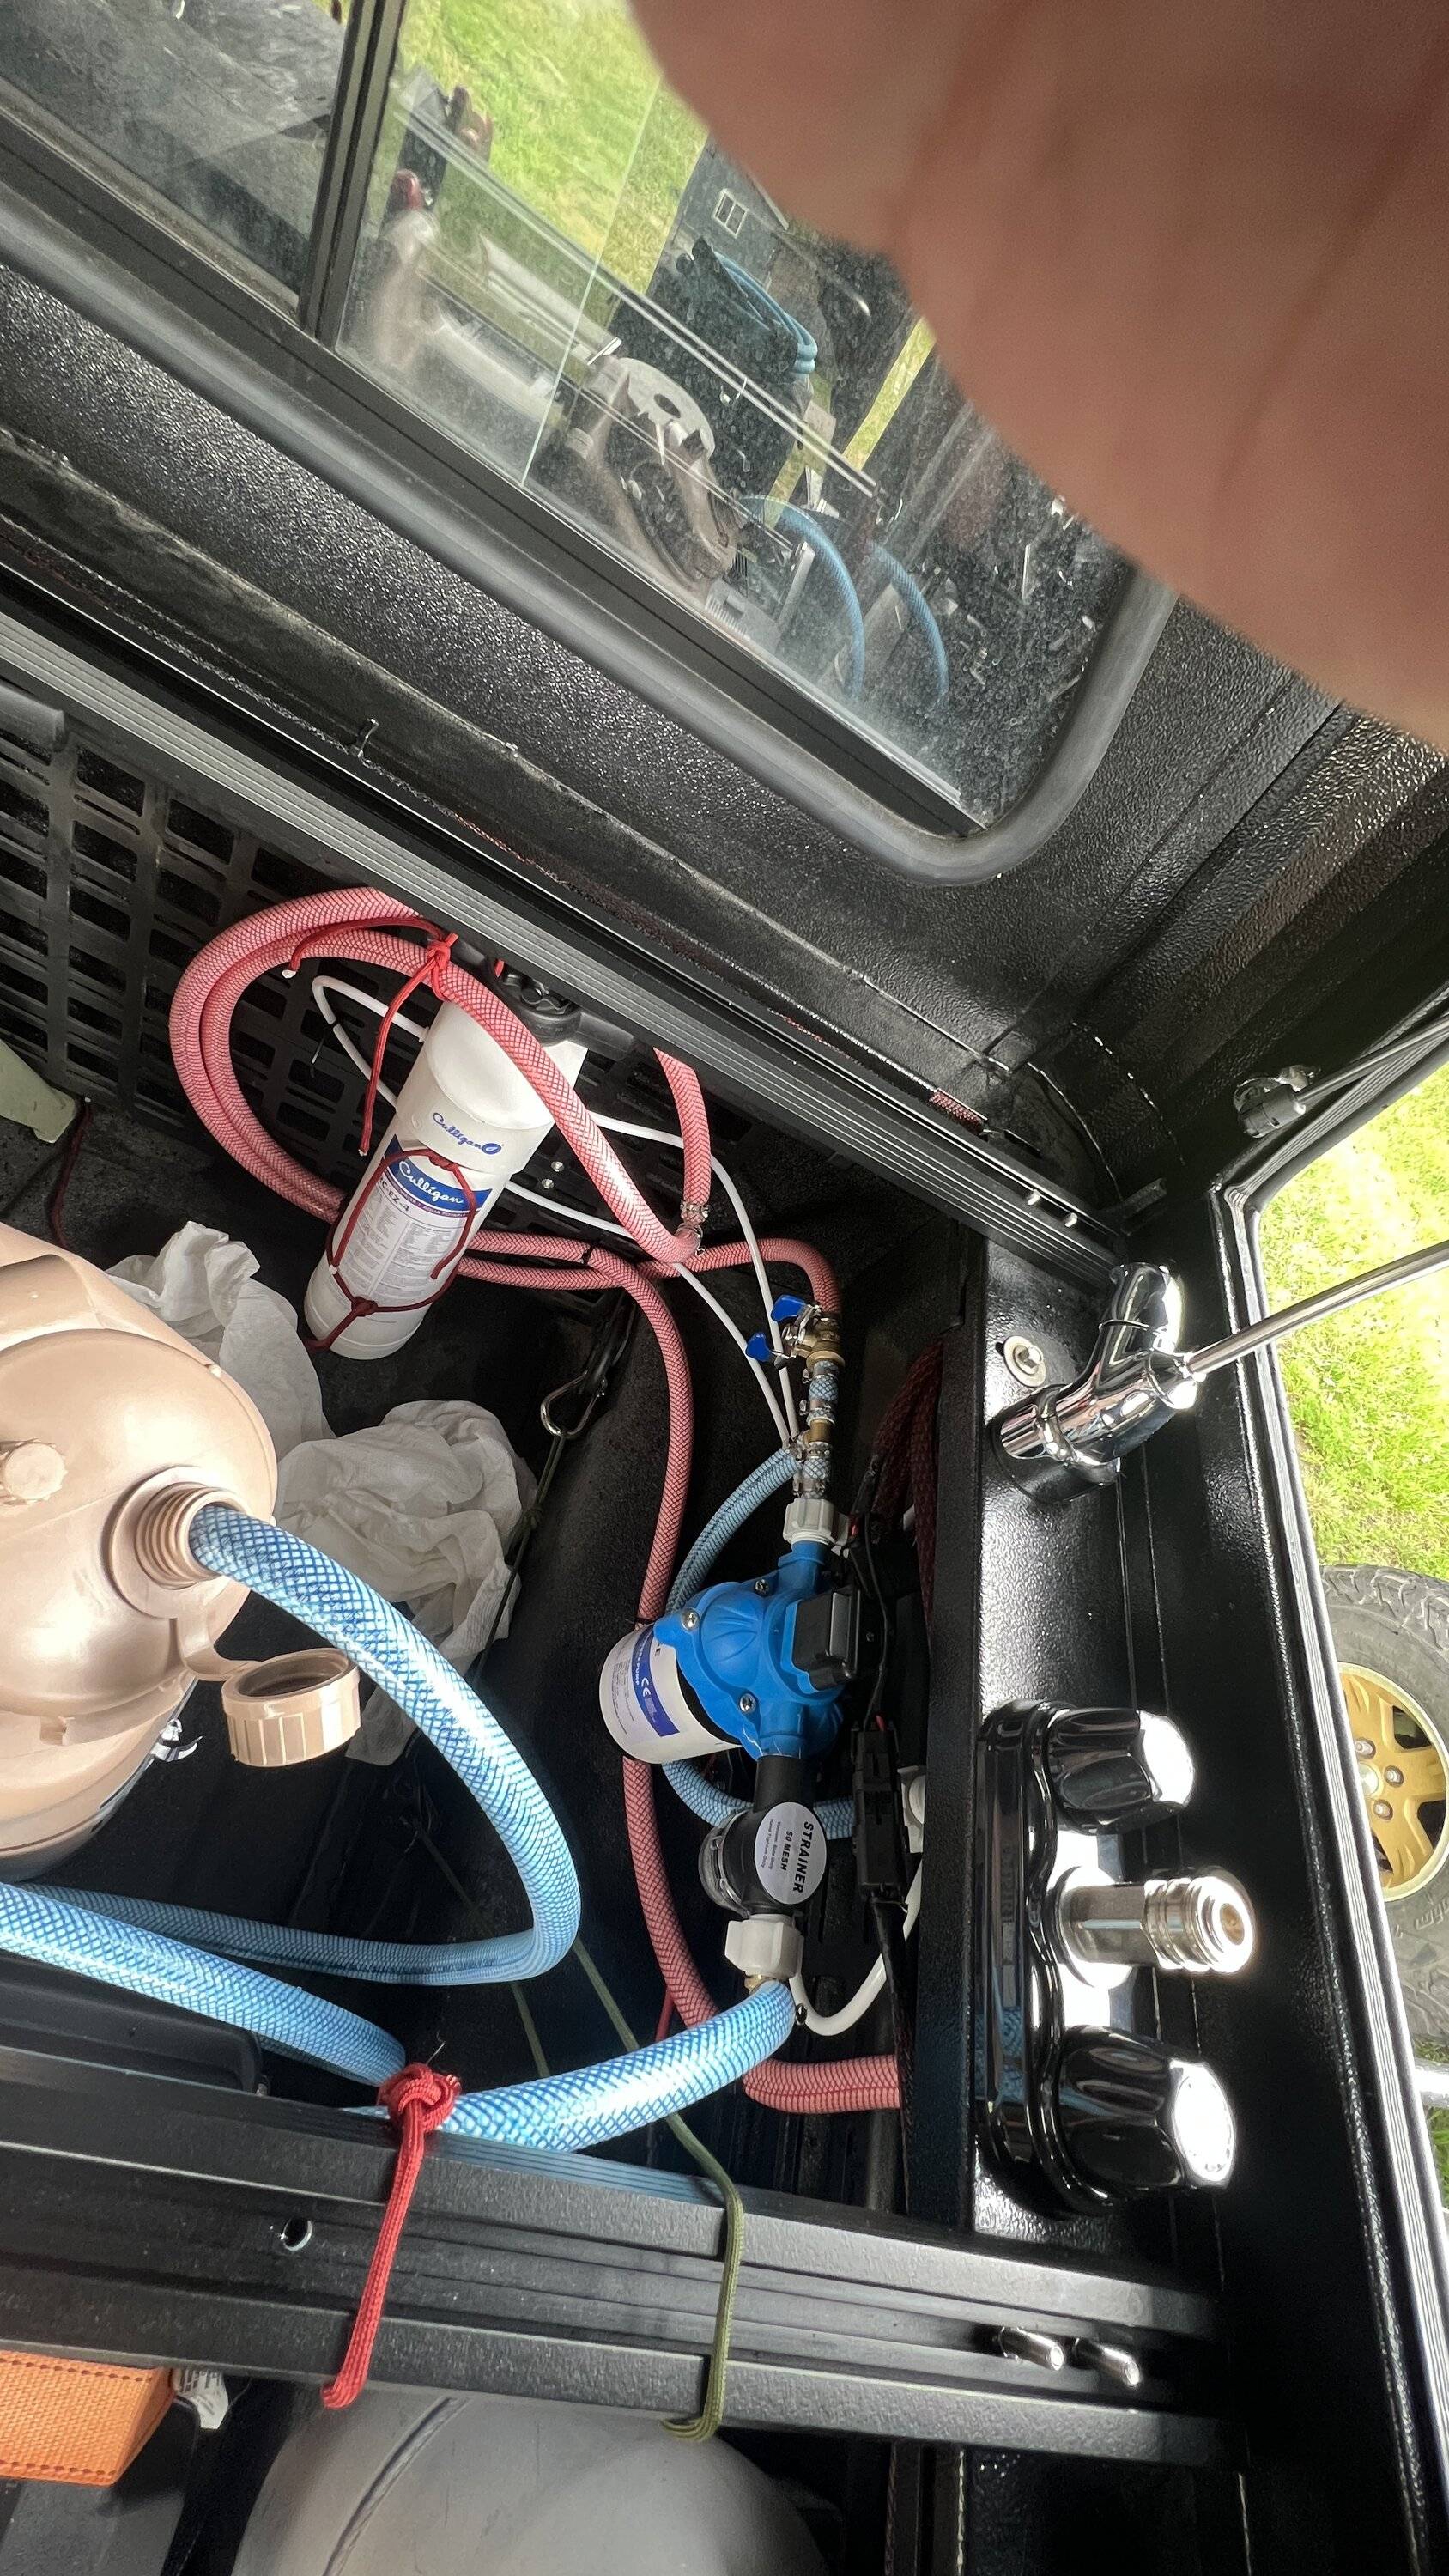
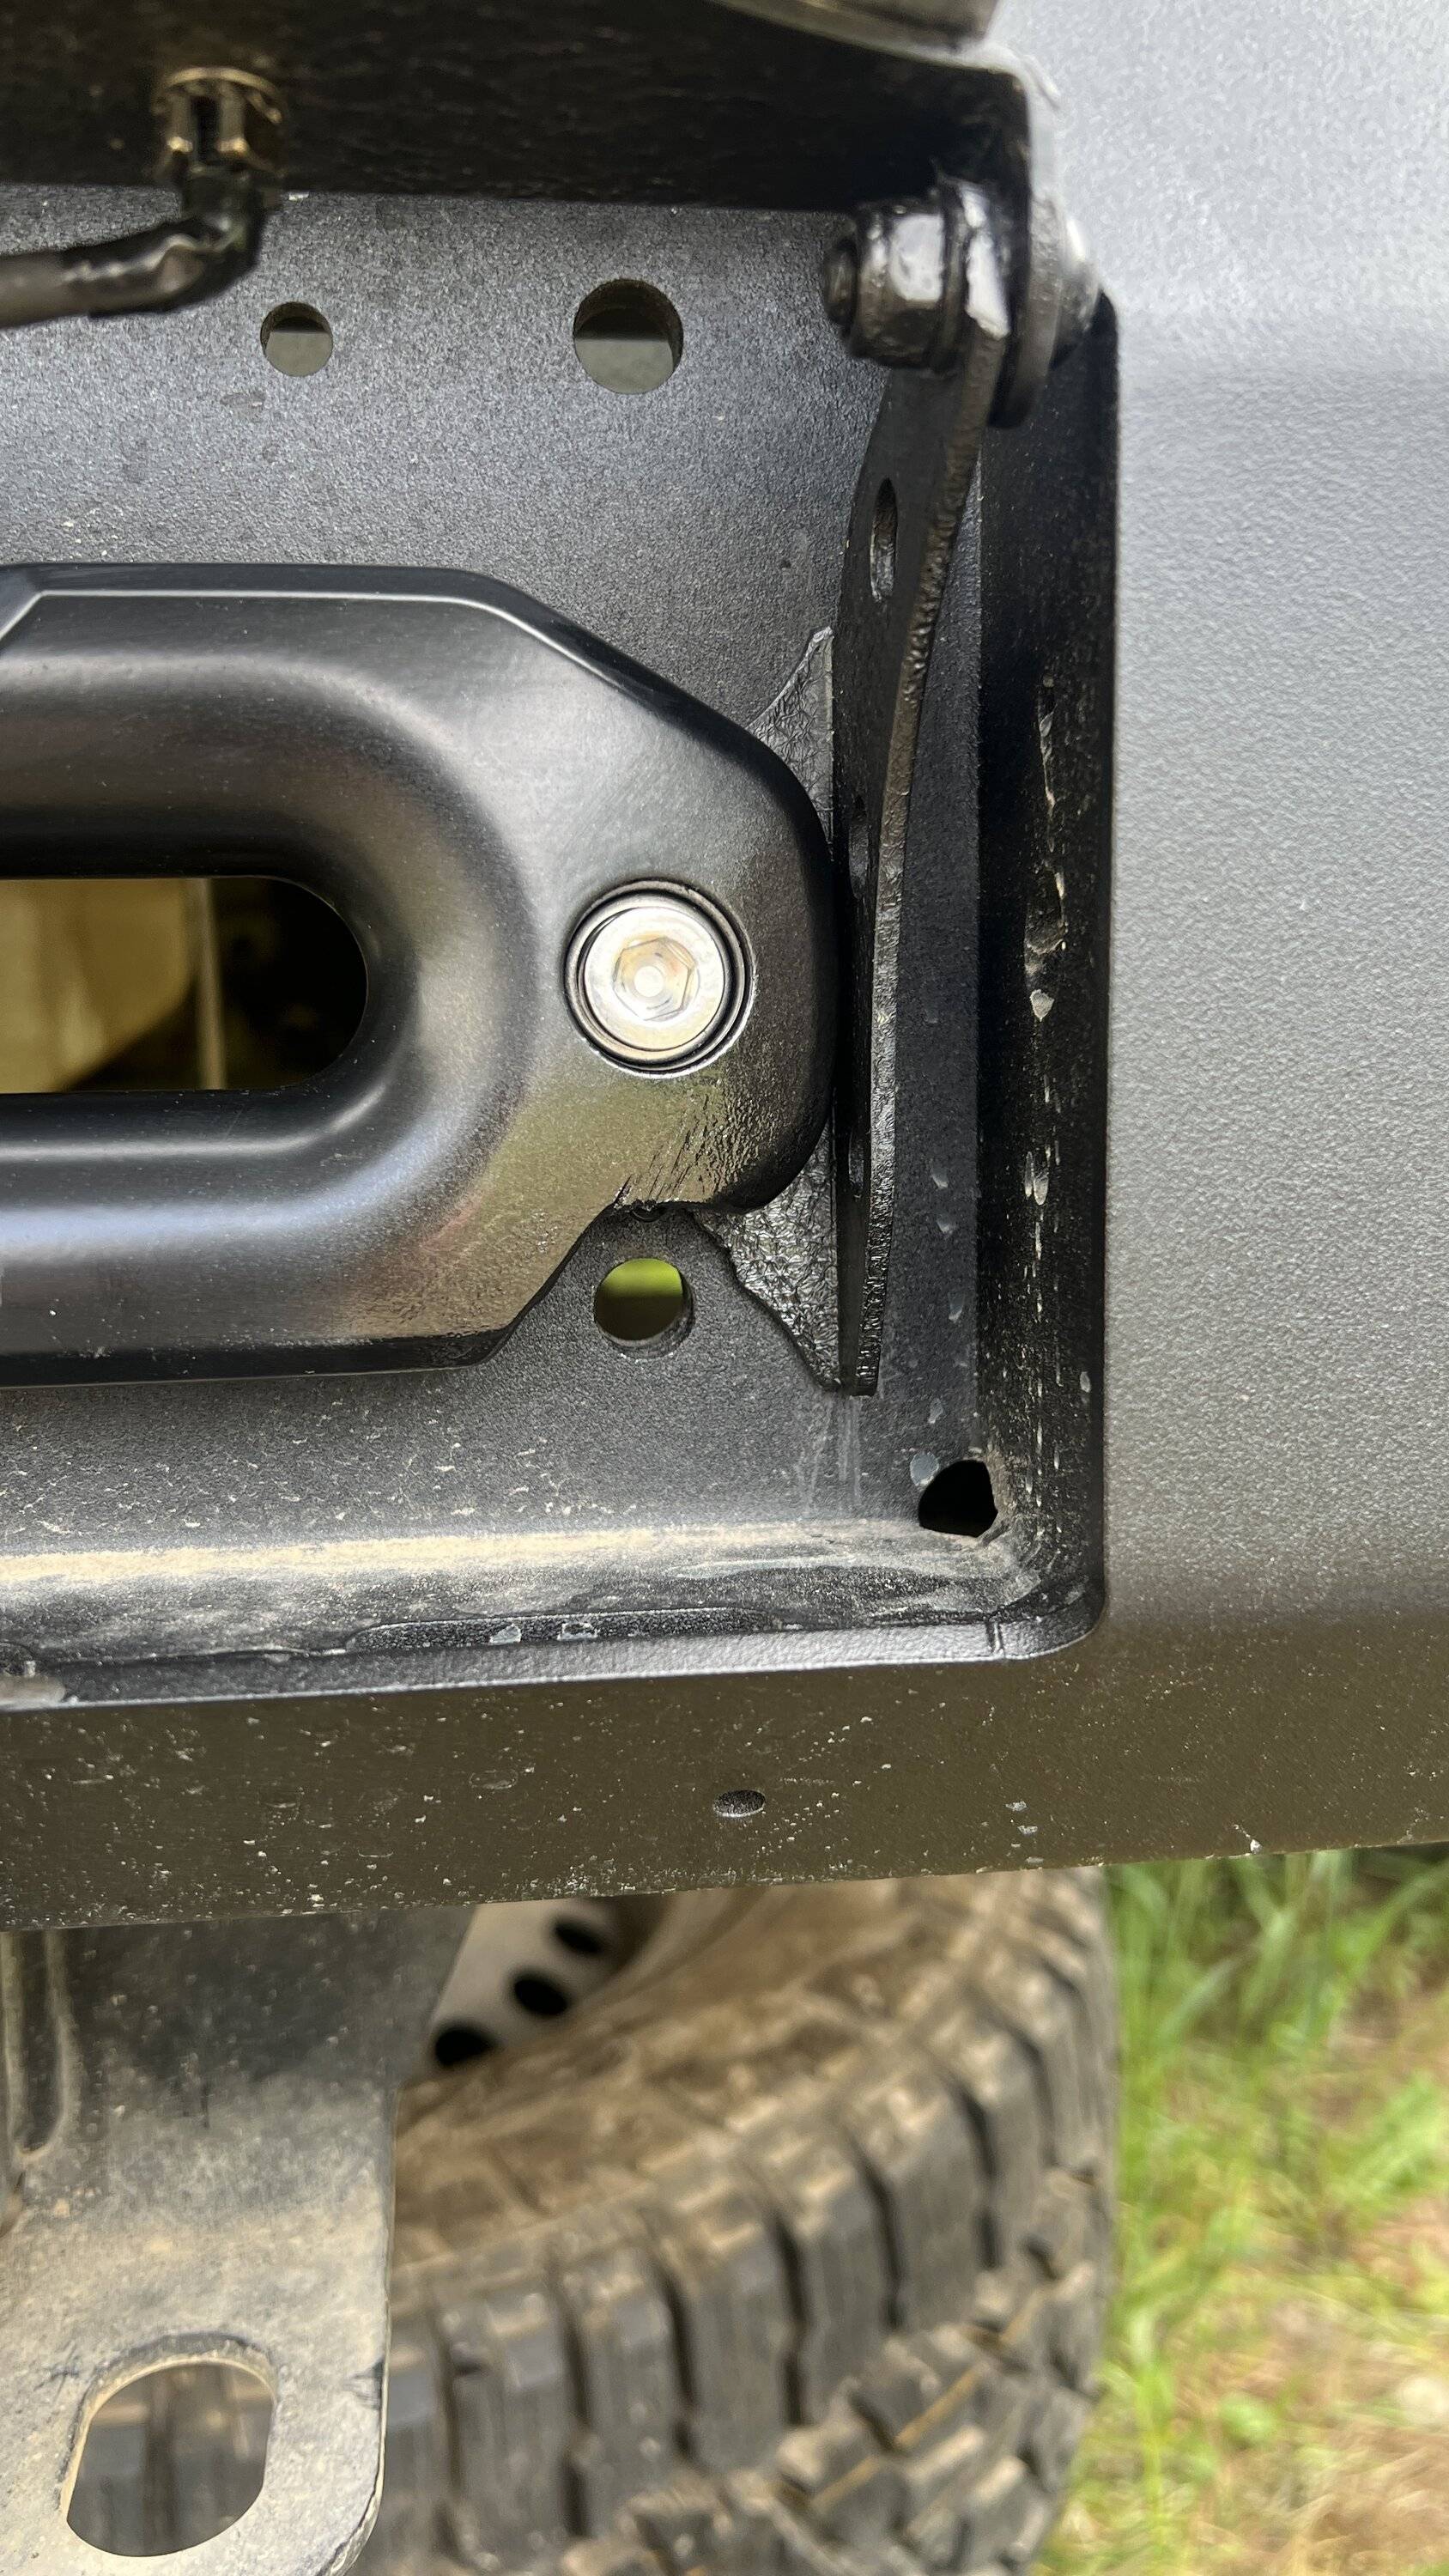
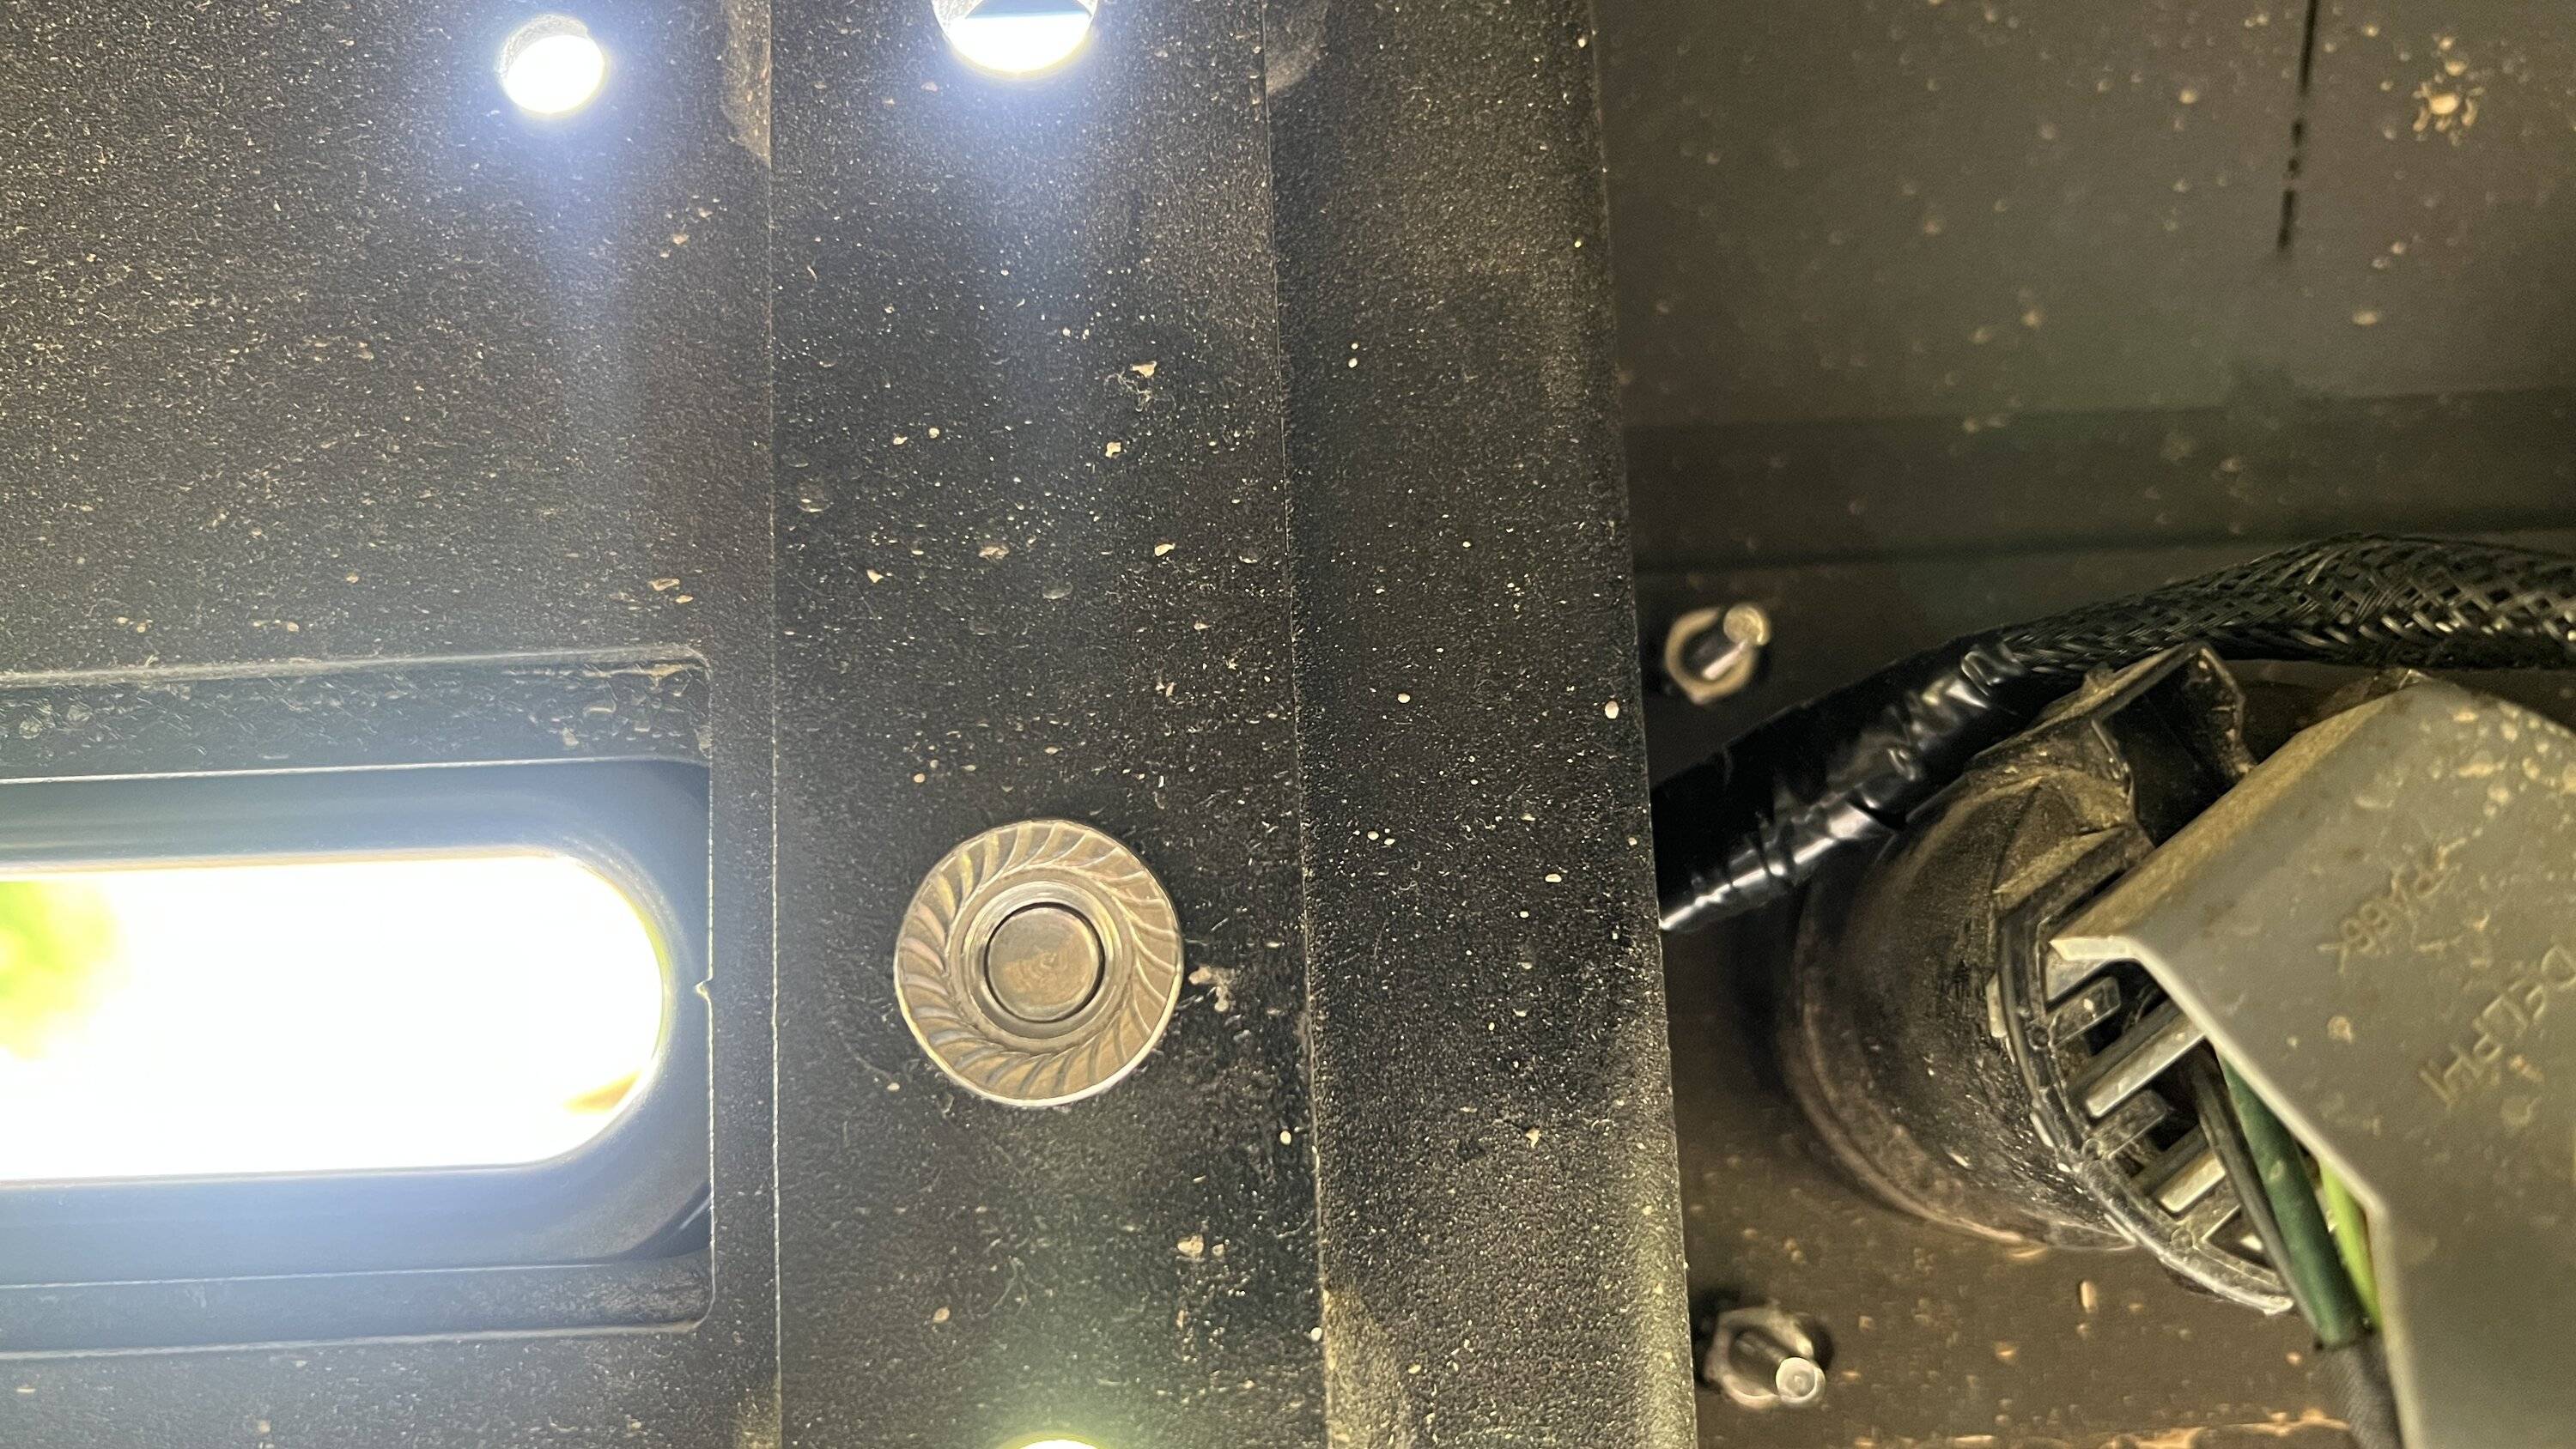
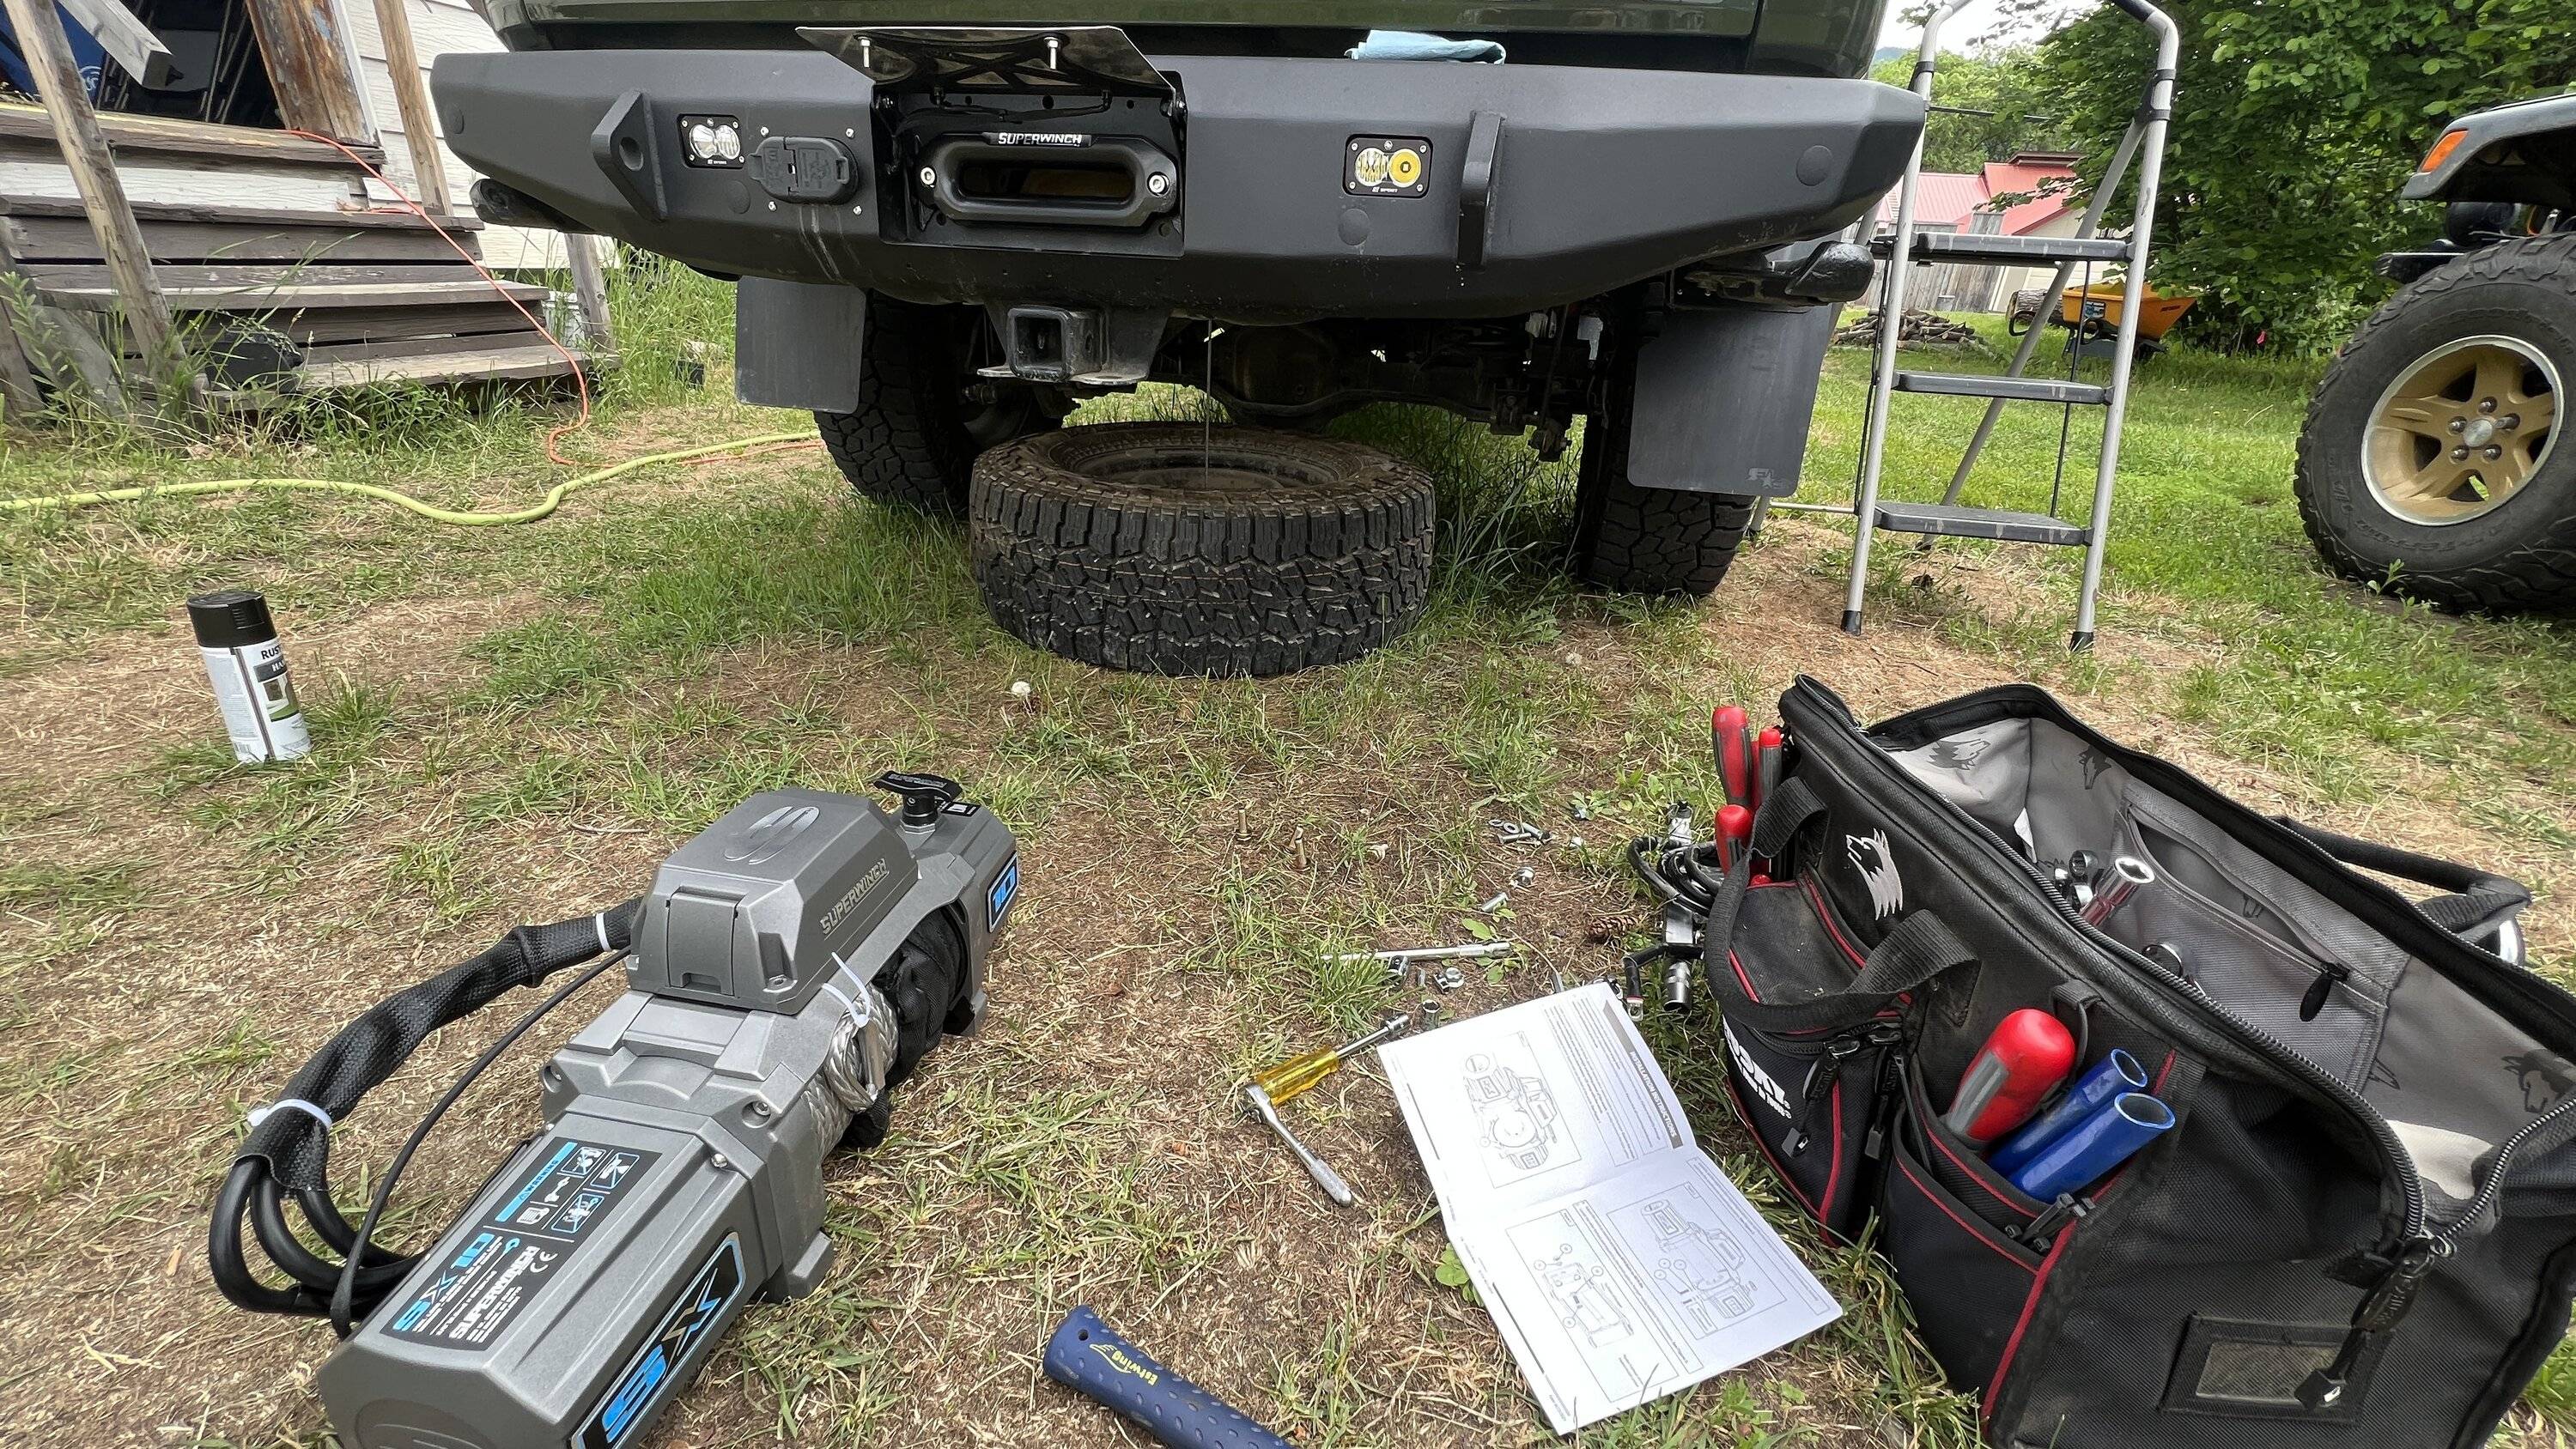
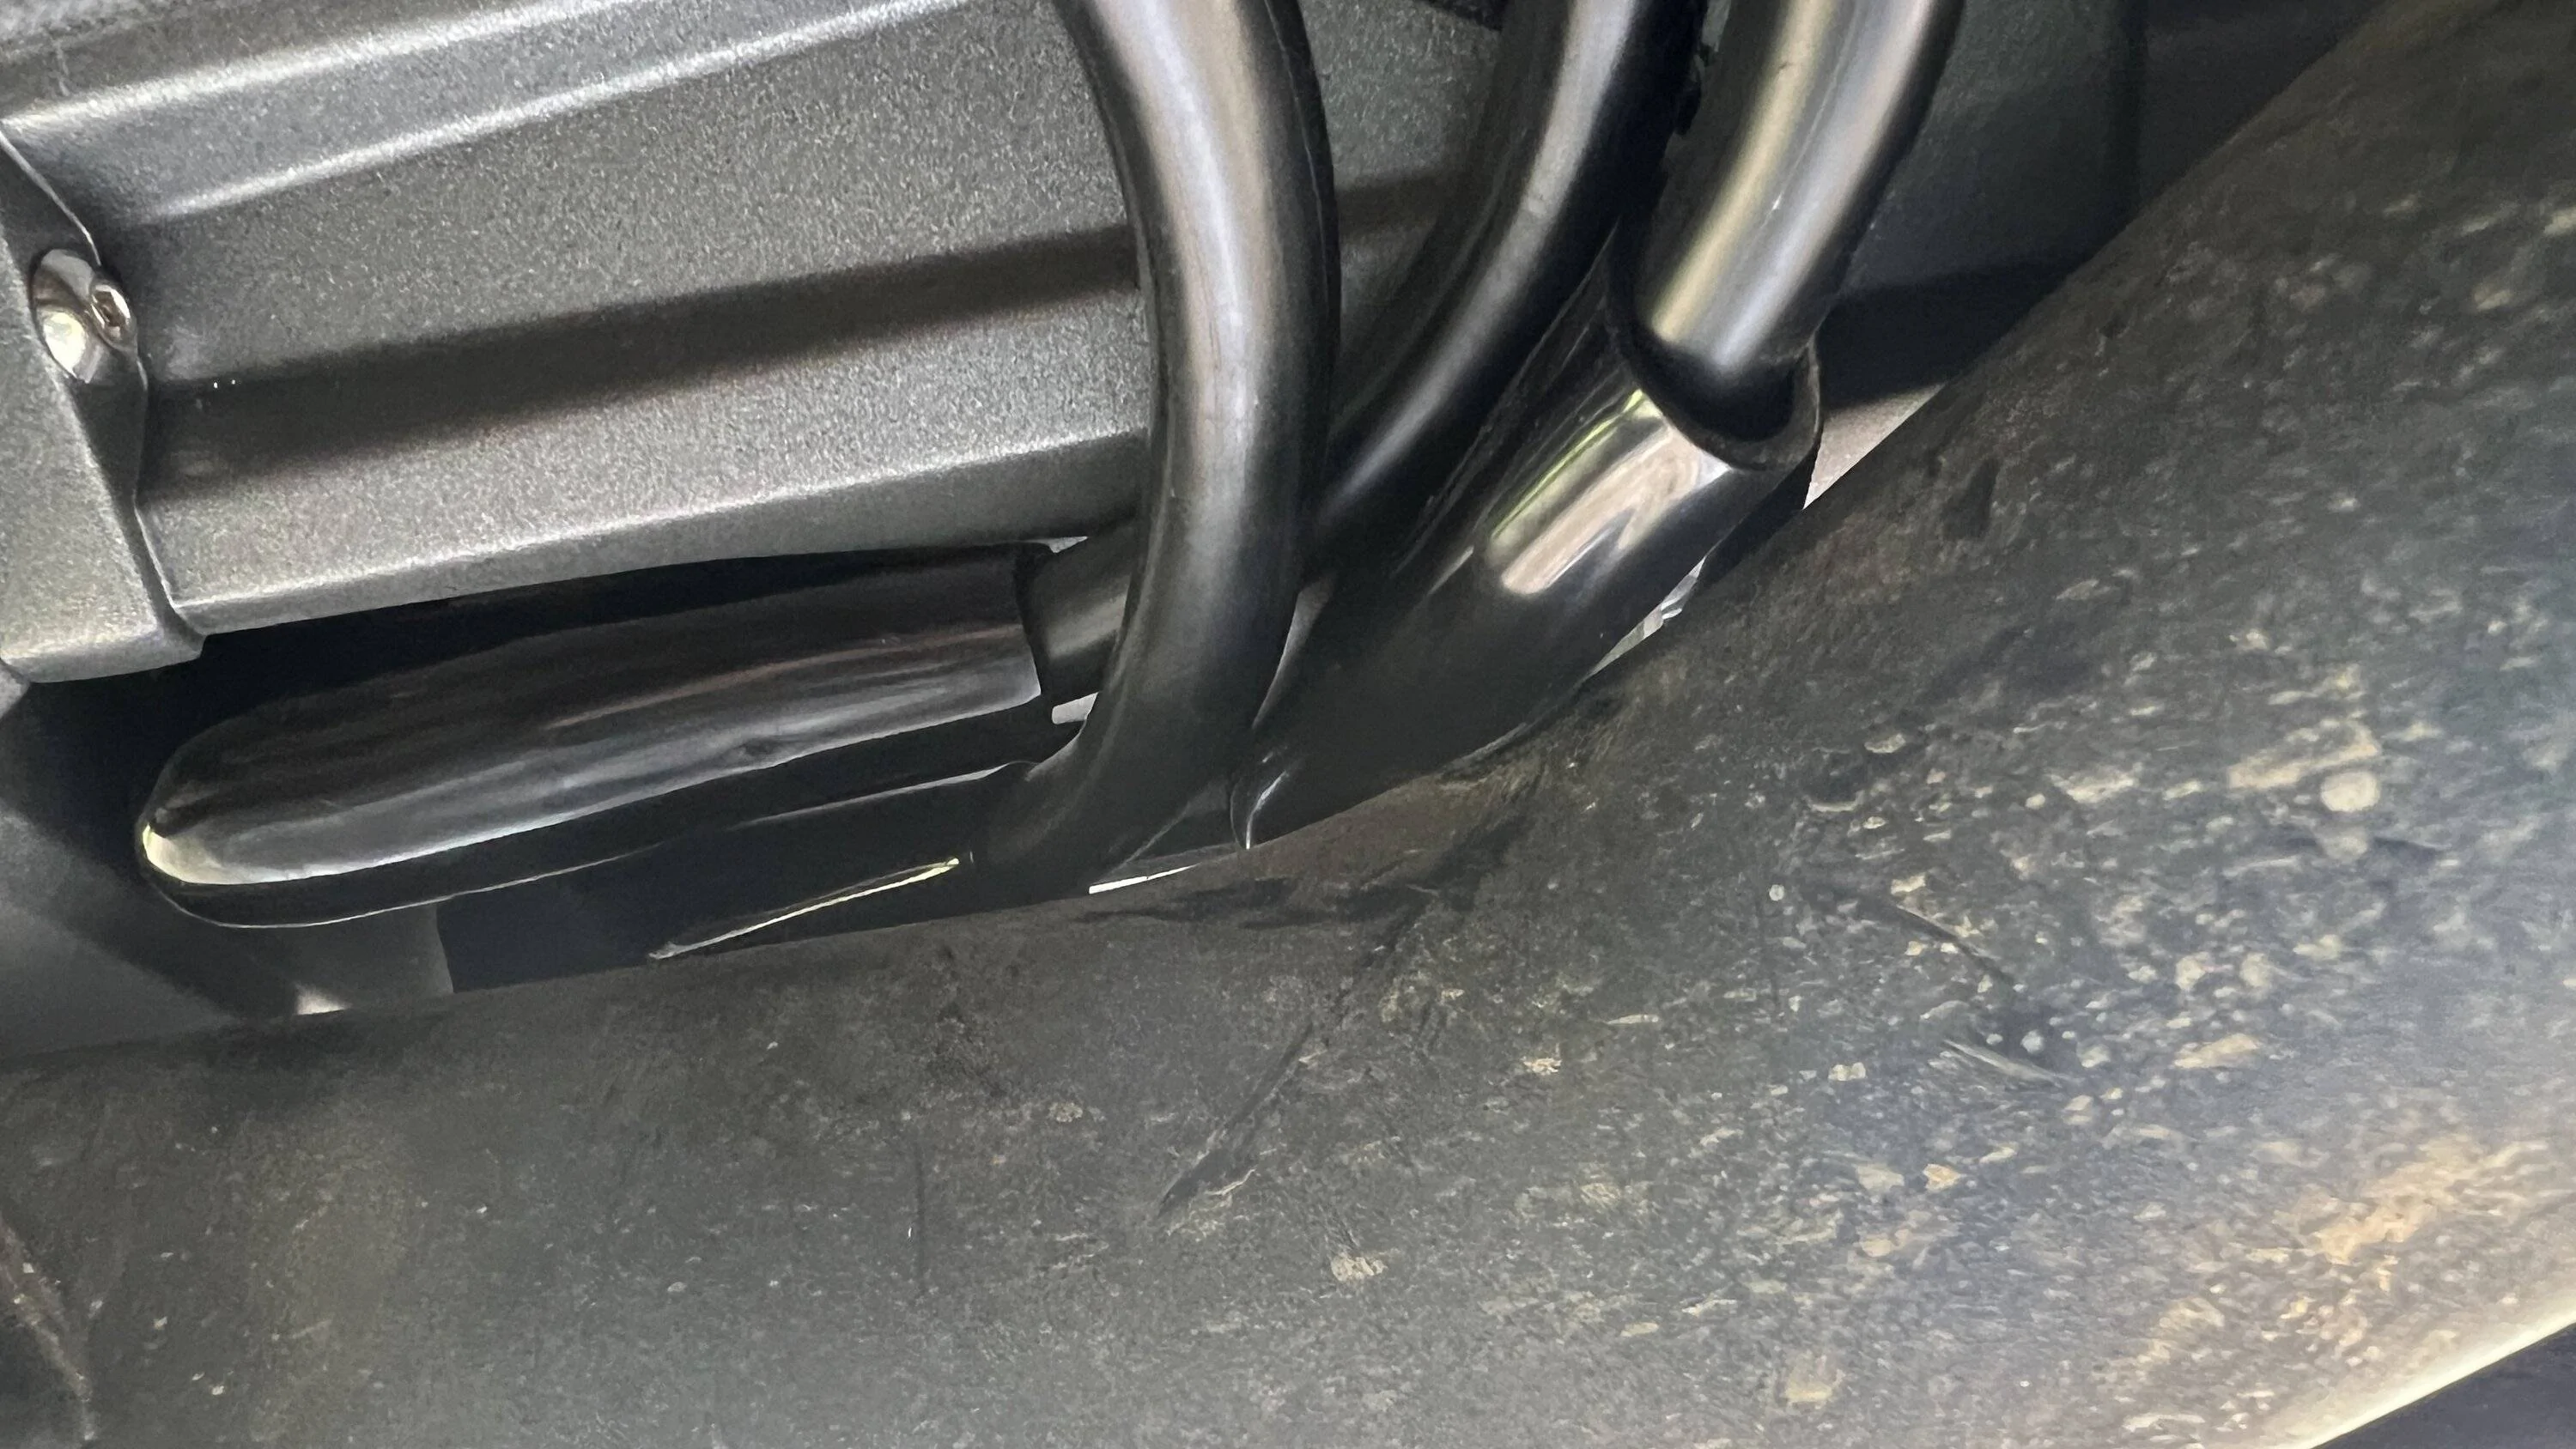
Sponsored
OP
OP
chorky

chorky

Well-Known Member
First Name
Chad
Joined
Feb 26, 2022
Threads
175
Messages
3,466
Reaction score
3,801
Location
Montana
Website
www.youtube.com
Vehicle(s)
'22JTR, '06 LJ, '06 TJ GE
Build Thread
Link
Occupation
GIS Specialist
Haha, sounds like you have your priorities in the right place, Jeep stuff and tractors first all the house stuff, perfect!….Jack
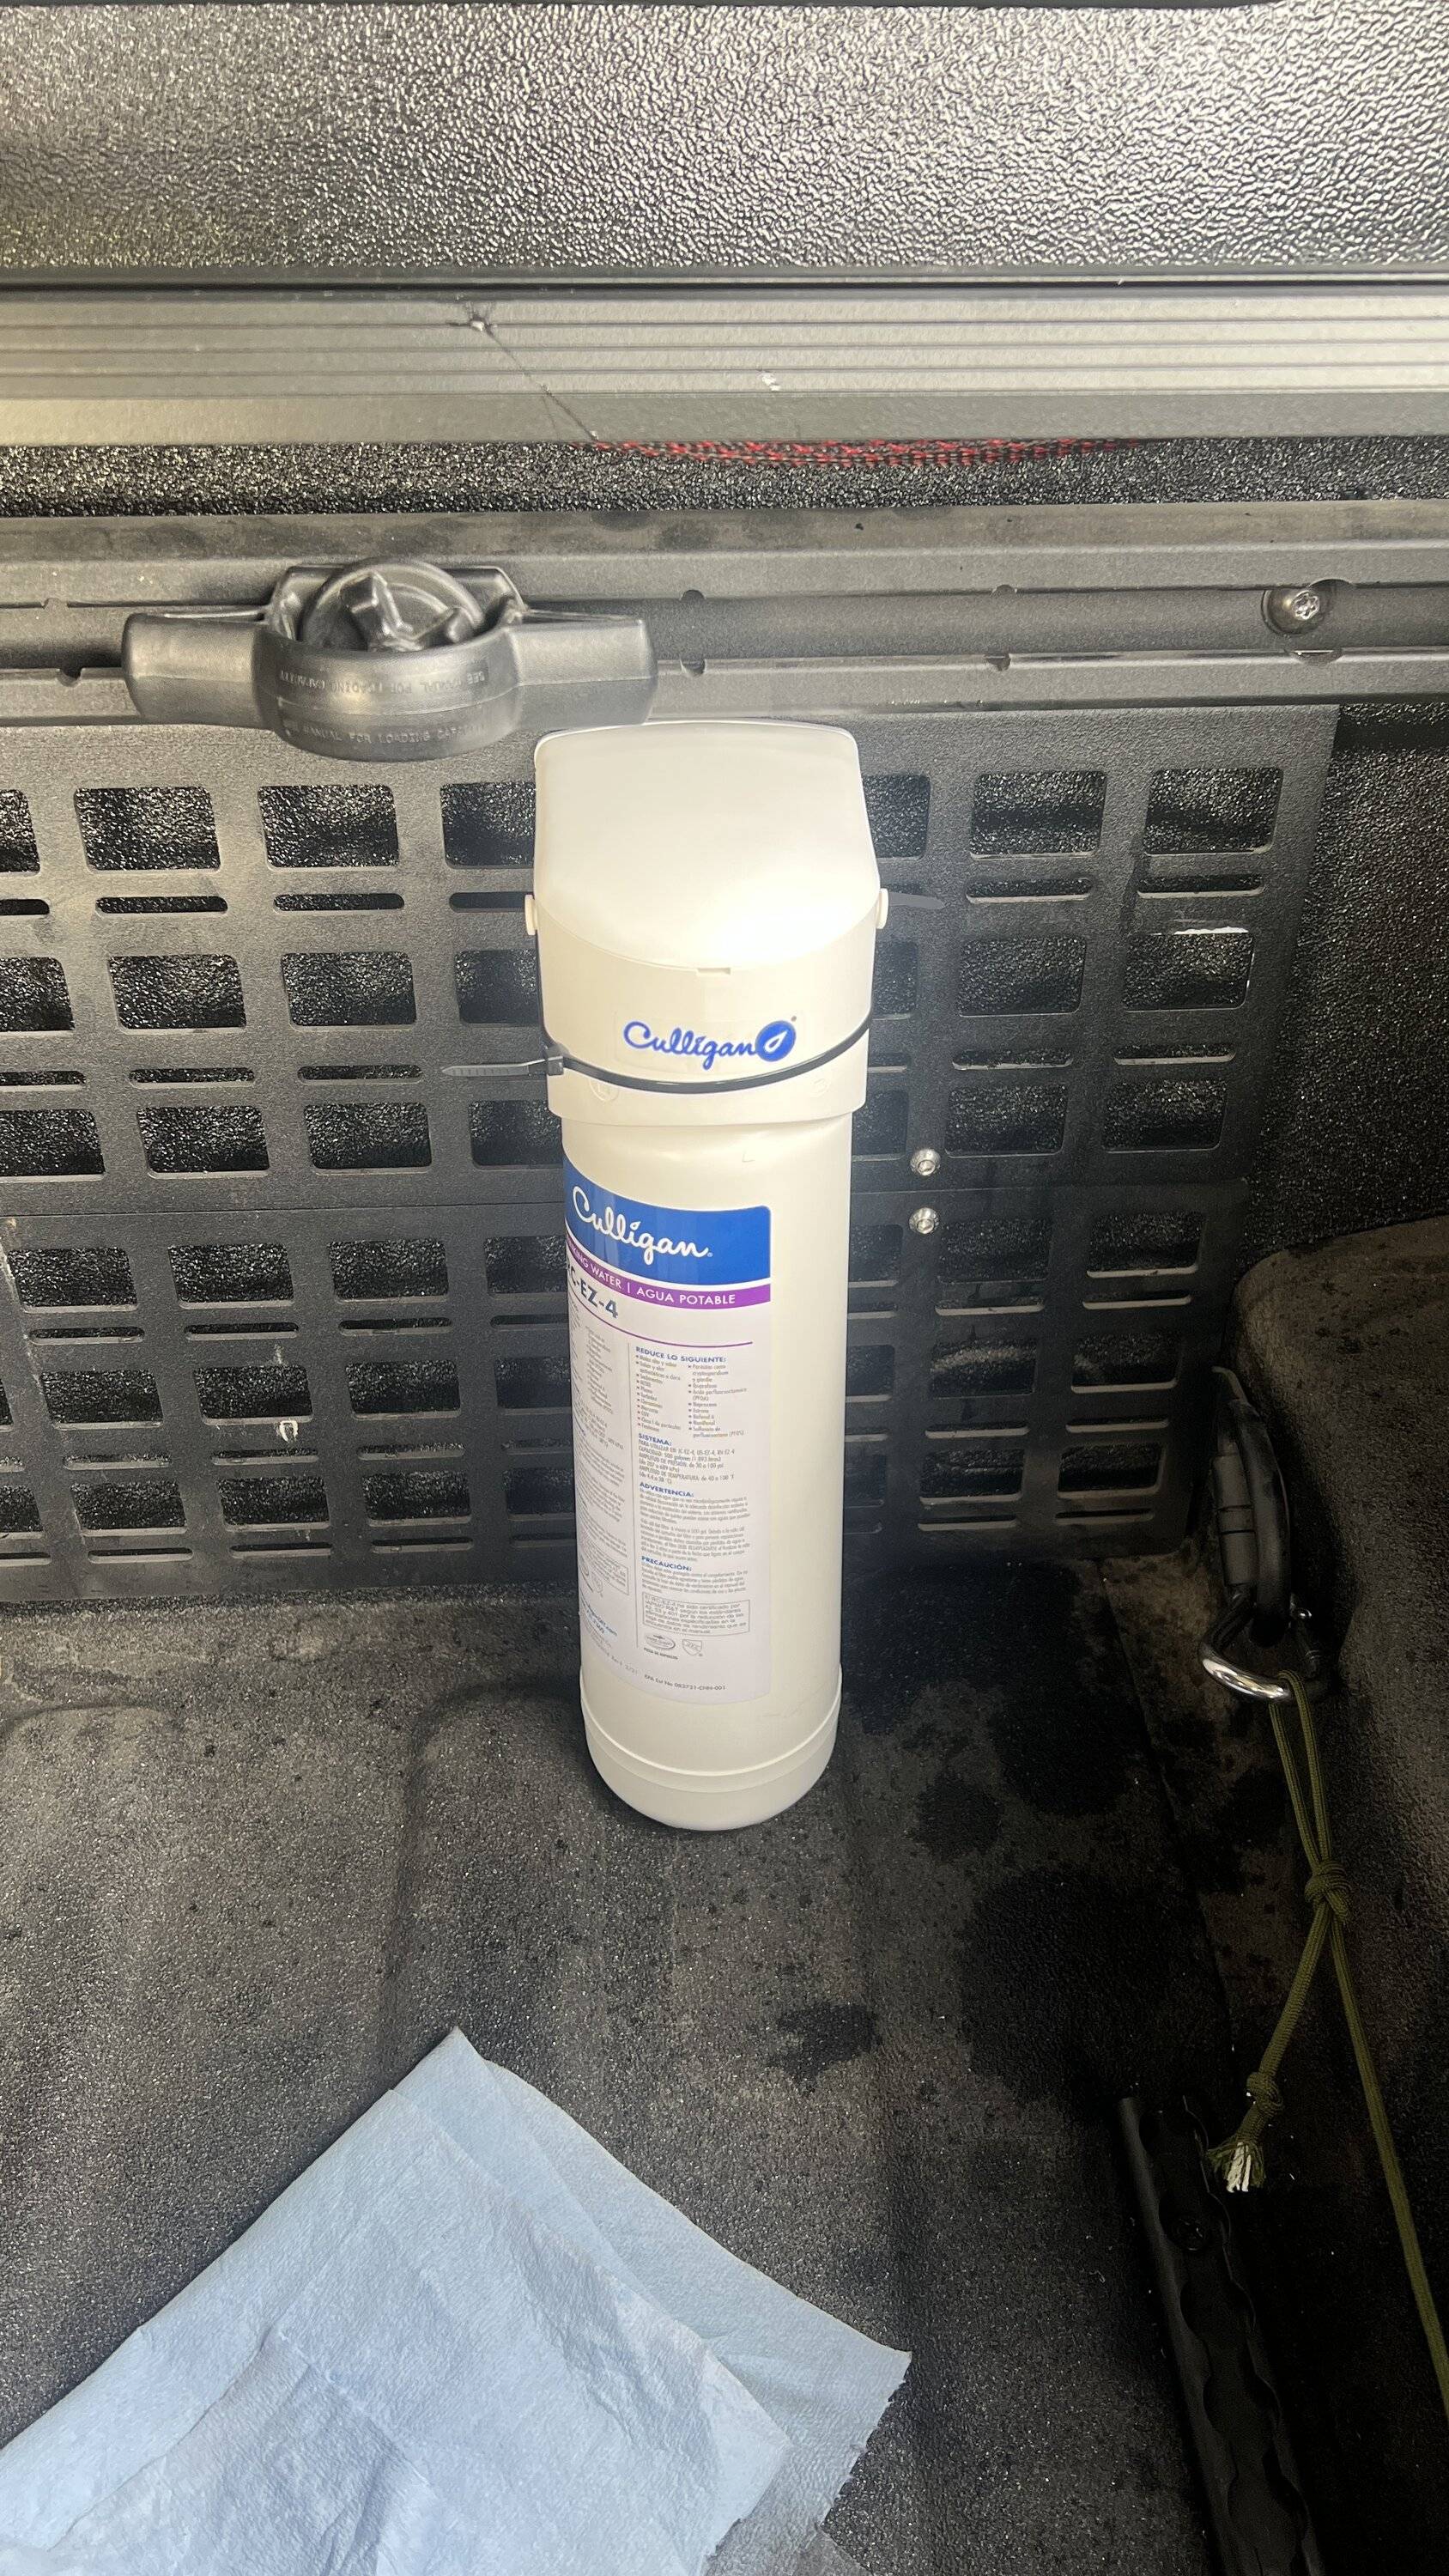
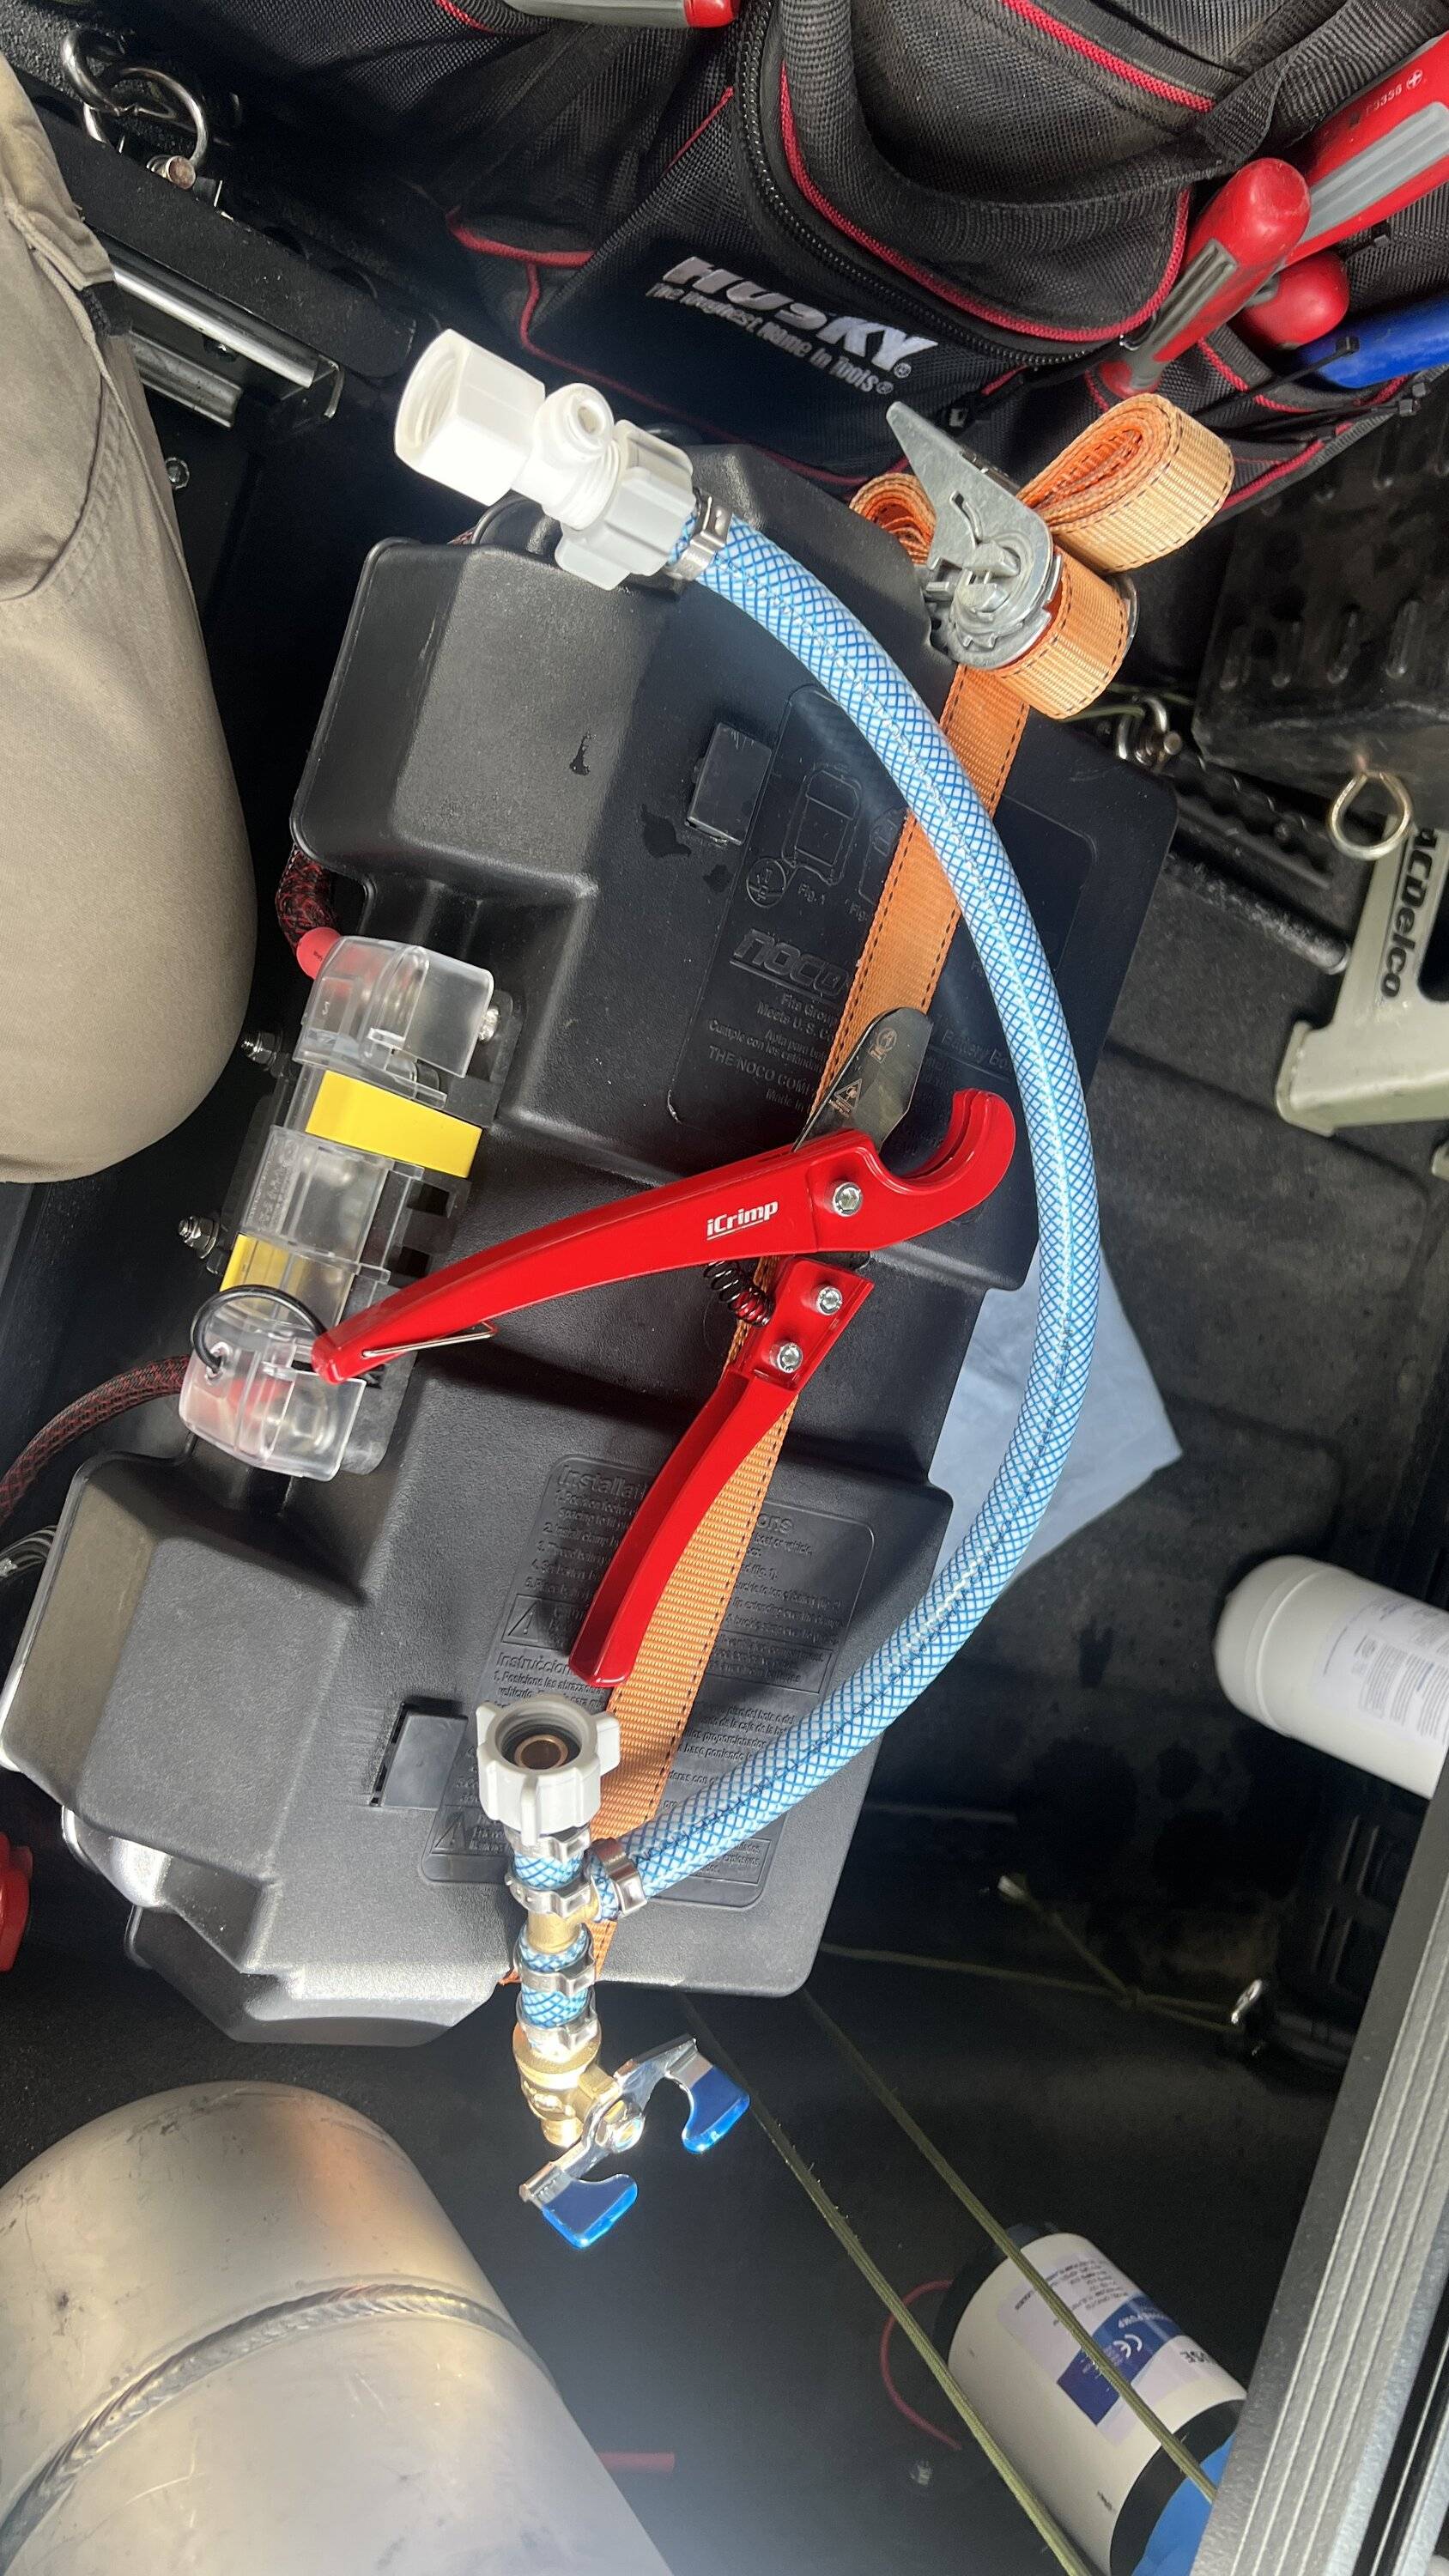
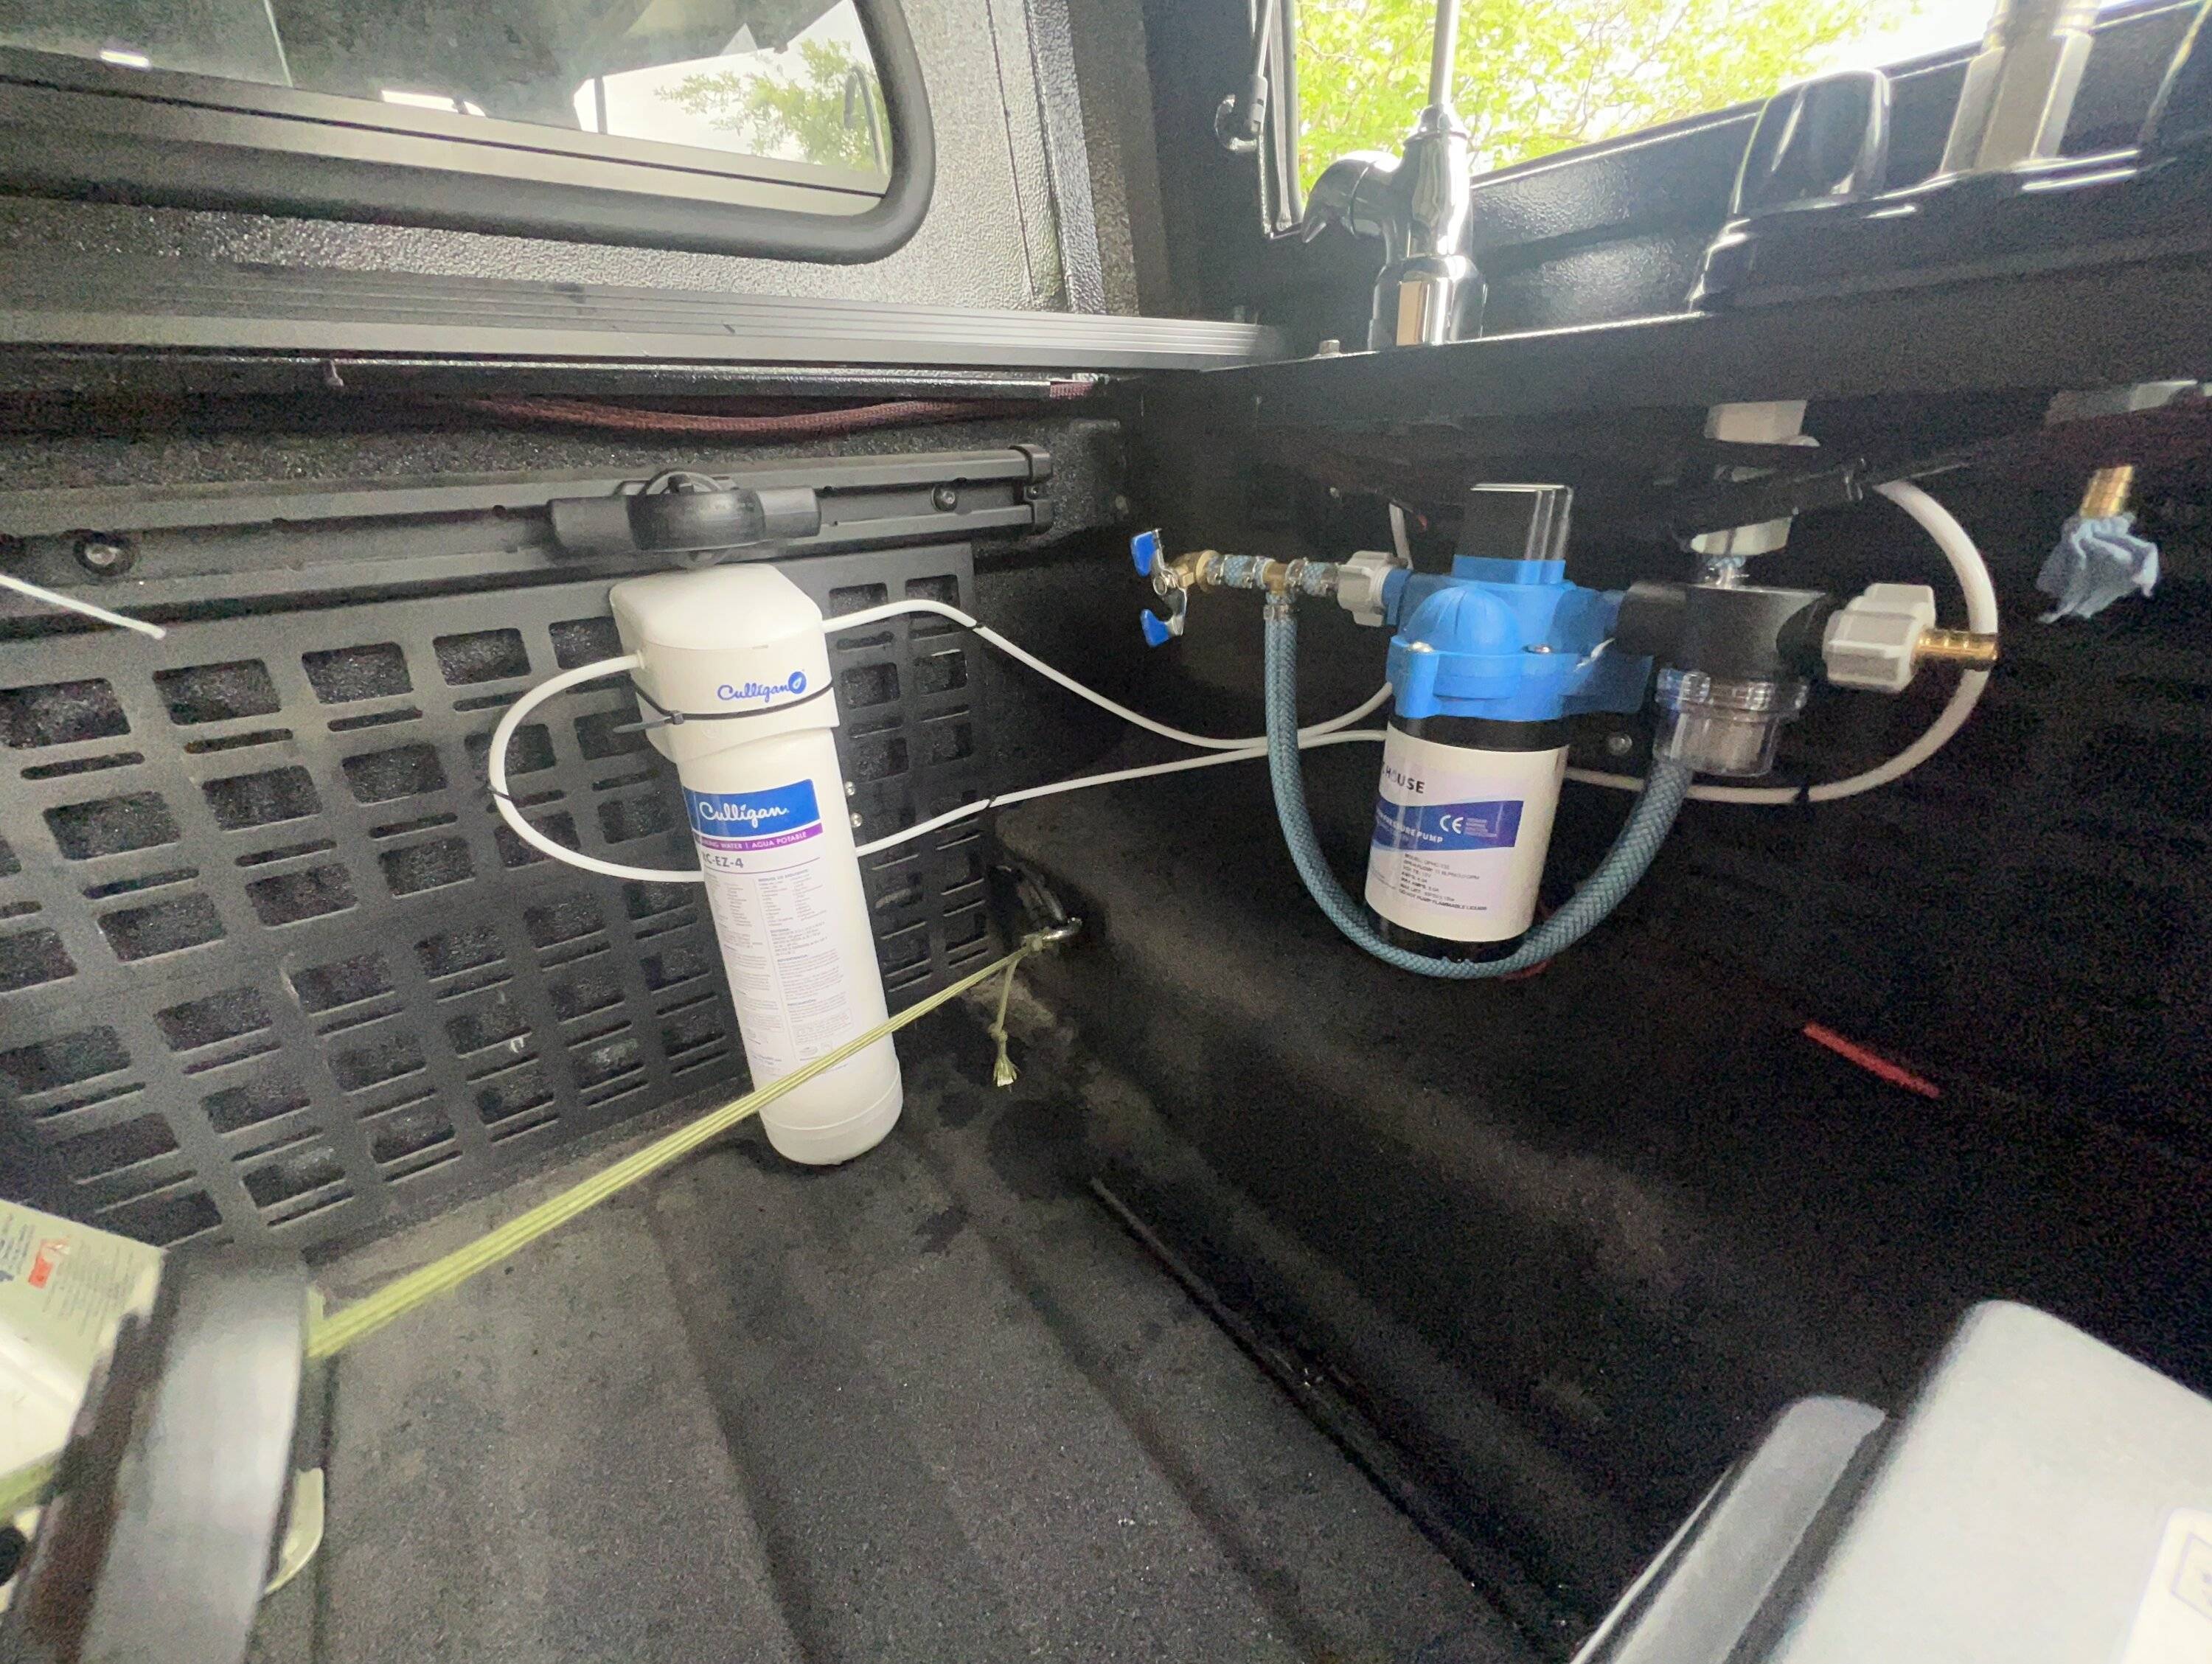
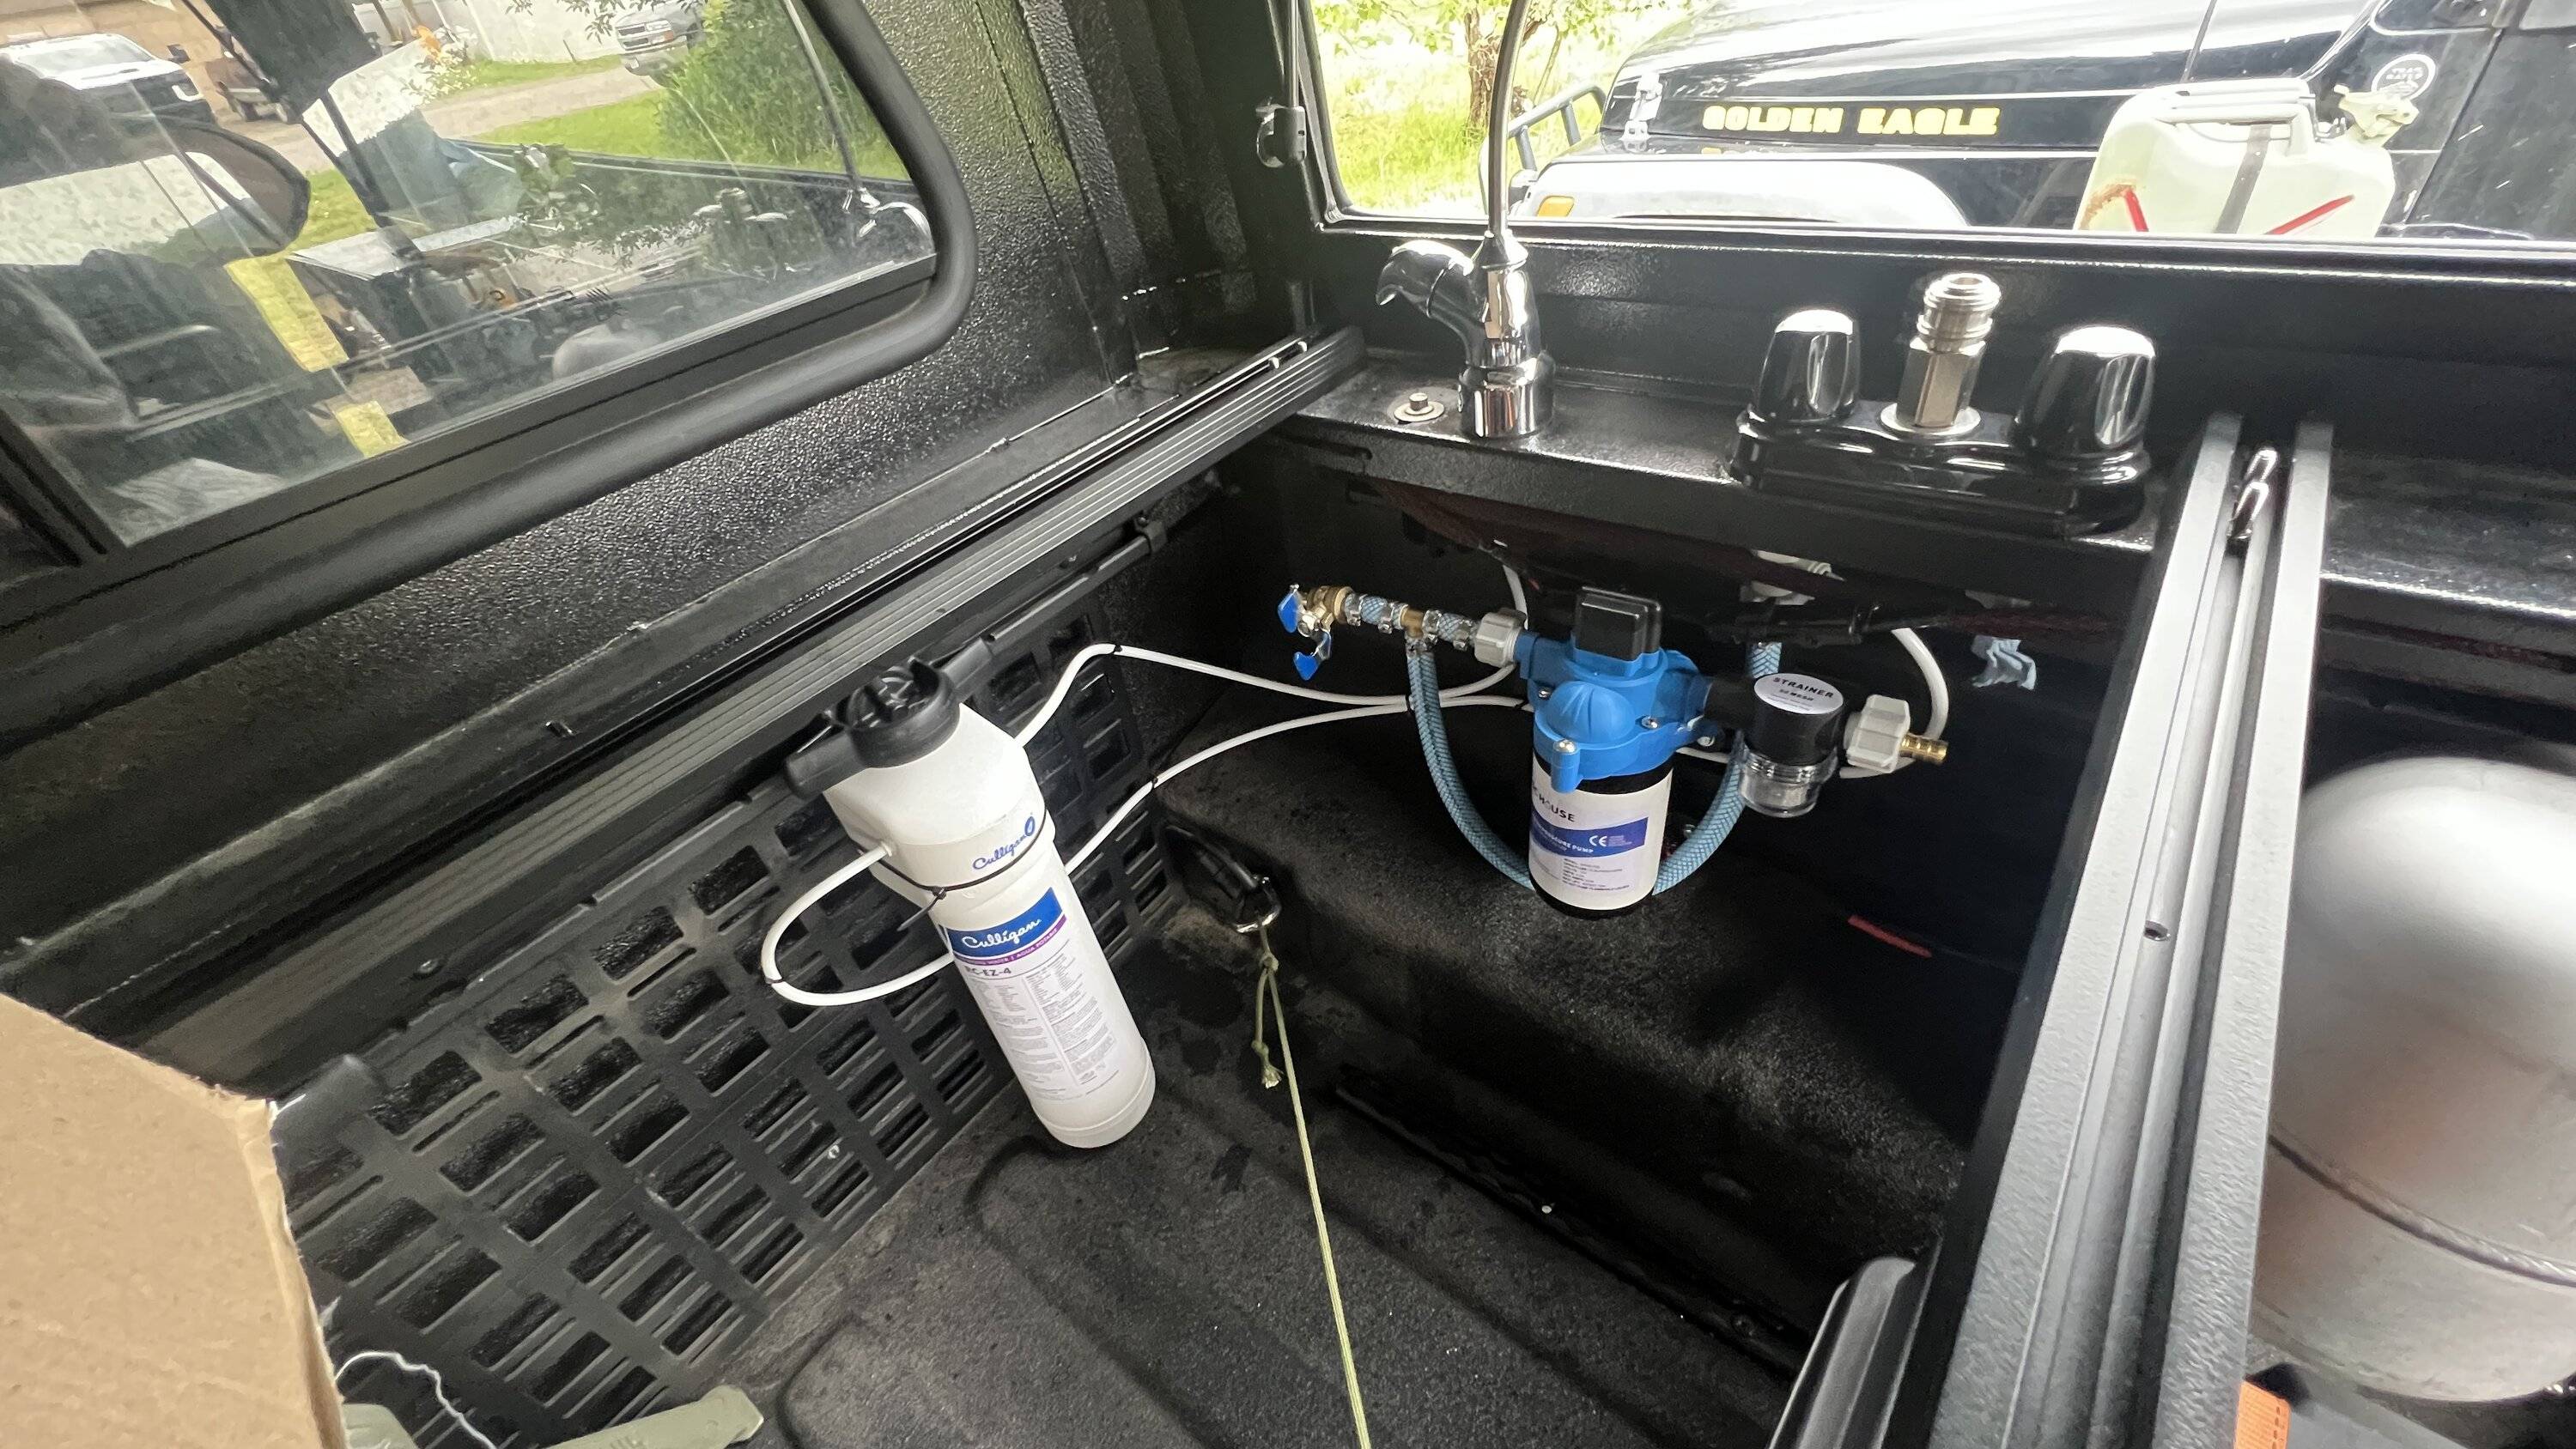
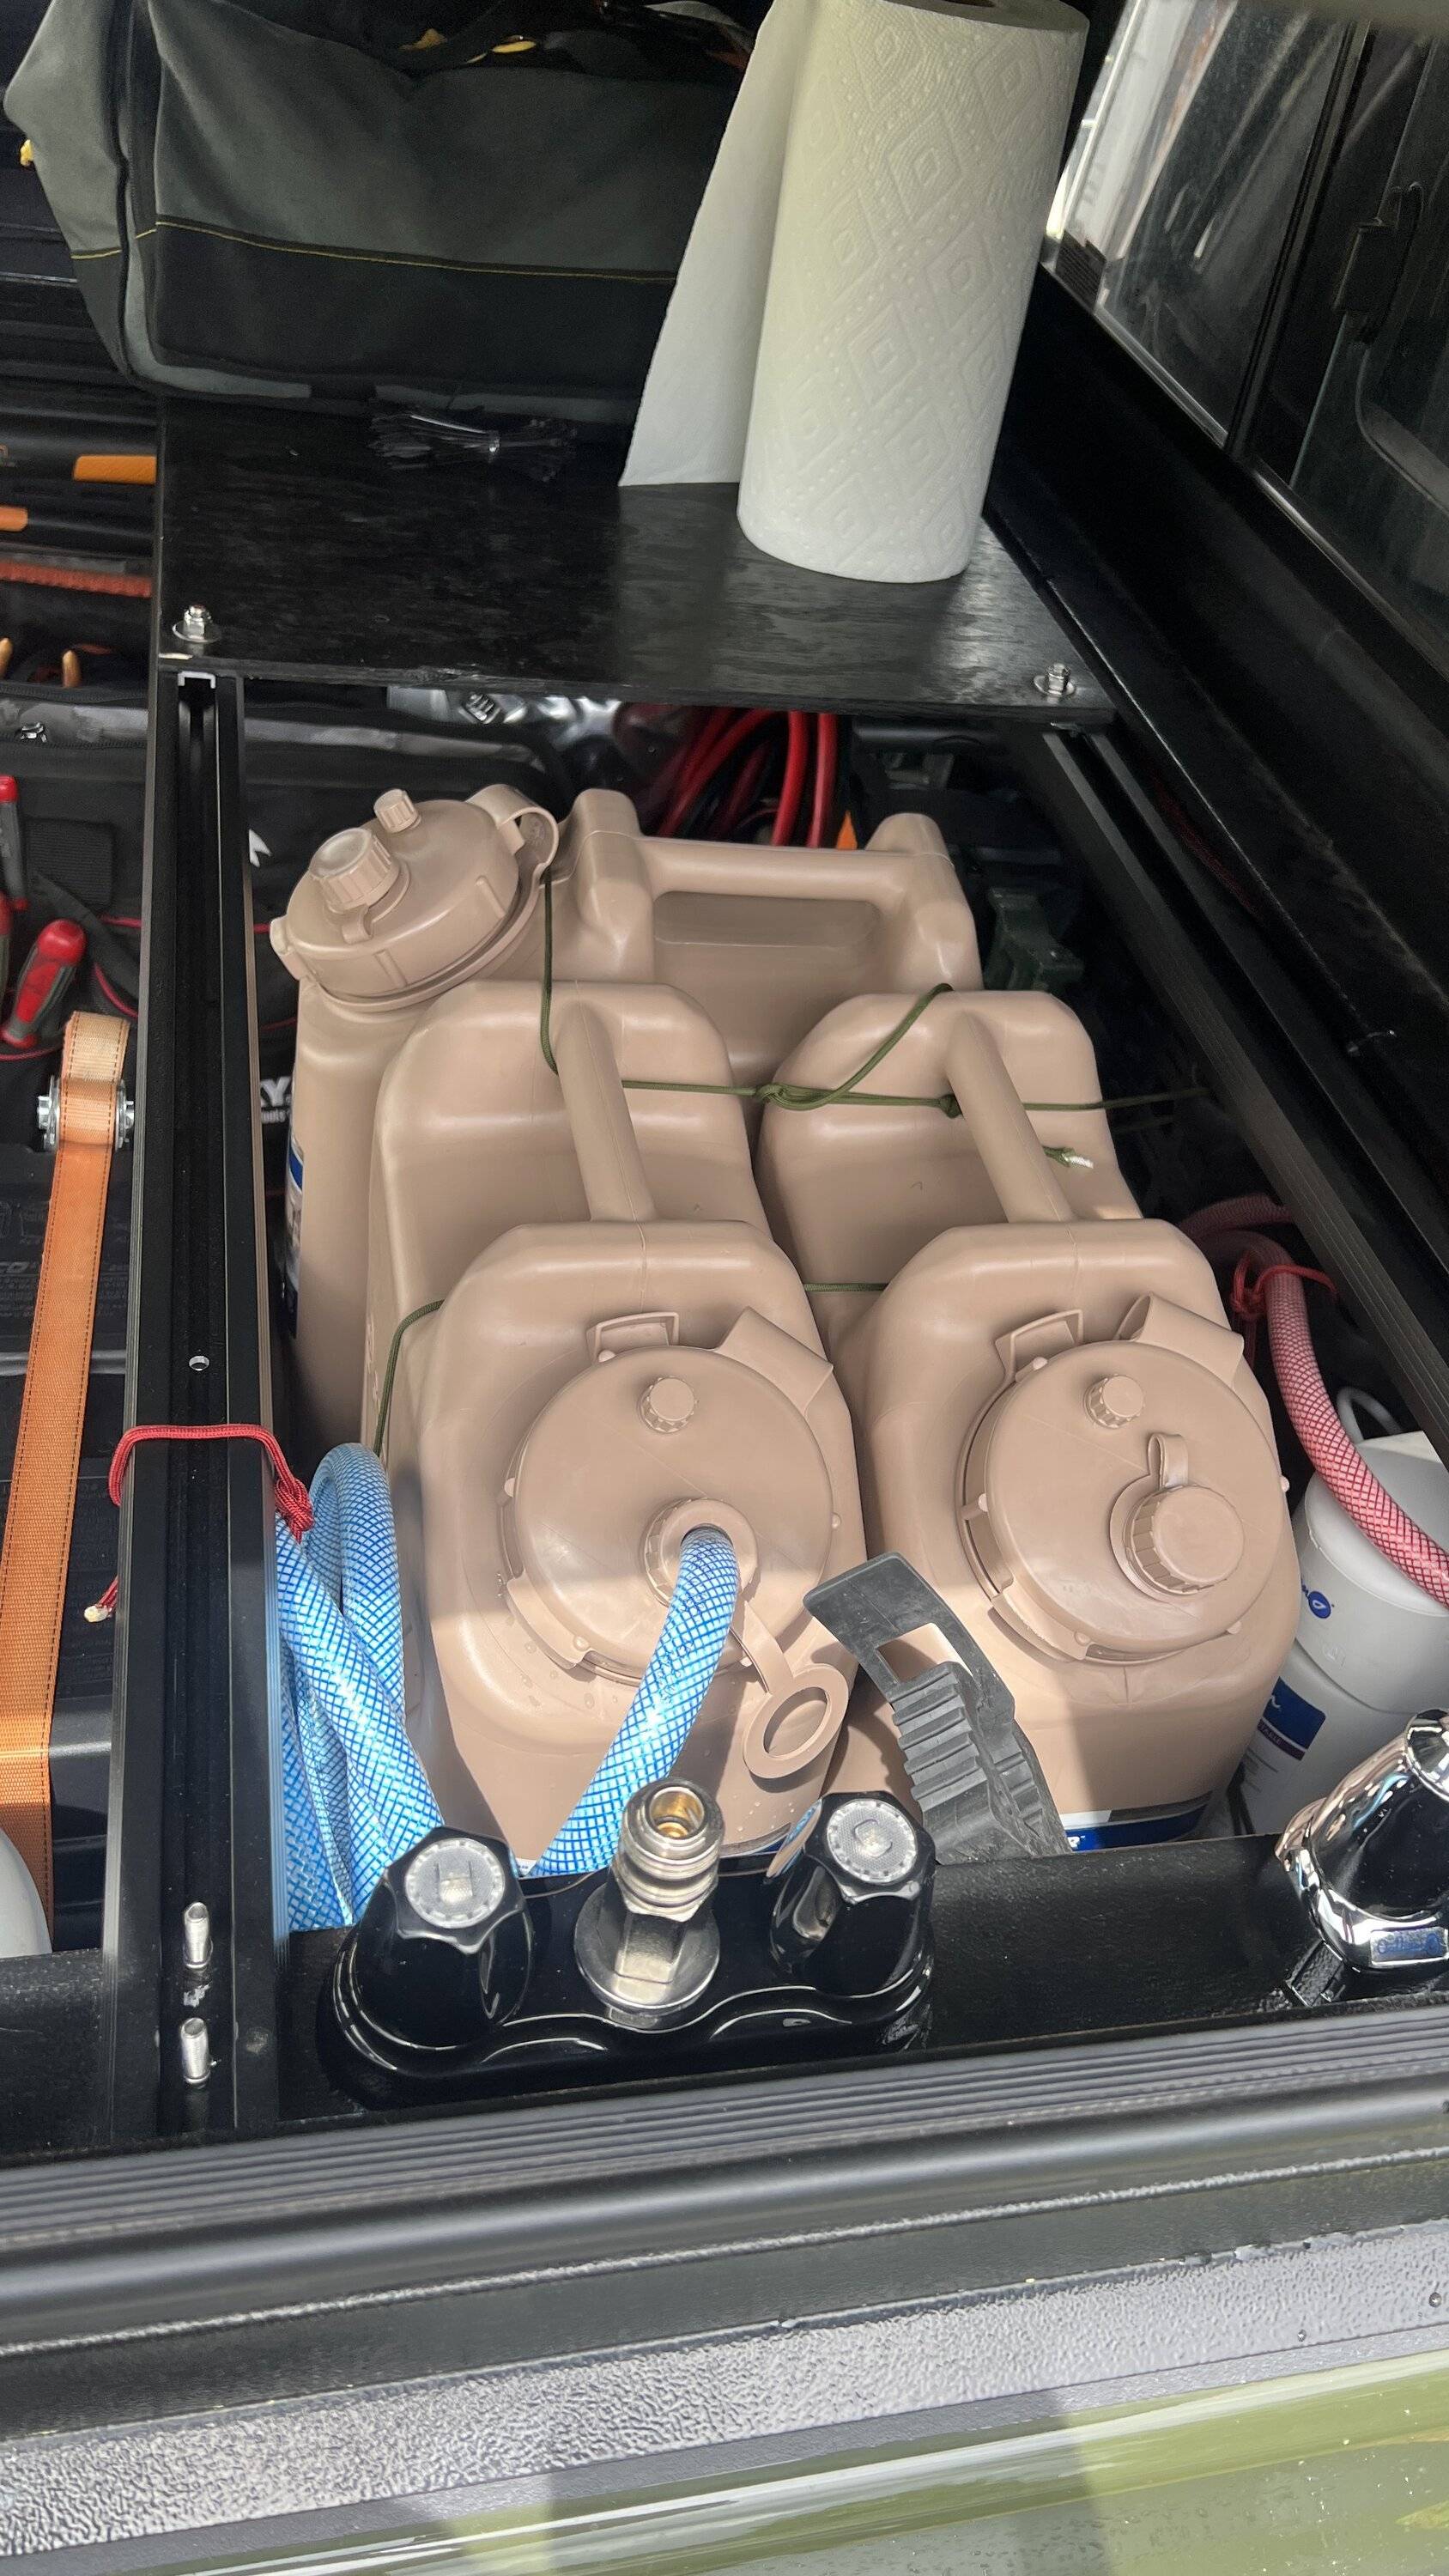
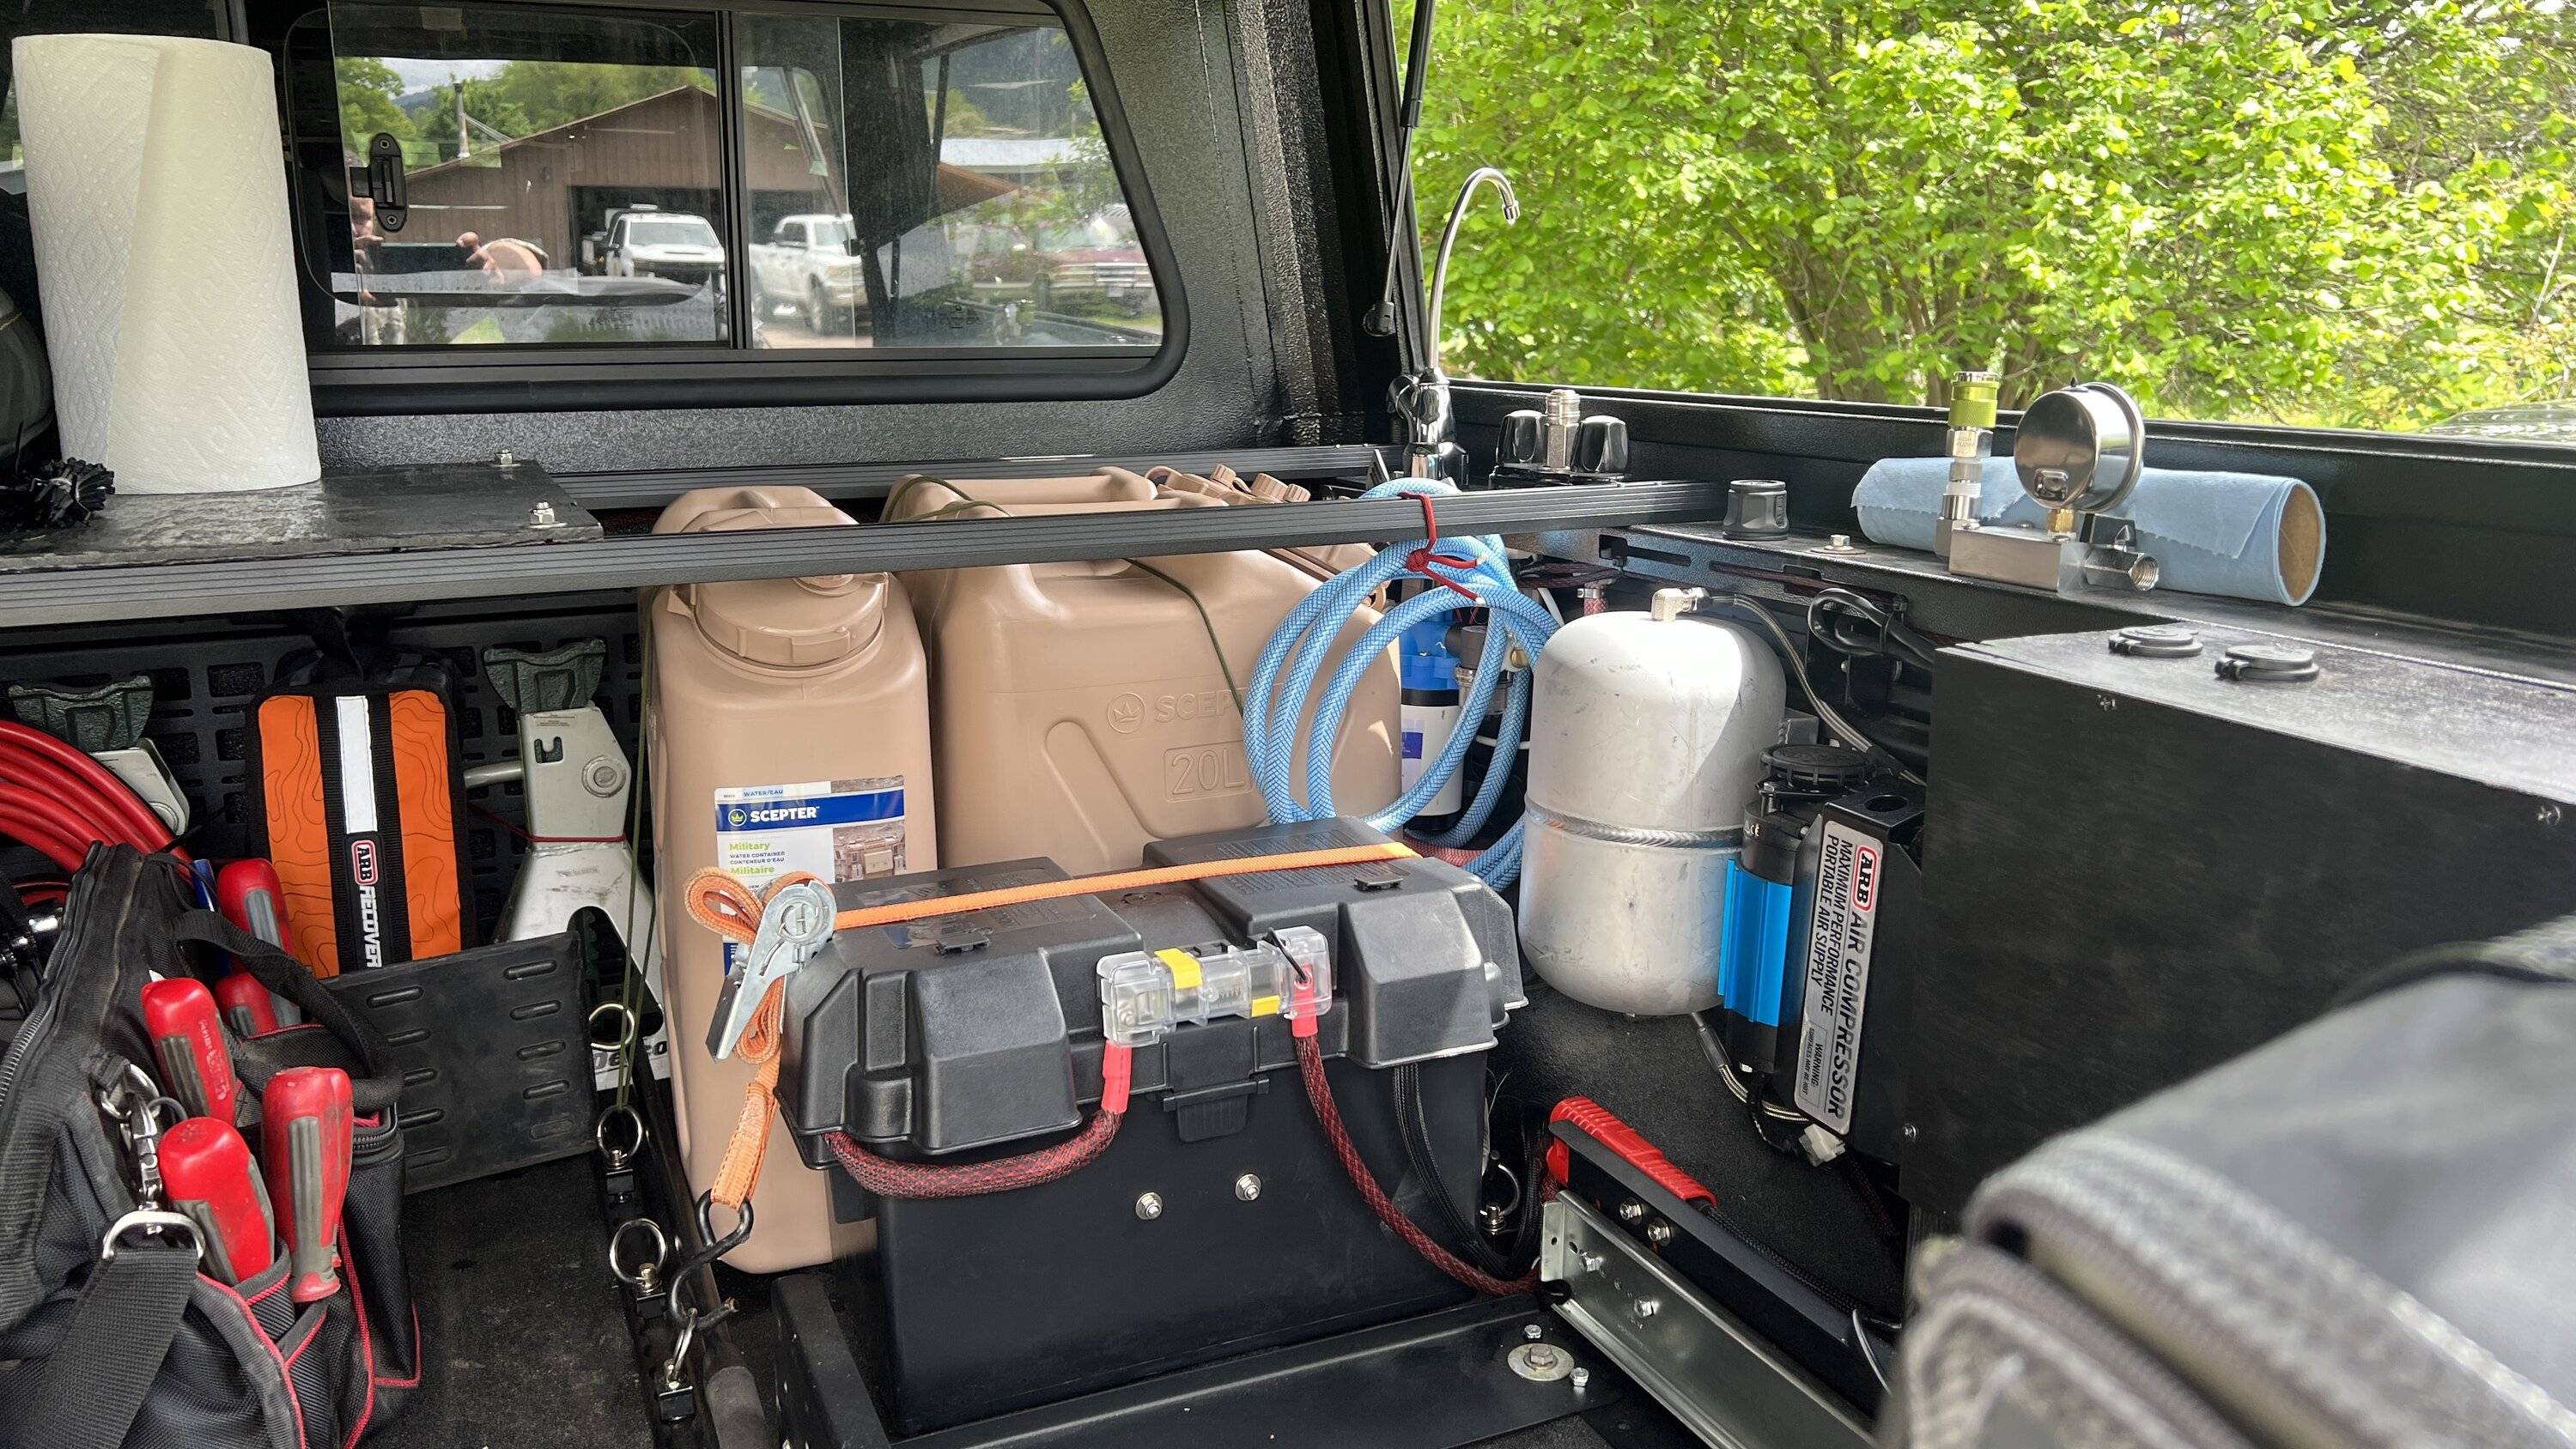
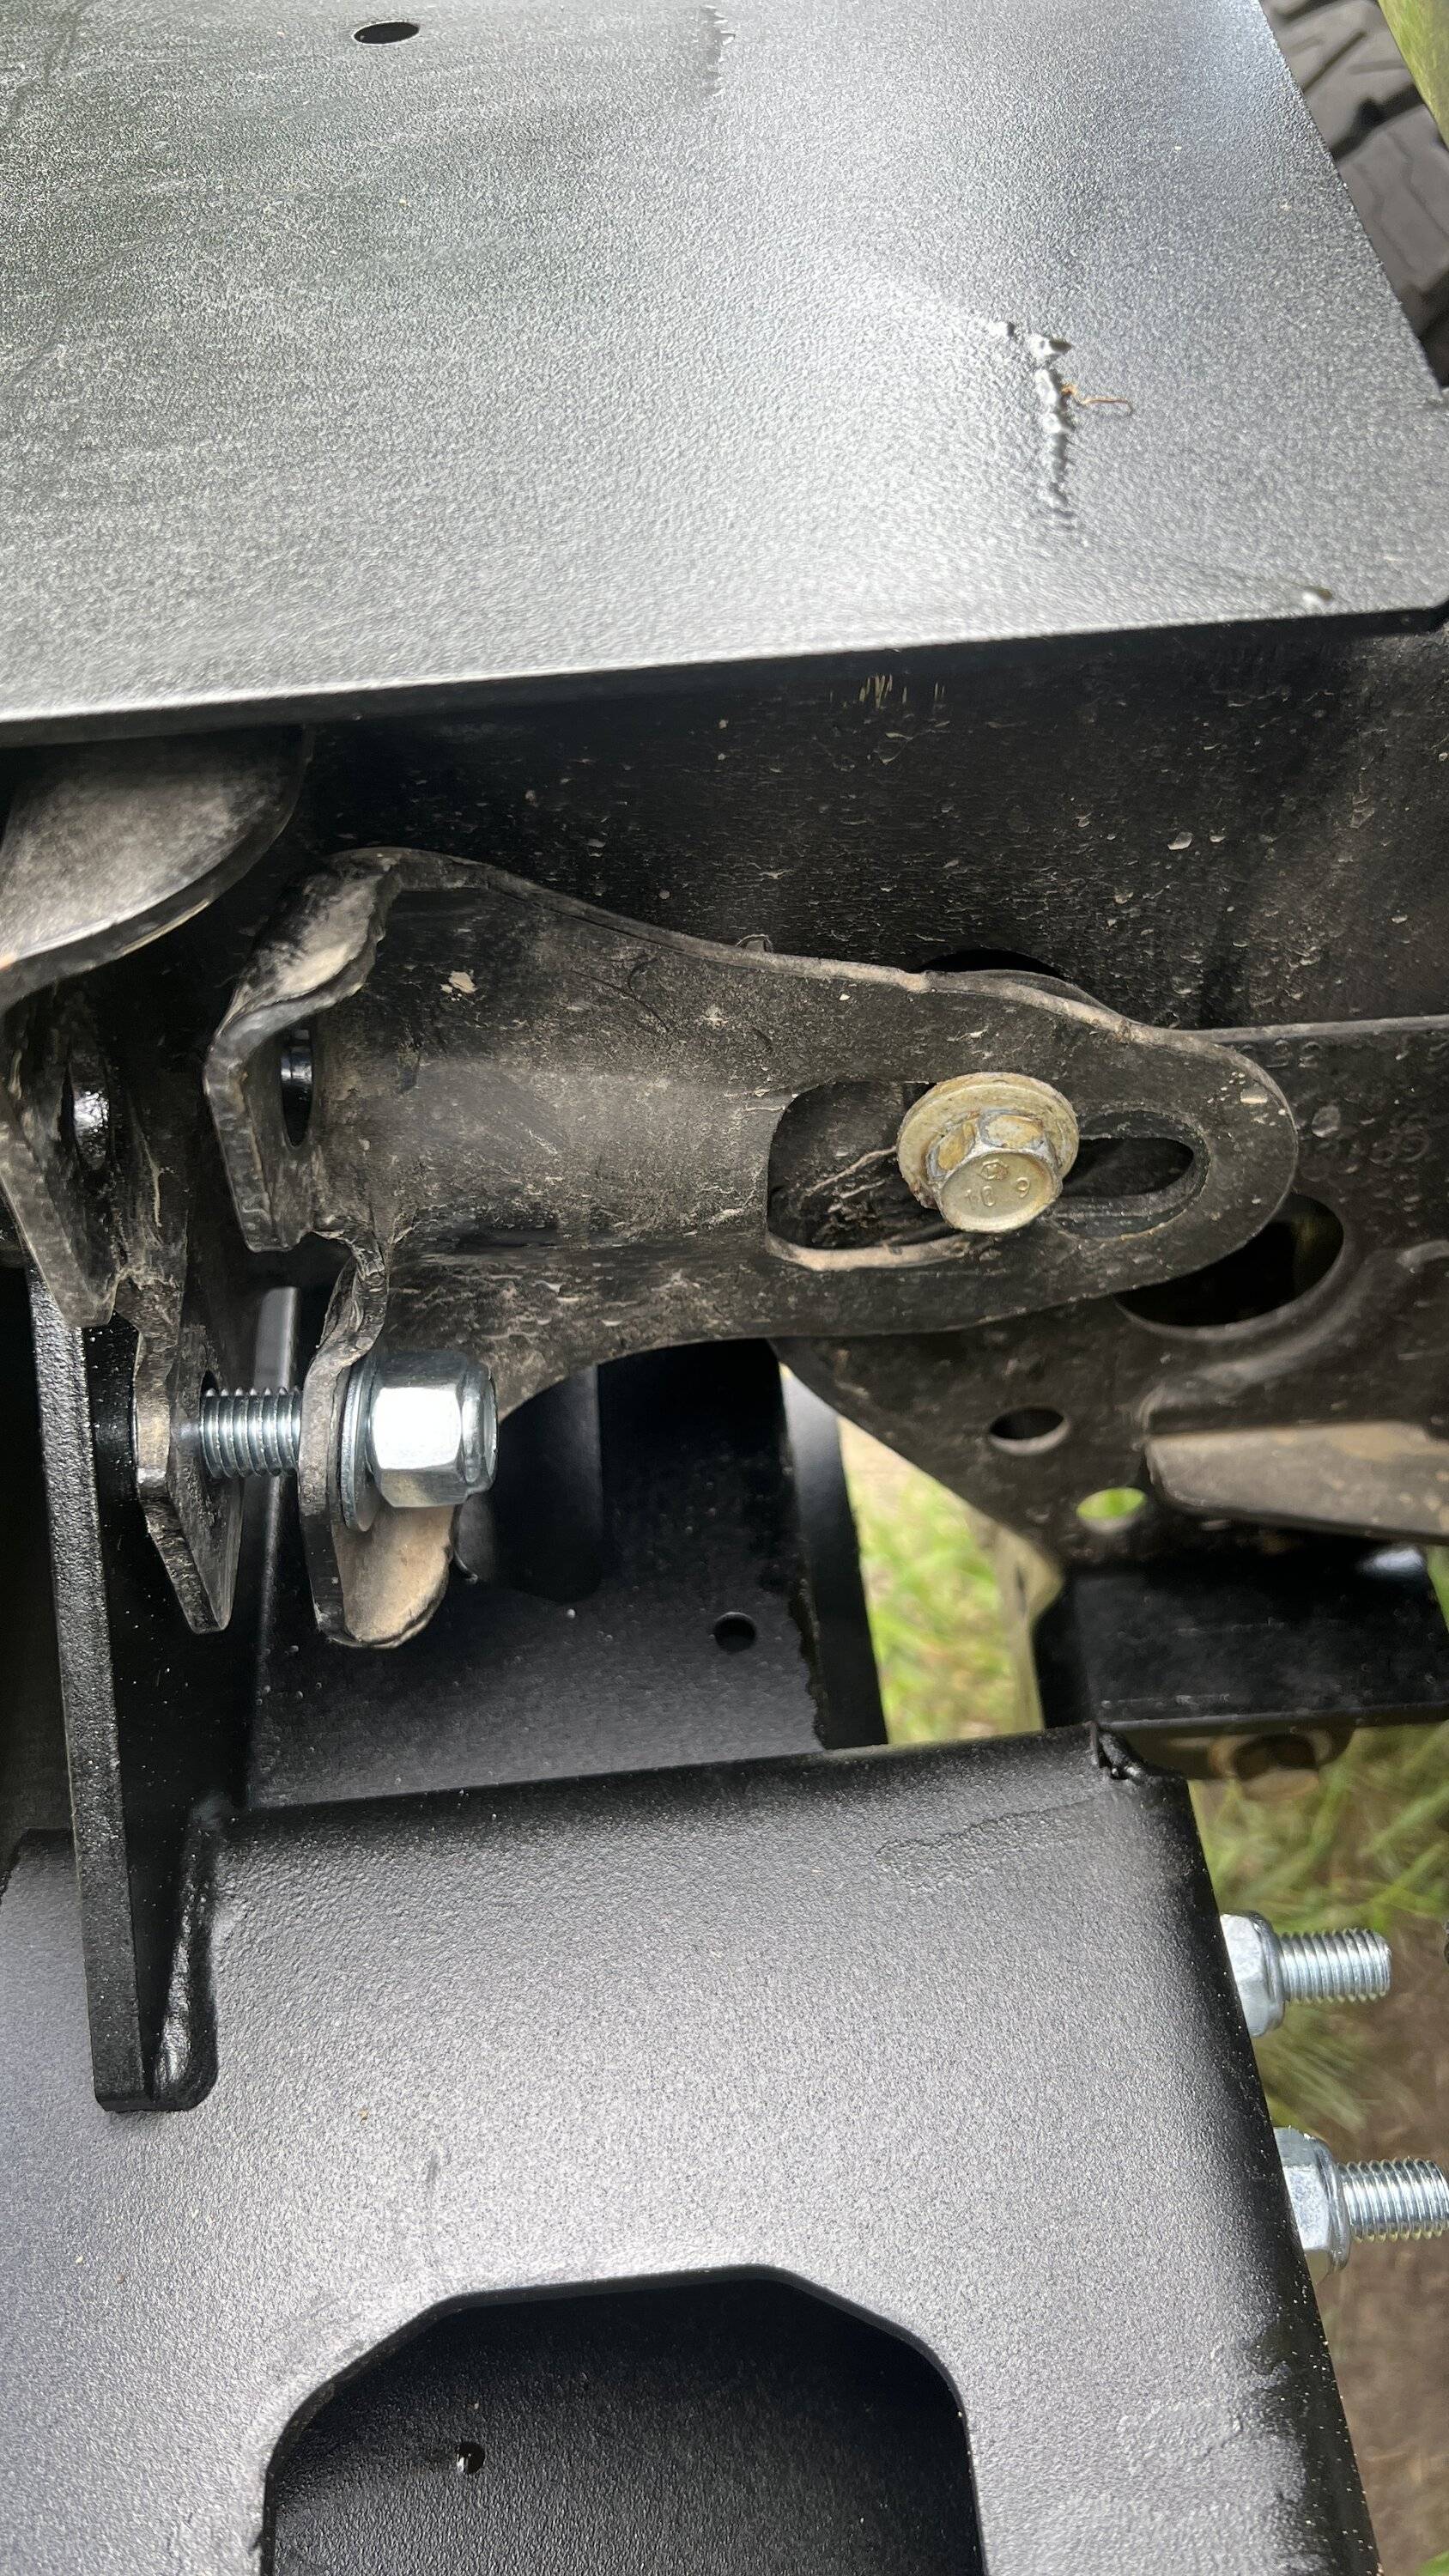
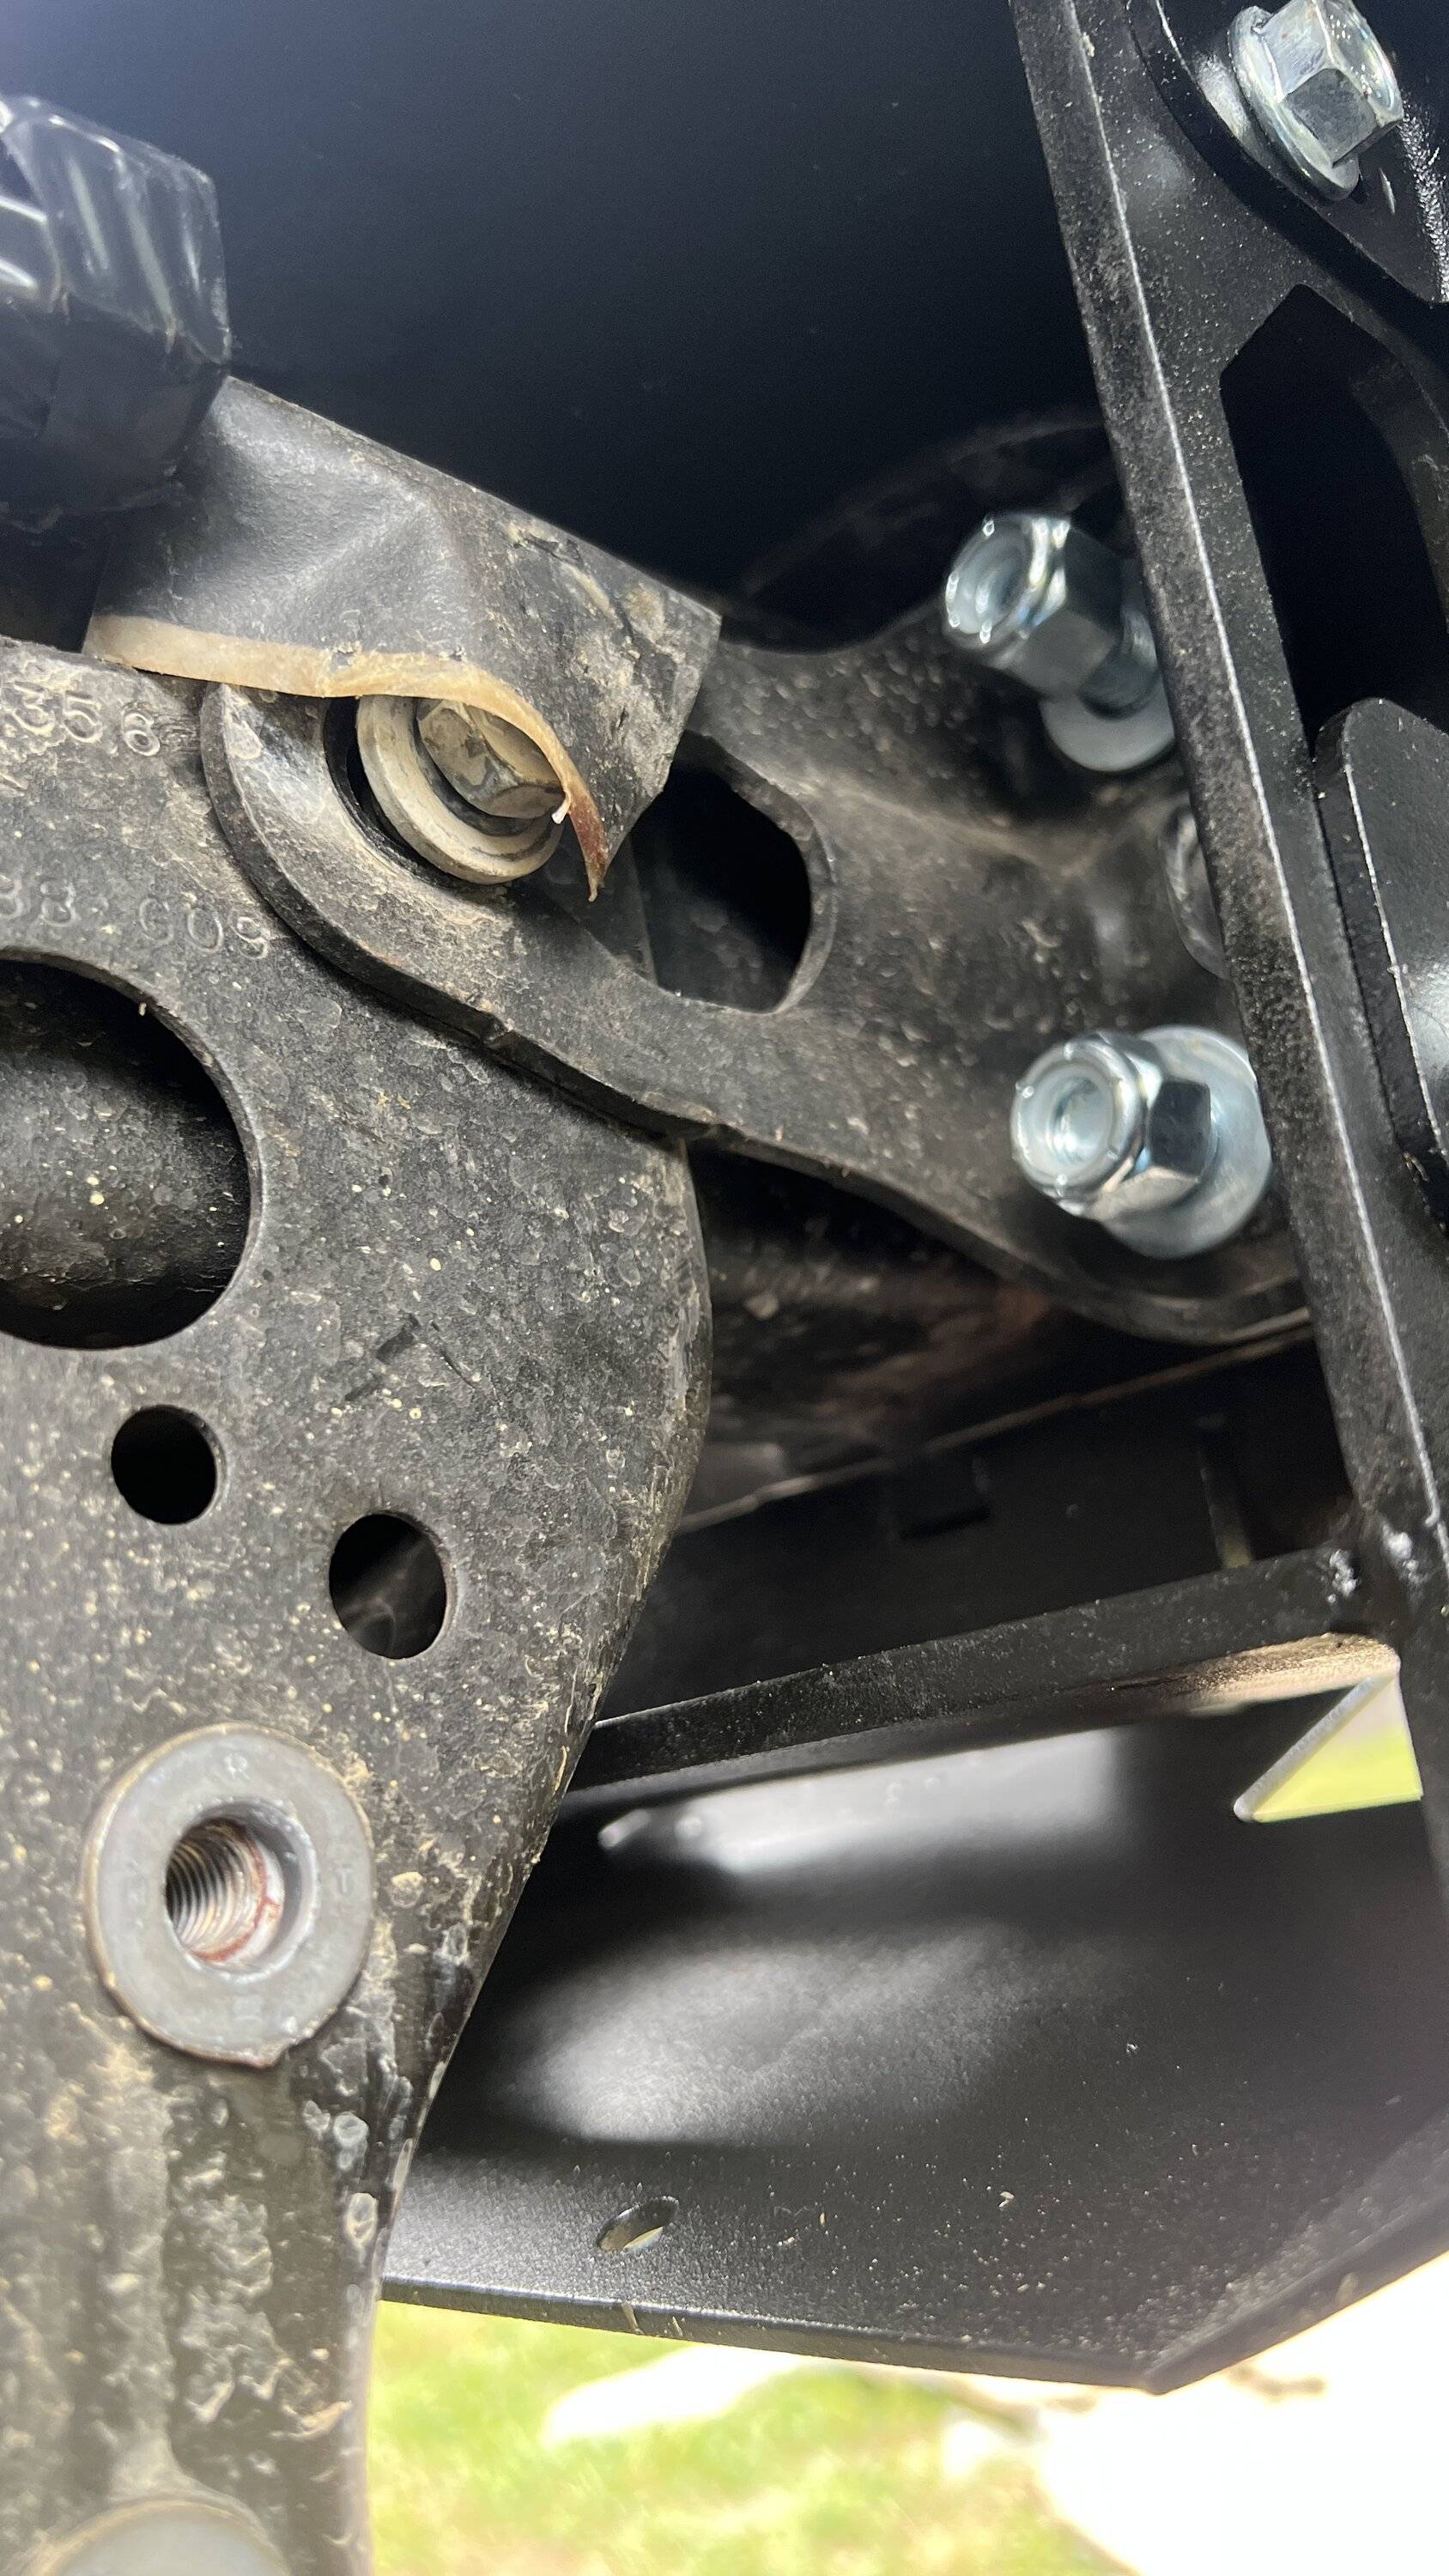
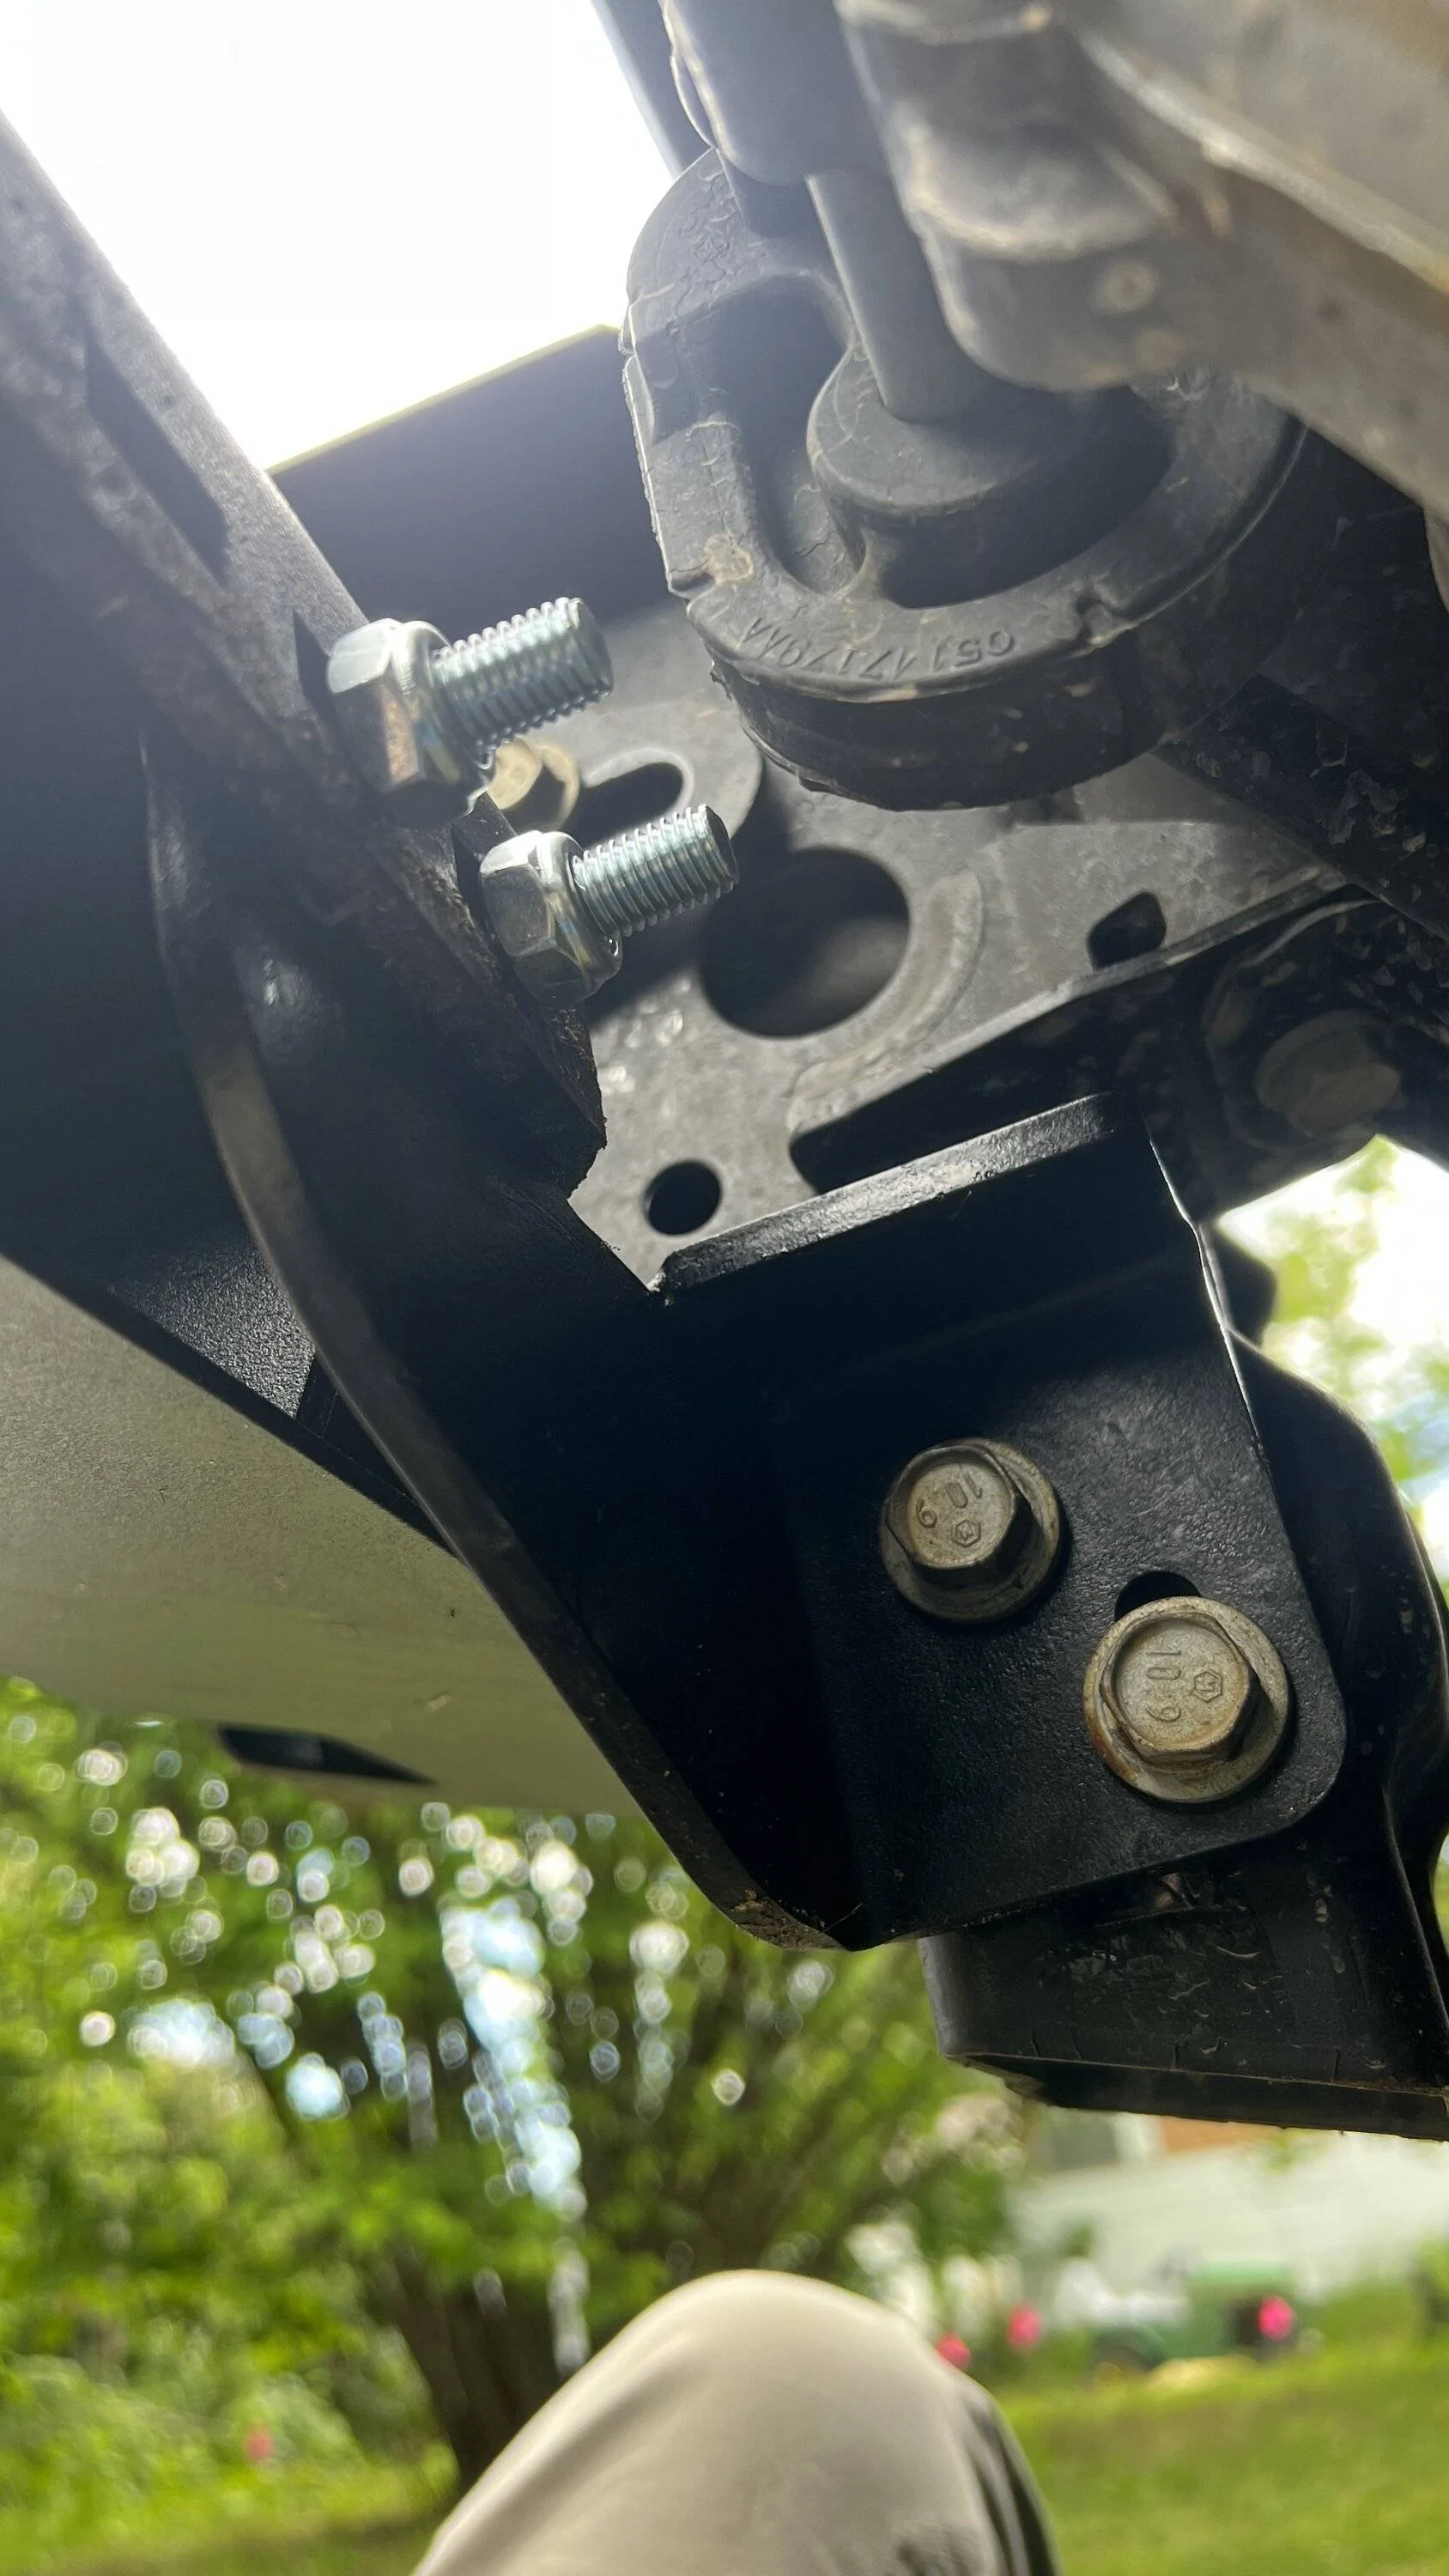
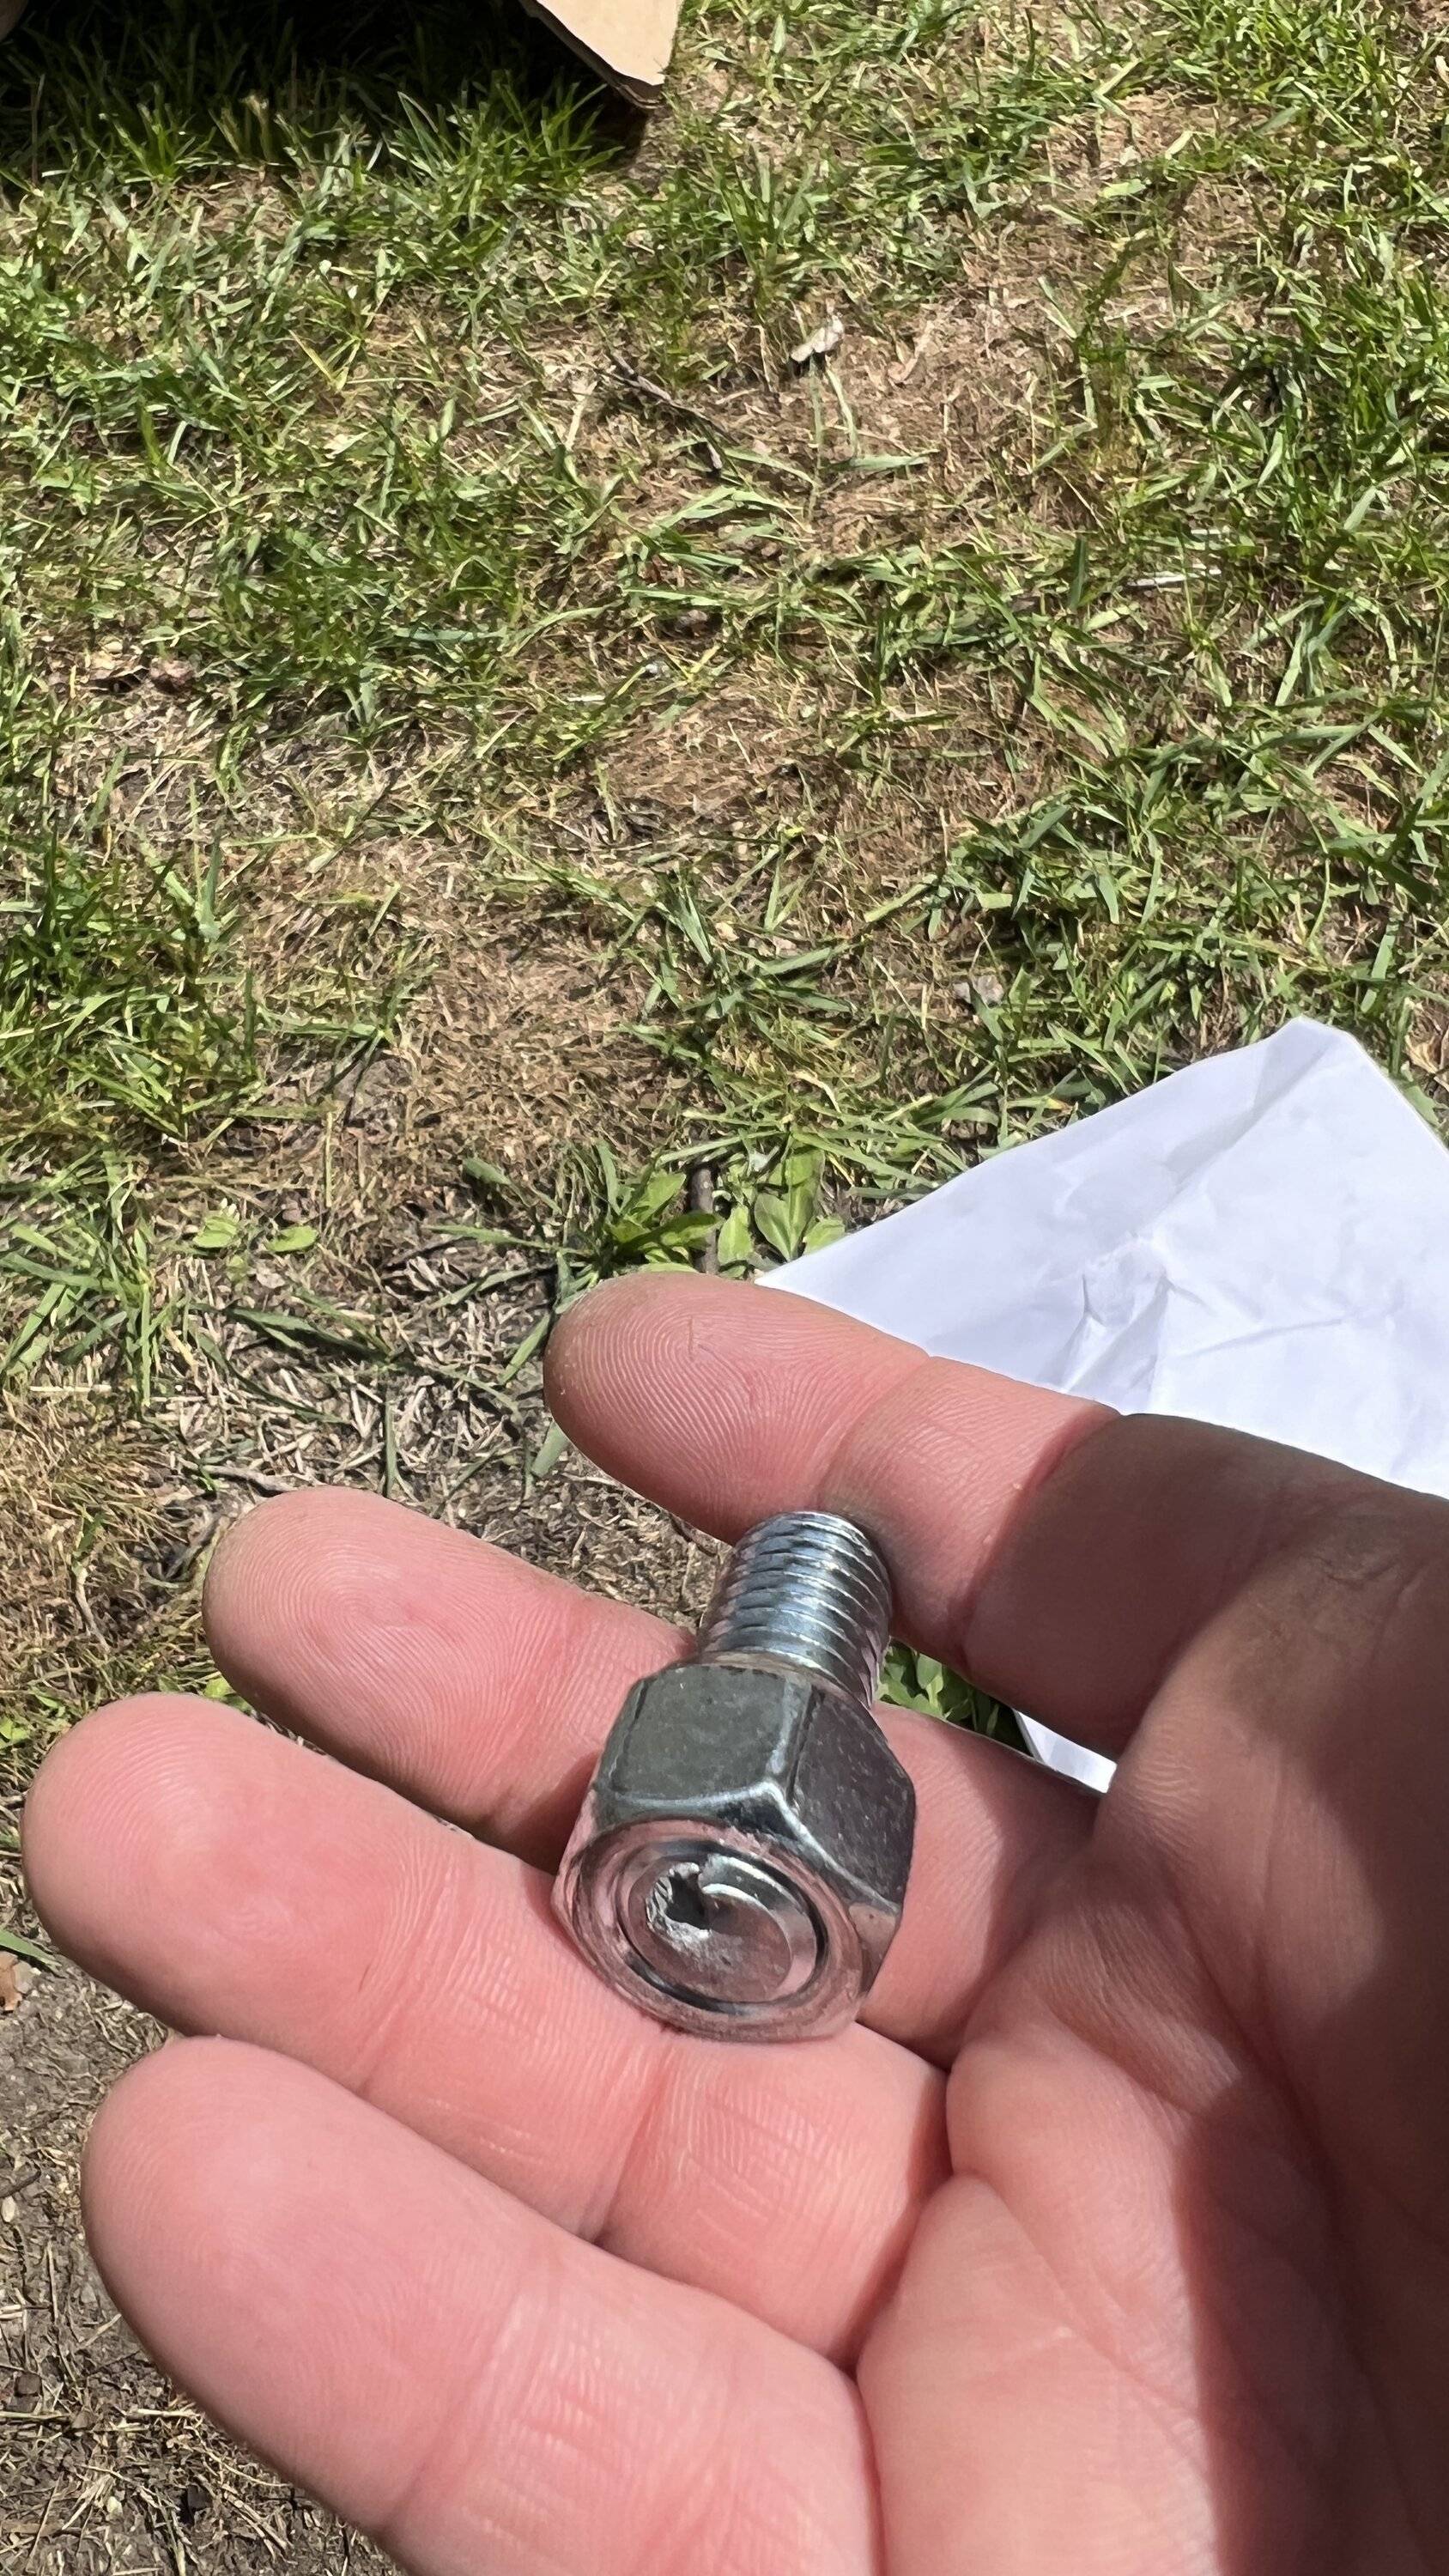
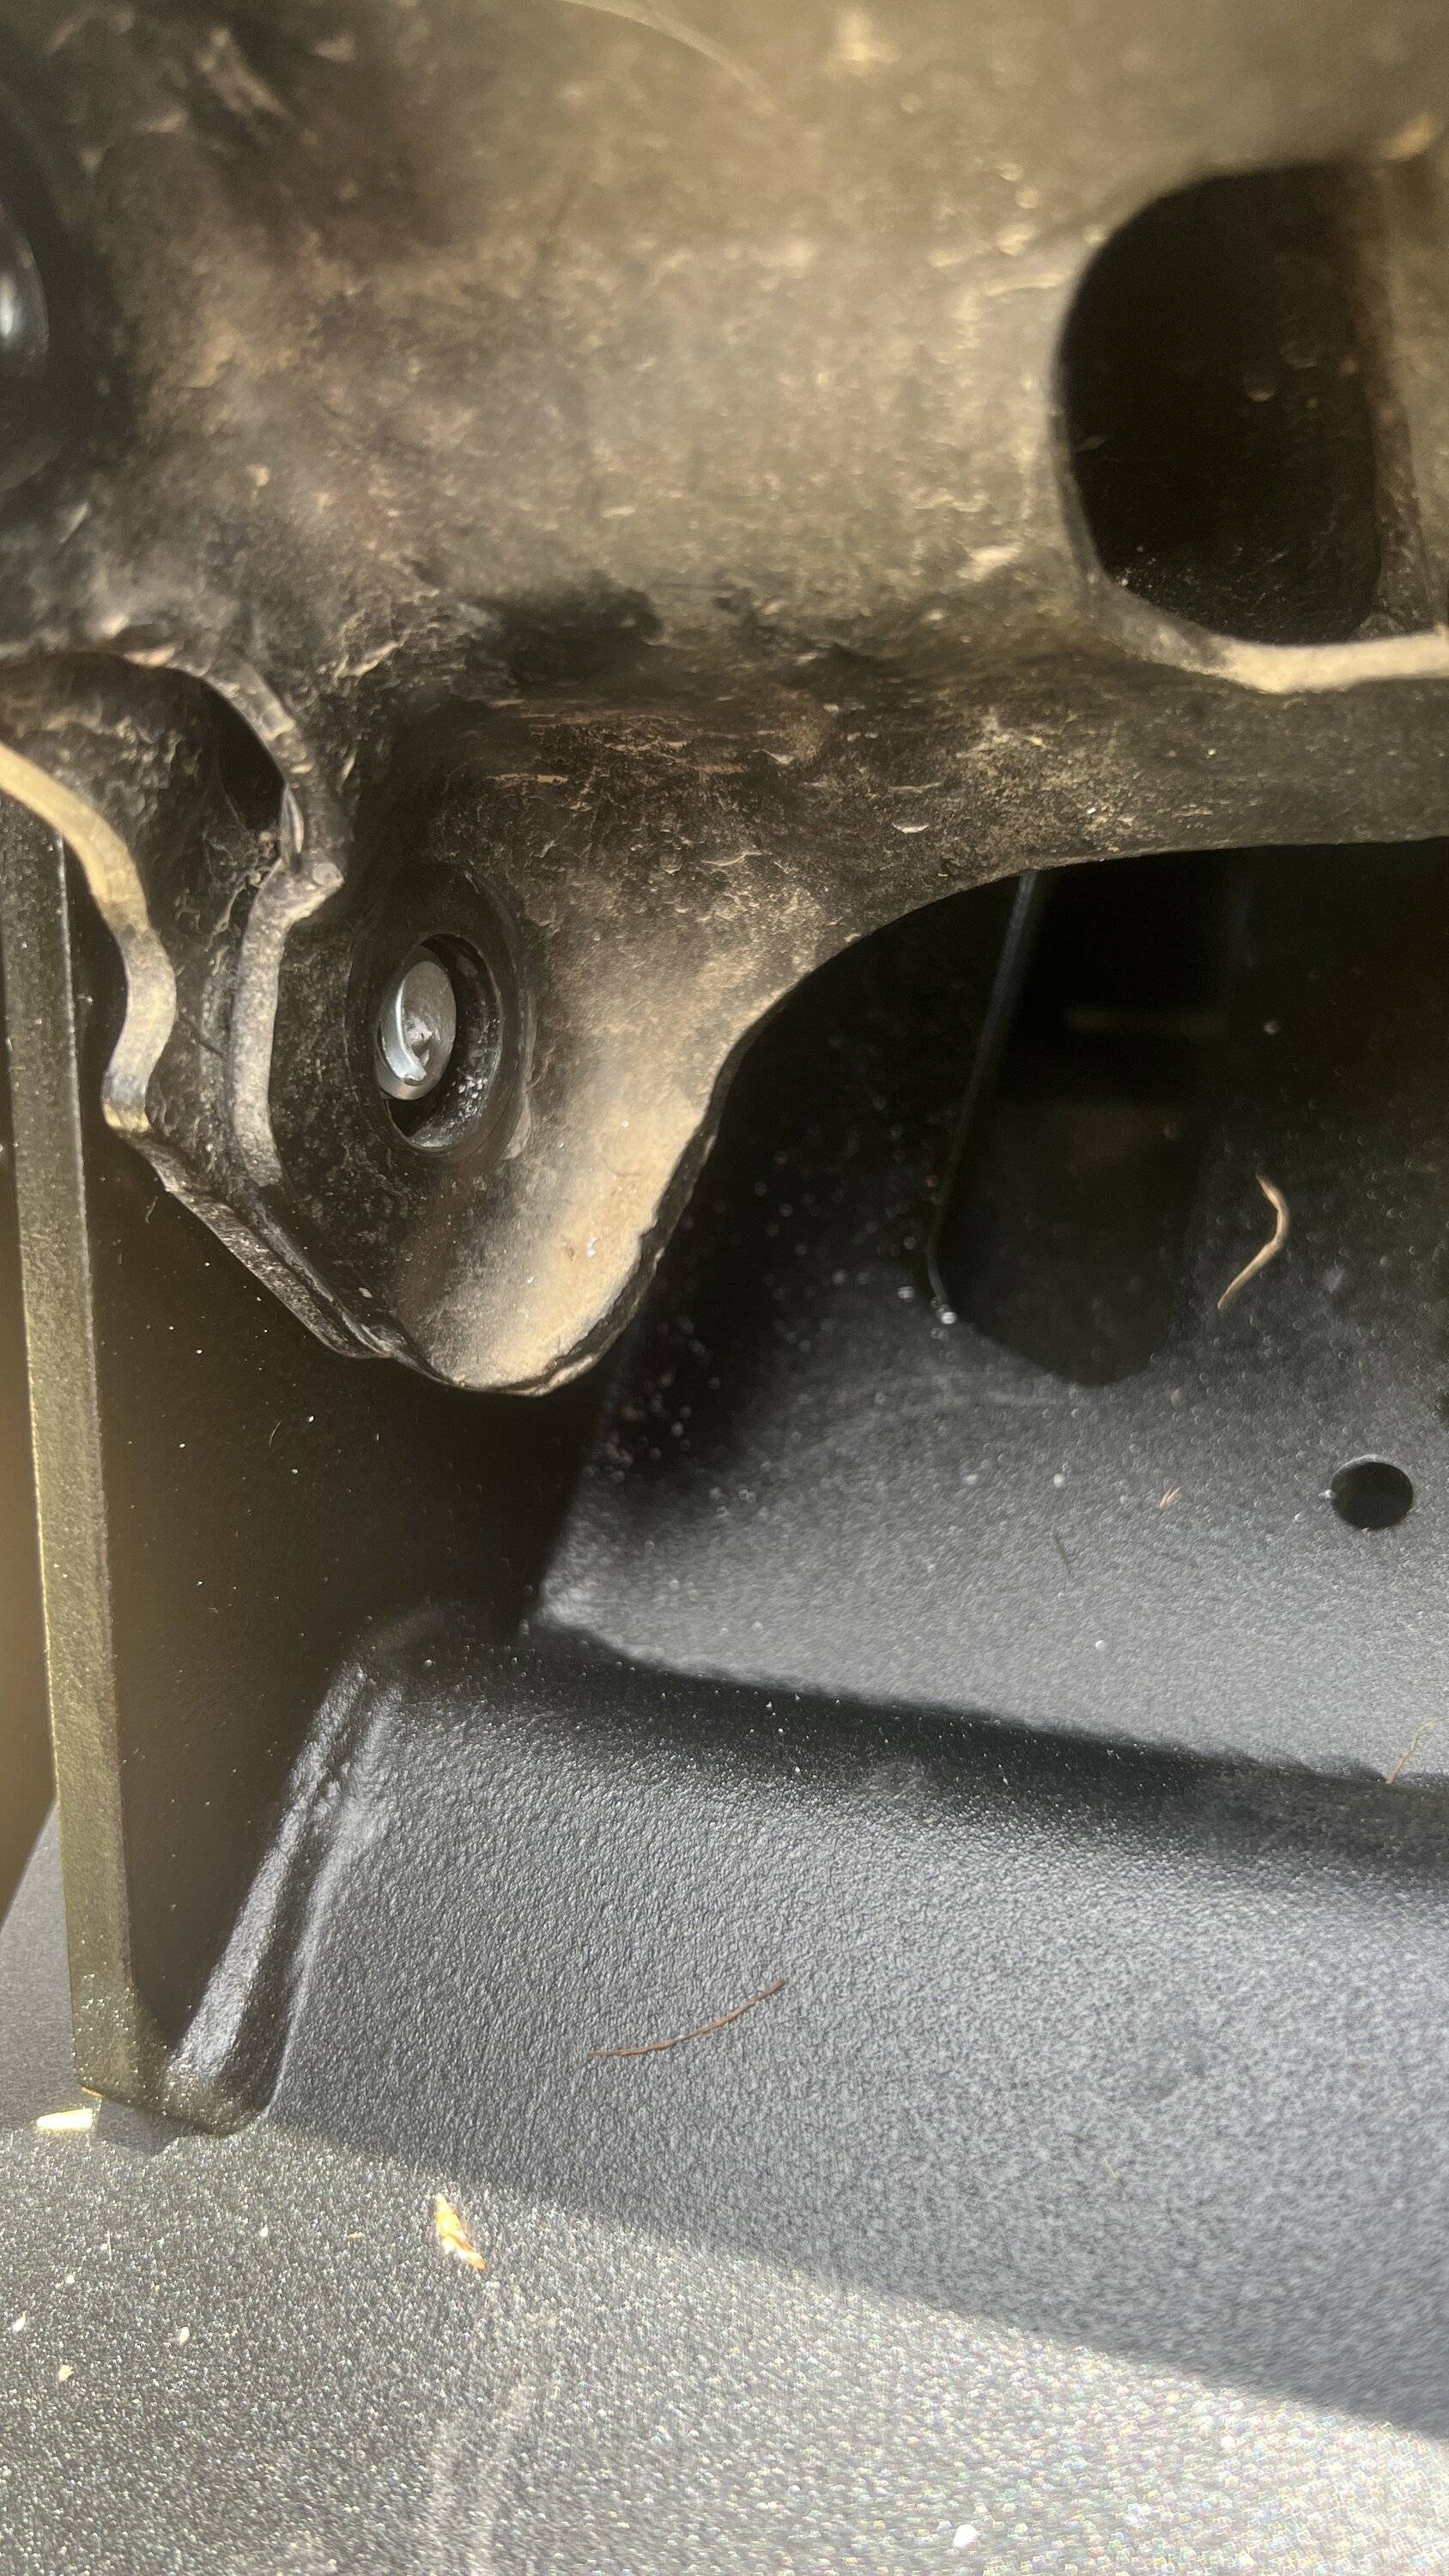
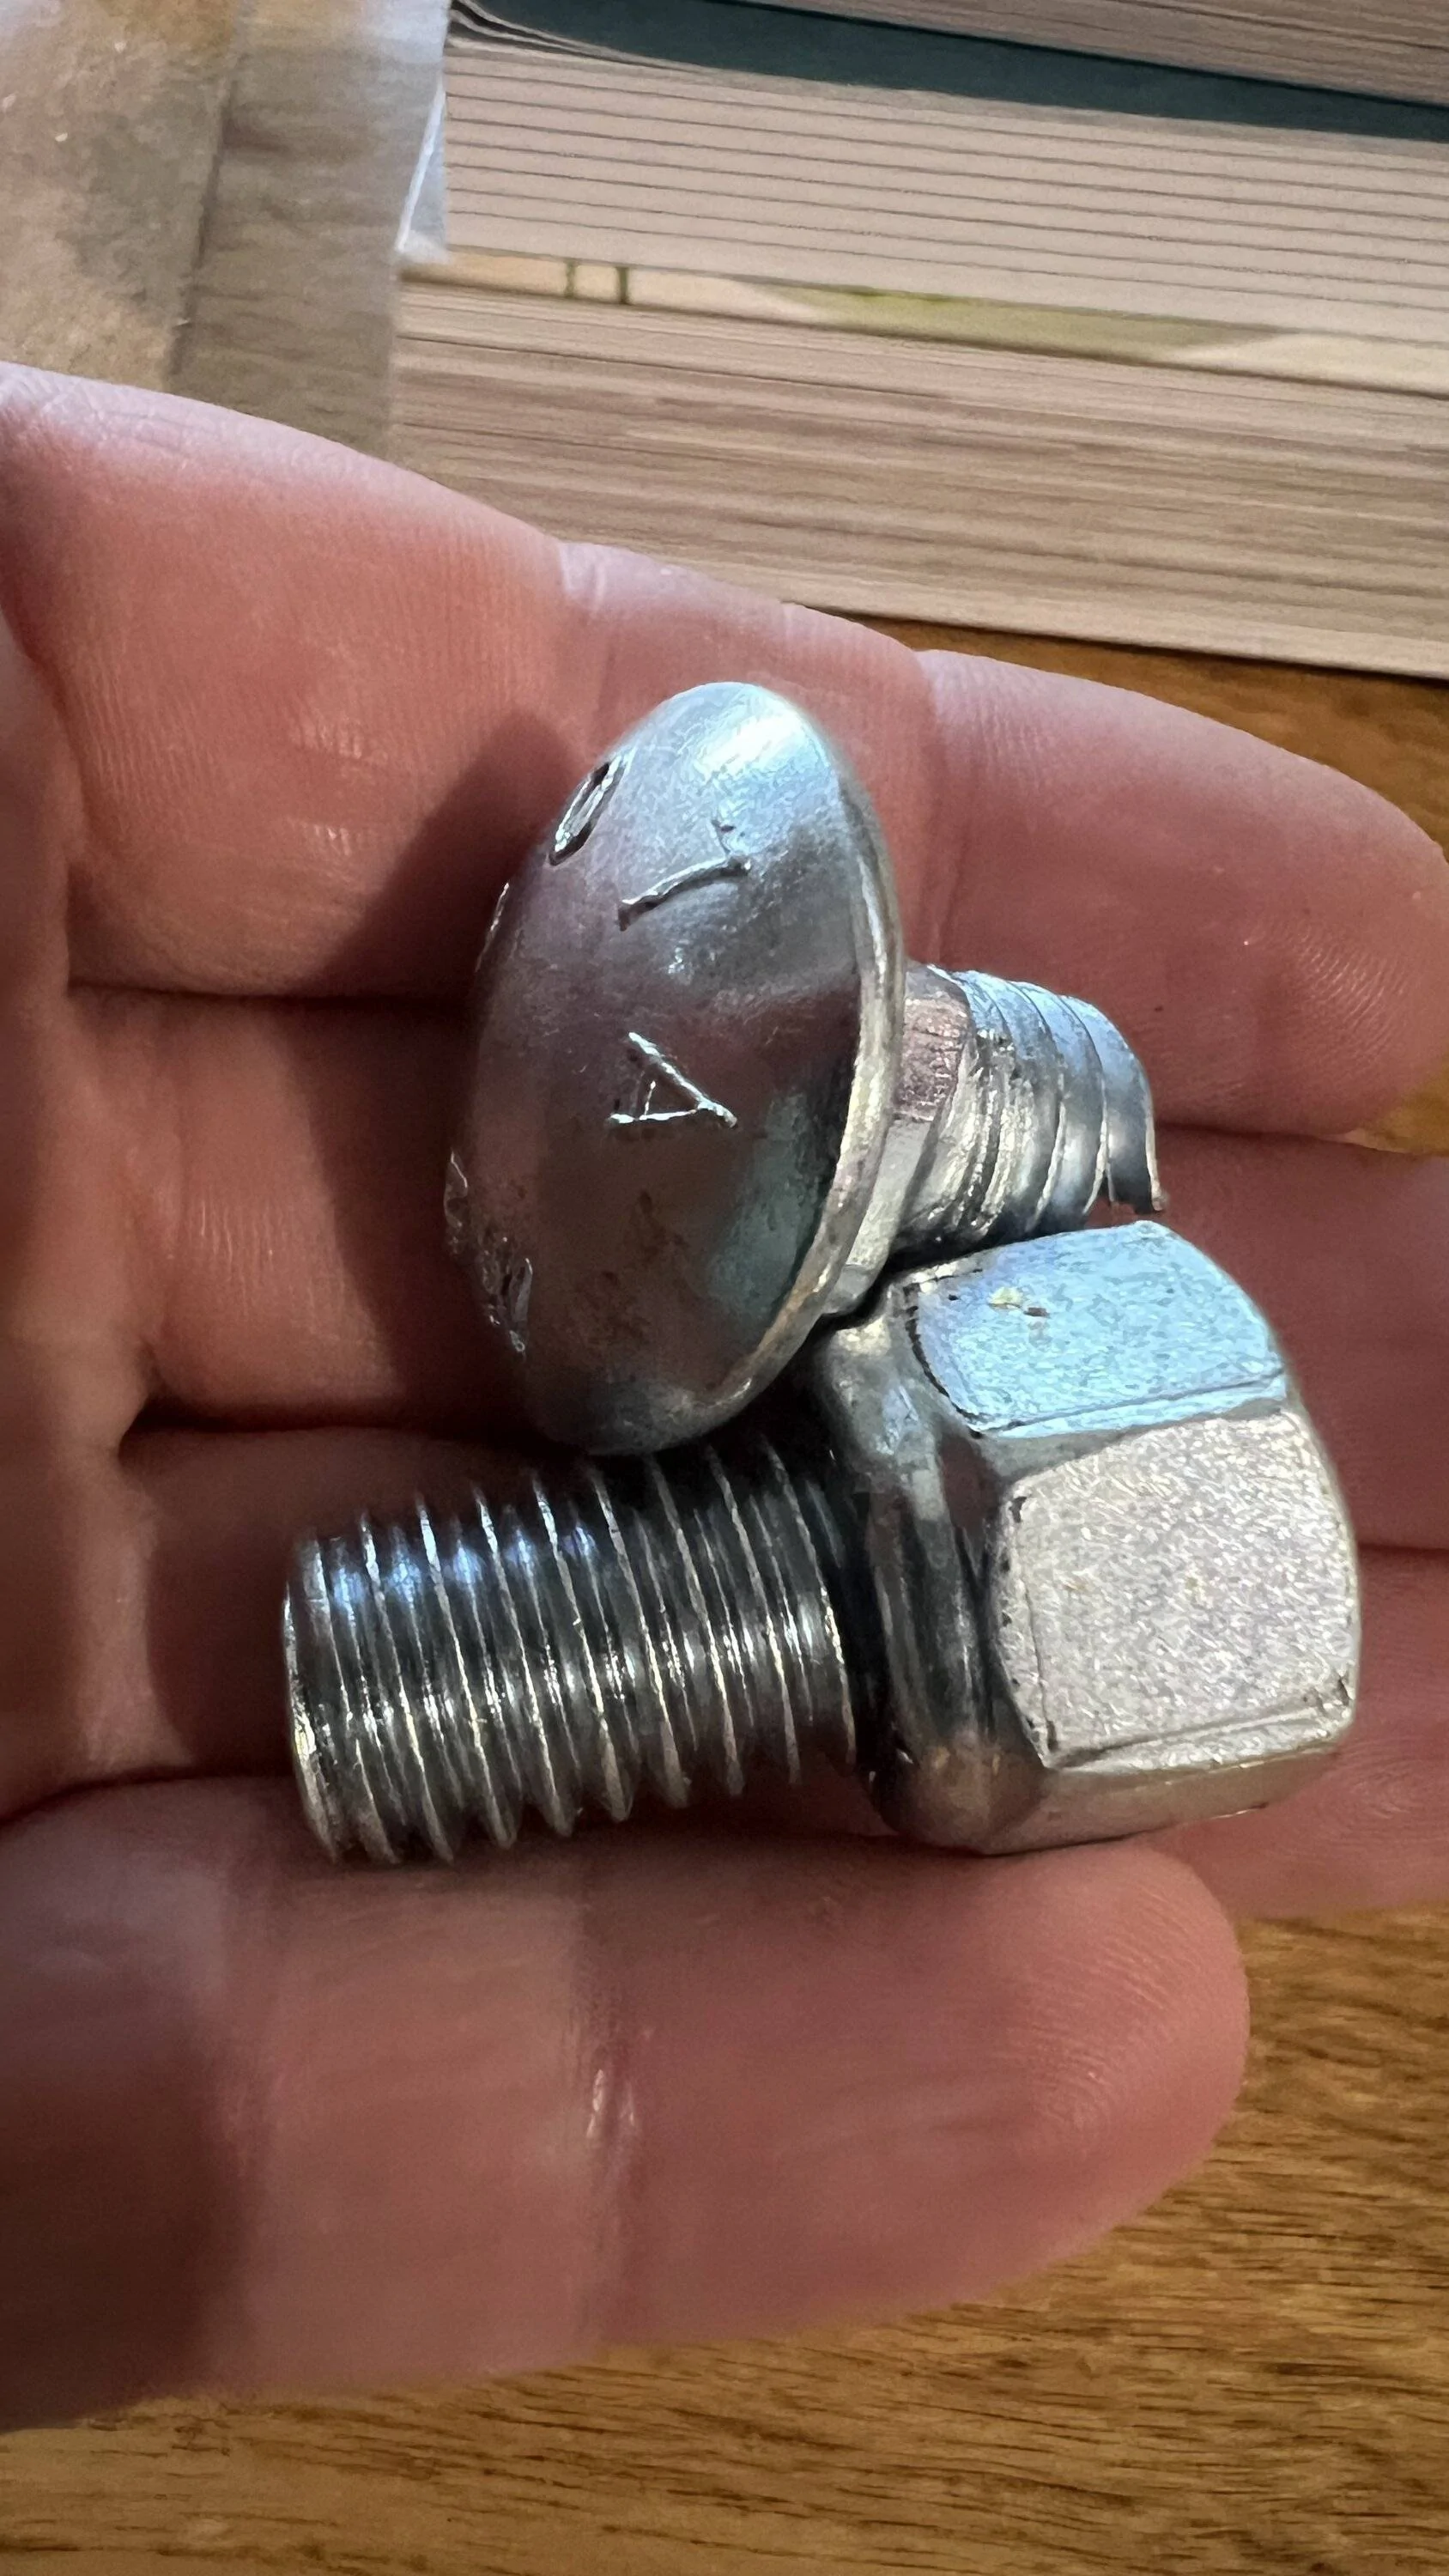
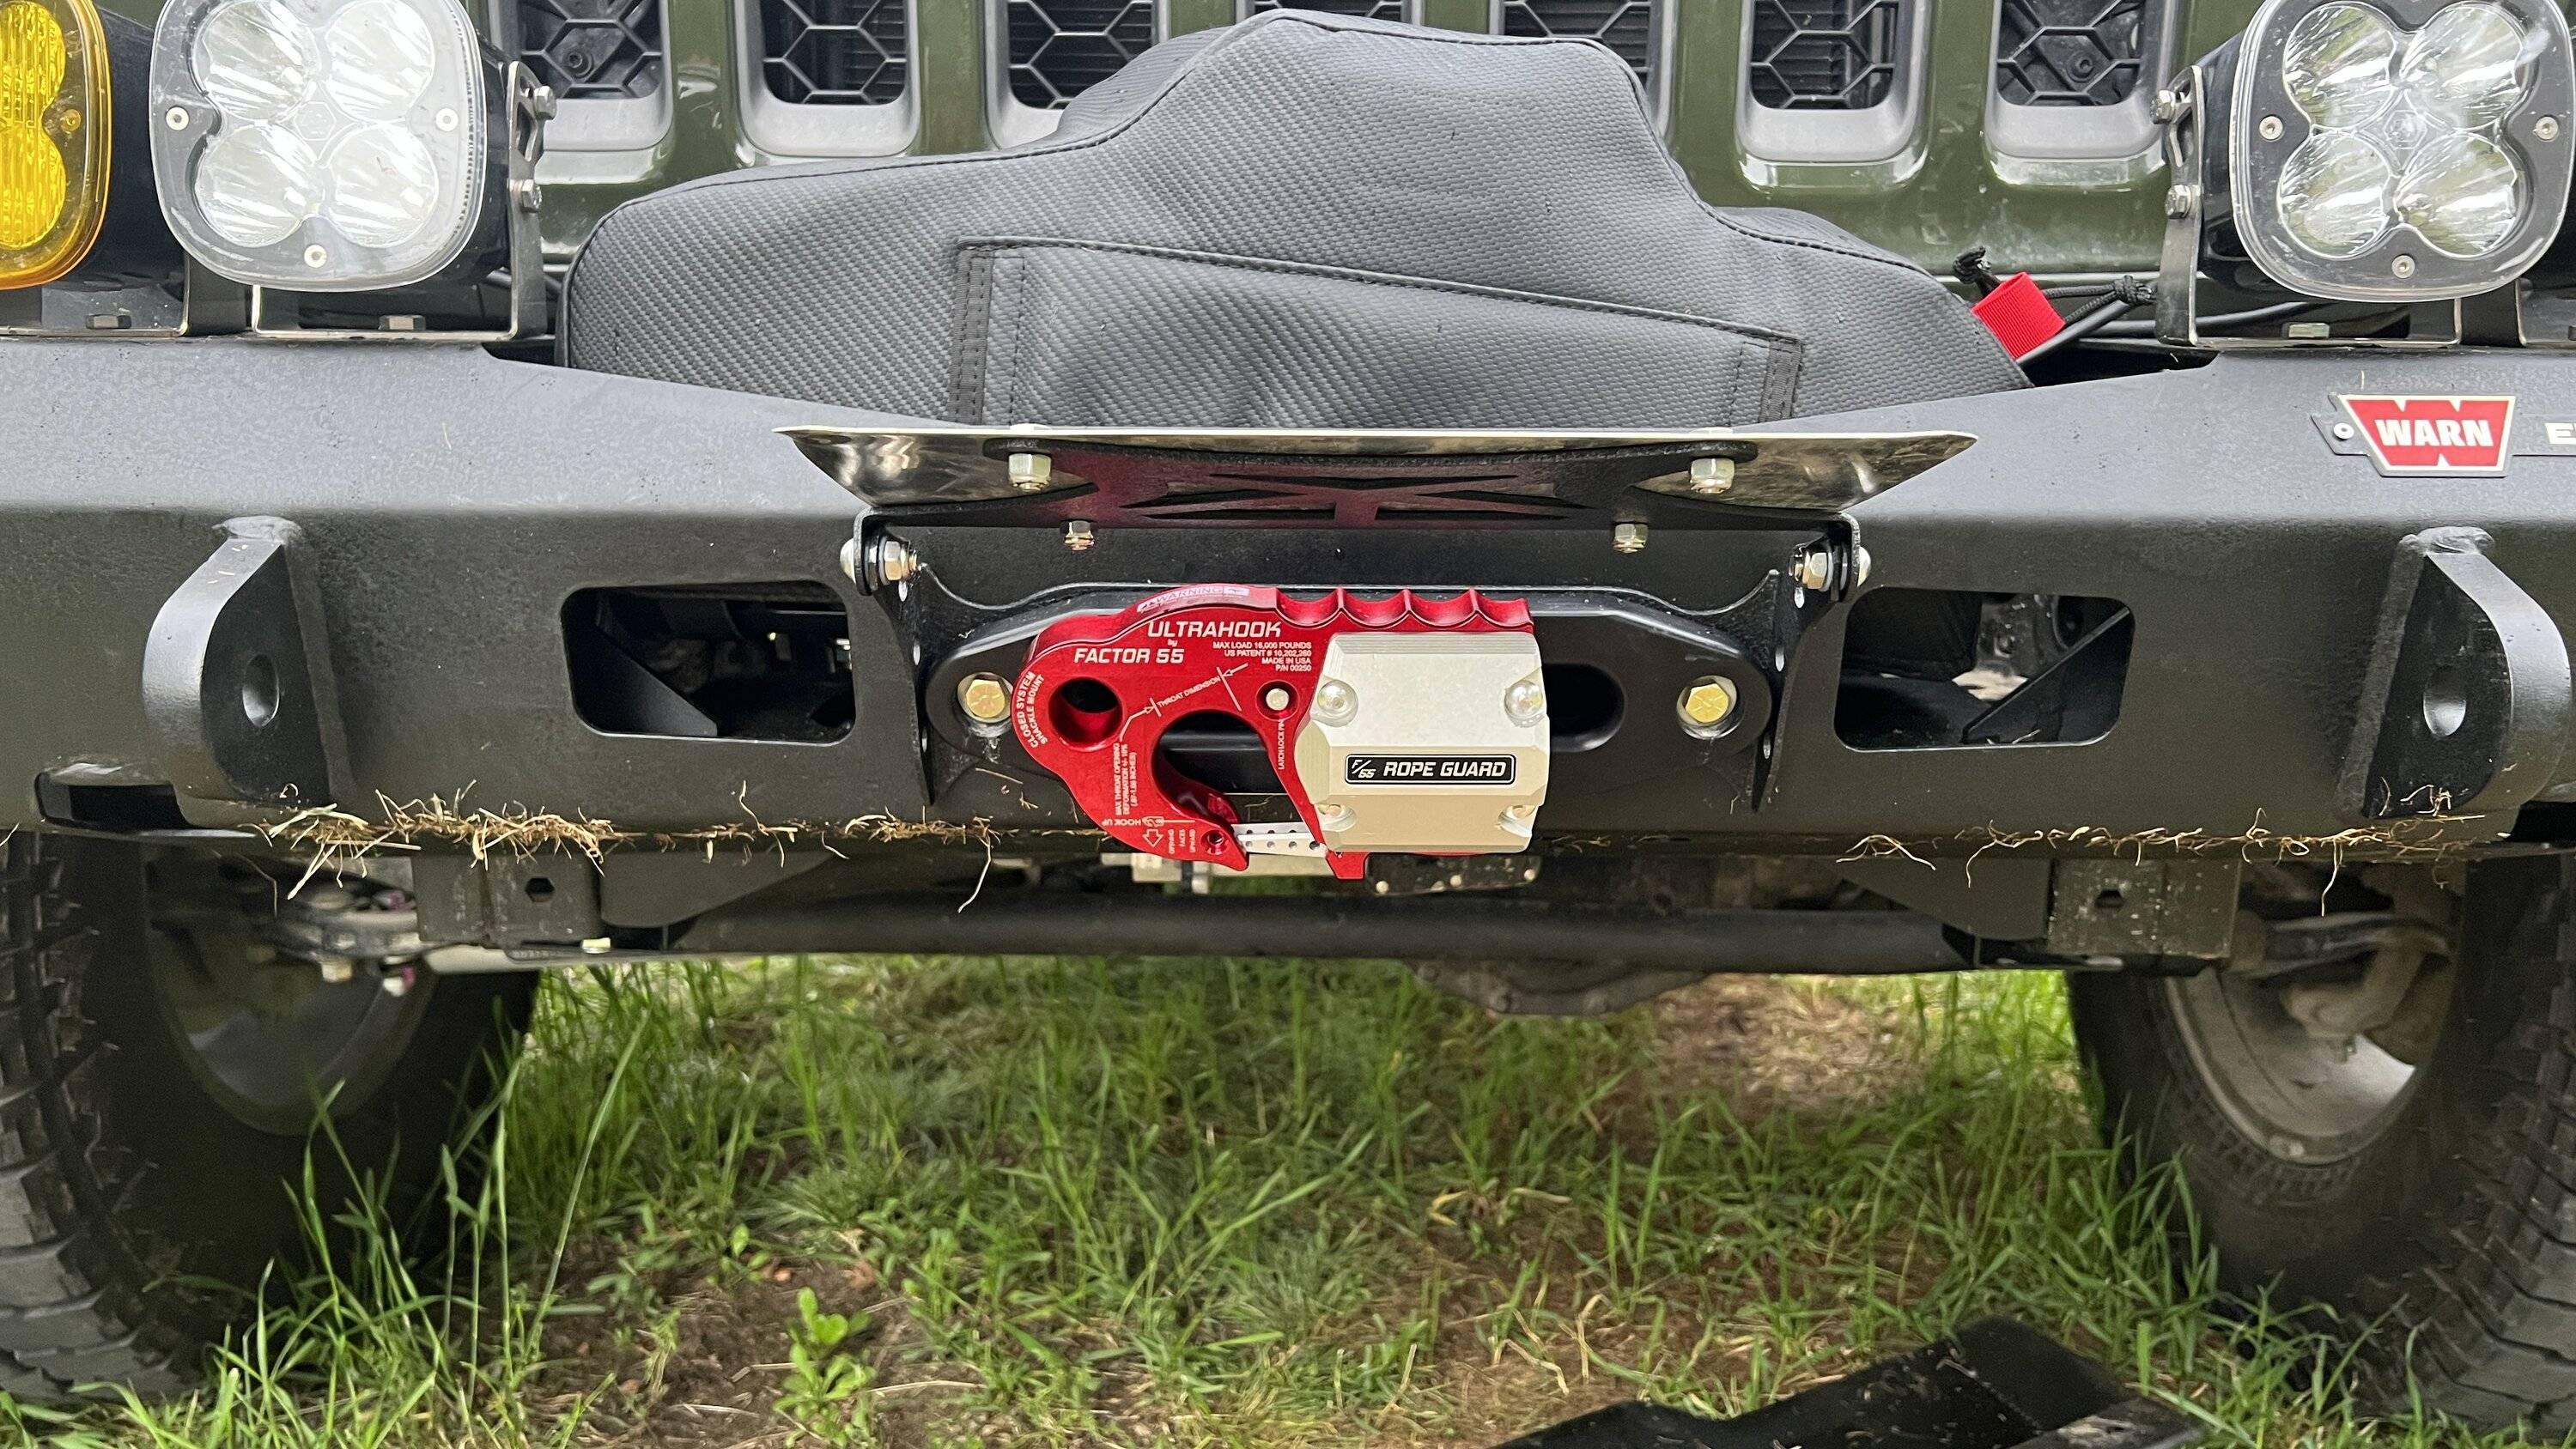
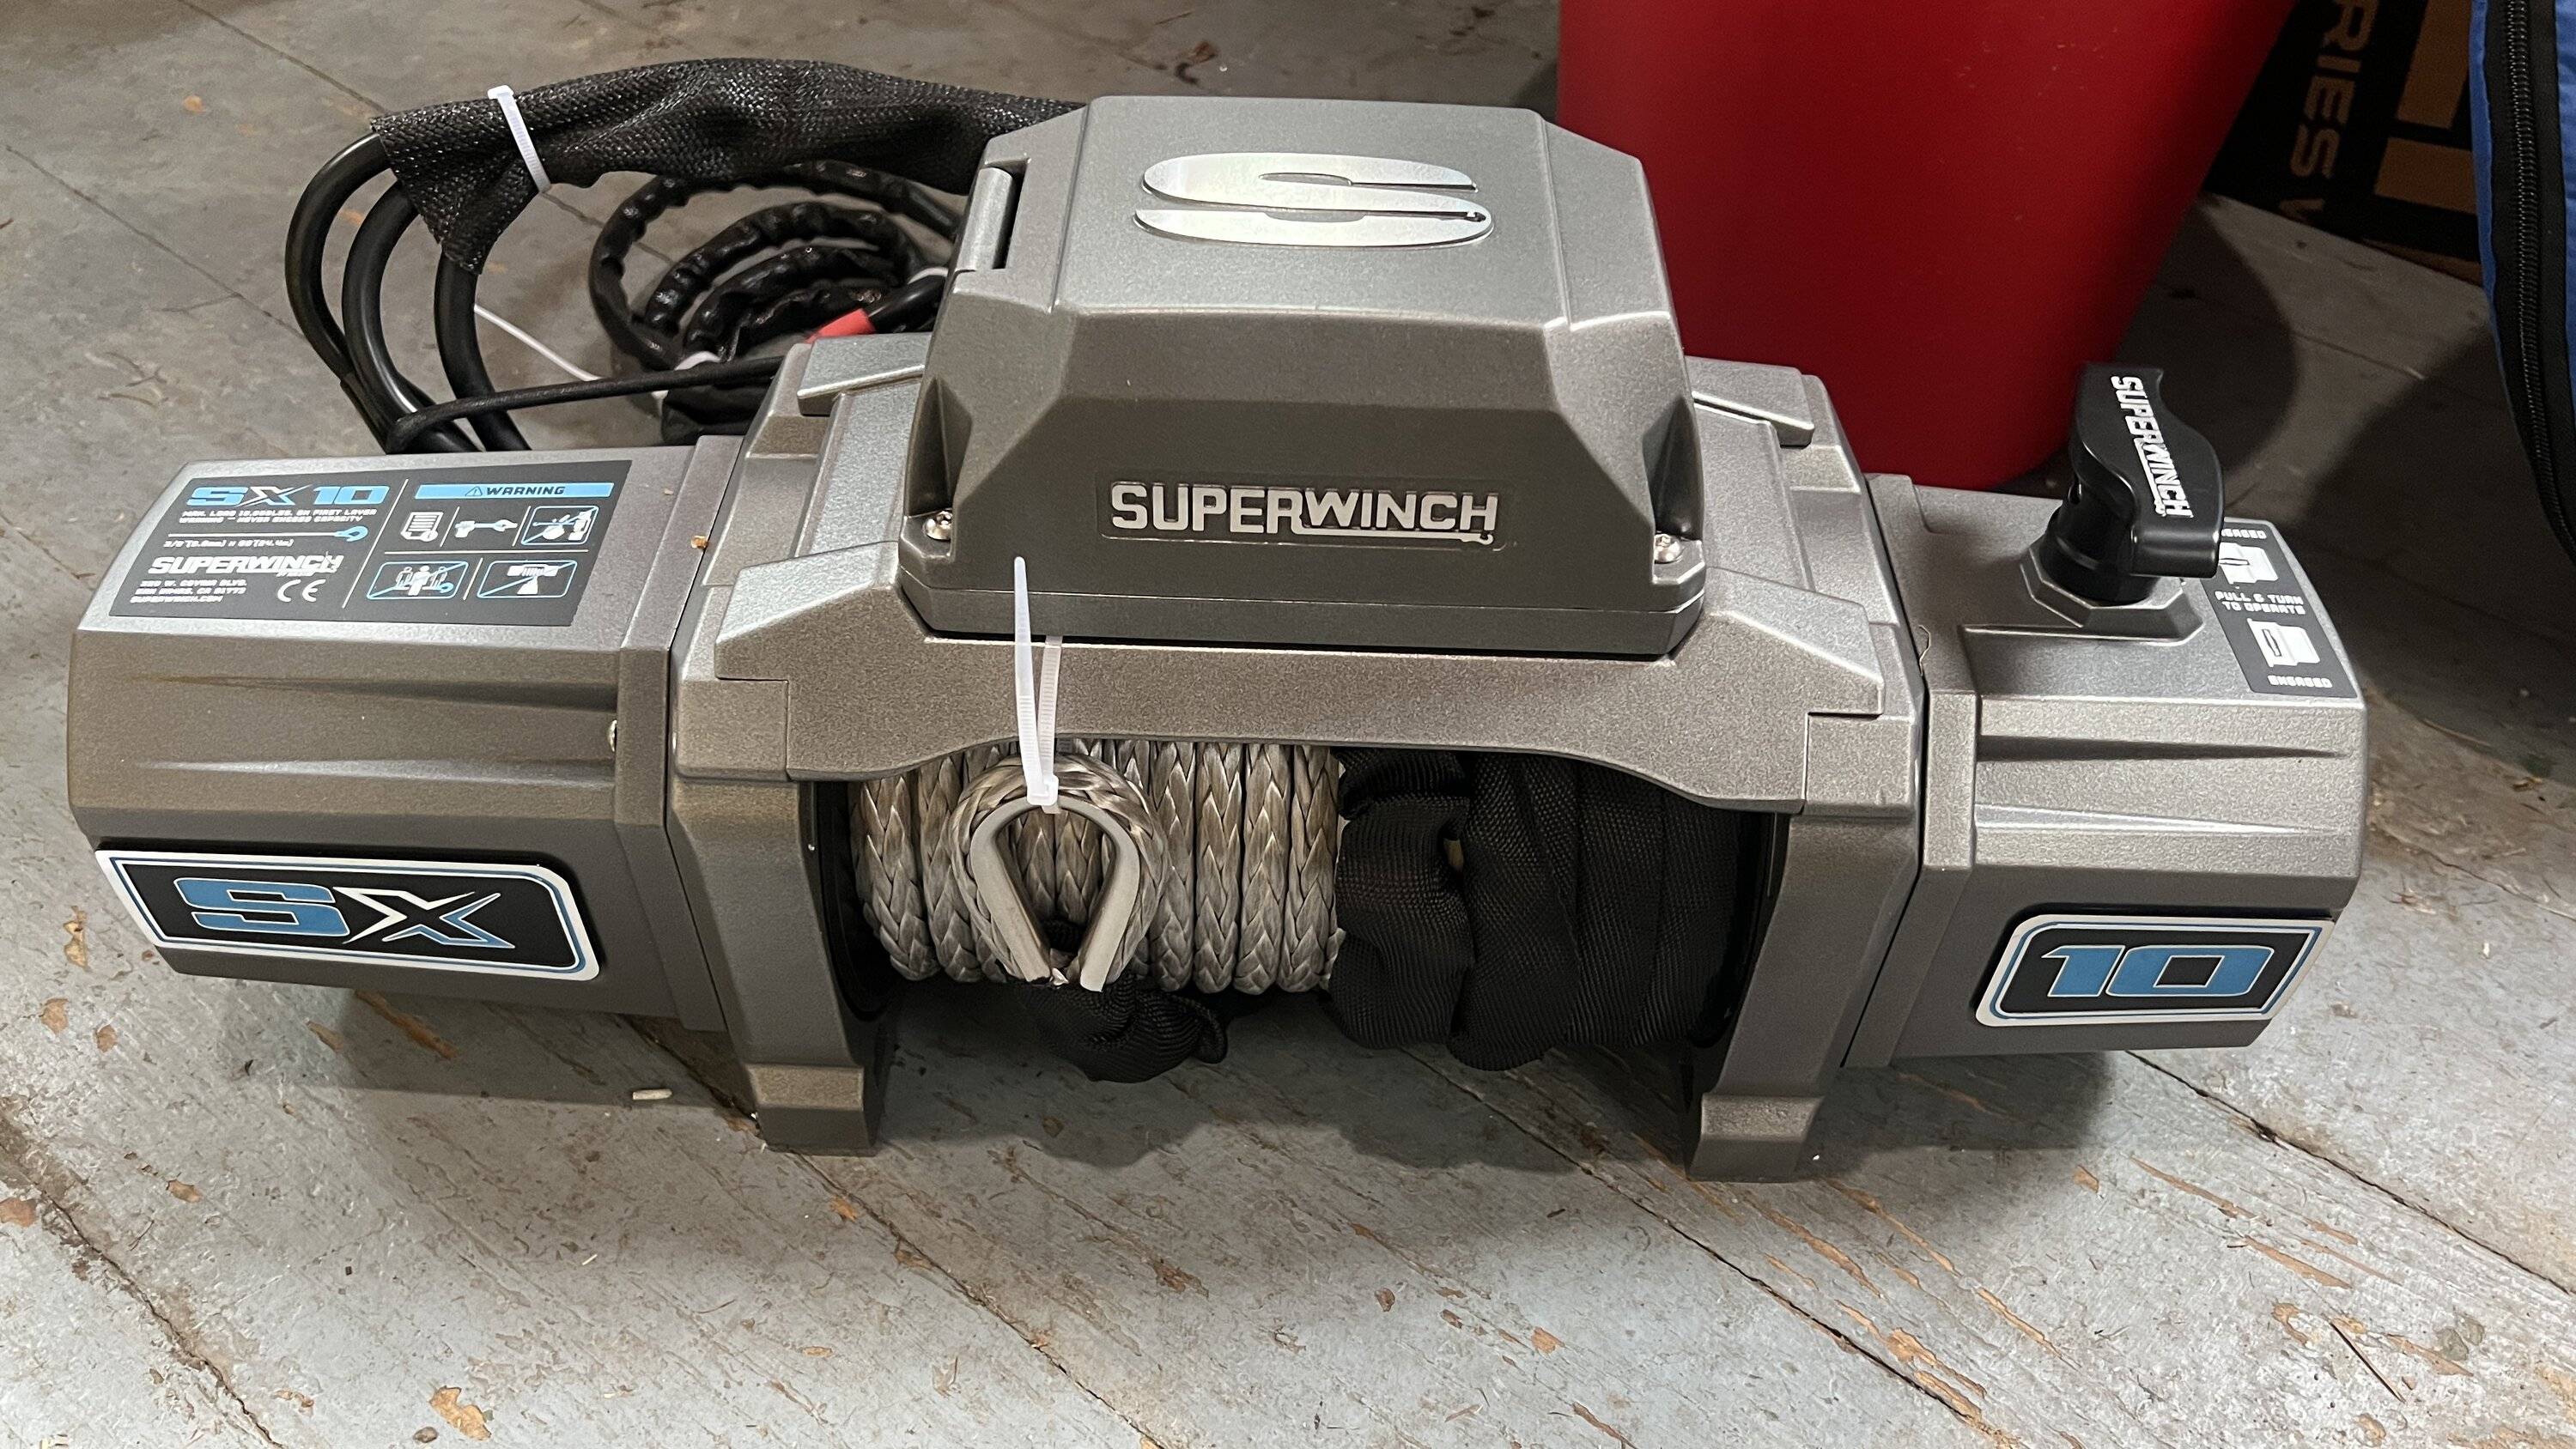
I have a fair bit of digging to do. Foundation repairs on the back side of the house, putting power in the ground and running power/water to a greenhouse. Plus power and water to the future garage, tearing up the garage foundation. I also have 3 stumps to dig out from old apple trees that had to get cut, they were going into the foundation. Oh and a French drain all around. A tractor sure would be nice, even a small sub-compact. But man oh man I never thought a small garden tractor with a front loader and backhoe would be more than half the cost of the JTR!!!!
Sponsored

 
OP
OP
chorky

chorky

Well-Known Member
First Name
Chad
Joined
Feb 26, 2022
Threads
175
Messages
3,466
Reaction score
3,801
Location
Montana
Website
www.youtube.com
Vehicle(s)
'22JTR, '06 LJ, '06 TJ GE
Build Thread
Link
Occupation
GIS Specialist
Today I finished a project I have been thinking about and wanting to do since I purchased the Jeep. Along with air, water is nice to have. For rinsing off boots, cooking, dishes, drinking...all sorts of things. So, I set out to install a water pump.
Jeep Gladiator Destination Unknown - 2022 JTR journal IMG_0652.JPG


The parts list was fairly long since I wanted to try and get it done in a day or two - so I purposefully purchased more than I needed knowing that some of it will be used on the TJ for a similar system. I would also be able to use much of the tools for re-plumbing the fresh side of my house. I have never plumbed pex before, but knew it was relatively simple. And simple it was. I encourage anyone needing home plumbing repair to do it themselves with pex.
Jeep Gladiator Destination Unknown - 2022 JTR journal IMG_0643.JPG


All of the parts I used was purchased on Amazon. I hate to say that I really really like Amazon, but it's true. I much prefer to support my local small town stores whenever possible, but a lot of this 'speciality' sort of stuff they just don't have. In fact, nobody really does. It's amazing how much Amazon and online purchasing has revolutionized...all sorts of things really. Getting the water pump installed was the first task. This took a long time. Mostly because I did NOT want to even consider removing the @813 Fabrication & Design panels. Since the fridge is in place, the air and electrical system is in place - removing these panels to mount the water pump would be disastrous. Fortunately I was just barely able to reach the nuts on the back side to tighten everything down.
Jeep Gladiator Destination Unknown - 2022 JTR journal IMG_0641.JPG


Next was to decide where the faucet would go. I had a decision to make. Use just a RV style faucet, or faucet and add a water filter. I thought long and hard about this one because obviously this entire system would have to be blown out by air come fall to prevent freeze damage. Considering that I drink a lot of water, and didn't want to carry around a filter separately, I opted to install a filter. In the future, I could always remove the actual filter and bypass so that the little faucet can still be used. So it was time to lay things out and see where I would be drilling holes.
Jeep Gladiator Destination Unknown - 2022 JTR journal IMG_0642.JPG


The filter I chose to use is a culligan EZ-4. This is their 'best' filter for water drinking applications. However, it only filters to 0.5 microns. Most backpacking filters filter below this, and I would never own a backpacking filter that does not filter smaller than 0.2 microns for viruses and protozoa. MSR is a top notch backpacking filter if anyone is looking. However, I mostly expect to be filling water jugs at home (I have a whole house 5 stage filtration system), and any sources I use other than home would be potable water anyway. Plus I will have some Sodium Chlorite on hand in the event I need to purify and then filter stream water. I opted to place the filter in this general area. It is only temporary as it needs to move further to the right and tie into the trail rail system better. But this will be a good test for now.
Jeep Gladiator Destination Unknown - 2022 JTR journal IMG_0646.JPG


Now I needed to start figuring out the layout for water pipe. The plan was relatively simple. Fresh 'cold' water would immediately exit the pump to a T. Where it would be diverted one direction to the cold tap, and the other direction to a closed off ball valve - for now. Where the cold water enters the tap, is where it will also tee off to run a small 1/8“ line to the filter, and back to the drinking faucet. The pex I chose was 1/2". This is because the water pump, a standard RV style pump by DC House, is also 1/2". All RV lines, connections, etc. are 1/2" if you didn't know.
Jeep Gladiator Destination Unknown - 2022 JTR journal IMG_0645.JPG


It was very important for me to lay out the hose and make all the crimp connections before it was hooked up. This way I can angle the hose, crimp connectors, and everything appropriately to reduce as much bind as possible. In this case, the already bending pex made it helpful to route under the pump.
Jeep Gladiator Destination Unknown - 2022 JTR journal IMG_0647.JPG


Then the addition of the water filter hose, and it all went together pretty smoothly.
Jeep Gladiator Destination Unknown - 2022 JTR journal IMG_0648.JPG


Because this is in a vehicle, and not a RV, it was very important to me to make sure all connections were tight, and the maximum water tight as possible. I do plan to support the portion of pipe going from the output of the pump to the ball valve tomorrow because I just don't like it hanging in the air like that especially with all the vibration of potholes and off highway travel. So, to make sure these fittings didnt work loose over time, as they usually do, I added in some teflon tape. The teflon is not there to provide any sealing as that is done internal to the connections with rubber gaskets. The teflon is purely a friction component between threads to tighten up things. Also, all of the brass is led free, but if led is somehow introduced, it will be stopped by the filter before drinking.
Jeep Gladiator Destination Unknown - 2022 JTR journal IMG_0649.JPG

Jeep Gladiator Destination Unknown - 2022 JTR journal IMG_0650.JPG


With that, the cold water side was just about done. Why do I specify cold water? Well...if you see the red pex below you can probably figure out I do plan on adding a hot water heater at some point. Washing dishes, and taking showers is just better with warmer water - especially if you are camping at high elevation and it's only 40 outside.
Jeep Gladiator Destination Unknown - 2022 JTR journal IMG_0653.JPG


The pump draws just under 5 amps. So all should be good with battery power. I do wonder what some functional tests will show, but it's not like one will run the pump for 20 minutes. Maybe on/off for about 5 minutes of dishes washing, and a quick 2 minute combat shower - just enough to get wet, scrub, and rinse. Battery power shouldn't be a problem as I have previously calculated that if you go back several pages and look at the electrical section. But, with using the pump a solid 12 minutes in a 24 hour period, it should equate to about 0.054 amps. So the fridge is still the big power draw.
Jeep Gladiator Destination Unknown - 2022 JTR journal IMG_0655.JPG


For the final functional test - let's power it up! And.....no leaks. I still need to make a hose to connect to the quick coupling. But, I have water, and drinkable water at that!!
 

813 Fabrication & Design

Rock Sponsor (Level 1)
First Name
Jeremy
Joined
Dec 21, 2019
Threads
51
Messages
918
Reaction score
1,323
Location
Louisville, KY
Website
www.813fabrication.com
Vehicle(s)
2020 Jeep Gladiator Rubicon Launch Edition
Today I finished a project I have been thinking about and wanting to do since I purchased the Jeep. Along with air, water is nice to have. For rinsing off boots, cooking, dishes, drinking...all sorts of things. So, I set out to install a water pump.
IMG_0652.JPG


The parts list was fairly long since I wanted to try and get it done in a day or two - so I purposefully purchased more than I needed knowing that some of it will be used on the TJ for a similar system. I would also be able to use much of the tools for re-plumbing the fresh side of my house. I have never plumbed pex before, but knew it was relatively simple. And simple it was. I encourage anyone needing home plumbing repair to do it themselves with pex.
IMG_0643.JPG


All of the parts I used was purchased on Amazon. I hate to say that I really really like Amazon, but it's true. I much prefer to support my local small town stores whenever possible, but a lot of this 'speciality' sort of stuff they just don't have. In fact, nobody really does. It's amazing how much Amazon and online purchasing has revolutionized...all sorts of things really. Getting the water pump installed was the first task. This took a long time. Mostly because I did NOT want to even consider removing the @813 Fabrication & Design panels. Since the fridge is in place, the air and electrical system is in place - removing these panels to mount the water pump would be disastrous. Fortunately I was just barely able to reach the nuts on the back side to tighten everything down.
IMG_0641.JPG


Next was to decide where the faucet would go. I had a decision to make. Use just a RV style faucet, or faucet and add a water filter. I thought long and hard about this one because obviously this entire system would have to be blown out by air come fall to prevent freeze damage. Considering that I drink a lot of water, and didn't want to carry around a filter separately, I opted to install a filter. In the future, I could always remove the actual filter and bypass so that the little faucet can still be used. So it was time to lay things out and see where I would be drilling holes.
IMG_0642.JPG


The filter I chose to use is a culligan EZ-4. This is their 'best' filter for water drinking applications. However, it only filters to 0.5 microns. Most backpacking filters filter below this, and I would never own a backpacking filter that does not filter smaller than 0.2 microns for viruses and protozoa. MSR is a top notch backpacking filter if anyone is looking. However, I mostly expect to be filling water jugs at home (I have a whole house 5 stage filtration system), and any sources I use other than home would be potable water anyway. Plus I will have some Sodium Chlorite on hand in the event I need to purify and then filter stream water. I opted to place the filter in this general area. It is only temporary as it needs to move further to the right and tie into the trail rail system better. But this will be a good test for now.
IMG_0646.JPG


Now I needed to start figuring out the layout for water pipe. The plan was relatively simple. Fresh 'cold' water would immediately exit the pump to a T. Where it would be diverted one direction to the cold tap, and the other direction to a closed off ball valve - for now. Where the cold water enters the tap, is where it will also tee off to run a small 1/8“ line to the filter, and back to the drinking faucet. The pex I chose was 1/2". This is because the water pump, a standard RV style pump by DC House, is also 1/2". All RV lines, connections, etc. are 1/2" if you didn't know.
IMG_0645.JPG


It was very important for me to lay out the hose and make all the crimp connections before it was hooked up. This way I can angle the hose, crimp connectors, and everything appropriately to reduce as much bind as possible. In this case, the already bending pex made it helpful to route under the pump.
IMG_0647.JPG


Then the addition of the water filter hose, and it all went together pretty smoothly.
IMG_0648.JPG


Because this is in a vehicle, and not a RV, it was very important to me to make sure all connections were tight, and the maximum water tight as possible. I do plan to support the portion of pipe going from the output of the pump to the ball valve tomorrow because I just don't like it hanging in the air like that especially with all the vibration of potholes and off highway travel. So, to make sure these fittings didnt work loose over time, as they usually do, I added in some teflon tape. The teflon is not there to provide any sealing as that is done internal to the connections with rubber gaskets. The teflon is purely a friction component between threads to tighten up things. Also, all of the brass is led free, but if led is somehow introduced, it will be stopped by the filter before drinking.
IMG_0649.JPG

IMG_0650.JPG


With that, the cold water side was just about done. Why do I specify cold water? Well...if you see the red pex below you can probably figure out I do plan on adding a hot water heater at some point. Washing dishes, and taking showers is just better with warmer water - especially if you are camping at high elevation and it's only 40 outside.
IMG_0653.JPG


The pump draws just under 5 amps. So all should be good with battery power. I do wonder what some functional tests will show, but it's not like one will run the pump for 20 minutes. Maybe on/off for about 5 minutes of dishes washing, and a quick 2 minute combat shower - just enough to get wet, scrub, and rinse. Battery power shouldn't be a problem as I have previously calculated that if you go back several pages and look at the electrical section. But, with using the pump a solid 12 minutes in a 24 hour period, it should equate to about 0.054 amps. So the fridge is still the big power draw.
IMG_0655.JPG


For the final functional test - let's power it up! And.....no leaks. I still need to make a hose to connect to the quick coupling. But, I have water, and drinkable water at that!!


Great setup!
 
OP
OP
chorky

chorky

Well-Known Member
First Name
Chad
Joined
Feb 26, 2022
Threads
175
Messages
3,466
Reaction score
3,801
Location
Montana
Website
www.youtube.com
Vehicle(s)
'22JTR, '06 LJ, '06 TJ GE
Build Thread
Link
Occupation
GIS Specialist
This week I added another item to the water system. It was on order by the last post and was a quick install. My objective was to have a long hose to connect to the faucet on that table I have stored on the top of the canopy. That way I can put the table anywhere within reason, and have water for washing dishes. I also wanted a long enough hose to be able to take a shower but not right next to the Jeep causing a muddy mess. So after searching, you gotta hate to love amazon, but I found a 13 foot RV stainless shower hose. Mostly used for outdoor showers of course - but the faucet mounted inside the canopy is a RV faucet - so the threads would match. I purposefully used RV stuff for the water system because they are widely available, and easy to use.

I also test fitted all 3 water cans. Likely I will only use one for a weekend trip, 2 for a 4 day trip - and all three for the few times I will do a week long trip. The fit is perfect, exactly as I had envisioned when planning out the storage. Side note, is I looked at all these measurements (the water cans, battery box, fridge, and fridge slide) BEFORE purchasing anything. So that first year was pondering how I wanted it to be set up. So it pays to take time and think of what you want to do before just diving in. And the water cans, with pain, be placed in these spots from the side when full. And removed when empty. So at the sacrifice of my already messed up shoulders, my knees will be grateful. I also noticed that the outside dimensions of the PEX being 3/8's fits perfectly inside the mouth of the scepter can and creates a bit of a seal preventing any dirt from entering.
Jeep Gladiator Destination Unknown - 2022 JTR journal IMG_0658.JPG

Jeep Gladiator Destination Unknown - 2022 JTR journal IMG_0659.JPG
 
OP
OP
chorky

chorky

Well-Known Member
First Name
Chad
Joined
Feb 26, 2022
Threads
175
Messages
3,466
Reaction score
3,801
Location
Montana
Website
www.youtube.com
Vehicle(s)
'22JTR, '06 LJ, '06 TJ GE
Build Thread
Link
Occupation
GIS Specialist
The water pressure is outstanding!
 

Sponsored

OP
OP
chorky

chorky

Well-Known Member
First Name
Chad
Joined
Feb 26, 2022
Threads
175
Messages
3,466
Reaction score
3,801
Location
Montana
Website
www.youtube.com
Vehicle(s)
'22JTR, '06 LJ, '06 TJ GE
Build Thread
Link
Occupation
GIS Specialist
Over the last week I spent time installing the front Warn Elite full width winch bumper, and Quadratec's 12K synthetic winch. I will say up front that the bumper from Warn is very difficult to install, does not line up as good as it should being a Warn product, and comes with sub-par fasteners for a bumper that is rated to handle a 12K winch. I do like still the overall fit and finish, but am very frustrated with the install.

That being said, it all started with removing the factory plastic bumper - which is easy enough.
Jeep Gladiator Destination Unknown - 2022 JTR journal IMG_0662.JPG


The most frustrating part about this is removing the excessively amount of small screws to separate the plastic pieces in order to remove the factory fog light harness - which is placed inside the warn bumper to reuse the factory fog lights (or in my case, Baja Designs fog lamps with the factory style harness connectors).
Jeep Gladiator Destination Unknown - 2022 JTR journal IMG_0660.JPG


The first step (according to Warn) is to line up the bumper after placing the carriage bolts in the bumper, and slide it onto the frame. They say to remove and discard the inner brackets that provide extra support. They also do not use all 8 bolts, but only 6 because they expect people to install their Zeon series winches which requires cutting the upper inner bolt spot on the frame. Because of this their bumper does not even have the option to add the 2 bolts - which I think is a poor choice. So I reused all 4 of the extra factory brackets since my winch will fit between the rails just fine.
Jeep Gladiator Destination Unknown - 2022 JTR journal IMG_0664.JPG

Jeep Gladiator Destination Unknown - 2022 JTR journal IMG_0666.JPG


The next step is to install the winch plate support brackets onto the frame horn (didn't realize what this was until after some research). This is apparently the key to how and why this bumper can support a super heavy pull from a 12K winch.
Jeep Gladiator Destination Unknown - 2022 JTR journal IMG_0667


This is where my problems began. After this step, warn has you tighten bolts down to spec. Well.....their spec and instructions are not good, and neither is the fasteners they provide. Because, by HAND, I snapped in half the largest carriage bolts of the kit.
Jeep Gladiator Destination Unknown - 2022 JTR journal IMG_0668.JPG

Jeep Gladiator Destination Unknown - 2022 JTR journal IMG_0669.JPG


At this point, I was pretty furious, especially after the whole 'fix' warn had for their lower end winches - I was beginning to wonder if their entire company quality was going downhill. So doing some looking and researching, and with community input (https://www.jeepgladiatorforum.com/forum/threads/bumper-retaining-bolt-torque.69579/#post-1147288) I came to the conclusion the bolts Warn provided are mostly grade 5. Some are 8.8, and I think one set was 10.9 (the metric version of grade 8). However, the carriage bolts had some weird markings on them I didn't figure out.
Jeep Gladiator Destination Unknown - 2022 JTR journal IMG_0681

Jeep Gladiator Destination Unknown - 2022 JTR journal IMG_0680.JPG

Jeep Gladiator Destination Unknown - 2022 JTR journal IMG_0682

Jeep Gladiator Destination Unknown - 2022 JTR journal IMG_0683


So, off to the hardware store we go. Luckily for me, my local Ace which is 2 minutes away has a good assortment of stuff for being such a small town. The next option is more than 2 hours round trip. So, off comes the bumper.
Jeep Gladiator Destination Unknown - 2022 JTR journal IMG_0670.JPG


I opted to not use any of the big carriage bolts and got grade 8 hardware. I didn't even want to consider having this problem again. I also opted to NOT use the bolt retainers (the little round thing that presses onto a bolt to keep it in place. Even though this meant spending more time getting bolts and nuts on - I didn't want that tiny little 1/2mm space between the bumper and frame. It just didn't sit right with me. So, a few hours later, the next day, the bumper went back on.
Jeep Gladiator Destination Unknown - 2022 JTR journal IMG_0673.JPG


You can see how tight some of the access is - and this is easy compared to other aspects of this bumper later on.
Jeep Gladiator Destination Unknown - 2022 JTR journal IMG_0674

Jeep Gladiator Destination Unknown - 2022 JTR journal IMG_0675


I felt comfortable tightening these down to spec, about 75 lb-ft
Jeep Gladiator Destination Unknown - 2022 JTR journal IMG_0676.JPG

Jeep Gladiator Destination Unknown - 2022 JTR journal IMG_0677.JPG


Now it was time to put the winch plate brackets on again.
Jeep Gladiator Destination Unknown - 2022 JTR journal IMG_0672.JPG


And I noticed something interesting. The brackets did not line up. The holes lined up ok since there was a ton of play, but the brackets needed to bend for metal to contact metal flush.
Jeep Gladiator Destination Unknown - 2022 JTR journal IMG_0691


But, following their instructions, and some comments from a forum member, I started tightening things down anyway to spec. And guess what - another broken bolt. Well, rather in this case a stripped rivet nut and a bolt that no longer had any threads.
Jeep Gladiator Destination Unknown - 2022 JTR journal IMG_0709


So, what to do now? Well I ended up chatting with @Summitdan since he has the same bumper, and he experienced none of what I did. But we talked through some things anyway (appreciate your input Dan!). This was a bit of a problem as there was no room to easily cut out the rivet nut. The bigger problem is Warn doesn't even recognize these rivet nuts even exist. How could they have such bad instructions from 'the best' winch company? So back to the hardware store again.
Jeep Gladiator Destination Unknown - 2022 JTR journal IMG_0710.JPG


I opted to get more grade 8 hardware. I drilled out the rivet nut to 1/2 inch (to my surprise it didnt fall out! So I put grade 8 hardware in the hole and squished the crap out of the rivet nut. It was able to torque to spec, so I think it will hold. I also opted to get different bolts for the other rivet nuts, that are longer, after making sure I had the right thread. I think the problem here was the factory bolts just were not long enough to grab threads enough. But, poor on Warn to not even know these exist. So there must have been a change here between 2020 and 2022.
Jeep Gladiator Destination Unknown - 2022 JTR journal IMG_0732.JPG


I also opted to get rid of ALL hardware that Warn includes, and get specifically grade 8 hardware. I am very not happy they would not include grade 8.
Jeep Gladiator Destination Unknown - 2022 JTR journal IMG_0733.JPG


Finally, after 5 days of working on a darn bumper, I was able to get it up and tightened down. Phew. Warn will certainly be hearing from me as this is a big oversight IMO. And from such a reputable company, just not ok at all. But I do still like the look and lines of the bumper better than any other options out there. Hopefully it will give me years and years of trouble free use.
Jeep Gladiator Destination Unknown - 2022 JTR journal IMG_0671.JPG
 

Rusty PW

Well-Known Member
First Name
Russ
Joined
Jan 10, 2022
Threads
37
Messages
11,358
Reaction score
30,310
Location
Fayette Nam, Pennsyltucky
Website
www.youtube.com
Vehicle(s)
'22 JTRD, '11 370Z Nismo, '07 Honda VFR
Build Thread
Link
Occupation
Muff Diver
I hate hearing about all the issues you had with this bumper.

This reminded me of the issues I had with a Fussion rear bumper for my Power Wagon. I hate that company with a passion.
 
OP
OP
chorky

chorky

Well-Known Member
First Name
Chad
Joined
Feb 26, 2022
Threads
175
Messages
3,466
Reaction score
3,801
Location
Montana
Website
www.youtube.com
Vehicle(s)
'22JTR, '06 LJ, '06 TJ GE
Build Thread
Link
Occupation
GIS Specialist
I hate hearing about all the issues you had with this bumper.

This reminded me of the issues I had with a Fussion rear bumper for my Power Wagon. I hate that company with a passion.
I think my biggest beef is the hardware they chose to include. Its not a huge deal that all the brackets didnt line up perfectly some of that is just how it goes. But not having grade 8 to start with is pretty lame. But. It is together now and looks really good.
 

Rusty PW

Well-Known Member
First Name
Russ
Joined
Jan 10, 2022
Threads
37
Messages
11,358
Reaction score
30,310
Location
Fayette Nam, Pennsyltucky
Website
www.youtube.com
Vehicle(s)
'22 JTRD, '11 370Z Nismo, '07 Honda VFR
Build Thread
Link
Occupation
Muff Diver
I think my biggest beef is the hardware they chose to include. Its not a huge deal that all the brackets didnt line up perfectly some of that is just how it goes. But not having grade 8 to start with is pretty lame. But. It is together now and looks really good.
Sometimes, it's the little things that get under your skin.

I talked to Fusion about an off road rear bumper. They had one that I liked. They said that the bumper is off road ready. I ordered it. It came in and I was pissed. It was made from 1/16" sheet metal. And weight about 40 lbs. I called them to send it back. They wanted a 25% restocking fee plus I had to pay for shipping. Screw that. After I got done with it. It weight 90 lbs. And could take a hit.
 
OP
OP
chorky

chorky

Well-Known Member
First Name
Chad
Joined
Feb 26, 2022
Threads
175
Messages
3,466
Reaction score
3,801
Location
Montana
Website
www.youtube.com
Vehicle(s)
'22JTR, '06 LJ, '06 TJ GE
Build Thread
Link
Occupation
GIS Specialist
Once the front bumper was on, and before the skid plate, came the winch. I chose to purchase a Quadratec winch. They offered a 12K option for about $750. I am pretty sure it and others are all made in the same plant in China. However, it has some nice features I like. A push button on/off button, wireless controller with a wire attachment for wired operation, and a drum light. I first thought a drum light was a gimmick but I do see how it can be helpful. And it turns on when the winch is on. The winch bolted on easy enough, as the holes in the Warn bumper lined up perfectly, and Quadratec included good quality 10.8 flange bolts with nylon lock nuts.
Jeep Gladiator Destination Unknown - 2022 JTR journal IMG_0692.JPG


Taking notes from watching other build threads and how wires were routed, I opted to route wires up along the inside of the front grille, under the air filter box, and around the battery.
Jeep Gladiator Destination Unknown - 2022 JTR journal IMG_0693


Jeep Gladiator Destination Unknown - 2022 JTR journal IMG_0696.JPG


This has to be the easiest wiring I have ever done.
Jeep Gladiator Destination Unknown - 2022 JTR journal IMG_0697.JPG


The actual hook up is temporary as I do still need to install a solenoid if I can find room, so it is direct wired for now. The only reason I felt comfortable enough with this is due to the on/off button.
Jeep Gladiator Destination Unknown - 2022 JTR journal IMG_0714.JPG


Most winches don't seem to offer good hooks. I am sure they are plenty strong, but they just seem awful cheesy to me. Quadratec's included hook didn't seem up to par to me. Especially with how narrow it was, it certainly would not work well with synthetic shackles. So, I opted for a set of Factor 55 ultrabooks. A pricy option but I think well worth it.
Jeep Gladiator Destination Unknown - 2022 JTR journal IMG_0700.JPG


With the winch and ultrabook mounted, it was time to wrap up the last task. The skid plate. The skid plate is quite minimalist, but offers good protection for the sway disco. Although it does not offer much protection for anything else. Unfortunately the steering components are hung out to dry so to speak.
Jeep Gladiator Destination Unknown - 2022 JTR journal IMG_0715.JPG


The skid plate was possibly the most difficult part of this process. Funny enough, the bolts for the skid plate from Warn were listed as stronger than the primary carriage bolts for the bumper to frame mount. Crazy. These bolts, as described by @Summitdan were quite hard to reach. And difficult they were. I spent about 3 hours just trying to get the 5 front skid plate bolts on. I decided to only utilize 7 of the 9 bolts since the potential of me smacking that skid is pretty low, and 5 bolts is plenty strong. They are in fact extremely difficult to access, difficult enough that I considered drilling access holes in the bottom of the skid itself - made only worse for those of us with physical issues.
Jeep Gladiator Destination Unknown - 2022 JTR journal IMG_0734


The outside bolts are easy enough to access and torque. But the inside bolts - well...you're lucky to get two hands and two wrenches in there to get them snug. But, after 3 hours of fighting, it worked out.
Jeep Gladiator Destination Unknown - 2022 JTR journal IMG_0733.JPG


And with that it was time to put on the first load, stretch and wind up the synthetic line. I did not get a video of this part as it required both hands, paying attention, and my neighbor using his 500 pound ATV with the brakes locked up. The winch pulled very well, clean, and I did not notice any warmth to the winch or wires, and no hiccups to the pull. It should work well - my only hope is that I never have to remove this bumper, or the skid plate, for at least the next 8 years. There are several things I think Warn can do much better on especially considering they are 'the best of the best'. but overall I am still satisfied because my primary concern was having a good quality full width bumper capable of handling a 12K winch.
Jeep Gladiator Destination Unknown - 2022 JTR journal IMG_0755.JPG
 

Sponsored

OP
OP
chorky

chorky

Well-Known Member
First Name
Chad
Joined
Feb 26, 2022
Threads
175
Messages
3,466
Reaction score
3,801
Location
Montana
Website
www.youtube.com
Vehicle(s)
'22JTR, '06 LJ, '06 TJ GE
Build Thread
Link
Occupation
GIS Specialist
Today, I decided to run to town for a new chainsaw. I really didn't want to spend this much on a saw, but I dont use them much anymore other than firewood and the occasional tree across the road. My big full wrap 362 is hard for me to even handle anymore. With modern tech, I have been quite interested in the battery powered saws. After seeing plenty of reviews, and our own battery saws at work being used flawlessly the last 2 years by the fire guys without any issues, I opted to get one. This is the 220 TC-O - a tree saw. Basically the battery version of my 201 T C-M tree saw. I like tree saws a lot for back of Jeeps. My 201 gasser is a super hot saw and I have easily felled large 20+" trees with it. Word on the street is the 220, the battery version, is just as powerful. With the 300S battery, run time is about 1 hour. And I can get a charger that will charge the battery from the in cab inverter. The best part is...nor more messing with gas, having gas go bad, clogging up carb's, or hard high elevation winter start's. The 201 is never really hard to start, but I'm just not wanting to mess with gas anymore with how little I use it these days. It even has a low oil light - how cool.
Jeep Gladiator Destination Unknown - 2022 JTR journal IMG_0758.JPG


Side note - if you are not experienced with saws, do NOT get a top handle tree saw. they are significantly more dangerous and harder to handle. Experienced sawyers only for these.
 

Rusty PW

Well-Known Member
First Name
Russ
Joined
Jan 10, 2022
Threads
37
Messages
11,358
Reaction score
30,310
Location
Fayette Nam, Pennsyltucky
Website
www.youtube.com
Vehicle(s)
'22 JTRD, '11 370Z Nismo, '07 Honda VFR
Build Thread
Link
Occupation
Muff Diver
I have an 039 with a 24" bar and Rapid Cut chain. Hate those anti kick back chains. I've had this since around late 1980's I think. Love it.

For small work. Been thinking on a small 12" electric one.
 
OP
OP
chorky

chorky

Well-Known Member
First Name
Chad
Joined
Feb 26, 2022
Threads
175
Messages
3,466
Reaction score
3,801
Location
Montana
Website
www.youtube.com
Vehicle(s)
'22JTR, '06 LJ, '06 TJ GE
Build Thread
Link
Occupation
GIS Specialist
To my surprise, yesterday (Friday) another order arrived. This is possibly one of the most exciting bits of gear to me since this is pretty rare for most vehicles and something I have wanted for the better part of 15 years. Not really the winch, but the winch location! This item, and the front Warn bumper I had previously ordered from Quadrated due to some sales and discounts. However, for some reason they were unable to process the order. After some searching around I found them on, none other than, Amazon! I hate to love Amazon, but both items were each $200 cheaper on Amazon - and also being sold by some lesser named 4x4 off road businesses that are American, so I wasn't supporting non-americas business. So after 2 weeks of parts being in stock but not being able to process it I told Quadratec to cancel the order. And this arrived 5 days after I placed the order!
Jeep Gladiator Destination Unknown - 2022 JTR journal IMG_0738.JPG


I made several measurements after installing the Road Armor rear bumper because it would undoubtedly be a pretty tight fit. The bumper is rated to handle an 8,500 pound winch according to instructions, and according to the company directly it is rated at 9,500. But I wanted to try this winch for 2 reasons. 1, I want to get another one if it works well for my TJ. 2, it is wireless. I did not want two wireless winches of the same company in the 1 in 1,000,000 chance that both winches are needed simultaneously. This could cause an issues as a wireless remote would be telling both winches what to do. So, after making even more measurements, I opted for this one. I doubt I will ever be making a 10,000 pound pull and pushing this winch to the limit and going over the bumper rating, so I think it will be fine. Plus, this winch, like Quadratec and others is fully water tight - a big deal considering it will be on the rear bumper, and winter ice/snow/salt/crap will be smashing into it 9 months of the year.

Unlike others, this winch came with two remotes. One is wired, the other is wireless. It also came with some decently long cable which I won't use as I need custom cables at about 22' long. But I was surprised to see how small the cable included is.
Jeep Gladiator Destination Unknown - 2022 JTR journal IMG_0736

Jeep Gladiator Destination Unknown - 2022 JTR journal IMG_0737

Jeep Gladiator Destination Unknown - 2022 JTR journal IMG_0739


I knew several weeks ago upon install of the bumper itself that there would have to be some slight modifications. Although I give props to Road Armor for making the only currently available rear winch bumper, and though space is an ultimate premium, the fairlead location could be adjusted... The mounting bolts for the fairlead are too close to the winch bolts, requiring some cutting. Fortunately the farilead is aluminum, so rust shouldn't be a problem. With my neighbors grinder, I went to work and did the best I could without having access to proper fabrication tools and equipment.
Jeep Gladiator Destination Unknown - 2022 JTR journal IMG_0740.JPG

I think this looks OK, and I doubt it will cause any structural concerns.

Now bolting on the fairlead was also a bit of a problem that just happened to turn out ok. The bumper offers inset bolt spots for the fairlead nuts. Because the fairlead and winch bolts are on the same plane, it is important that the bolts be flush to prevent any contact interference with the winch itself. Well... it didn't work. The nuts offered with the winch for the fairlead wouldn't fit in the pre-stamped hex holes on the bumper. But! Fortunately I just so happened to have some grade 8 nuts lying around. They, however; were a flanged nut. So I took some measurements of the flange thickness, and there was just enough room for the flange not to have excessive contact with the winch body when everything was snug. So on it went.
Jeep Gladiator Destination Unknown - 2022 JTR journal IMG_0741.JPG


Now that the fairlead was on, it was time to install the winch. I was hoping it would bolt right up just fine, but based on measurements I was pretty confident it would not.
Jeep Gladiator Destination Unknown - 2022 JTR journal IMG_0742.JPG


But I put it up anyway. This was a chore. Actually a really big and painful chore. I'm going to hurt all week probably. Unlike with Warn, these mounting holes for the winch did not line up well. It required a lot of finagling to get things to line up - I almost got out some drill bits to make the holes larger even. Clearances were very tight, and that certainly contributed to some difficulty.
Jeep Gladiator Destination Unknown - 2022 JTR journal IMG_0745


The bolt holes finally lined up enough to all get started.
Jeep Gladiator Destination Unknown - 2022 JTR journal IMG_0746.JPG


So I torqued everything down, and on it was. And it looks awesome!
Jeep Gladiator Destination Unknown - 2022 JTR journal IMG_0743.JPG

Now if you note the position of the clutch handle above, you can see it is dangerously close to the tire location. Superwinch does provide for this super awesome feature of re-clocking the gears so that you can rotate the clutch assembly 90 degrees in either direction - this is a really really awesome feature that I dont think any other companies offer. My hope was that this would provide enough space to operate.

So the real question was - is it going to fit with the spare? The answer.... NO. It is just too tall. By about 4-5 inches. However, another reason I specifically wanted this winch is it offers a removable and remote mounted solenoid body. The Quadratec option does not as the solenoid body is cast into the winch body as a whole and is not removable. So, after some thinking, I found a location that will make space work appropriately, AND allows for relatively easy access if I want to use the hard wire option.
Jeep Gladiator Destination Unknown - 2022 JTR journal IMG_0747.JPG


And here you can see access to the plug for a hard wire method.
Jeep Gladiator Destination Unknown - 2022 JTR journal IMG_0748.JPG


This did require drilling more holes of course. Hopefully all the holes I have made are protected enough from my efforts to prevent rust with painting several coats, and a few coats of Amsoil HD Metal Protect.
Jeep Gladiator Destination Unknown - 2022 JTR journal IMG_0749.JPG


And now for the final and hopefully successful space test.
Jeep Gladiator Destination Unknown - 2022 JTR journal IMG_0751.JPG


It fits! Barely but it fits! And there is even a few inches on the opposite end of the tire before the heat shield, so I am pretty sure I can fit a 35" tire too. The clutch handle on the opposite side of this picture is easy to access. Reach under and it's right there. It has about 3" clearance from the tire, so plenty of space to lift and turn.
Jeep Gladiator Destination Unknown - 2022 JTR journal IMG_0750.JPG

Also note in the photo above there is a wire going right next to the tire - the Superwinch also has a drum light, which I find super awesome to make sure no weird winding during a night operation.

And with that, it was time to stretch and wind the rear winch just the same as the front. I do have to finish wiring though. I used a temporary wire solution of the included wires, lying on the ground, clamped to jumper cables, and ran to the battery. Maybe tomorrow I will run and measure what length of wire is needed and try to get a custom order completed in town. So there is another couple hours of finish work. But the hard part is completed. All just in time before filming next weekend. Now if I can only get 3 more things delivered and installed before Friday - the build will be complete before filming.
Jeep Gladiator Destination Unknown - 2022 JTR journal IMG_0753.JPG
 
OP
OP
chorky

chorky

Well-Known Member
First Name
Chad
Joined
Feb 26, 2022
Threads
175
Messages
3,466
Reaction score
3,801
Location
Montana
Website
www.youtube.com
Vehicle(s)
'22JTR, '06 LJ, '06 TJ GE
Build Thread
Link
Occupation
GIS Specialist
I have an 039 with a 24" bar and Rapid Cut chain. Hate those anti kick back chains. I've had this since around late 1980's I think. Love it.

For small work. Been thinking on a small 12" electric one.
The 220 I just picked up is 14". It's the same length as the 201 gasser I have but not as tall of a bar - so unfortunately the chain's don't intermix.

I think 12" would be a tad too small. At least for what I deal with here, 14" usually requires cuts on both sides. 16 or 18" would be perfect, but then you're stepping up a couple sizes for the head unit. But with as hot of a saw that the 201 is, it is pretty amazing. I am hoping this 220 lives up to that same name and based on a bunch of arborist reviews, it will. There is a version of this that has a rear handle, so not a top handle tree saw. These battery saws are not cheap though, at all. This one, with a battery, charger, was about $900. For comparison, the 201 I have (though that was purchased in 2017 and pre-covid crazies, was about $600. So there is a cost factor. But to not have to deal with gas, I will pay that extra. Not that gas is bad - but I just dont use mine often enough so I end up getting old gas, having to empty or clean the carb....etc. It's a hassle.
 

WILDHOBO

Well-Known Member
First Name
Dan
Joined
Sep 24, 2021
Threads
73
Messages
11,666
Reaction score
17,748
Location
Colorado
Vehicle(s)
2021 Gladiator Rubicon
Occupation
Network Engineer
Vehicle Showcase
1
I love my two husqevarnas. I think one 345 and one 460. I have a ripping chain and Alaskan sawmill for the 460. I’ve live edged a few trees for fun. I don’t take them with me on the trail though. I take an 18v sawzall and a couple long pruning blades. For me it seems easier for the occasional downed limb. But it wouldn’t help for a large downed tree. Then the ax comes out I guess. Hopefully that won’t happen any time soon. Maybe I should consider the 18v Milwaukee chainsaw as an addition to the trail gear.
Sponsored


Top