Sponsored
DAVECS1
Well-Known Member
- First Name
- David
- Joined
- Jan 24, 2020
- Threads
- 56
- Messages
- 1,861
- Reaction score
- 2,538
- Location
- Peoria, IL
- Vehicle(s)
- 2020 Gladiator Sport S Max Tow
I have a sticky at the top of this forum.@DAVECS1 where can I read more about your tune? I don't live far from you. (I'm in Indiana)
The short description is I have done extensive work to give this engine a similar power curve and transmission performance as a Ram pickup, utilizing the low RPM performance of the magnuson, and remapping the throttle performance.
DAVECS1
Well-Known Member
- First Name
- David
- Joined
- Jan 24, 2020
- Threads
- 56
- Messages
- 1,861
- Reaction score
- 2,538
- Location
- Peoria, IL
- Vehicle(s)
- 2020 Gladiator Sport S Max Tow
I hesitate to reply to this as I would like to offer a comprehensive explanation of things happening here and the comment about manifold pressure and cylinder pressure. Unfortunately I just don't have the energy to write the thesis it deserves. This is good work and it actually captures the phenomena, we are discussing, dealing with cylinder pressure, and unfortunately what many calibrations are missing.As long as you stay out of detonation, it is my understanding that cylinder pressure and manifold pressure track together. It makes more sense. More A and F = more cylinder pressure = more torque.
And yes, more manifold pressure does equal more torque. In a rather linear way actually.
I suspect you are referencing the possibility of detonation. But if not, I'd like to hear an explanation.
Merry Christmas.
Lets start with temp rise. We are comparing air to air with air to water. The air to water has a limited temp swing. The air to air will vary depending outside air temp. I prefer air to water for a DD because I can work with a limited set of temps to calibrate to. In the Graph the Magnuson starts higher because it is basically ambient engine temps. It does not go much higher as it generally tops out at 108.
Next lets discuss manifold pressure and cylinder pressures. I have about 6 hours of dyno time and countless hours of road time wrapped up in tuning the variable valve timing on this engine. My findings: the stock Jeep 3.6L calibration in the JT and JL elevate cylinder pressures from 2400 to 3800 rpm by keeping the intake valve open longer and the exhaust valve shut longer. This is accompanied by a quick scavenging off idle to boost midrange performance. Great naturally aspriated but for forced induction, it is not ideal. The chart above looks like it shows 1-3rd gear acceleration. You will see a slow down as shown because I am dumping cylinder pressure by hanging the exhaust valves open. I am also doing this off idle to tame the jumpiness of the instant boost. Basically integrating the boost into the driving experience and negating the bypass valve. If you ran out to 80-100 mph you would actually see a speed up as I bring the valve timing back as the engine can tolerate a bit more cylinder pressure beyond 4000 RPM, because momentum of the rotating assembly does some work. Not bleeding cylinder pressure through this midrange requires little to no timing to keep things safe and even then it is possible to get auto ignition. Otherwise I have seen calibrations that get into pre-ignition situations at the end of this RPM band, not ideal. It is my belief this factory VVT routine is what causes alot of the complaints about misfire lights, surging, and the rattling sounds. Its a good idea but pretty temperamental, in its current state. I just went to something more conventional, for boost operation.
In the graph above the centrifugal SC is taking advantage of the stock boosting and even building off of it to build good mid-range power, until the manifold pressure goes well into the positive range, this causes a short run of high cylinder pressures.
As spoken about before, my calibration keeps boost at a low boil most of the time. This is a creation of my own based on a couple things. My main thought was to keep ring forces more consistant, along with rotor forces, and keeping the throttle body control stable. My opinion, the bypass valve is almost useless in this application. This engine rarely operates in vacuum.
Last but not least, it is my professional opinion that in order to keep operating ranges in check it is very very beneficial to alter the transmission tuning to keep the loads in areas the engine can address it the best. This has given me a bit of a struggle for the manual guys as they can load the engine how ever they feel like, and that is the reason I have had to make a complete different calibration for those drivetrains. The manual easily gets into negative manifold pressures, activates the bypass valve, and operates on the edge of scavenging. This causes fits with the torque reserves, cylinder pressures and throttle body model.
dcmdon
Well-Known Member
- First Name
- Don
- Joined
- Mar 31, 2021
- Threads
- 60
- Messages
- 3,656
- Reaction score
- 4,427
- Location
- Boston Metro-West, Northern NH
- Vehicle(s)
- .
Thanks for the great explanation.I hesitate to reply to this as I would like to offer a comprehensive explanation of things happening here and the comment about manifold pressure and cylinder pressure. Unfortunately I just don't have the energy to write the thesis it deserves. This is good work and it actually captures the phenomena, we are discussing, dealing with cylinder pressure, and unfortunately what many calibrations are missing.
Lets start with temp rise. We are comparing air to air with air to water. The air to water has a limited temp swing. The air to air will vary depending outside air temp. I prefer air to water for a DD because I can work with a limited set of temps to calibrate to. In the Graph the Magnuson starts higher because it is basically ambient engine temps. It does not go much higher as it generally tops out at 108.
Next lets discuss manifold pressure and cylinder pressures. I have about 6 hours of dyno time and countless hours of road time wrapped up in tuning the variable valve timing on this engine. My findings: the stock Jeep 3.6L calibration in the JT and JL elevate cylinder pressures from 2400 to 3800 rpm by keeping the intake valve open longer and the exhaust valve shut longer. This is accompanied by a quick scavenging off idle to boost midrange performance. Great naturally aspriated but for forced induction, it is not ideal. The chart above looks like it shows 1-3rd gear acceleration. You will see a slow down as shown because I am dumping cylinder pressure by hanging the exhaust valves open. I am also doing this off idle to tame the jumpiness of the instant boost. Basically integrating the boost into the driving experience and negating the bypass valve. If you ran out to 80-100 mph you would actually see a speed up as I bring the valve timing back as the engine can tolerate a bit more cylinder pressure beyond 4000 RPM, because momentum of the rotating assembly does some work. Not bleeding cylinder pressure through this midrange requires little to no timing to keep things safe and even then it is possible to get auto ignition. Otherwise I have seen calibrations that get into pre-ignition situations at the end of this RPM band, not ideal. It is my belief this factory VVT routine is what causes alot of the complaints about misfire lights, surging, and the rattling sounds. Its a good idea but pretty temperamental, in its current state. I just went to something more conventional, for boost operation.
In the graph above the centrifugal SC is taking advantage of the stock boosting and even building off of it to build good mid-range power, until the manifold pressure goes well into the positive range, this causes a short run of high cylinder pressures.
As spoken about before, my calibration keeps boost at a low boil most of the time. This is a creation of my own based on a couple things. My main thought was to keep ring forces more consistant, along with rotor forces, and keeping the throttle body control stable. My opinion, the bypass valve is almost useless in this application. This engine rarely operates in vacuum.
Last but not least, it is my professional opinion that in order to keep operating ranges in check it is very very beneficial to alter the transmission tuning to keep the loads in areas the engine can address it the best. This has given me a bit of a struggle for the manual guys as they can load the engine how ever they feel like, and that is the reason I have had to make a complete different calibration for those drivetrains. The manual easily gets into negative manifold pressures, activates the bypass valve, and operates on the edge of scavenging. This causes fits with the torque reserves, cylinder pressures and throttle body model.
One more question.
Do you, or can you change valve timing to reduce overlap on a forced induction tune? As I'm sure you know that's typically SOP when building a forced induction engine from scratch.
Does the VVT allow you to change timing to that extent?
DAVECS1
Well-Known Member
- First Name
- David
- Joined
- Jan 24, 2020
- Threads
- 56
- Messages
- 1,861
- Reaction score
- 2,538
- Location
- Peoria, IL
- Vehicle(s)
- 2020 Gladiator Sport S Max Tow
Yes, thatis exactly what I am doing, except instead of making the overlap smaller for more boost. I make it large of idle and mid range and then narrow it up at high RPM. This allows me to dump boost via the exhaust valve, vs the bypass valve on the blower. The bypass really only helps at idle with my tune. It is also the reason my tune has amplified whistle at part throttle as your blowing it through the exhaust.Thanks for the great explanation.
One more question.
Do you, or can you change valve timing to reduce overlap on a forced induction tune? As I'm sure you know that's typically SOP when building a forced induction engine from scratch.
Does the VVT allow you to change timing to that extent?
Sponsored
KurtP
Well-Known Member
edit; i see dave answered alsoAs long as you stay out of detonation, it is my understanding that cylinder pressure and manifold pressure track together. It makes more sense. More A and F = more cylinder pressure = more torque.
And yes, more manifold pressure does equal more torque. In a rather linear way actually.
I suspect you are referencing the possibility of detonation. But if not, I'd like to hear an explanation.
Merry Christmas.
that’s actually not accurate.
You can have high cyl pressures at relatively low manifold pressures and vice versa. People generally think that high or low manifold pressure equals the same as cyl pressure, and it’s not an absolute. They can easily track together; but there is a reason why you can spin a 1320 blower to 22psi and not blow the motor but then blow it at 15psi on a 2300 rotor pack. Or why a motor on factory turbo spun to 20psi (likely) lasts longer than giant turbo spun to the same.
manifold pressure is measuring air pressure inside the manifold relative to absolute pressure.
cylinder pressure is measuring the pressure of the explosion inside the combustion chamber. They are different.
Yes, you can drive manifold pressure to raise cylinder pressure, but air flow matters more than boost, and larger compressors flow more air at the same pressure ratio. ie; the volume of air moved by, say, a magnuson 1900tvs vs the edelbrock 1320tvs are vastly different despite same boost pressures.
this all leave out things like rpm efficiency range of the compressor, temp, etc; but i think gets at what the heart of what you’re looking at. Larger compressor = higher flow @ same psi as smaller compressor = higher cylinder pressure (generally)
you can also manipulate cyl pressure dramatically by phasing of the camshafts, and the timing of the detonation event.
does that help?
Wrathis79
Active Member
I currently am not but am seriously entertaining the Maggie. I waffle back and forth between doing it now or waiting till the factory warranty goes out...I assume you are supercharged? Brand?

DAVECS1
Well-Known Member
- First Name
- David
- Joined
- Jan 24, 2020
- Threads
- 56
- Messages
- 1,861
- Reaction score
- 2,538
- Location
- Peoria, IL
- Vehicle(s)
- 2020 Gladiator Sport S Max Tow
Well we love to camp down there and ride Hatfield McCoy trails, maybe we can work something put ?
Sponsored
NC_Overland
Well-Known Member
- First Name
- John
- Joined
- Feb 21, 2020
- Threads
- 18
- Messages
- 3,384
- Reaction score
- 4,158
- Location
- Raleigh, NC
- Vehicle(s)
- 2020 JT Overland
Should be pretty quick after the new gears.Jeep Gladiator Supercharger Comparison
Hamburger Centrifugal vs Magnuson TVS
Context/Background
It’s important to understand where I am coming from to help put my perspective in context. I bought the Gladiator in May of 2020 because I needed the utility and tow capability of a pickup. I really liked the Gladiator. My daily driver was a high hp Audi S6 and I really liked the idea of having a vehicle under warranty. I bought the Overland because I don’t rock crawl and didn’t need the panache or utility of the Rubicon or Mojave.
With the exception of a 2500 Duramax and a few Jeeps, most of my vehicles have been either Audi or VW. None of them remained stock. From engine builds to transmission swaps to turbos, everything eventually gets modified. Having a few bad experiences with OEM and independent shops, I do all the work myself, except tuning, because the work done by others typically needs to be redone. The closest I have gotten to tuning was recoding an Audi S8 ECU for a manual trans. It was a mind-bending and time-consuming effort. I learned tuning is not my gift.
The initial selection
After a few thousand miles on the Gladiator, I found the power delivery to be uninspiring at best. I felt I needed to wind it out to accelerate, pass, and tow. On top of that, the engine sounded terrible at higher RPMs. I wanted a power adder and a warranty, so I narrowed options down to the Hamburger and Magnuson kits. I decided on Hamburger in June 2020 because they agreed to honor the warranty with a self-install, Magnuson didn’t and there were reported drivability issues with the Maggie.
The repower
After a year of the Hamburger kit, I decided I wanted a better power delivery (low rpm power). I kinda considered trading for a diesel and seriously considered a Hemi swap both as a DIY and having it done. I did a ton of research and nearly called to make an appointment and came across Dave’s Magnuson crib notes with the updated tunes and smaller pulley details. So I decided to try the Maggie.
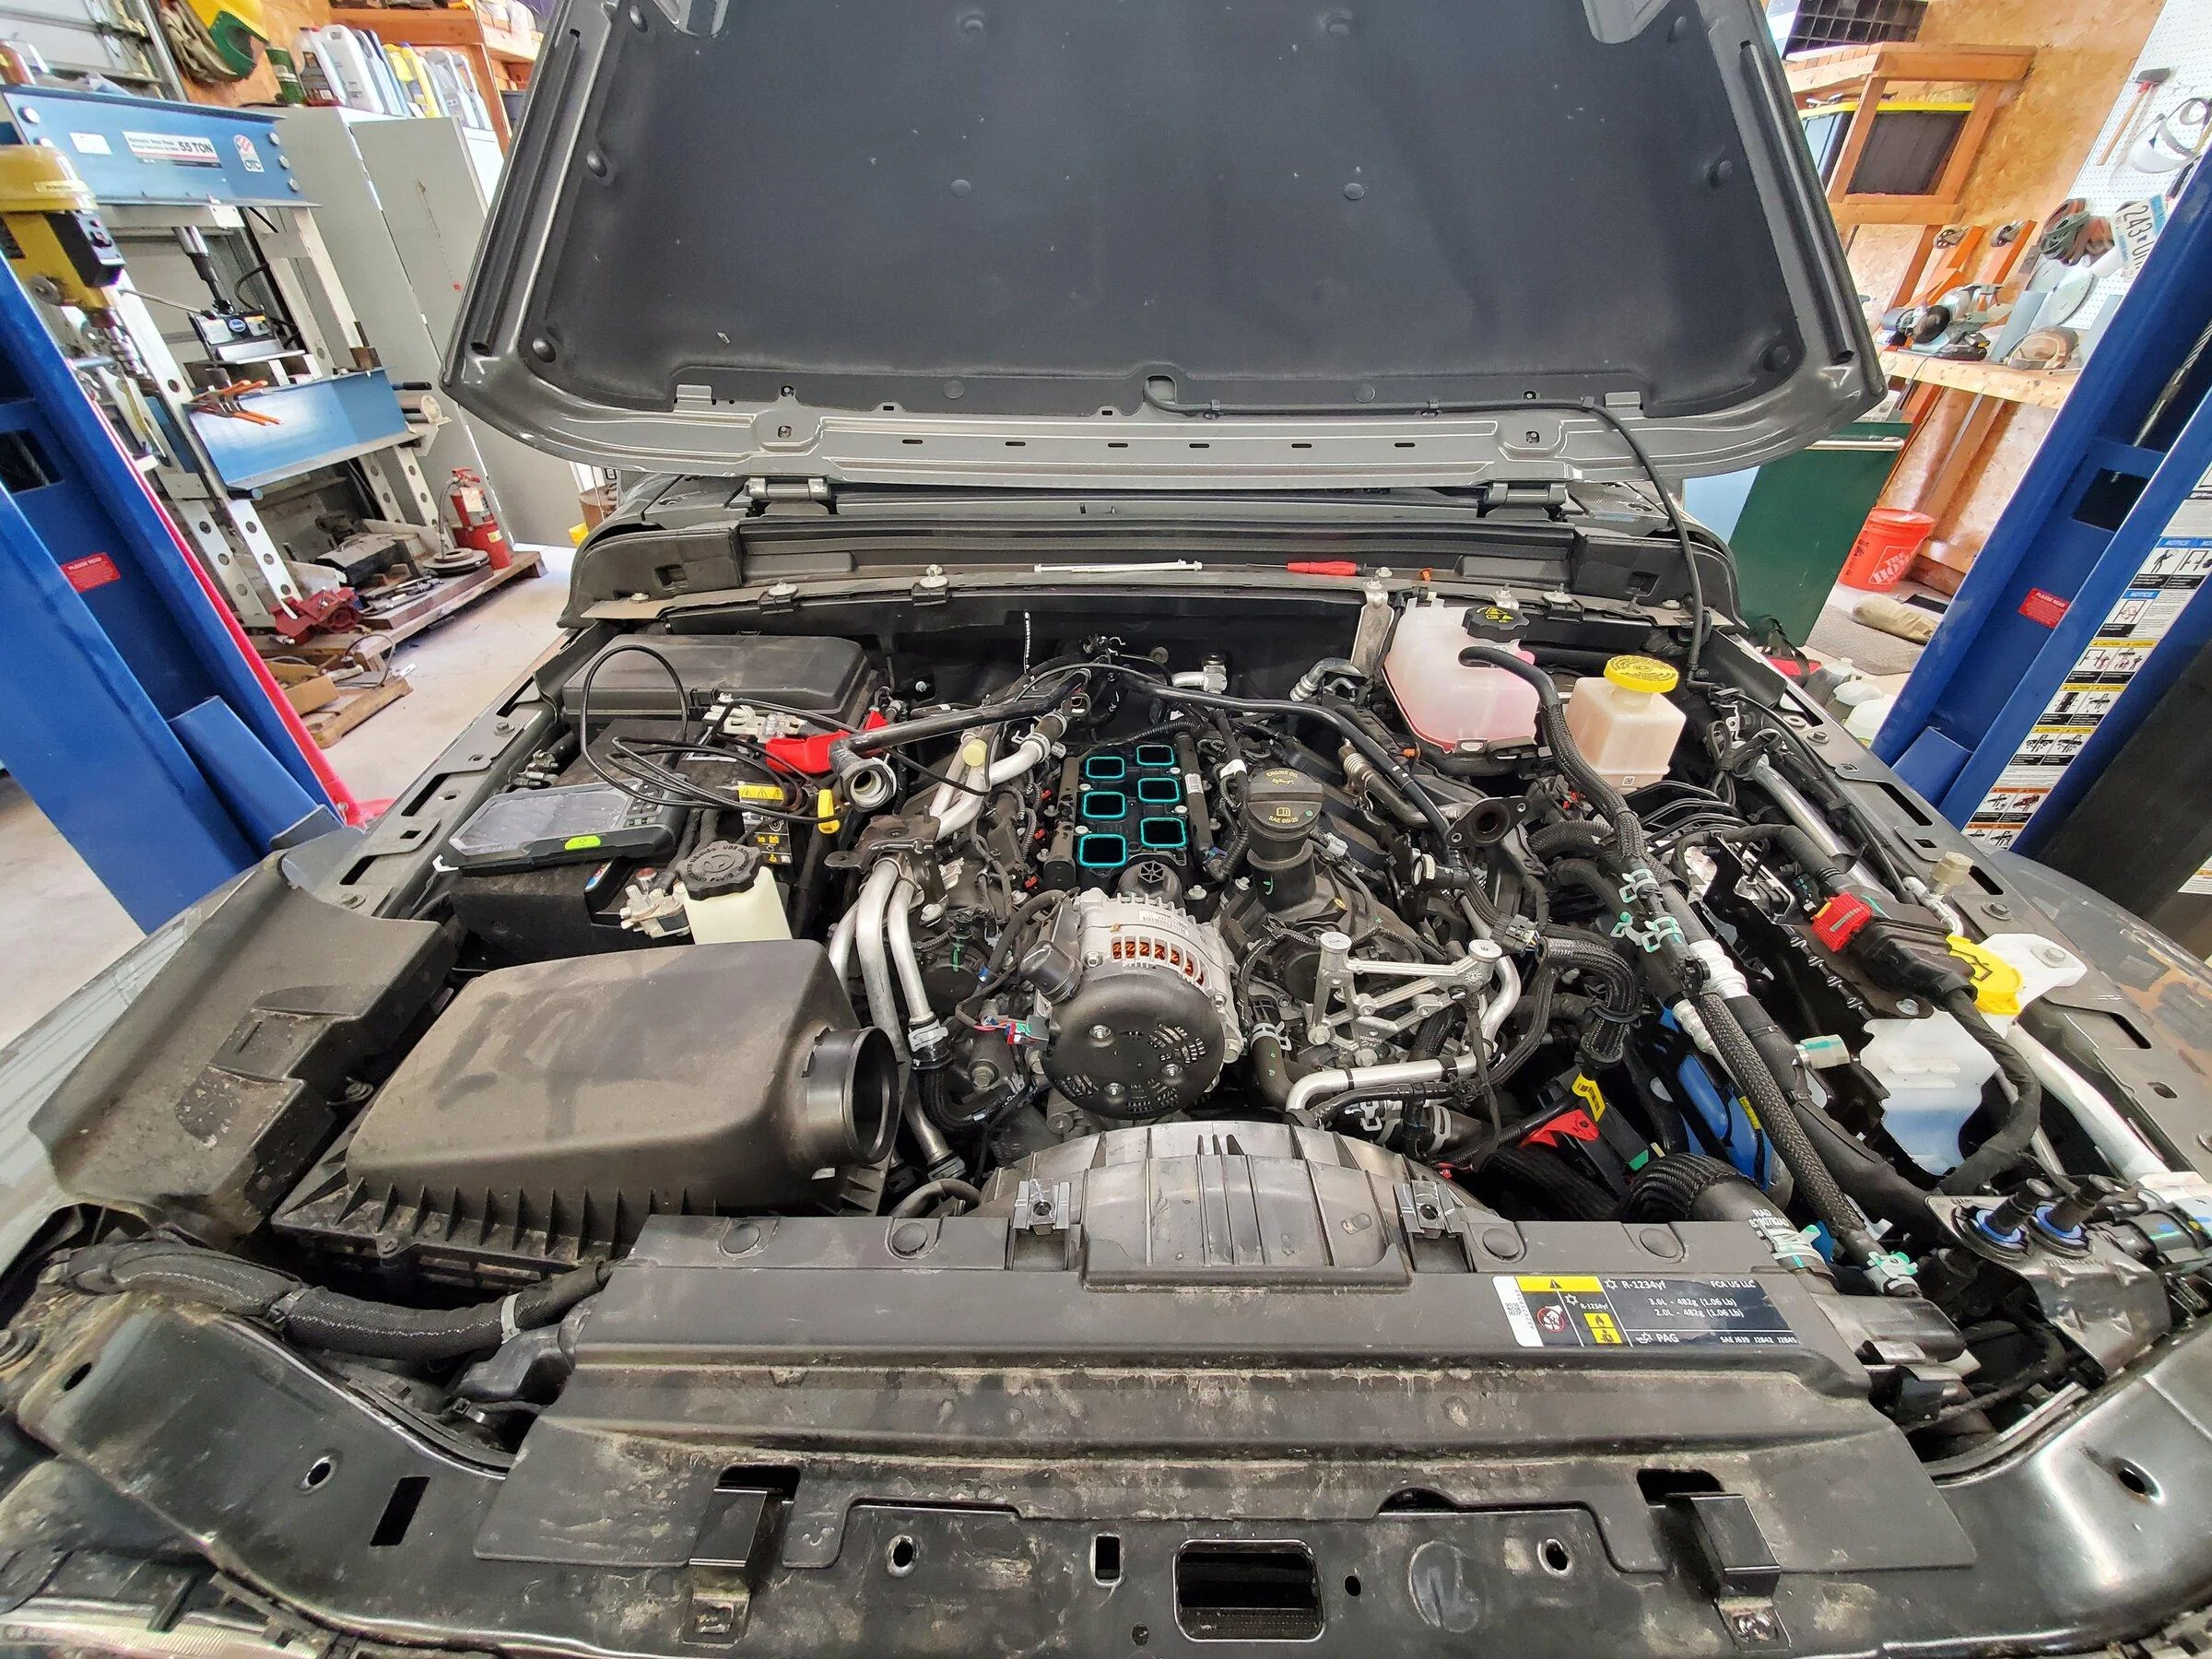
The Hamburger Install
The installation of the Hamburger kit is straightforward. There is some trimming of factory parts (airbox, radiator support, fan shroud), and while this sucks it’s not that big a deal. There are fewer components to the Hamburger kit and it is easier to install than the Magnuson. However, the installed product is not as OEM feeling as the Magnuson. Everything can be removed and the Jeep returned to stock but there are birthmarks left. The alternator wiring harness is modified for the relocation, I am replacing the modified wiring with a stock harness.
The instructions are okay but there are some unclear aspects and in a few cases I thought there were better ways to approach certain activities. All of the individual hardware and components were bagged and lettered, the included packing list was a great reference.


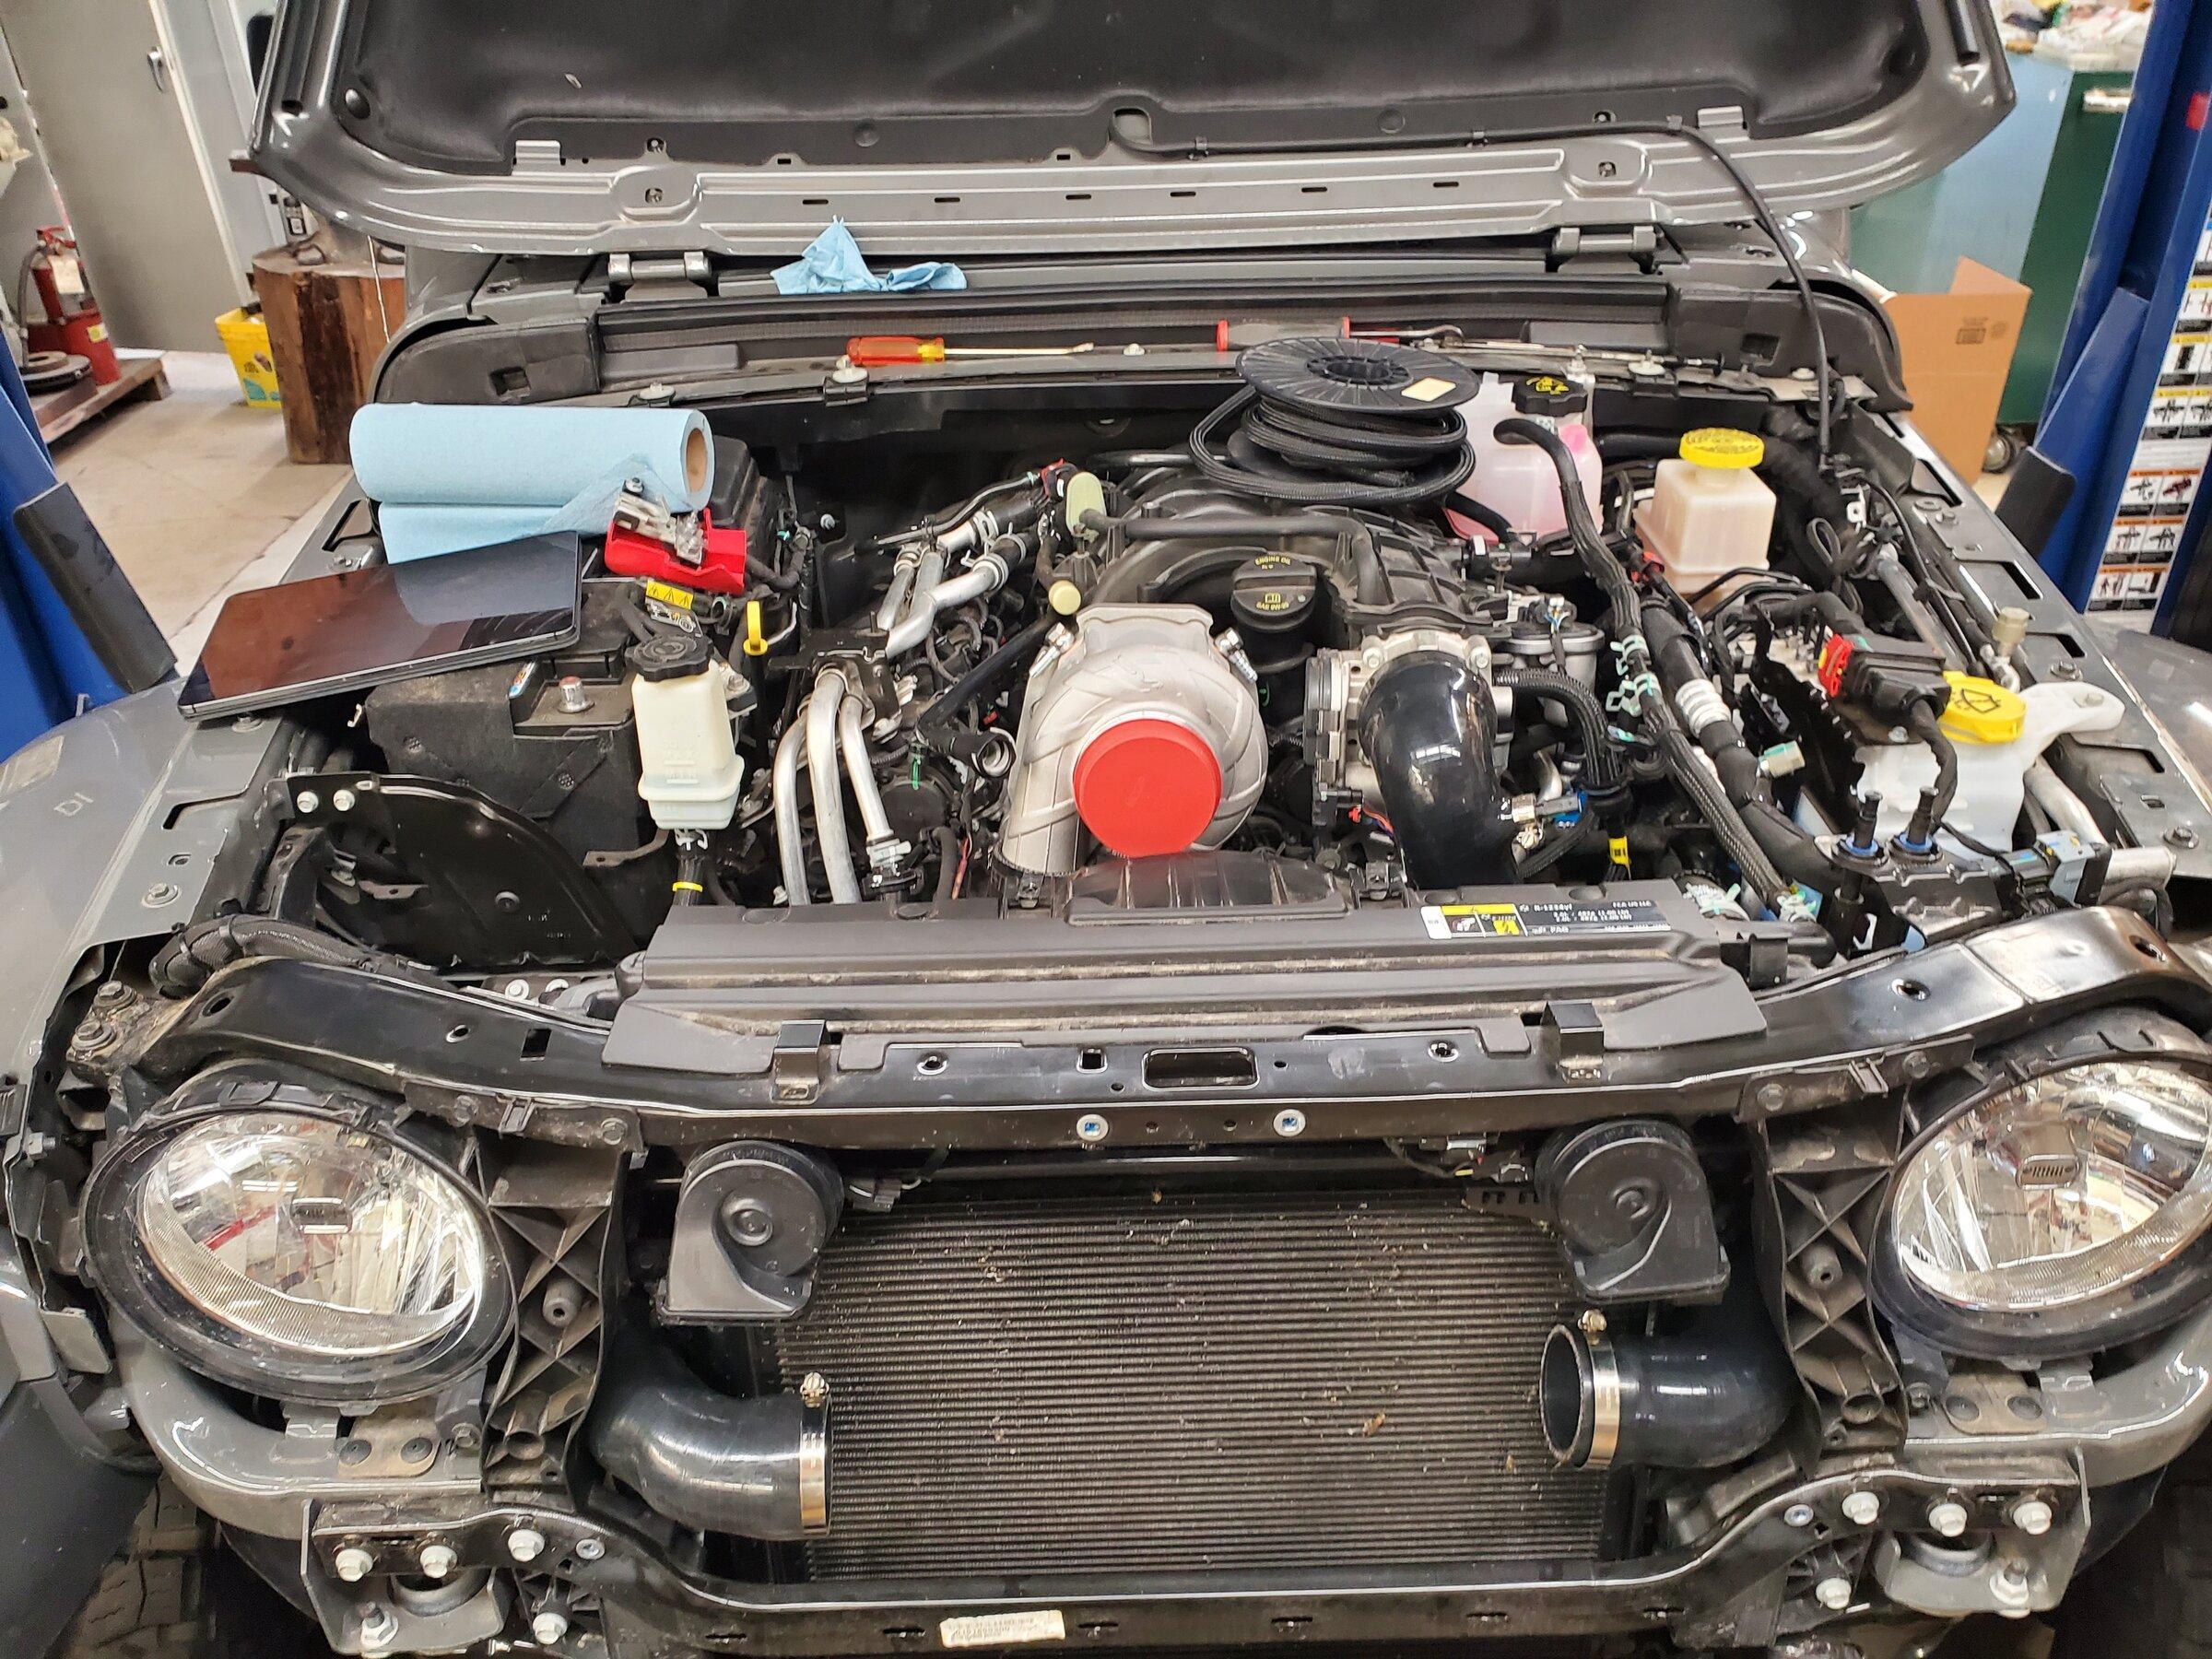
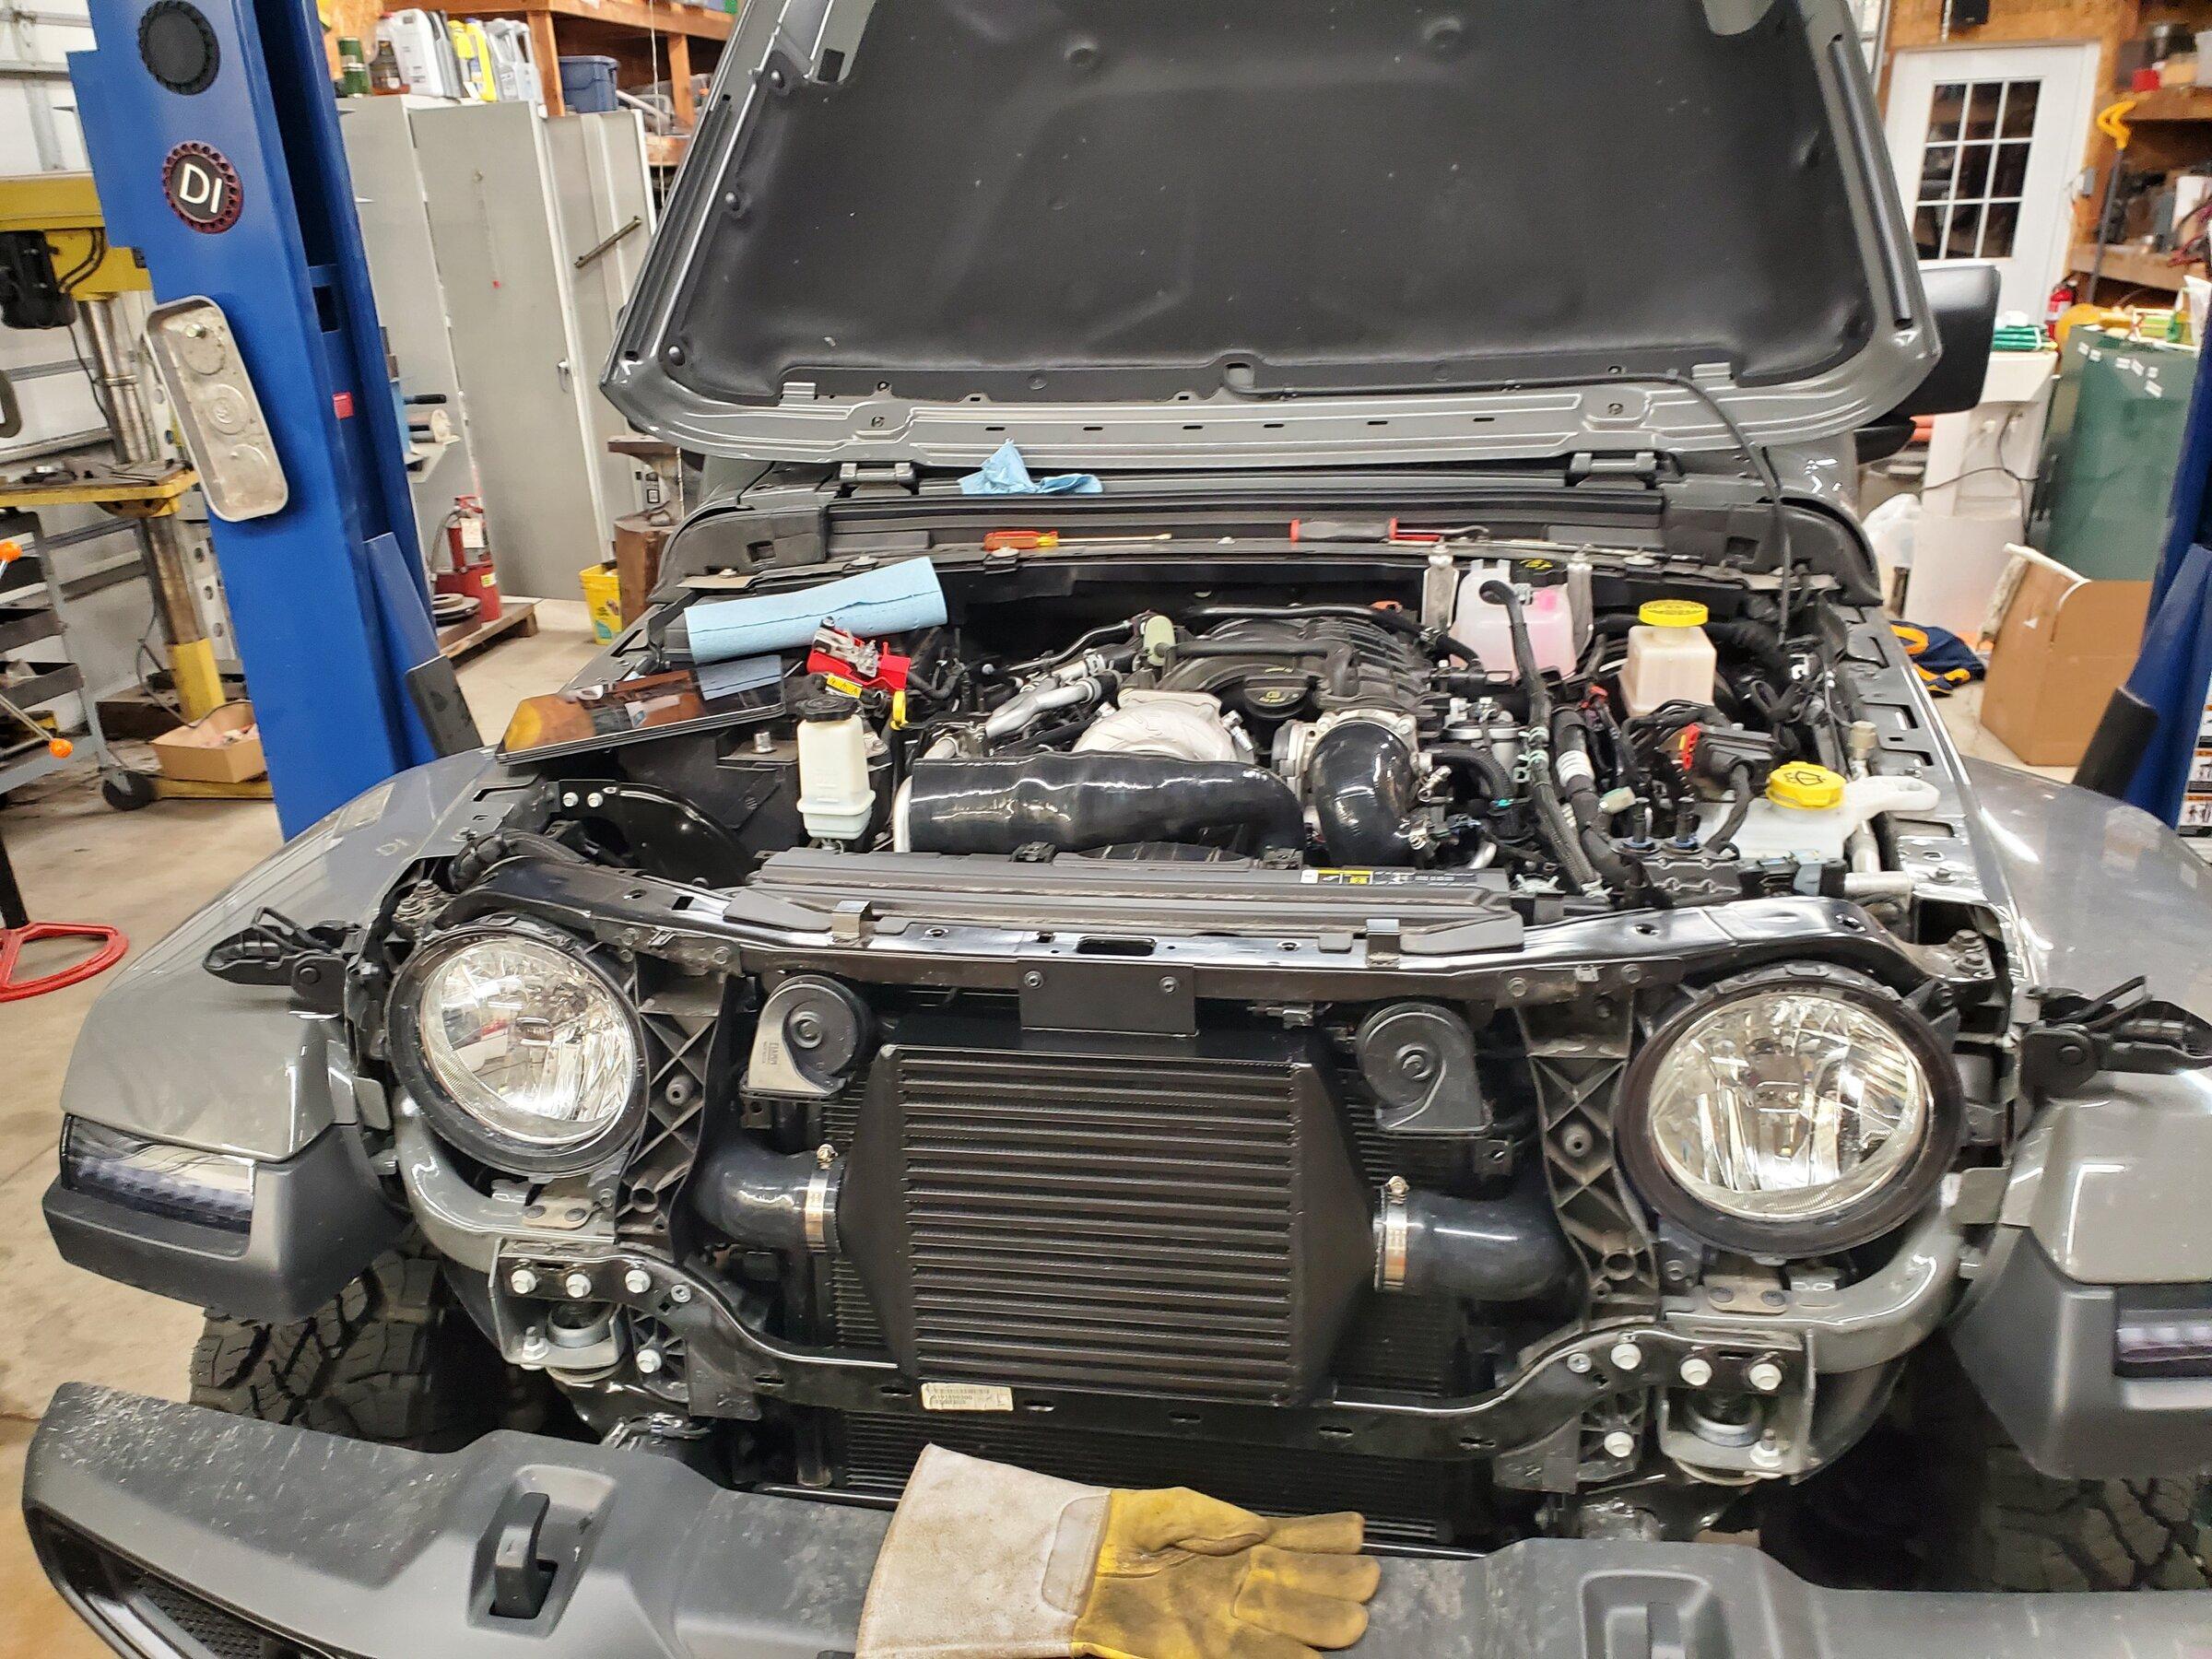
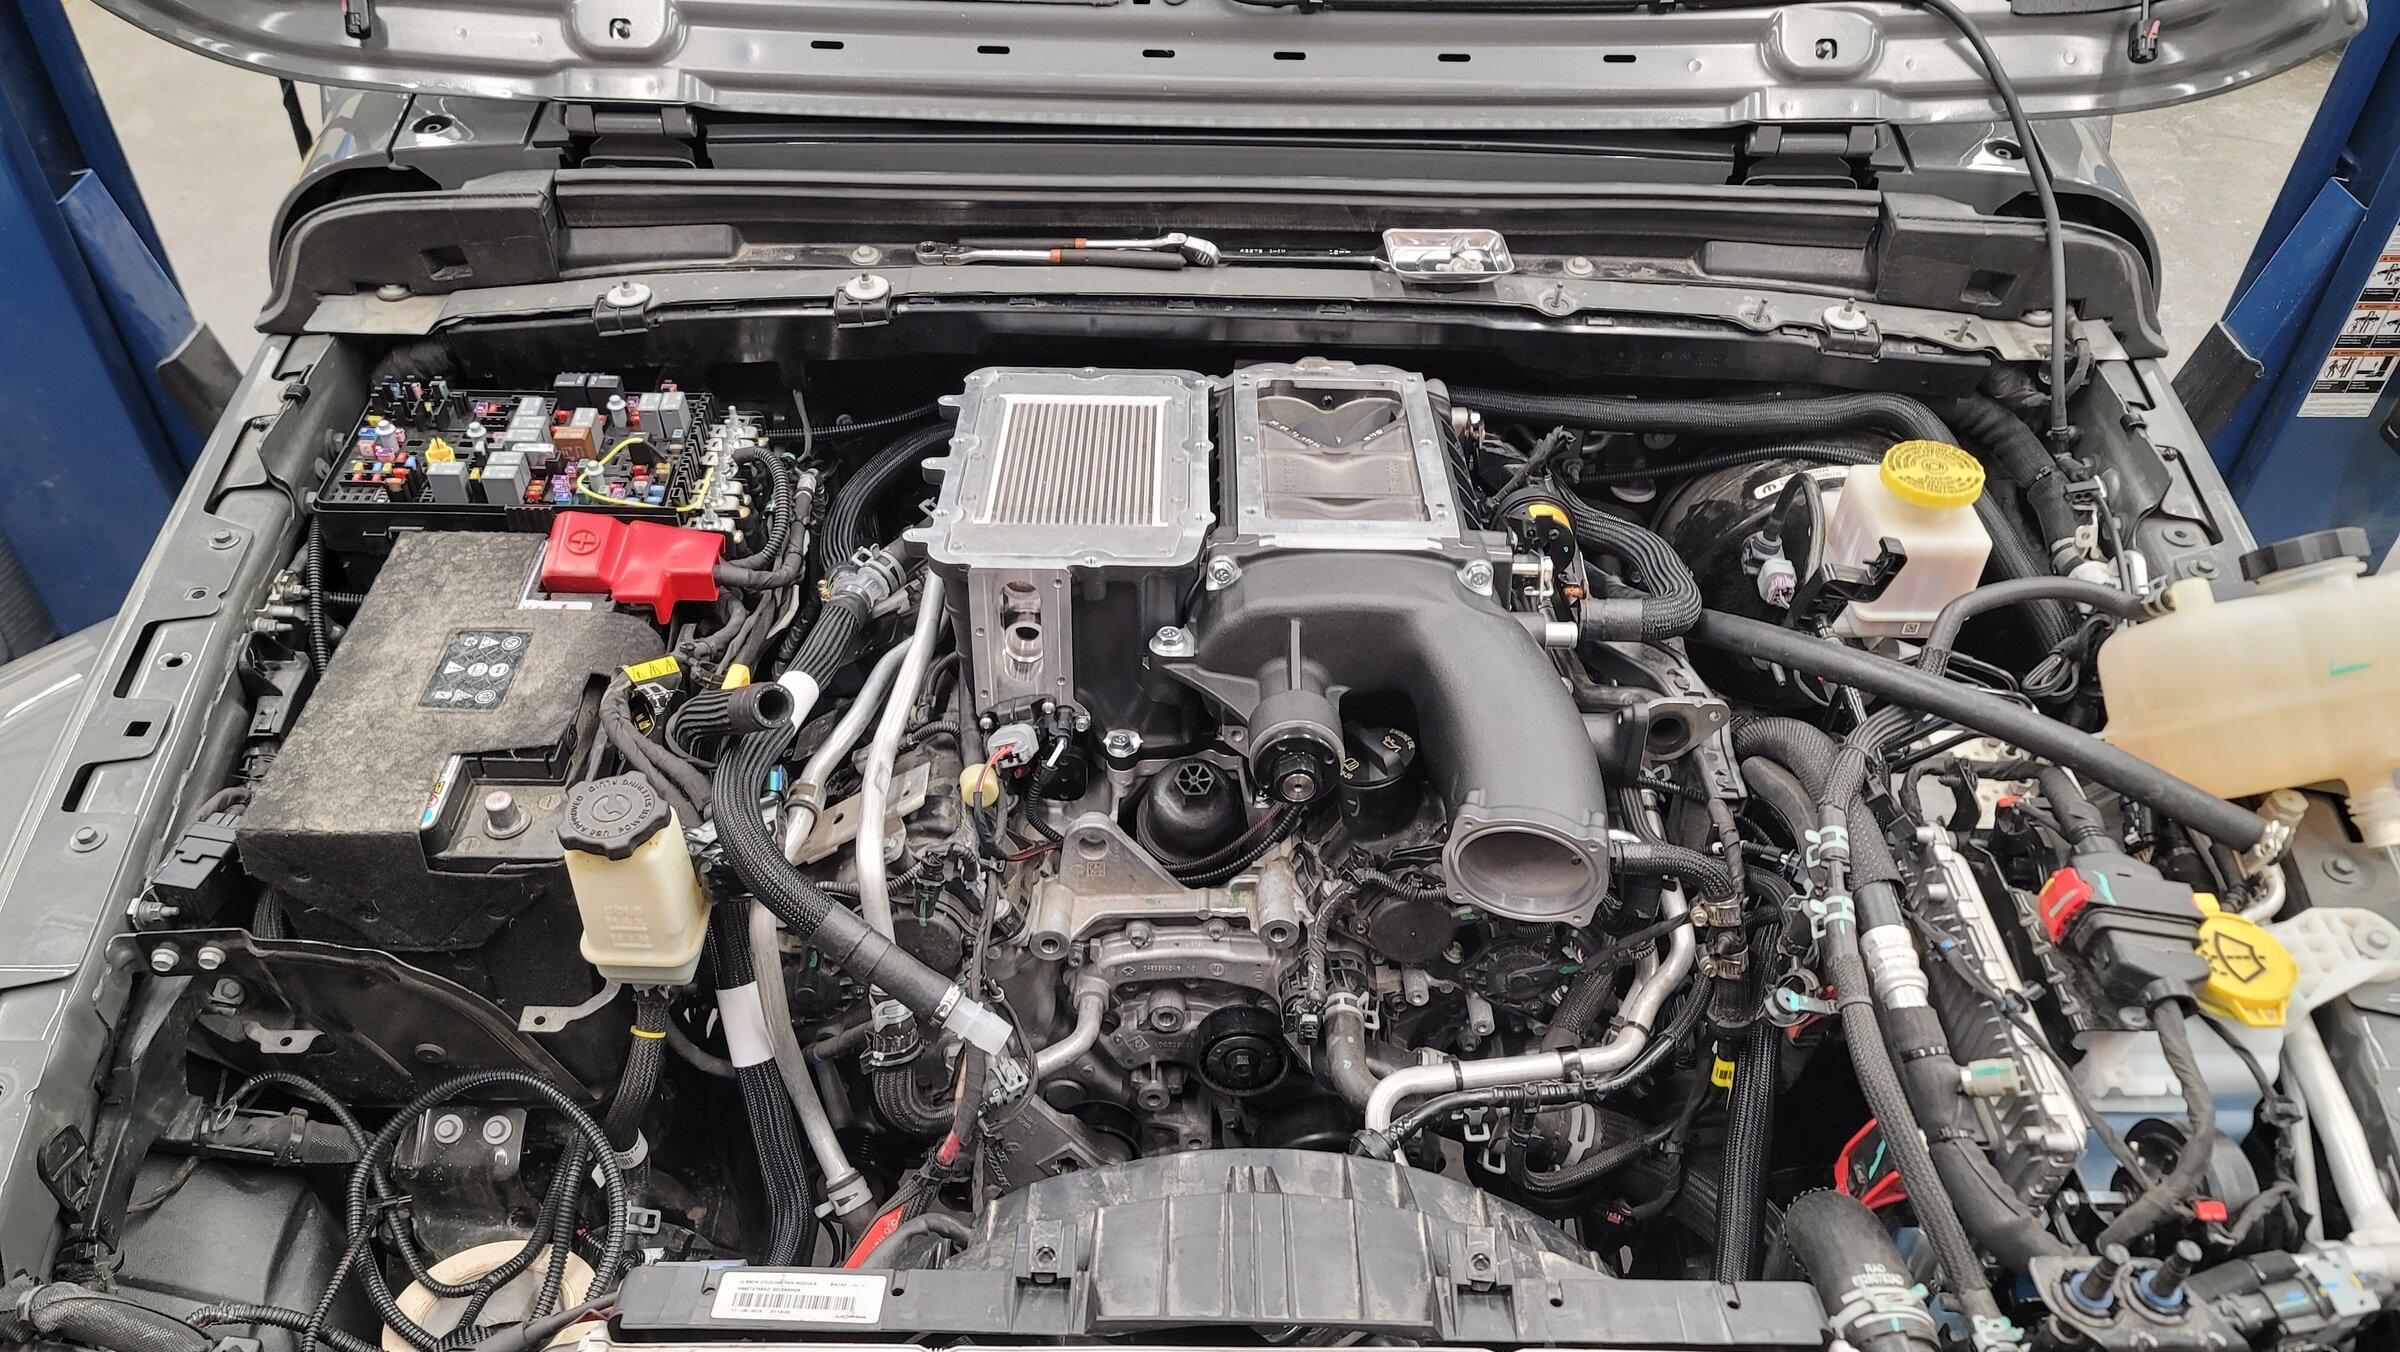
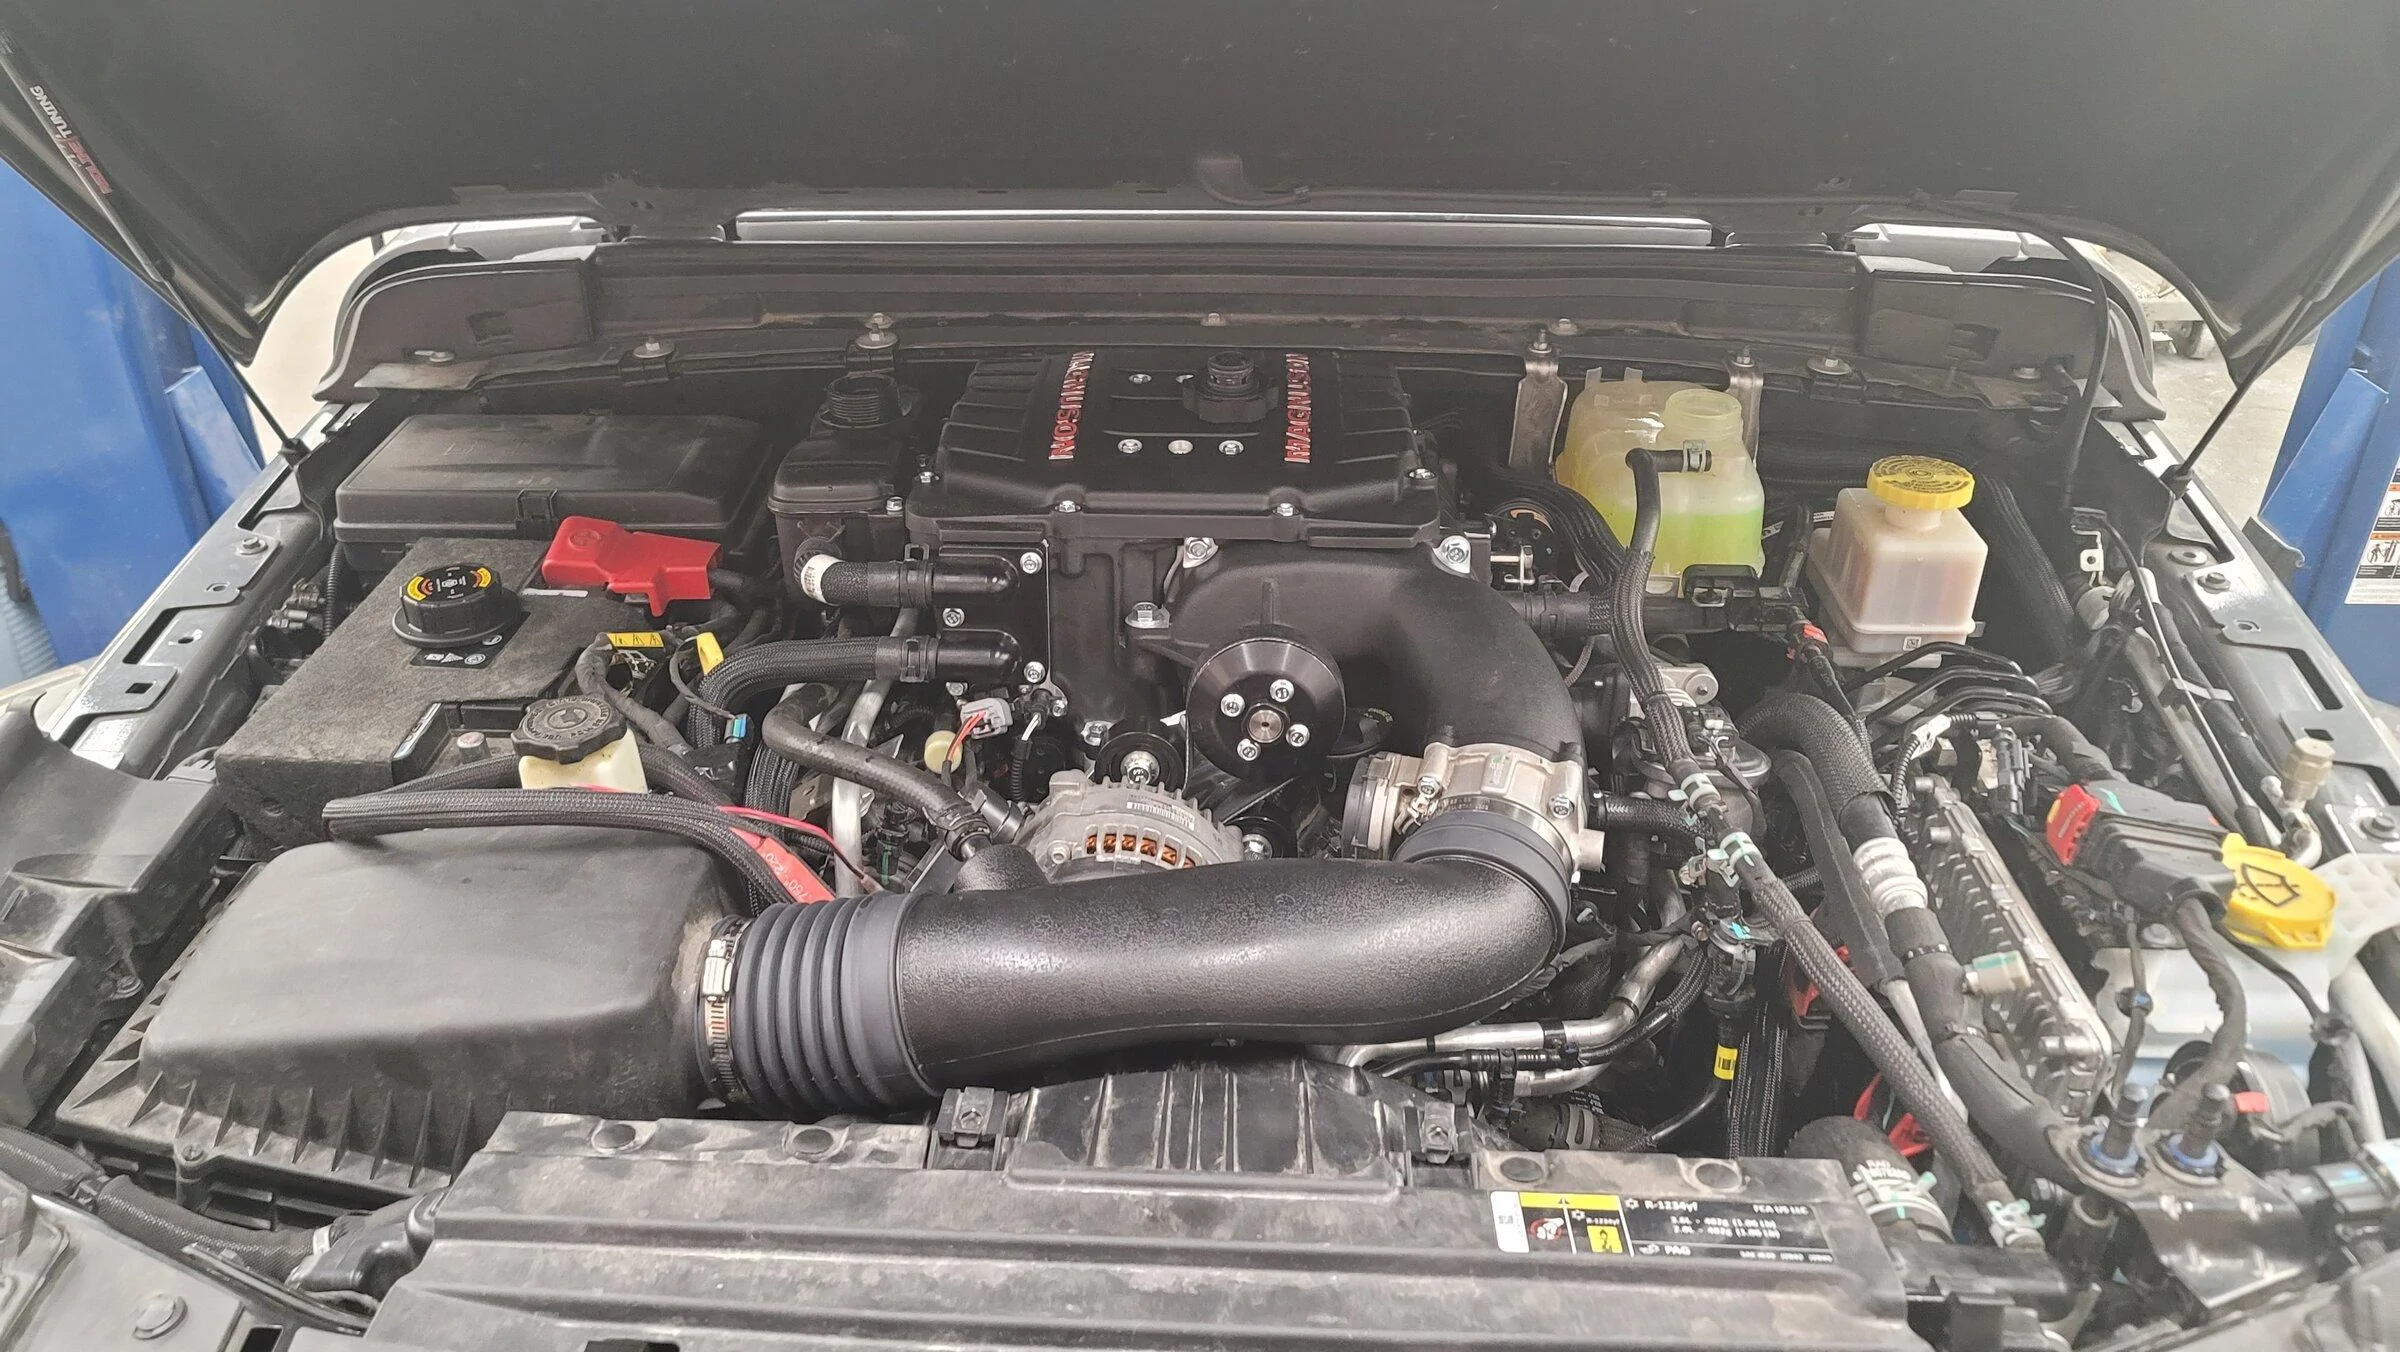
The Magnuson Install
The Magnuson kit was packaged extremely well, all of the hardware was segmented in heat-sealed bags. The Magnuson components just look amazing, it all felt like it came from the factory (or better). The installation was straightforward but time-consuming, I got the install done in a day. The removal of the Hamburger kit was about 6 hours. Removal and installation were both done in a methodical and comfortable pace. Dave’s crib notes were very helpful for early upgrades of the pulley bearings, plugs, and sensor positioning. My only gripe would be that the hardware (nuts & bolts) packaging wasn’t labeled. This is a simple but meaningful thing that Magnuson should do.
I found the instructions to be well-constructed and thorough. A couple of the photos in the instructions were at weird angles or perspectives which required a little creative orientation.


Install Comparison:
Either kit can be installed by a competent or experienced shade tree mechanic in my opinion. However, this is not a job for a minimalist tool collection. Having a proper set of mechanics tools and accessories is important. The Hamburger is “easier” to install but the Magnuson looks more polished.
Driving Comparison:
This comes down to preference and usage. I felt the Hamburger kit was powerful but always required a gear change to get boost. It was nearly always in vacuum unless I was WOT or pushing it. The Magnuson is pushing boost most of the time (for my driving style). I love that going up an incline or accelerating with the Magnuson results in boost pressure then shift, if necessary. I have seen a couple of lbs of boost all the way down below 1,500 RPM (of course this is the nature of the beast). I towed a ~6,000 lb load with the Magnuson this week and I appreciated the ability to modulate boost pressure with the right foot without requiring a shift and high RPM. It made for a more docile experience, which is exactly what I wanted.
It is too early to make an mpg claim, but it seems the Magnuson setup is thirstier. However, it might just be my ears prefer the whine and shift sound more ?. I suspect there won’t be a major difference in gas mileage between the two in the long run.
I was happy with the Hamburger but I am happier with the Magnuson. As shown in the graphs in the previous post, the WOT acceleration nets about the same result between the two kits. There are pros and cons of each configuration.


Ridgeline
Well-Known Member
- First Name
- Andrew
- Joined
- Feb 3, 2021
- Threads
- 7
- Messages
- 129
- Reaction score
- 353
- Location
- Irvine, CA
- Vehicle(s)
- 2021 Nacho Mojave
- Build Thread
- Link
- Occupation
- Intellectual Property Attorney
This may not be the most appropriate thread for this question, but y'all got me thinkin' now... 
Looks like the Magnuson kit has a CARB EO # that applies to the 2020 Gladiator. I have a 2021... Would anyone happen to know how this applies to me? Or if another EO # is in the works?
I know I don't have to smog for another four years, but I'm sure I'll still be in California when the time comes... Thanks!
DAVECS1
Well-Known Member
- First Name
- David
- Joined
- Jan 24, 2020
- Threads
- 56
- Messages
- 1,861
- Reaction score
- 2,538
- Location
- Peoria, IL
- Vehicle(s)
- 2020 Gladiator Sport S Max Tow
Not sure, if they can apply for the 2021 carb or not. There are throttle body control changes that can be addressed with a single calibration software, but the fact of the matter is, VE is calculated differently, so not sure if they care about stuff that deep in the control or not
19Delta
Well-Known Member
Do you do installs?Well we love to camp down there and ride Hatfield McCoy trails, maybe we can work something put ?
OP
OP
DC3
Well-Known Member
- First Name
- Carl
- Joined
- Jul 14, 2020
- Threads
- 47
- Messages
- 367
- Reaction score
- 938
- Location
- Willmar, MN
- Website
- dilabs.cc
- Vehicle(s)
- '21 JT GDE Ecodiesel, 22 Polestar 2
- Occupation
- engineer
- Thread starter
- #90
I was hoping to report on the regear but the FEDEX holiday confusion got the best of my plans. I can't imagine what it must be like in the shipping industry.
I did, however, get the small pulley and @DAVECS1 tune installed. The Gladiator is nearly perfect from a power standpoint, it would be fun to drive this and a Hemi back-to-back but I am satisfied with this setup, no more yearning. The regear is only going to make it better. Dave's tune is well worth it!!! I am excited to get more miles on the kit.
I did, however, get the small pulley and @DAVECS1 tune installed. The Gladiator is nearly perfect
from a power standpoint, it would be fun to drive this and a Hemi back-to-back but I am satisfied with this setup, no more yearning. The regear is only going to make it better. Dave's tune is well worth it!!! I am excited to get more miles on the kit.Sponsored
Similar threads

- Replies
- 12
- Views
- 5,901