BuiltRight
Well-Known Member
- Thread starter
- #1
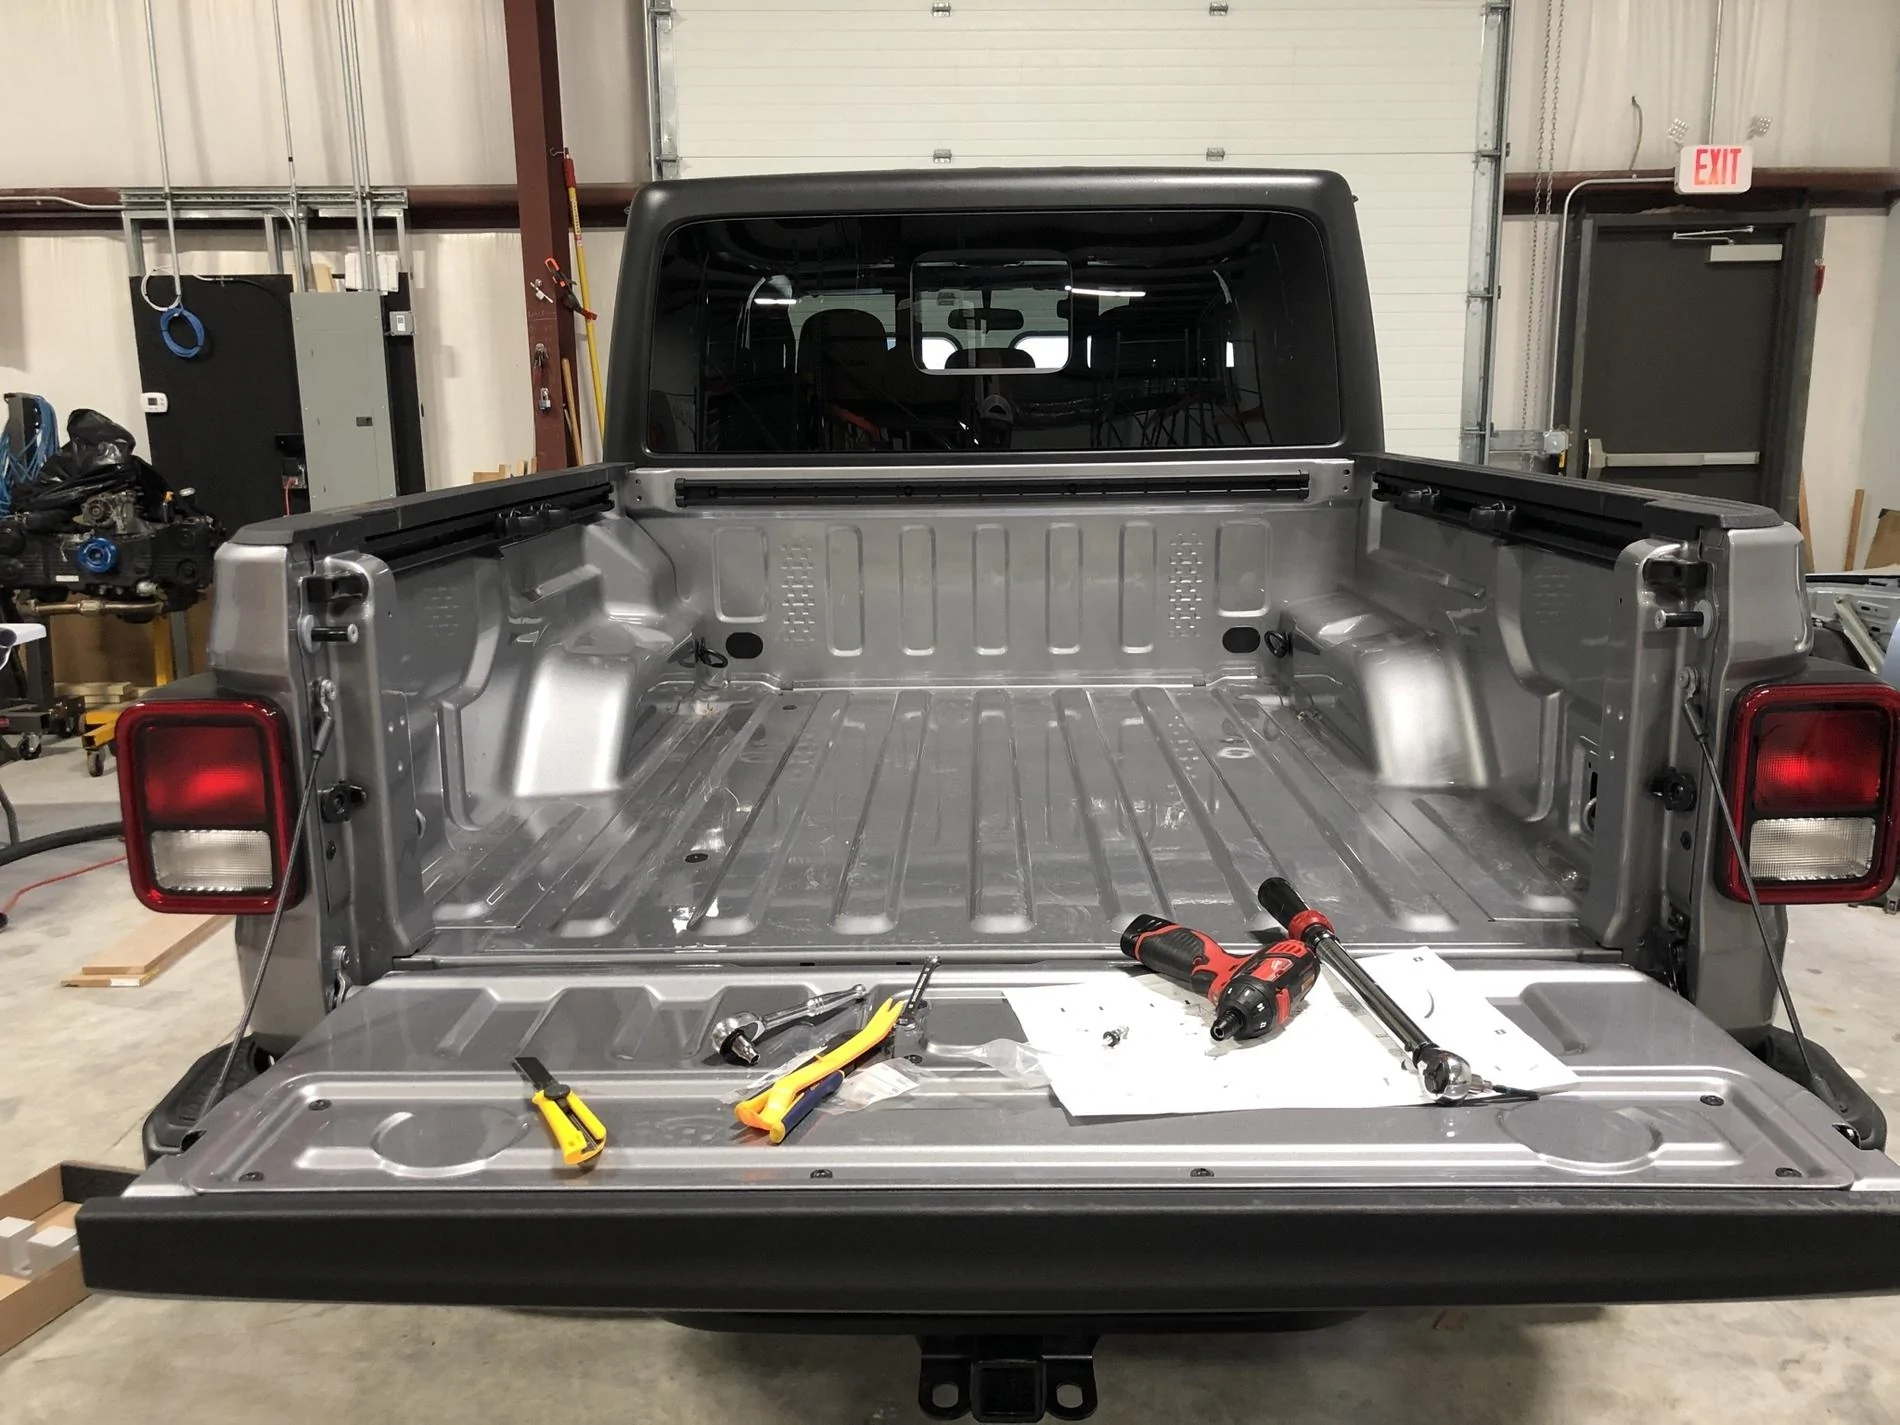
Well, I didn't have the patience to order and wait, so I found the truck that I wanted on a lot. The only thing missing was the Trail Rail kit in the bed! I pre-ordered the Mopar kit a while back and it finally arrived. Installation was simple, but there is one part that can be tricky, so I thought I'd write this to possibly help others.
Kit Contents:
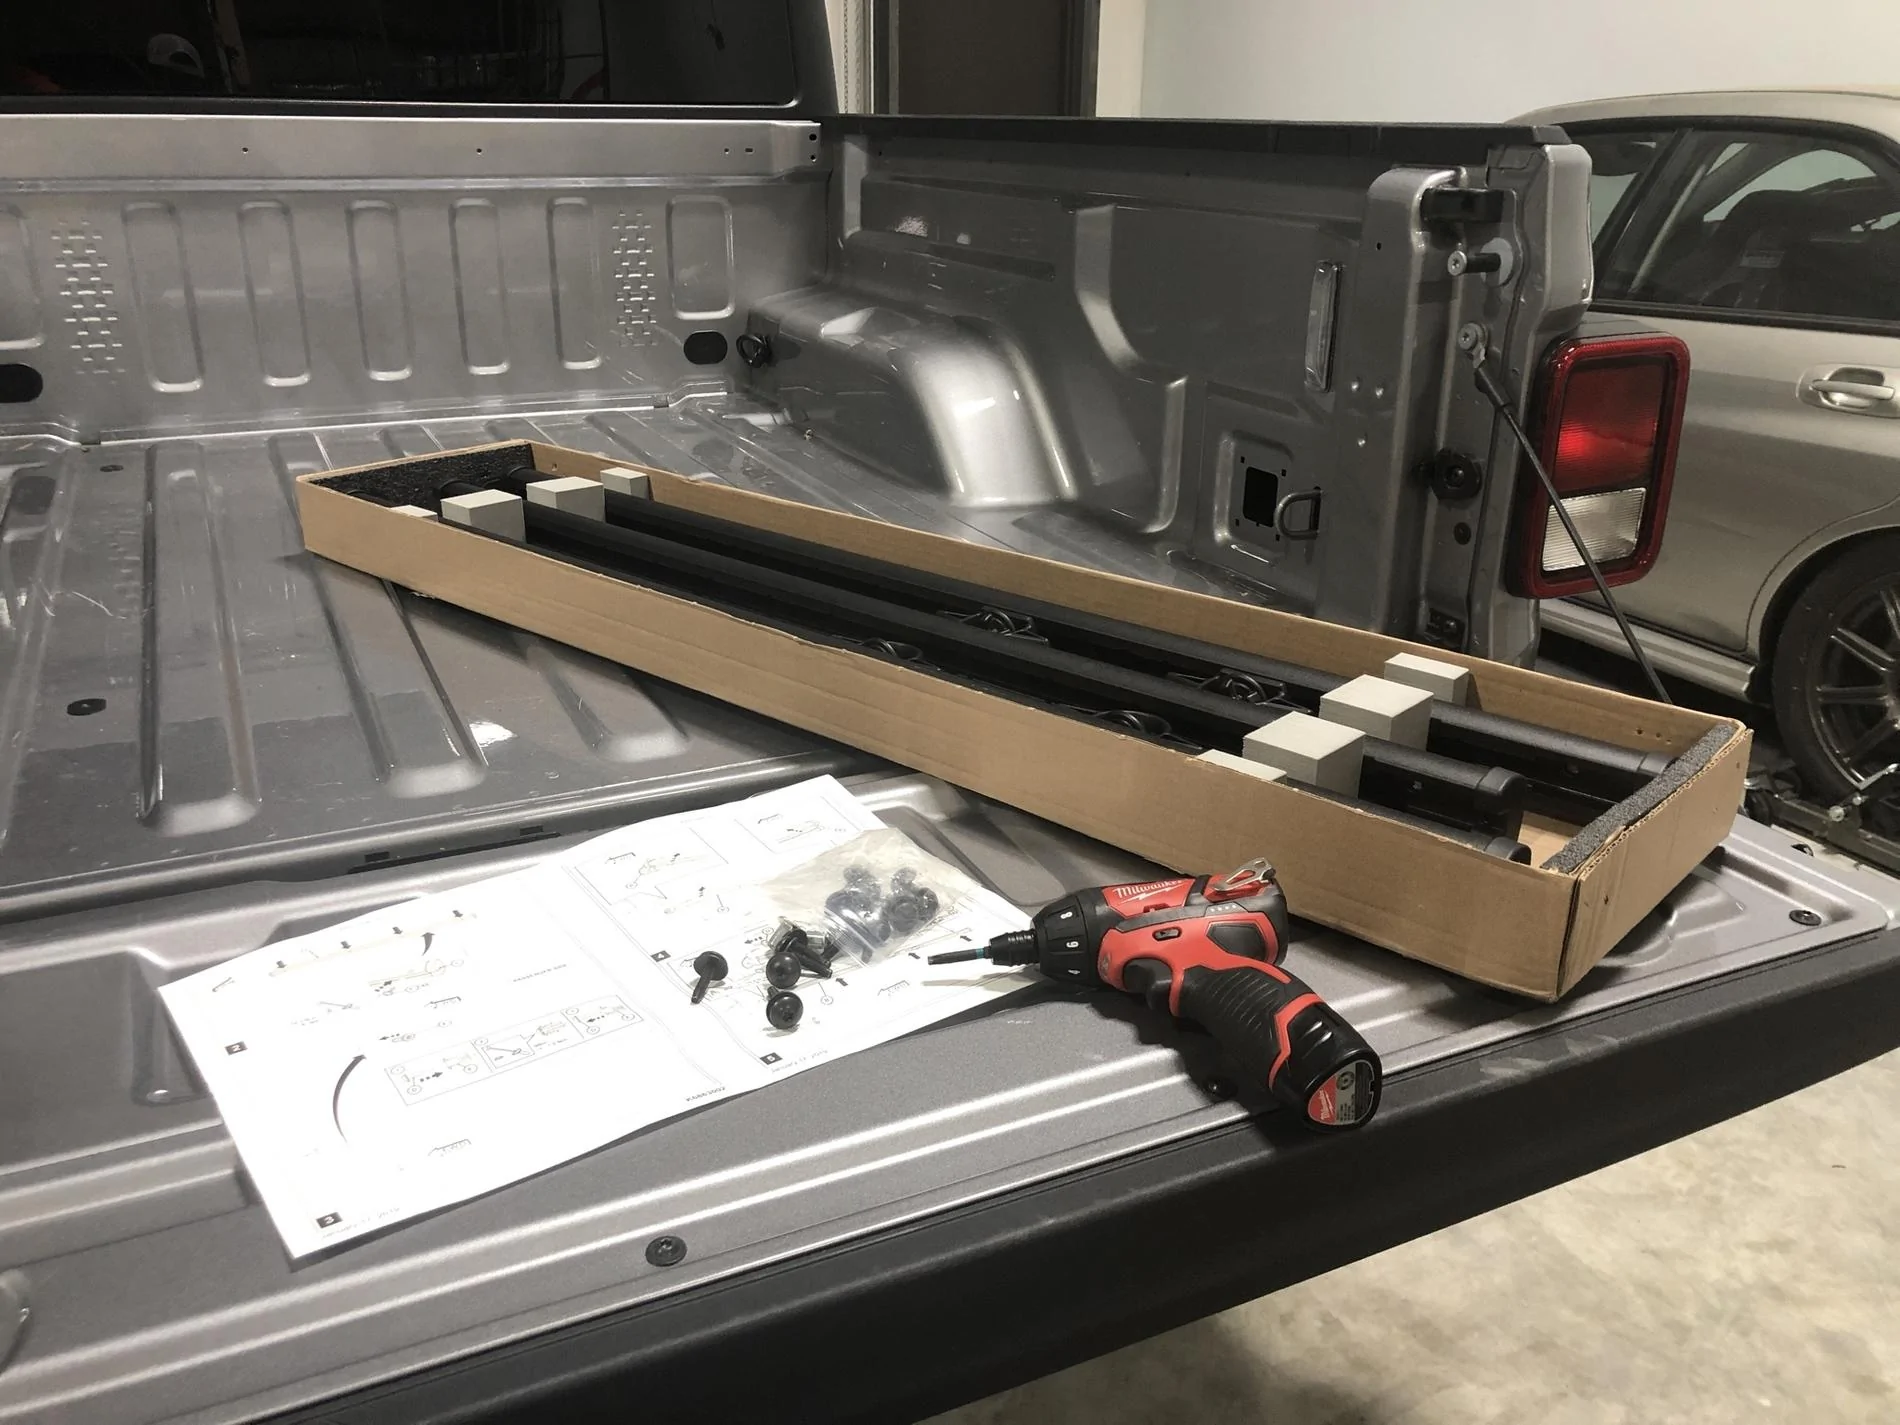
The kits includes a rail for each side of the bed (these are identical) and one for the front of the bed. The rails on the sides are around 52" long and the rail at the front is around 48" long. The kit also includes all hardware (12x T30 torx bolt and two nutserts).

Tools Needed:
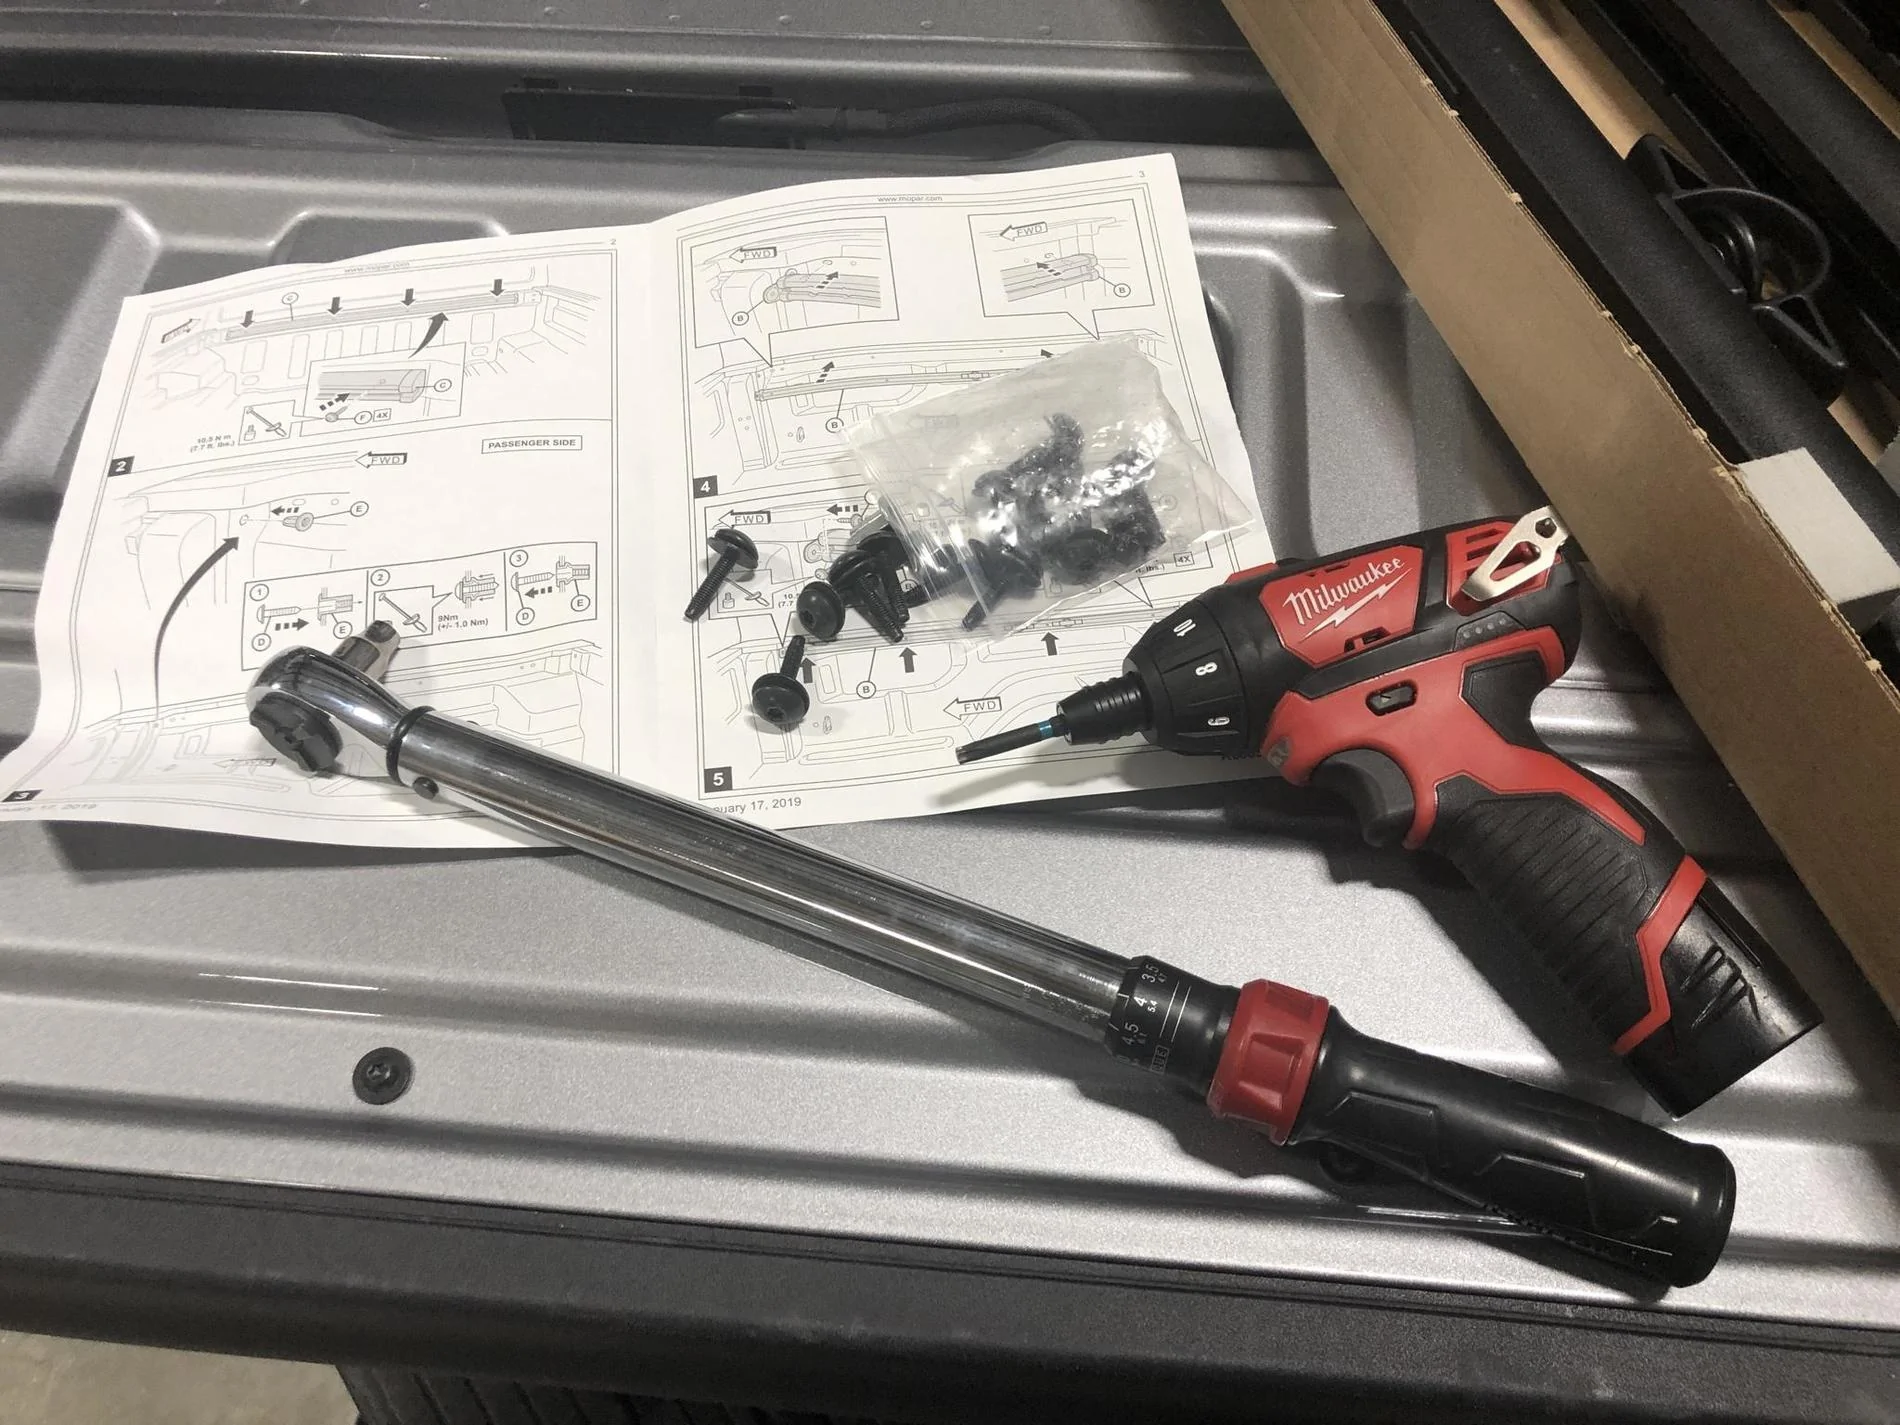
- T30 torx socket
- Torque wrench
- M6x1.0 bolt (length not critical, but I'd suggest over 30mm if possible)
- M6x1.0 nut
- M6 washer(s)
- Socket for M6 bolt
- Wrench for M6 nut
* The italicized tools are not called for in the official install guide, but I found that I needed them to install the nutserts. More on that below.
Procedure:
Initial impressions are that I always like receiving something that's packaged well and this fits the bill. No bells and whistles, but the pre-cut foam inserts did their job well. Removing one of the rails led to another surprise - these things are beefy! I was relieve to see this, as I'm hoping to mount my low-rise bed rack directly to the rail for reasons both obvious and not (I'll address that in a different post).
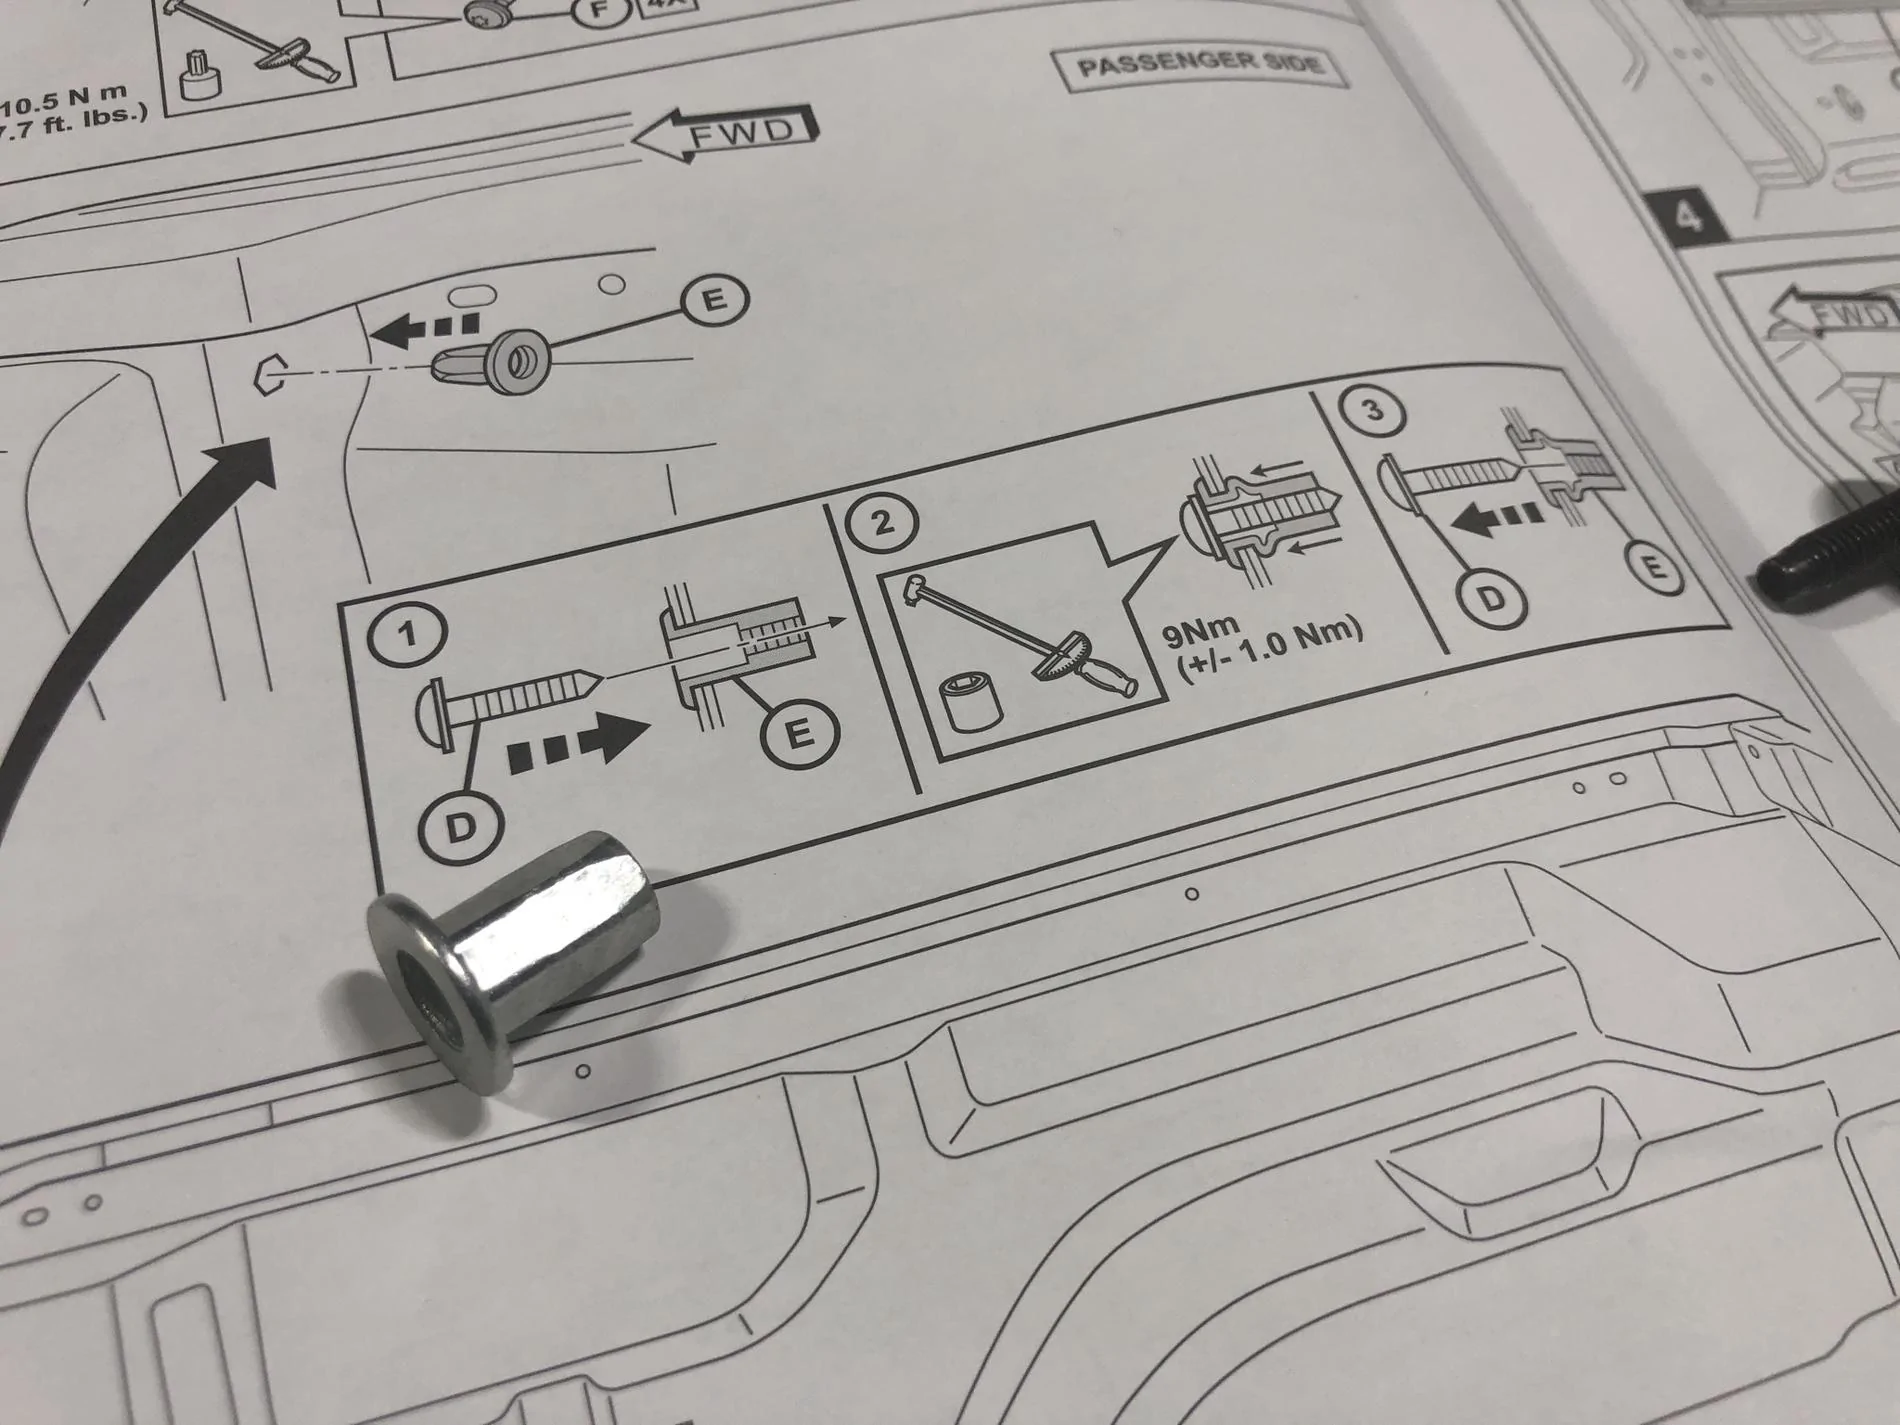
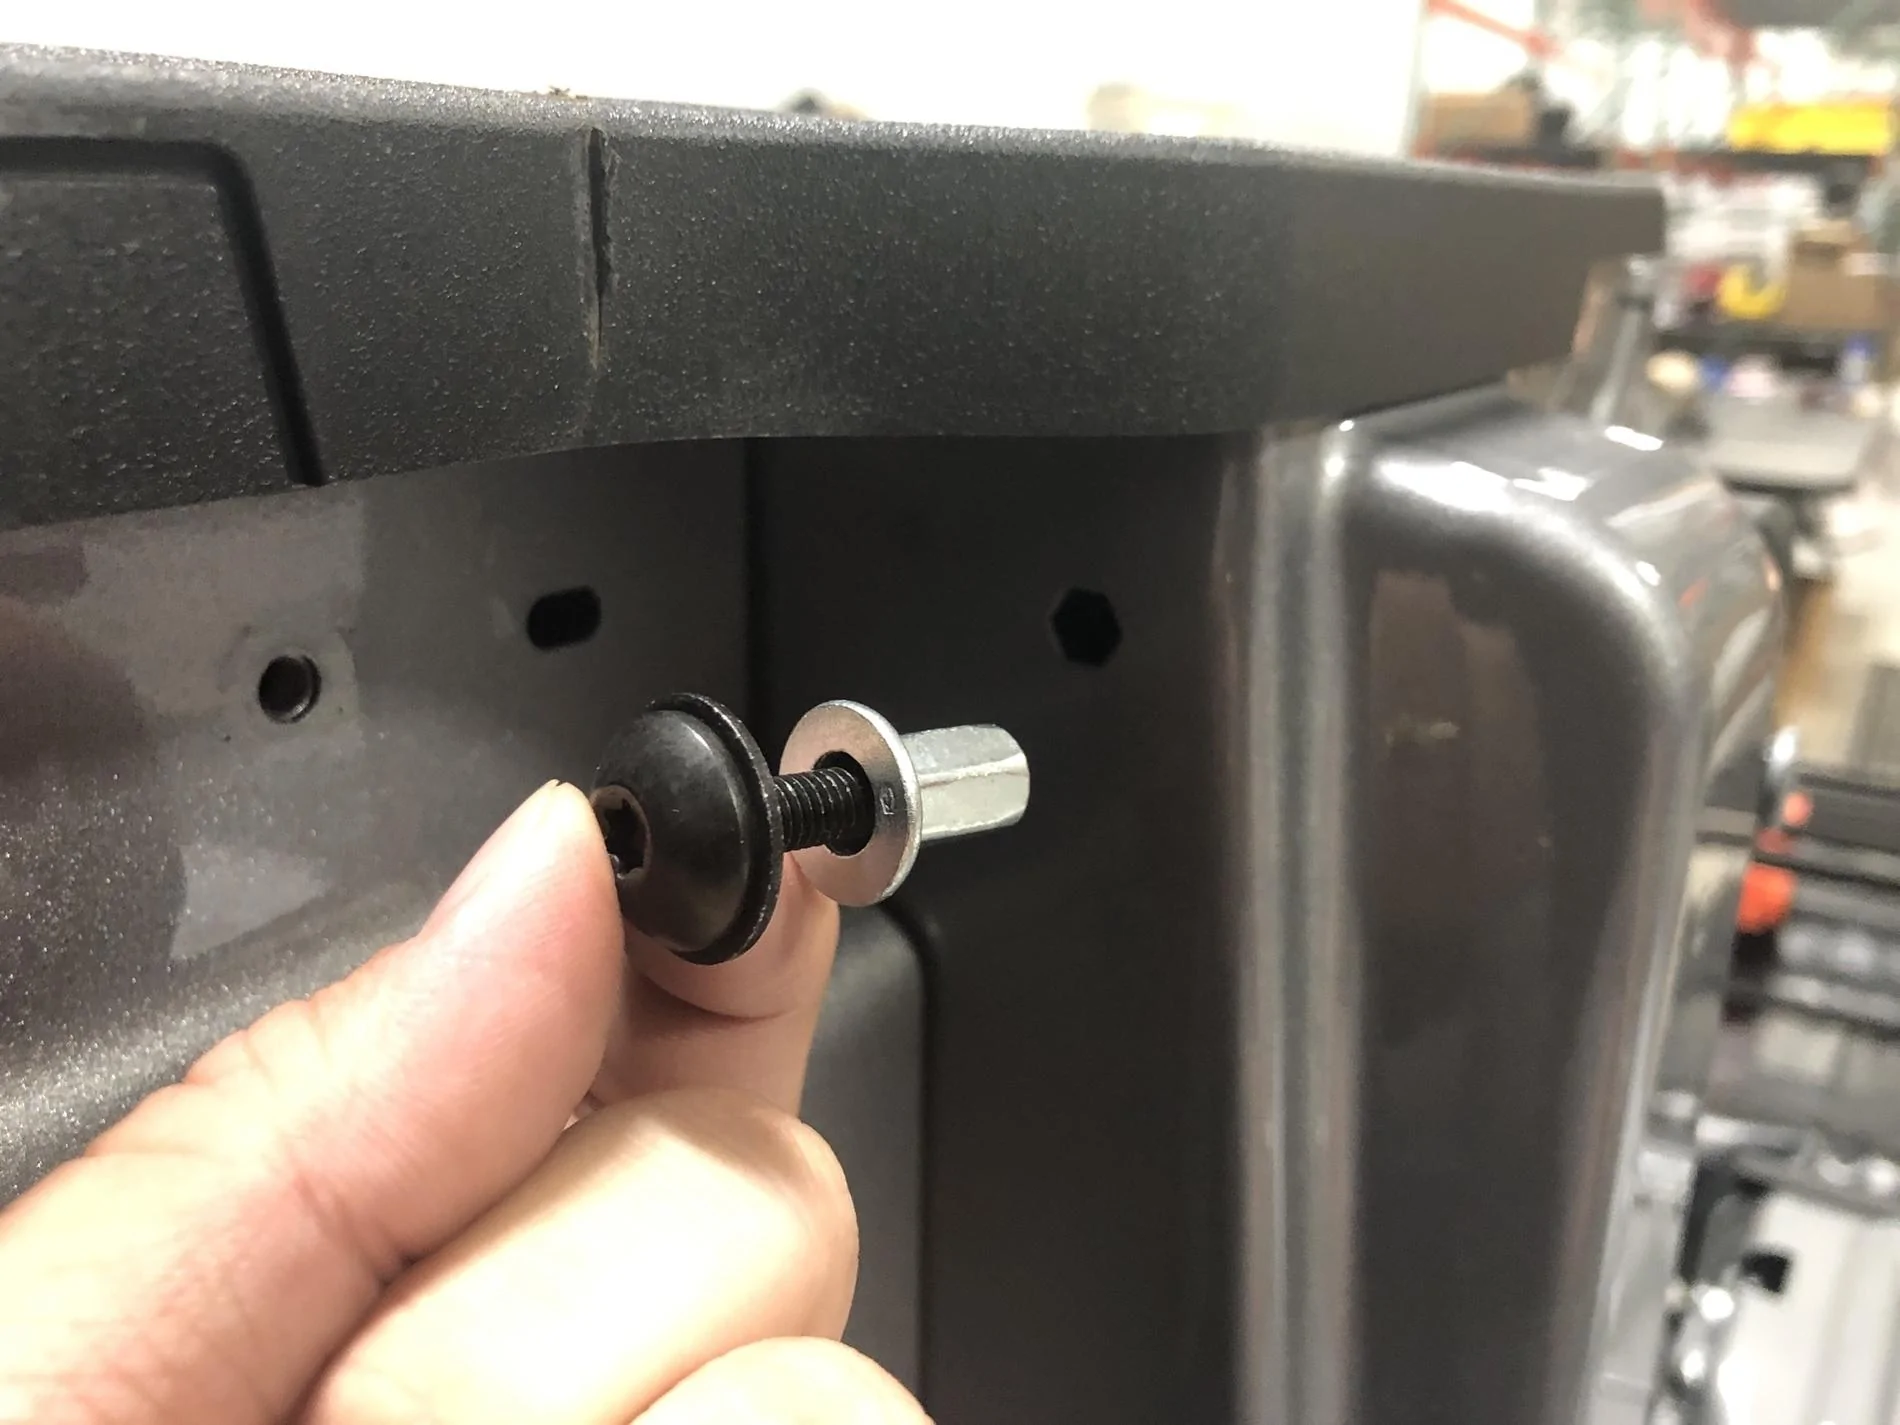
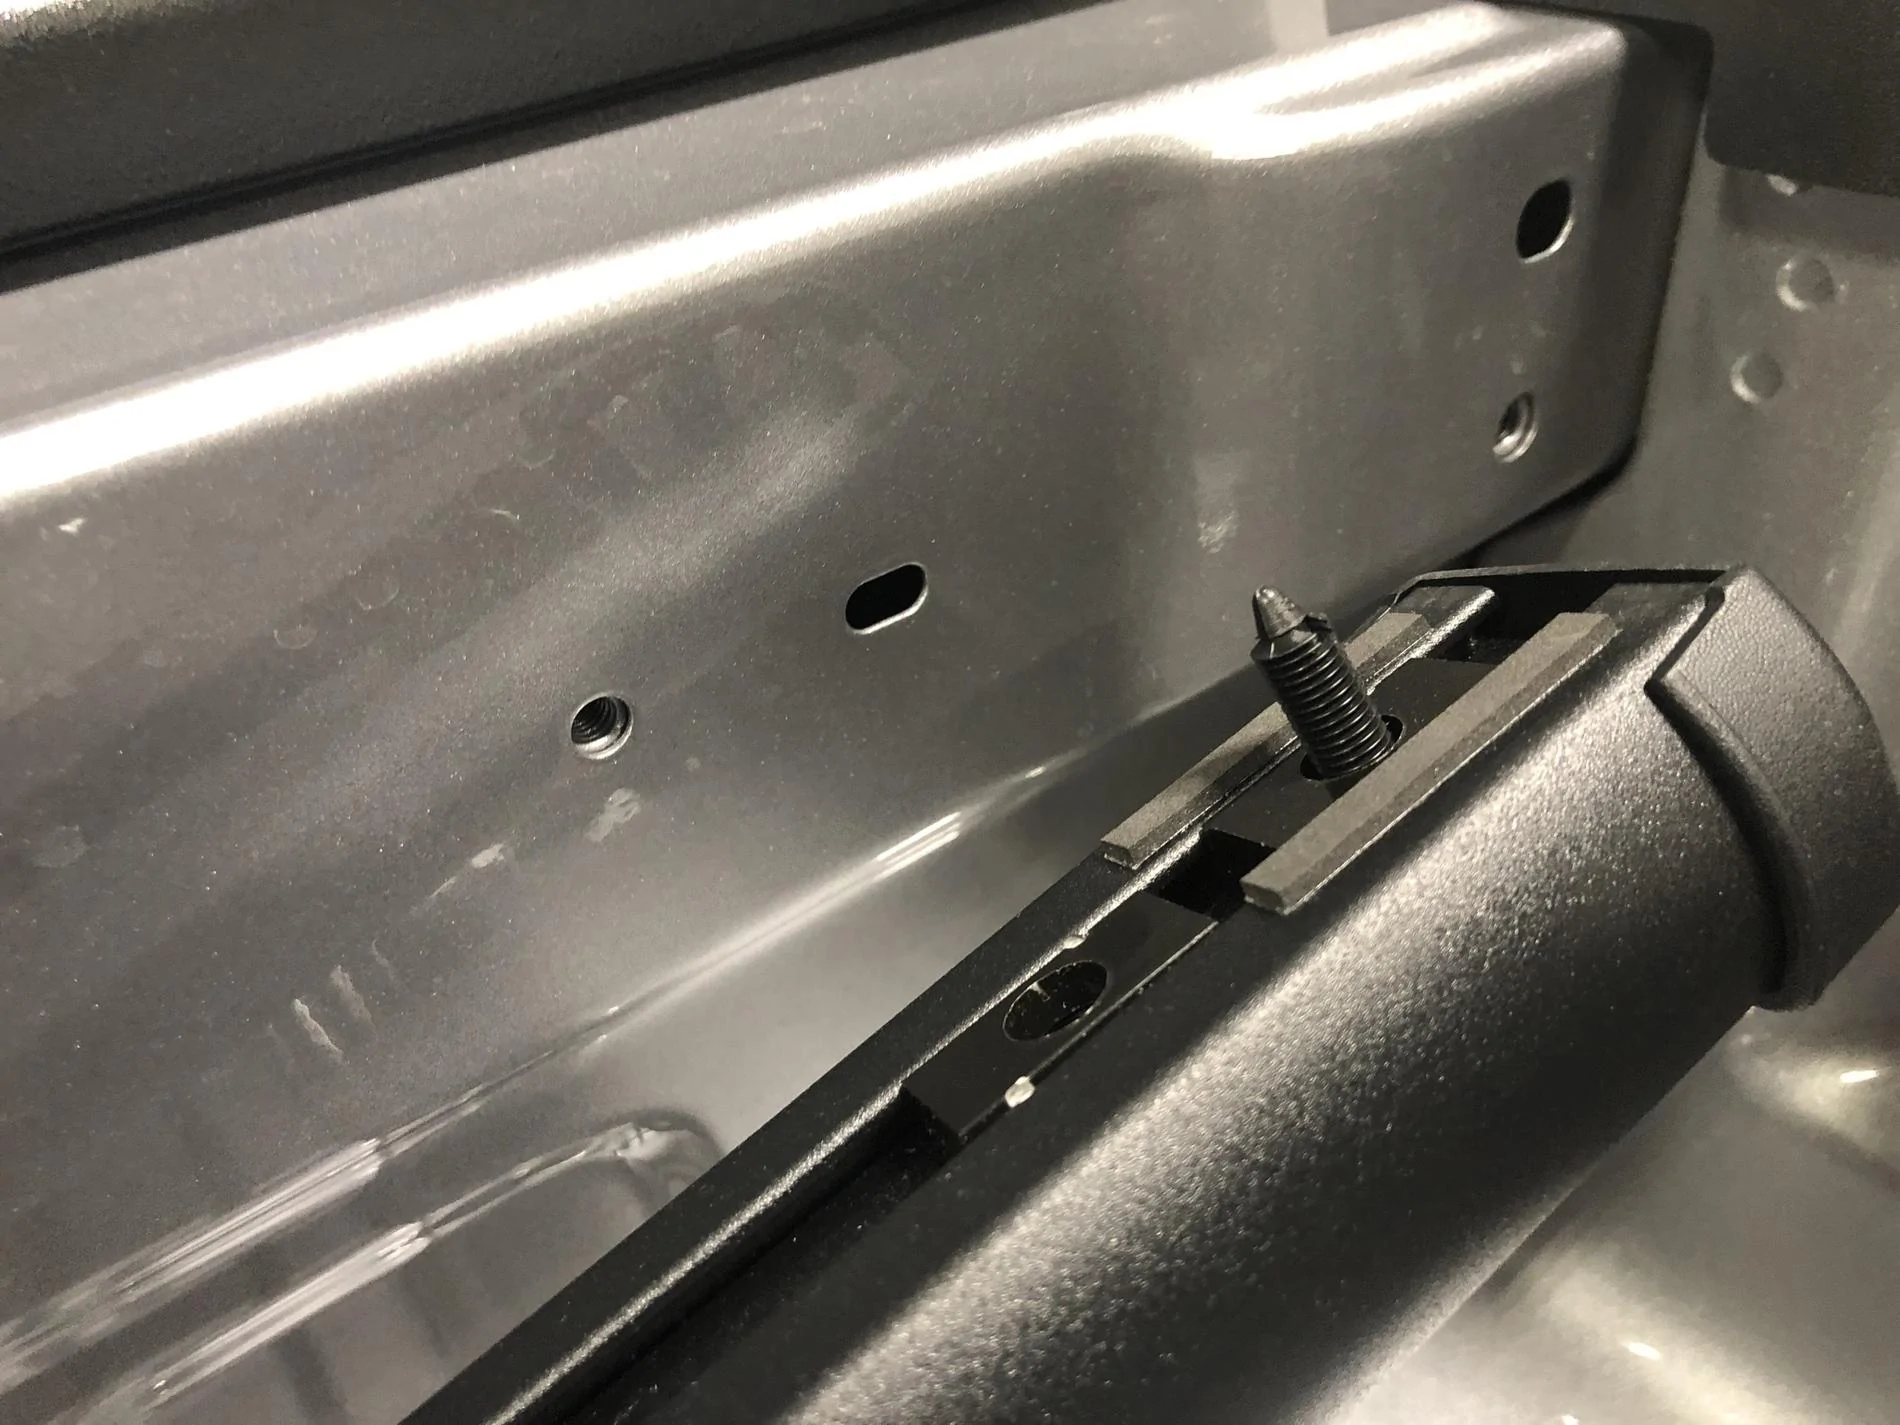
1.) The first and only remotely complicated step in the installation is to install the nutsert that Mopar includes in the kit on each side. This fills the hexagonal cutout in the pillar at the rear of the bed, near the tailgate. I don't understand why they didn't just install a threaded insert from the factory like the other holes, but whatever.
The nutsert that they include is cleverly hexagonal as well and fits snuggly into the cutout in the truck.
That's where the fun stops though - these things kinda suck. Instructions say to use one of the included fasteners to install the nutsert. Basically, you tighten it down, it bunches up the sleeve and locks the nutsert into place (see illustration above). That's great, if the nutsert doesn't just deform and spin inside of it's hexagonal cutout, which is what both sides did on my truck. Womp womp. Now the nutsert is stuck in place but also spinning and useless.
It's possible that this could be avoided by using a washer or two between the bolt and the nutsert, to reduce the friction between them. If this had crossed my mind before I did both using my method, I'd have tried it. Hopefully I'm missing something basic here and one of you can provide an easier solution!
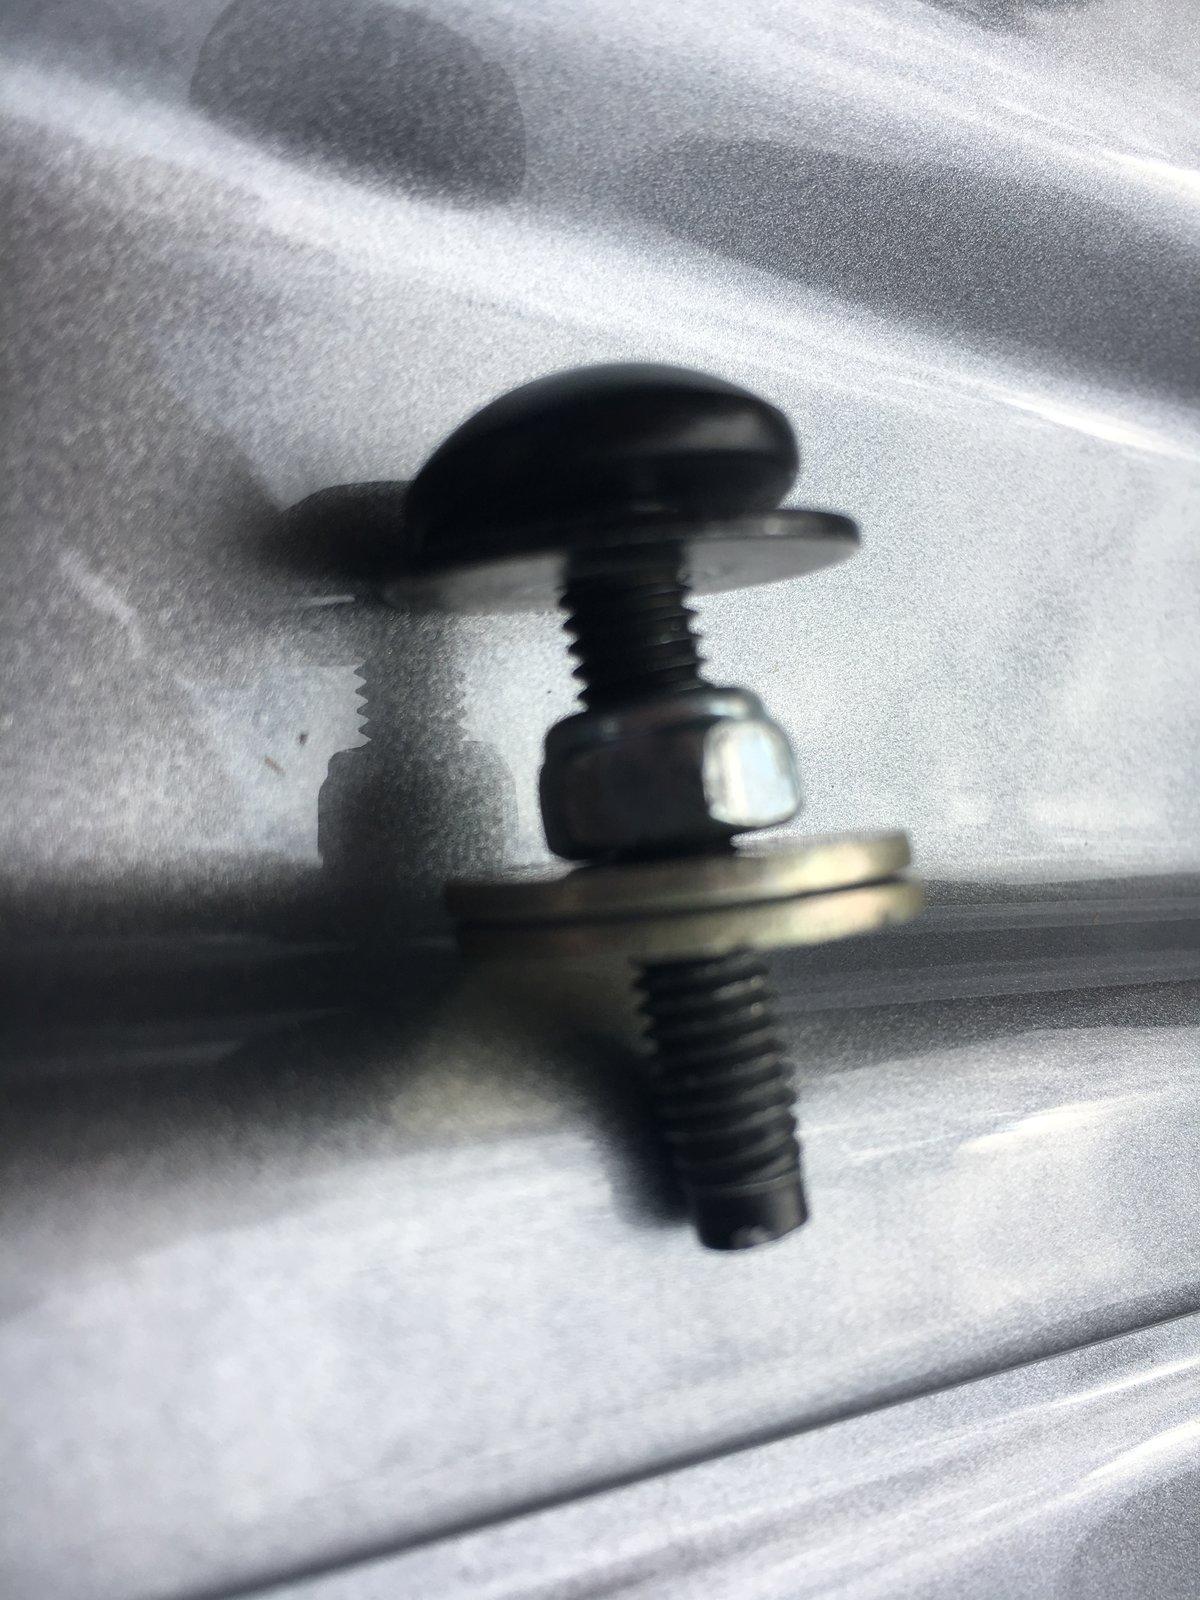
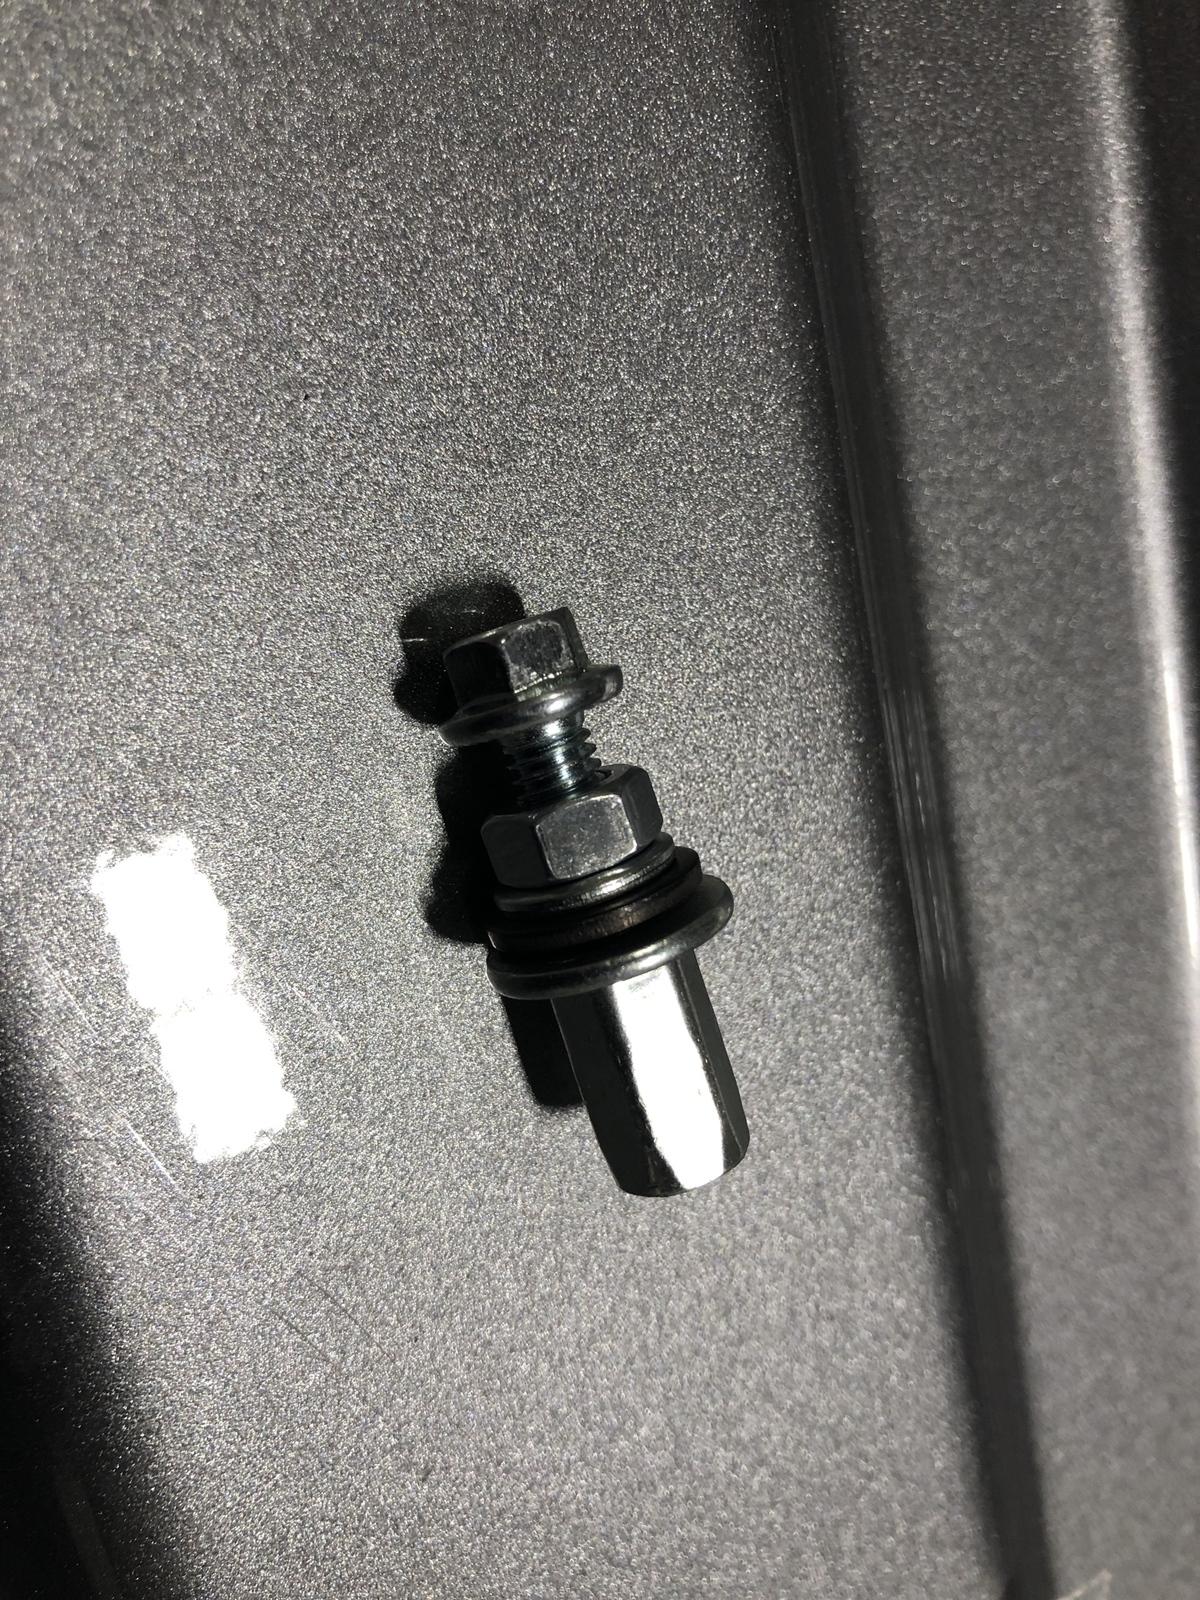
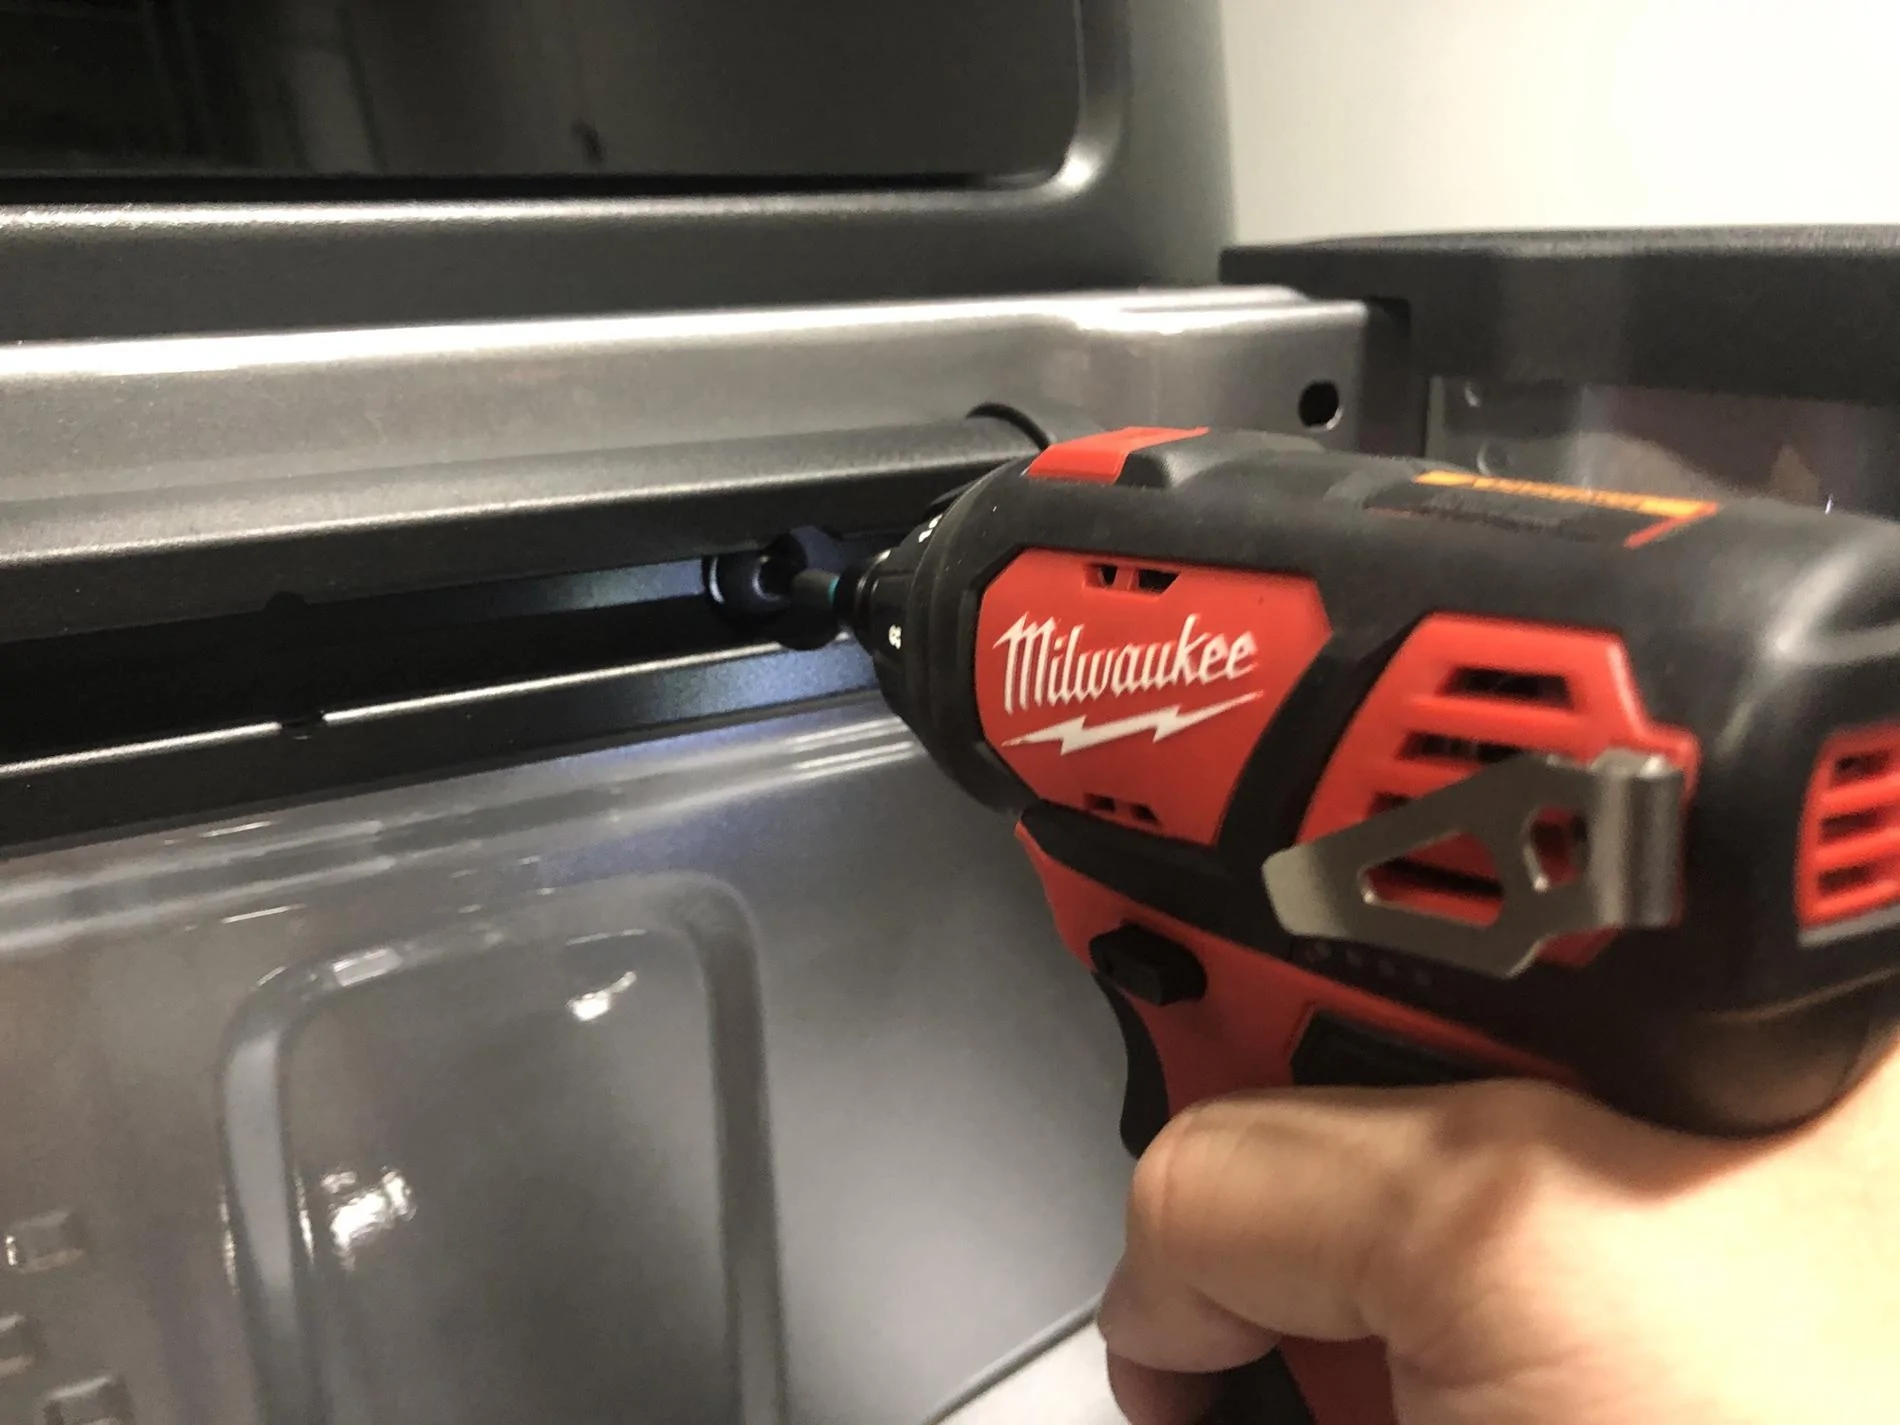
Luckily, I've had some experience with these things and know that they don't need to somehow lock into the panel to work. In fact, most are round. The idea is to keep the insert from spinning and 'pull' the threaded portion back out towards you, sandwiching the panel. We can accomplish this with a nut, bolt and washer in the configuration below. This is M6x1.0 hardware as noted in the tools section.

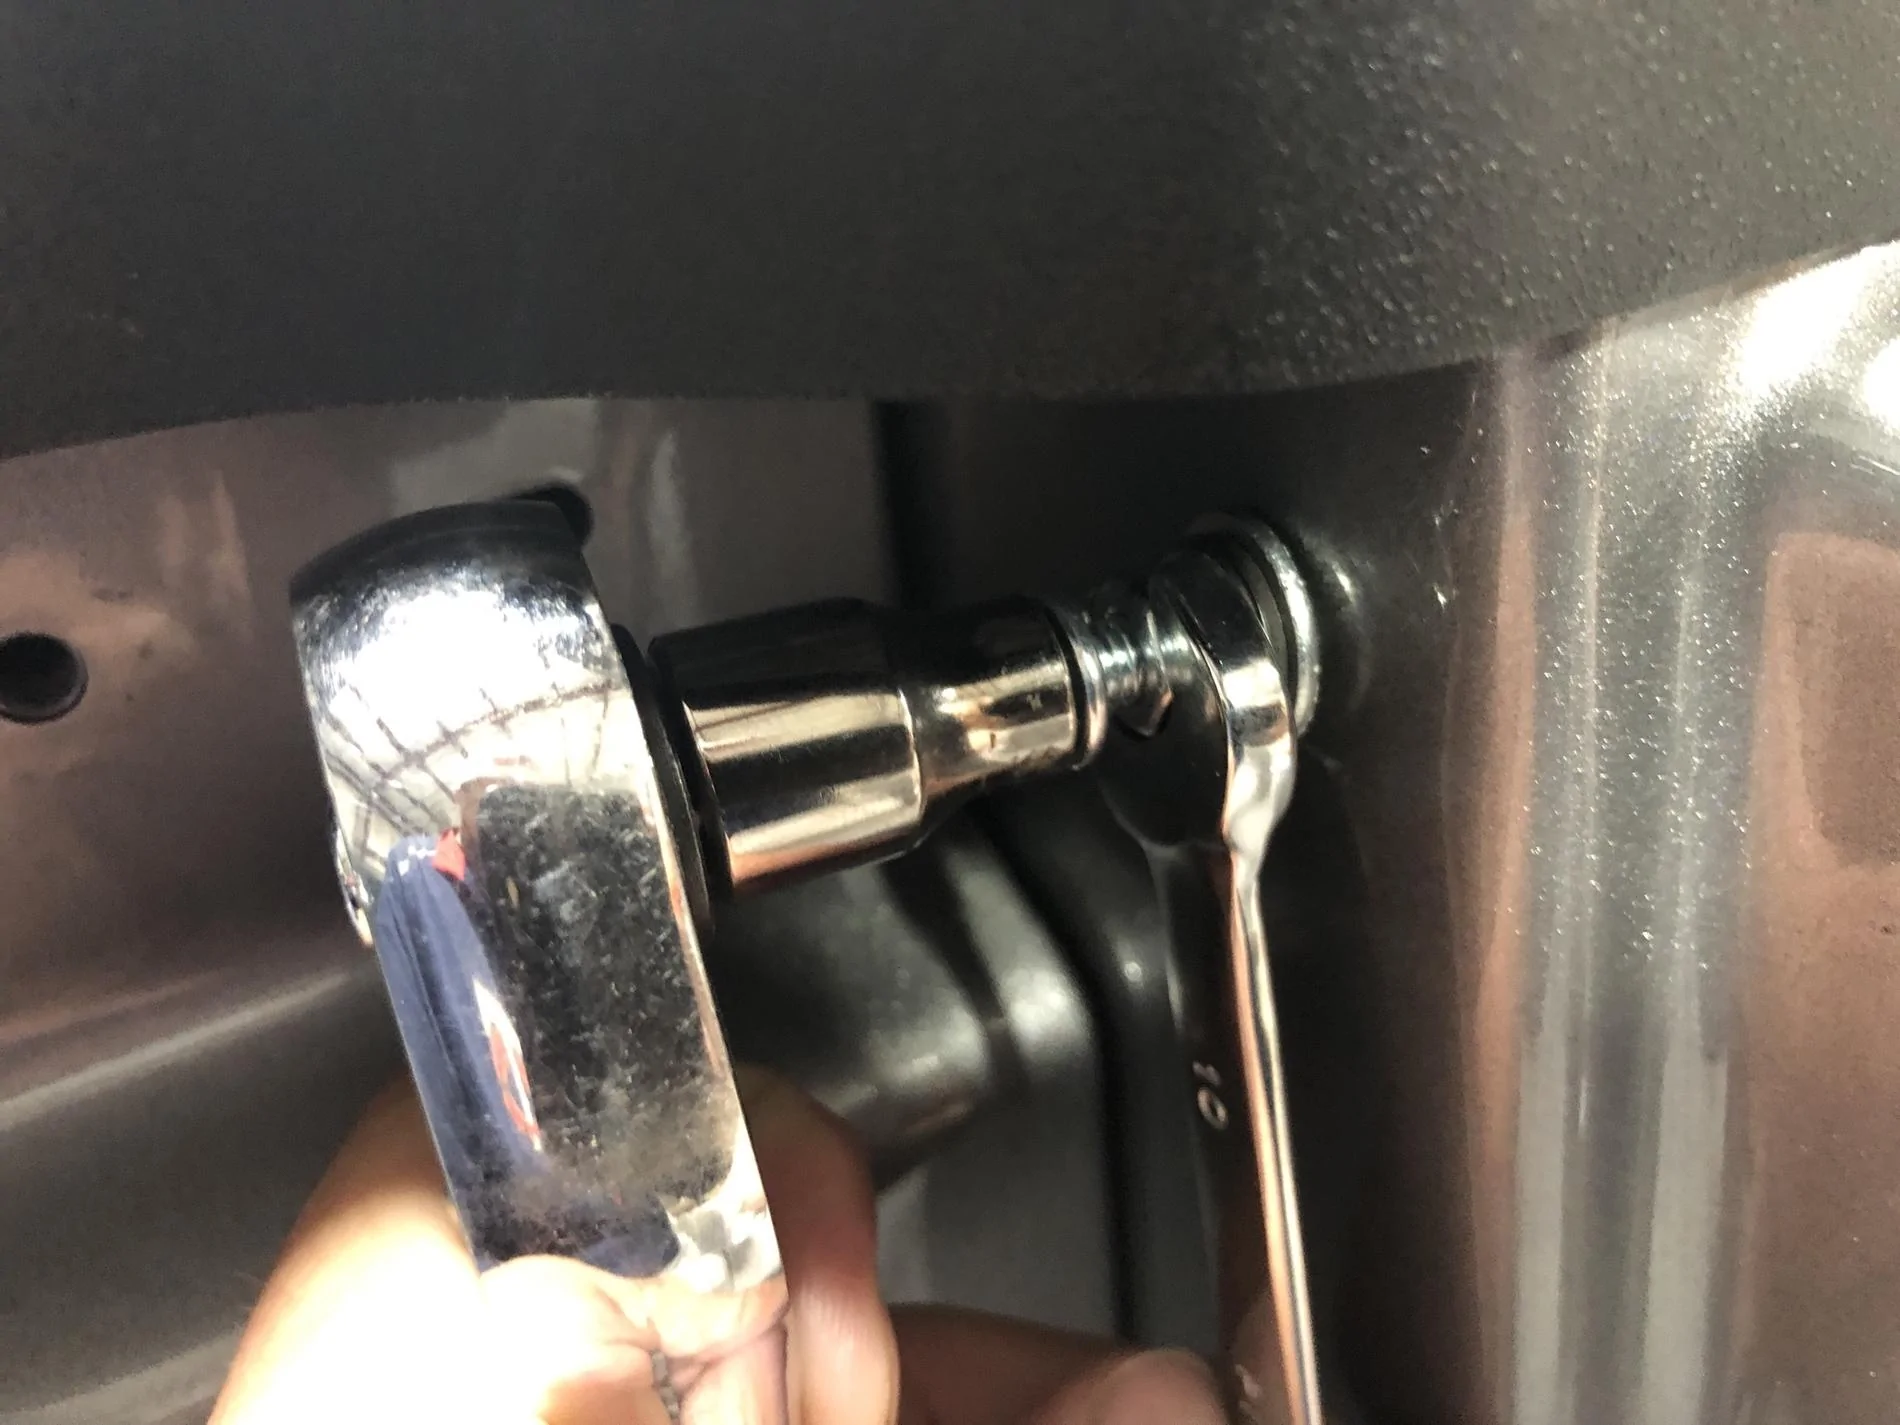
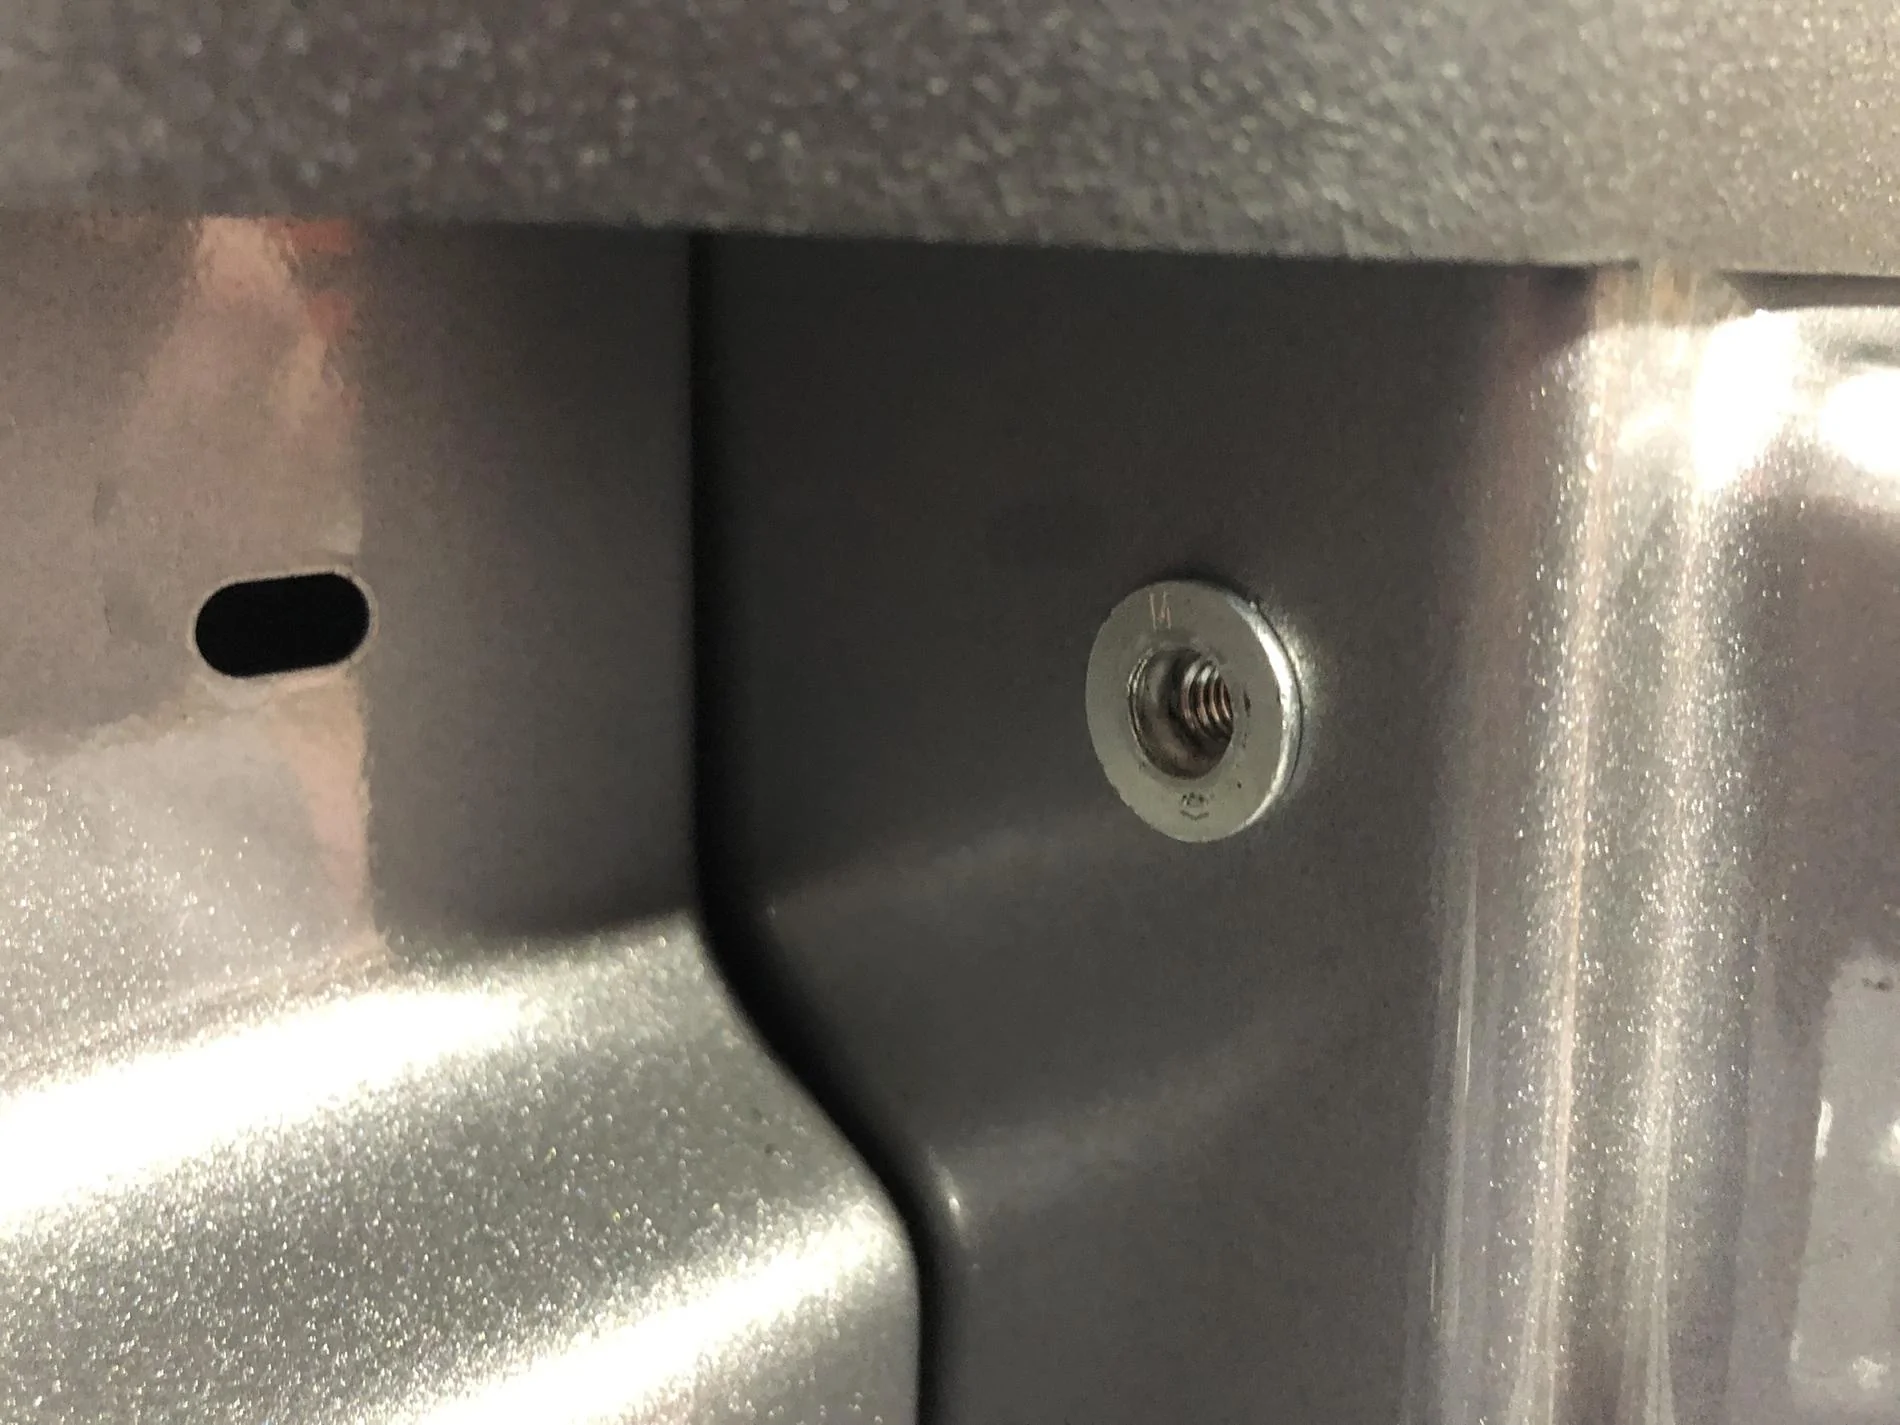
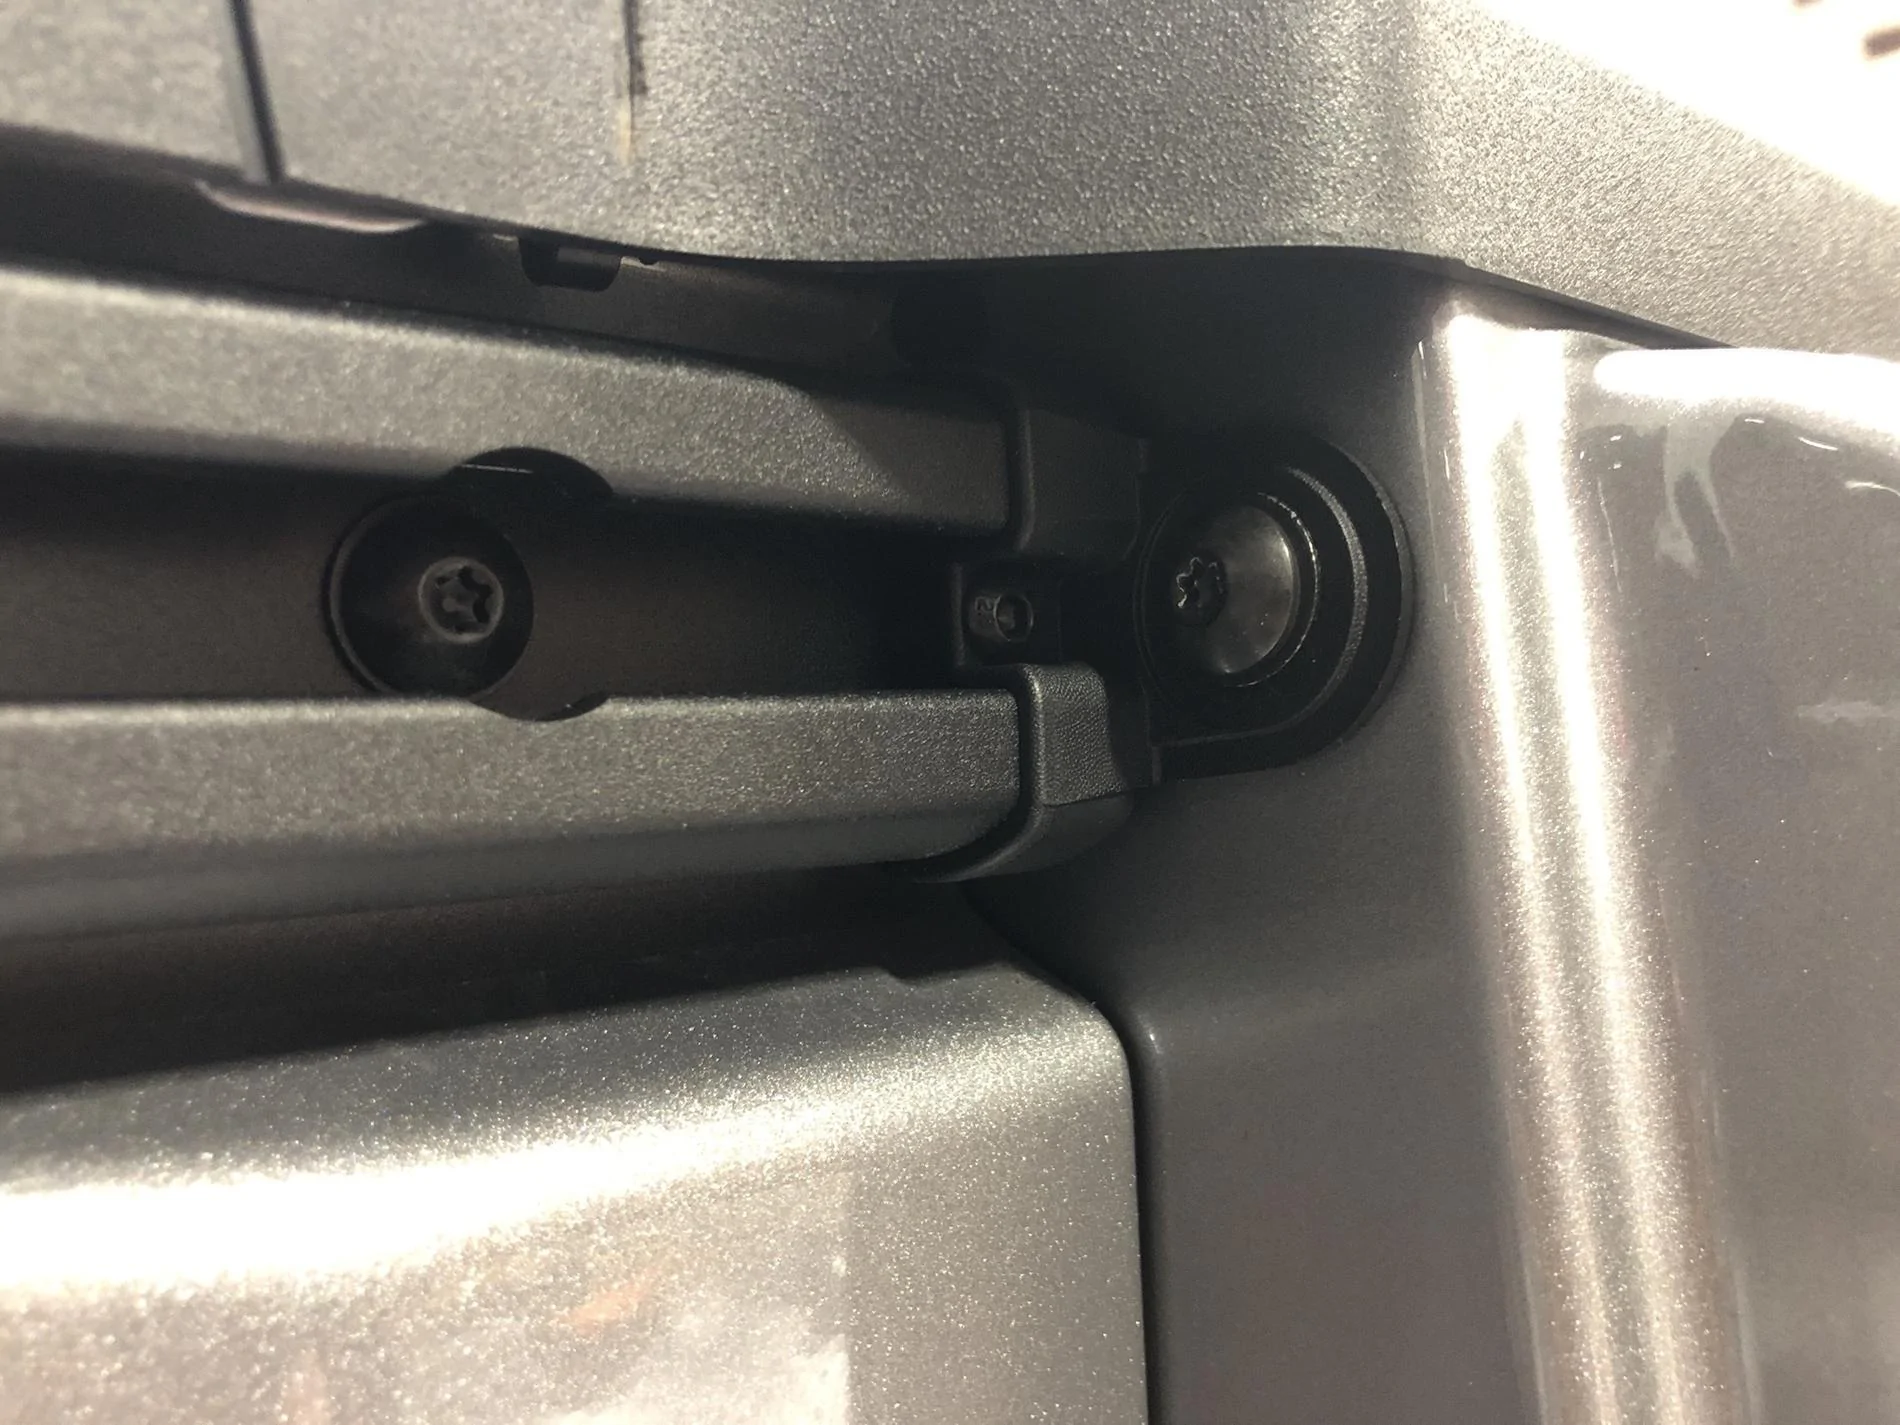
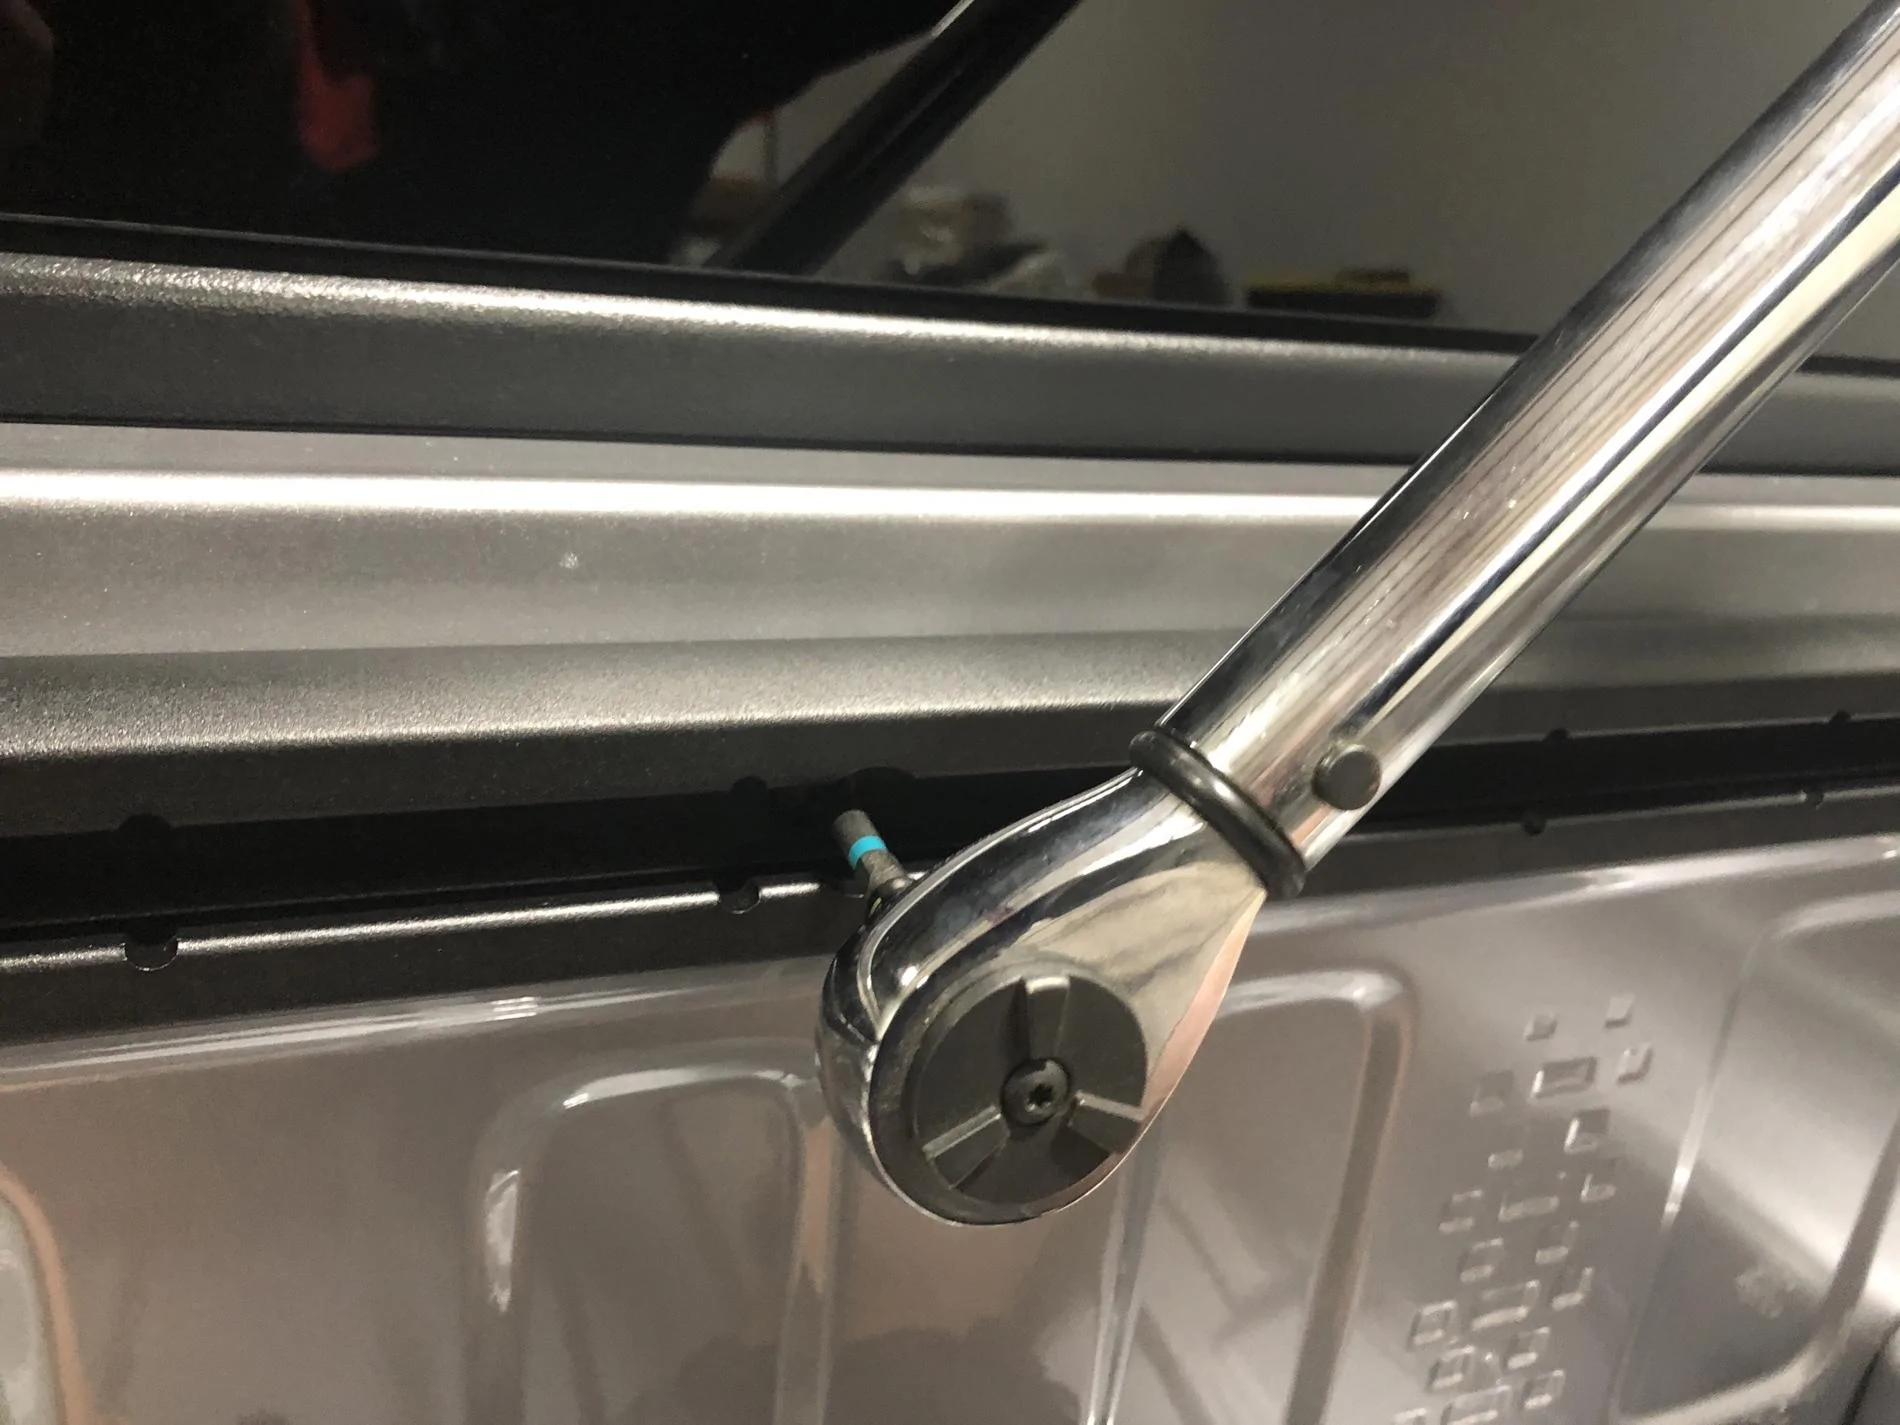
2.) With the bolt threaded all the way into the insert, we push the insert into place (or install in place, if you get stuck like me). Next, use a socket to hold the end of the bolt and keep it and the insert from spinning in place. Then, tighten the nut against the insert and keep going, making sure to keep the flange of the nutsert flat against the panel. This should require firm force, but nothing near your body weight. as you tighten the nut down, the bolt will be pulled towards you, along with the threaded portion of the insert. This creates the sandwich we need to lock it into place. When the effort required increased, I called it good.
3.) With that, we can proceed with the rest of the very simple installation. Each rail has four T30 torx fasteners and the instructions call for a Torque in the neighborhood of 10NM. This is pretty important, as they rails are meant to hold a pretty decent weight. Under torquing can mean that the rail isn't transferring the load into the bedside wall as intended. Too much torque (very easy to do) and you might over-stretch the fastener, causing or initiating early failure. Anyway, if you have a torque wrench, use it. if not, use this as an excuse to buy one.
Piece of cake!
Matt
Mopar Trail Rail Cargo Management System Install
Mopar PN: 82215956
Price: $370 or so
Difficulty: 2/10
Time: 30min
Mopar PN: 82215956
Price: $370 or so
Difficulty: 2/10
Time: 30min
Kit Contents:
The kits includes a rail for each side of the bed (these are identical) and one for the front of the bed. The rails on the sides are around 52" long and the rail at the front is around 48" long. The kit also includes all hardware (12x T30 torx bolt and two nutserts).
Tools Needed:
- T30 torx socket
- Torque wrench
- M6x1.0 bolt (length not critical, but I'd suggest over 30mm if possible)
- M6x1.0 nut
- M6 washer(s)
- Socket for M6 bolt
- Wrench for M6 nut
* The italicized tools are not called for in the official install guide, but I found that I needed them to install the nutserts. More on that below.
Procedure:
Initial impressions are that I always like receiving something that's packaged well and this fits the bill. No bells and whistles, but the pre-cut foam inserts did their job well. Removing one of the rails led to another surprise - these things are beefy! I was relieve to see this, as I'm hoping to mount my low-rise bed rack directly to the rail for reasons both obvious and not (I'll address that in a different post).
1.) The first and only remotely complicated step in the installation is to install the nutsert that Mopar includes in the kit on each side. This fills the hexagonal cutout in the pillar at the rear of the bed, near the tailgate. I don't understand why they didn't just install a threaded insert from the factory like the other holes, but whatever.
It's possible that this could be avoided by using a washer or two between the bolt and the nutsert, to reduce the friction between them. If this had crossed my mind before I did both using my method, I'd have tried it. Hopefully I'm missing something basic here and one of you can provide an easier solution!
Luckily, I've had some experience with these things and know that they don't need to somehow lock into the panel to work. In fact, most are round. The idea is to keep the insert from spinning and 'pull' the threaded portion back out towards you, sandwiching the panel. We can accomplish this with a nut, bolt and washer in the configuration below. This is M6x1.0 hardware as noted in the tools section.
Matt
Sponsored