Sponsored

AEV JT 2.5″ DUALSPORT RT SUSPENSION - Installation, tips and MOAB results!

JTdiRtyD

Well-Known Member
First Name
Wes
Joined
Dec 15, 2024
Threads
36
Messages
1,129
Reaction score
2,071
Location
MN
Vehicle(s)
'22 JTRD
Build Thread
Link
Occupation
Army vet, low-code dev
Great info. I've heard some say you need a track bar other say you don't. Long as it doesn't affect anything than I can do the install and not immediately worry. So thanks. I did figure I'd need to adjust the draglink which is expected.

Overall im not too worried about the install. However what makes it slightly harder and make take even more than the allotted time, is the fact that I'm not coming from a stock form which the instructions are based on. I currently have the AEV 2 inch spacer lift which I installed myself (part of what makes me confident about installing the dualsport myself). But considering that and that certain sections require stock hardware with AEV hardware etc, I'm having to refer back to the spacer install instructions as well. Luckily I kept my stock links and spring isolators which the spacer kit didn't need.
Yeah I wasn't impressed with the hardware. Would have been nice if they had used the same socket sizes as the factory stuff, but no. Mine was atleast all there though. I did have to not follow the instructions for the rear track bar relocation. IIRC it says to use the factory bolt in the factory location but with a AEV provided nut. Well the AEV supplied nut was a different thread that the OEM bolt so that didn't work. I believe I used the AEV bolt in the factory hole and the OEM bolt in the "new" trackbar location.

Also I edited my original post to state to remove at least one end of the trackbars before lowering the axles. Instructions state to loosen them but don't remove, but you'll fight with getting the axle low enough if you don't.
Sponsored
 

Sarge502

Well-Known Member
Joined
Jul 3, 2021
Threads
46
Messages
1,313
Reaction score
2,486
Location
Kentucky
Vehicle(s)
2020 Jeep Gladiator Overland
Build Thread
Link
Occupation
Thin Blue Line
Vehicle Showcase
1
Yeah I wasn't impressed with the hardware. Would have been nice if they had used the same socket sizes as the factory stuff, but no. Mine was atleast all there though. I did have to not follow the instructions for the rear track bar relocation. IIRC it says to use the factory bolt in the factory location but with a AEV provided nut. Well the AEV supplied nut was a different thread that the OEM bolt so that didn't work. I believe I used the AEV bolt in the factory hole and the OEM bolt in the "new" trackbar location.

Also I edited my original post to state to remove at least one end of the trackbars before lowering the axles. Instructions state to loosen them but don't remove, but you'll fight with getting the axle low enough if you don't.

Yeah I've heard from others about the AEV nut provided being different thread pattern. Luckily you caught that before torquing it down. So you're saying in the event that's the case for that, just to do the opposite? No issues if so? Otherwise I'd maybe have to source a nut with correct thread pattern
 

JTdiRtyD

Well-Known Member
First Name
Wes
Joined
Dec 15, 2024
Threads
36
Messages
1,129
Reaction score
2,071
Location
MN
Vehicle(s)
'22 JTRD
Build Thread
Link
Occupation
Army vet, low-code dev
Yeah I've heard from others about the AEV nut provided being different thread pattern. Luckily you caught that before torquing it down. So you're saying in the event that's the case for that, just to do the opposite? No issues if so? Otherwise I'd maybe have to source a nut with correct thread pattern
Bolts are the same size and grade, just different threads, so really doesnt matter what is used where.
 

49Gramps

Well-Known Member
First Name
John
Joined
Apr 8, 2019
Threads
3
Messages
312
Reaction score
333
Location
NJ
Vehicle(s)
'21 Gladiator Overland
Occupation
Retired Fire & EMS Dispatcher
I added Clayton's front track bar so the suspension would sit even under the frame.
 

Sarge502

Well-Known Member
Joined
Jul 3, 2021
Threads
46
Messages
1,313
Reaction score
2,486
Location
Kentucky
Vehicle(s)
2020 Jeep Gladiator Overland
Build Thread
Link
Occupation
Thin Blue Line
Vehicle Showcase
1
I added Clayton's front track bar so the suspension would sit even under the frame.
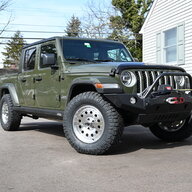
This is with the Dualsport though correct? Although Im being told I may not need it, in the event I still do get one eventually just wanted some good options coupled with the Dualsport.

Also noticed you have an Overland like myself. Any good side pics of it on the Dualsport? Im trying to get an idea of the look once complete. I generally see more pics on Rubicons with higher fenders so doesnt really show the potential effect. Although I'm also on 35's.
 

Sponsored

DanW

Well-Known Member
First Name
Dan
Joined
Mar 2, 2017
Threads
45
Messages
1,883
Reaction score
2,470
Location
Brownsburg, Indiana
Vehicle(s)
21 JT Rubi, 18 JLU Rubi, 2008 JKU Rubi, 07 Vette
I bought a cheap Rough Country adjustable front track bar copy....yes....cheaper than Rough Country....and it is fantastic. It is solid, strong, and adjustable and once adjusted, stays put. I have the Rough Country version on the rear of my JL. It is 7 years old and it's been to heck and back off-road with never an issue and never needing to be re-adjusted. I think I spent $130 or so on the newer one on the JT. The bushings are holding up very well, too. I have a much more expensive Rancho on the front of my JL, and it is also rock solid and holding up perfectly. But it was a heck of a lot more money and has to be unbolted to be adjusted.
 

49Gramps

Well-Known Member
First Name
John
Joined
Apr 8, 2019
Threads
3
Messages
312
Reaction score
333
Location
NJ
Vehicle(s)
'21 Gladiator Overland
Occupation
Retired Fire & EMS Dispatcher
This is with the Dualsport though correct? Although Im being told I may not need it, in the event I still do get one eventually just wanted some good options coupled with the Dualsport.

Also noticed you have an Overland like myself. Any good side pics of it on the Dualsport? Im trying to get an idea of the look once complete. I generally see more pics on Rubicons with higher fenders so doesnt really show the potential effect. Although I'm also on 35's.
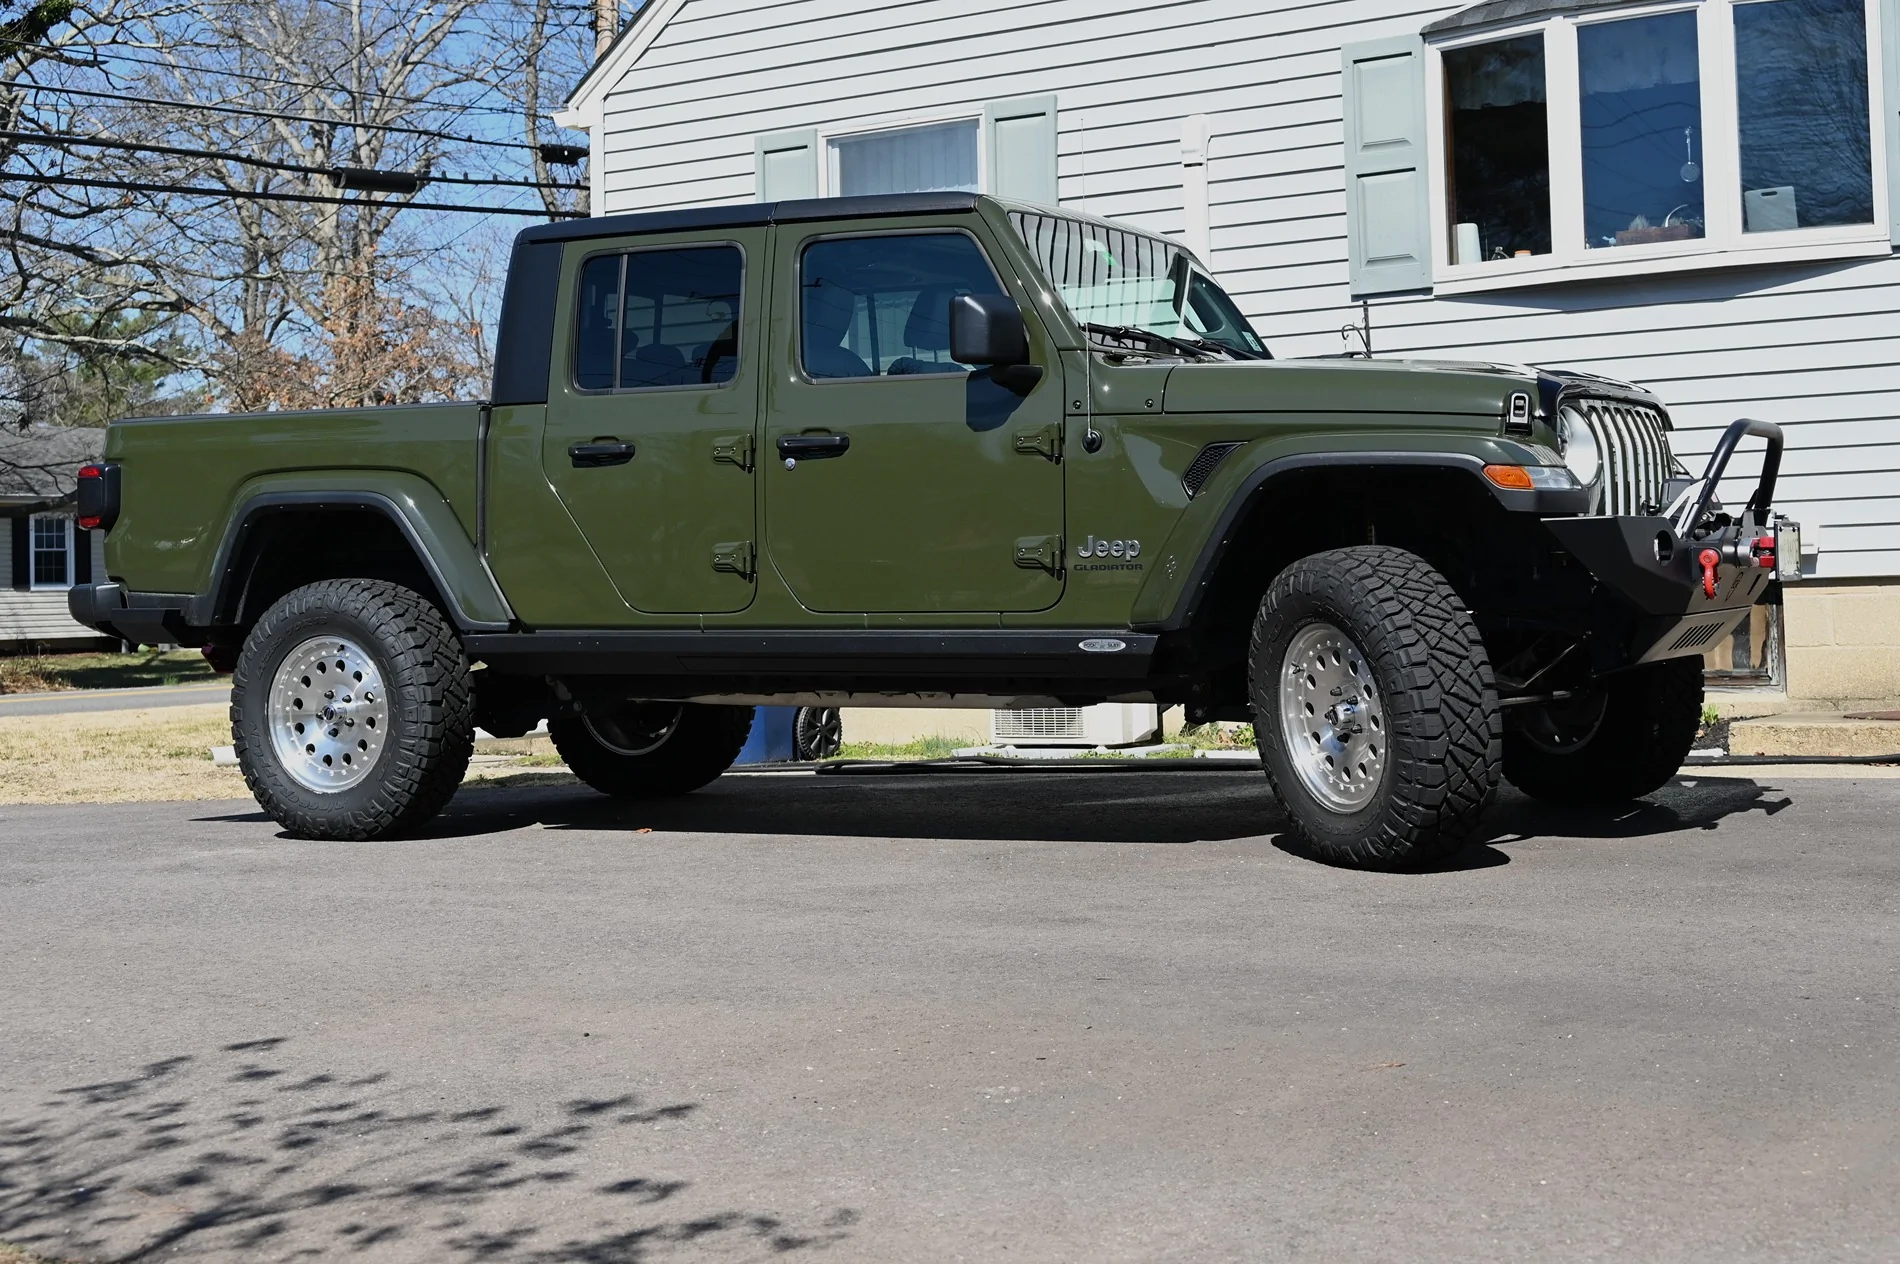
Yes, this is the dualsport. Wheels are 18 x 8 (+30), tire are Ridge Grappler 285/70 18 (34").
Jeep Gladiator AEV JT 2.5″ DUALSPORT RT SUSPENSION - Installation, tips and MOAB results! Z06_1202A
 

Sarge502

Well-Known Member
Joined
Jul 3, 2021
Threads
46
Messages
1,313
Reaction score
2,486
Location
Kentucky
Vehicle(s)
2020 Jeep Gladiator Overland
Build Thread
Link
Occupation
Thin Blue Line
Vehicle Showcase
1
Nice. Just finished my rear install. Starting the prep work for the front which I'll tackle in then next day or so. Then the geo brackets which I'm not looking forward to.
 

Sarge502

Well-Known Member
Joined
Jul 3, 2021
Threads
46
Messages
1,313
Reaction score
2,486
Location
Kentucky
Vehicle(s)
2020 Jeep Gladiator Overland
Build Thread
Link
Occupation
Thin Blue Line
Vehicle Showcase
1
Yes, this is the dualsport. Wheels are 18 x 8 (+30), tire are Ridge Grappler 285/70 18 (34").
Z06_1202A.webp

Nice visual. Thx. Mine should have a similar stance.
 

JTdiRtyD

Well-Known Member
First Name
Wes
Joined
Dec 15, 2024
Threads
36
Messages
1,129
Reaction score
2,071
Location
MN
Vehicle(s)
'22 JTRD
Build Thread
Link
Occupation
Army vet, low-code dev
Nice. Just finished my rear install. Starting the prep work for the front which I'll tackle in then next day or so. Then the geo brackets which I'm not looking forward to.
Geobrackets were a lot easier than I anticipated, maybe took 20 minutes per side. When installing I found it necessary to completely remove the upper control arm first. I did have to use a ratchet strap to pull the axle into place to get everything lined up.
 

Sponsored

Sarge502

Well-Known Member
Joined
Jul 3, 2021
Threads
46
Messages
1,313
Reaction score
2,486
Location
Kentucky
Vehicle(s)
2020 Jeep Gladiator Overland
Build Thread
Link
Occupation
Thin Blue Line
Vehicle Showcase
1
Geobrackets were a lot easier than I anticipated, maybe took 20 minutes per side. When installing I found it necessary to completely remove the upper control arm first.
Thanks for the heads up. I've been a little intimidated on that part on a couple videos. I did see that it makes sense to remove the uppers fully since they won't clear the brackets afterwards if still attached on one end, however, the instructions fails to mention that among other things

I'm assuming you also kept tires on for easier installation?
 

JTdiRtyD

Well-Known Member
First Name
Wes
Joined
Dec 15, 2024
Threads
36
Messages
1,129
Reaction score
2,071
Location
MN
Vehicle(s)
'22 JTRD
Build Thread
Link
Occupation
Army vet, low-code dev
Thanks for the heads up. I've been a little intimidated on that part on a couple videos. I did see that it makes sense to remove the uppers fully since they won't clear the brackets afterwards if still attached on one end, however, the instructions failed to mention that among other things

I'm assuming you also kept tires on for easier installation?
Yes. I did the brackets on the ground. One side at a time.

If I remember the process correctly (just did it a few weeks ago)

Remove upper control arm.
Loosen lower front bolt.
Remove lower rear bolt.
Push axle forward a tad. Install bracket.
Use ratchet strap to pull axle back into place and install rear lower bolt.
Install upper control arm.
Move to other side and repeat.
Tighten everything to spec once both sides were done.
 

JTdiRtyD

Well-Known Member
First Name
Wes
Joined
Dec 15, 2024
Threads
36
Messages
1,129
Reaction score
2,071
Location
MN
Vehicle(s)
'22 JTRD
Build Thread
Link
Occupation
Army vet, low-code dev
Another thing on the front, I had to unbolt the crossmember that is under the front driveshaft just in front of the transmission. The driveshaft would hit that and not let me lower the axle enough. But again, I have HD springs so I needed a little extra compared to the standard springs, so you might be ok.
 

Sarge502

Well-Known Member
Joined
Jul 3, 2021
Threads
46
Messages
1,313
Reaction score
2,486
Location
Kentucky
Vehicle(s)
2020 Jeep Gladiator Overland
Build Thread
Link
Occupation
Thin Blue Line
Vehicle Showcase
1
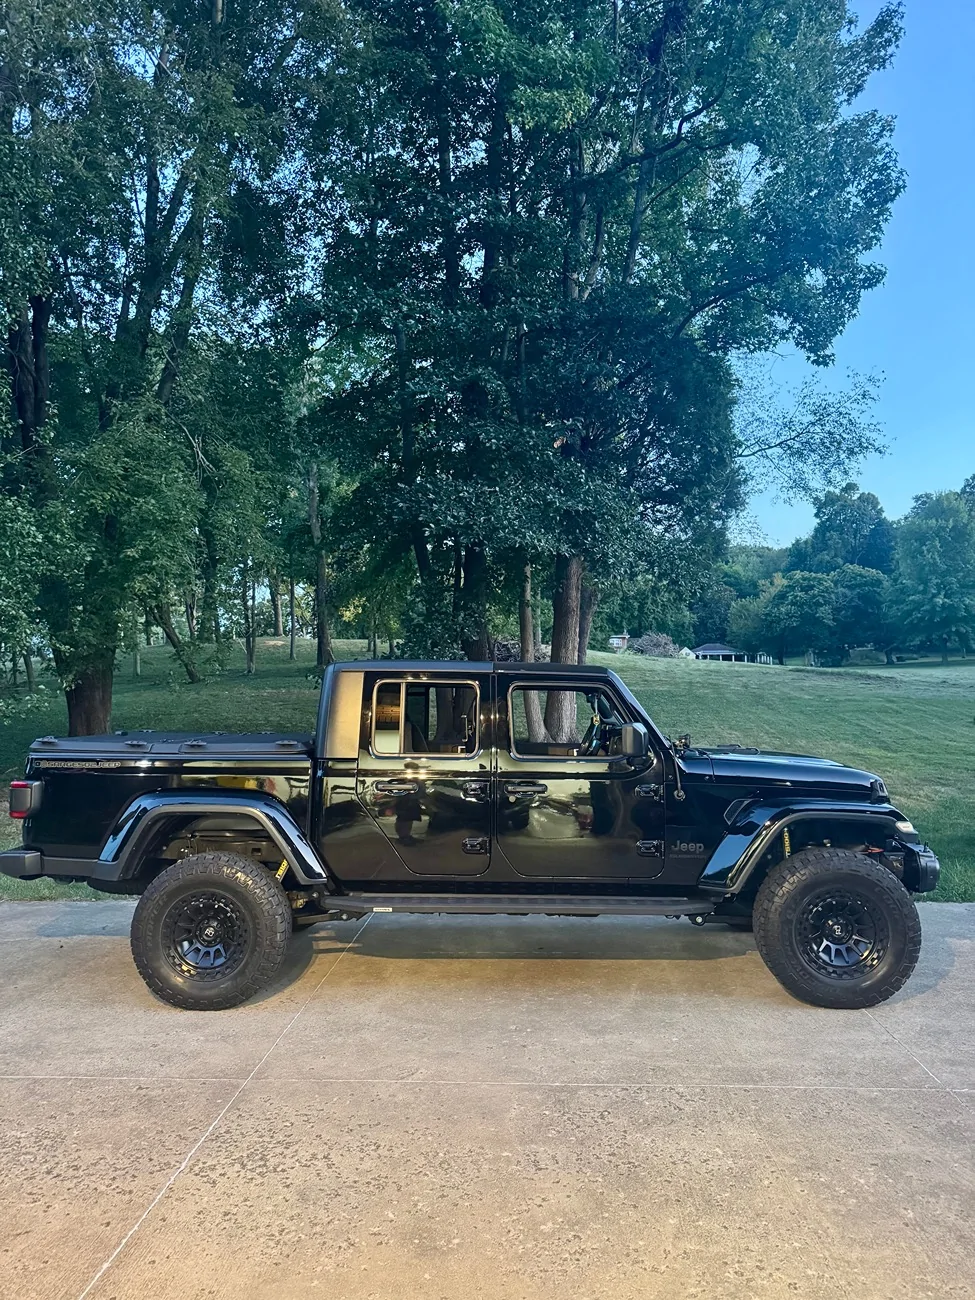
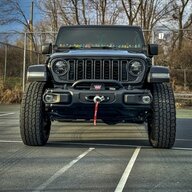
So just finished the lift this evening after packing away edit for a few days after work. Super amazed with the ride quality it literally feels like it's hugging the ground and I'm sure it's due to the geo brackets. Definitely more controlled.

Side question though for anyone with this lift considering the instructions doesn't mention it among other things.. but I assume that the heat shields removed from the upper control arms stay off considering I couldn't get them to fit back on after installing the geo brackets??

Jeep Gladiator AEV JT 2.5″ DUALSPORT RT SUSPENSION - Installation, tips and MOAB results! IMG_6856
Sponsored


Top