Sponsored

Diamondback HD Mounts - Crushing side rails!

Hsteeleman

Member
First Name
Hugh
Joined
Feb 14, 2021
Threads
1
Messages
14
Reaction score
2
Location
New City, New York
Vehicle(s)
2021 Jeep Gladiator
Occupation
CFO
off topic but I added Thule artificial rain gutters so I can use lockable roof cross bars, it works great and when not in use they look like they belong.

tempImageiPnj8S.png
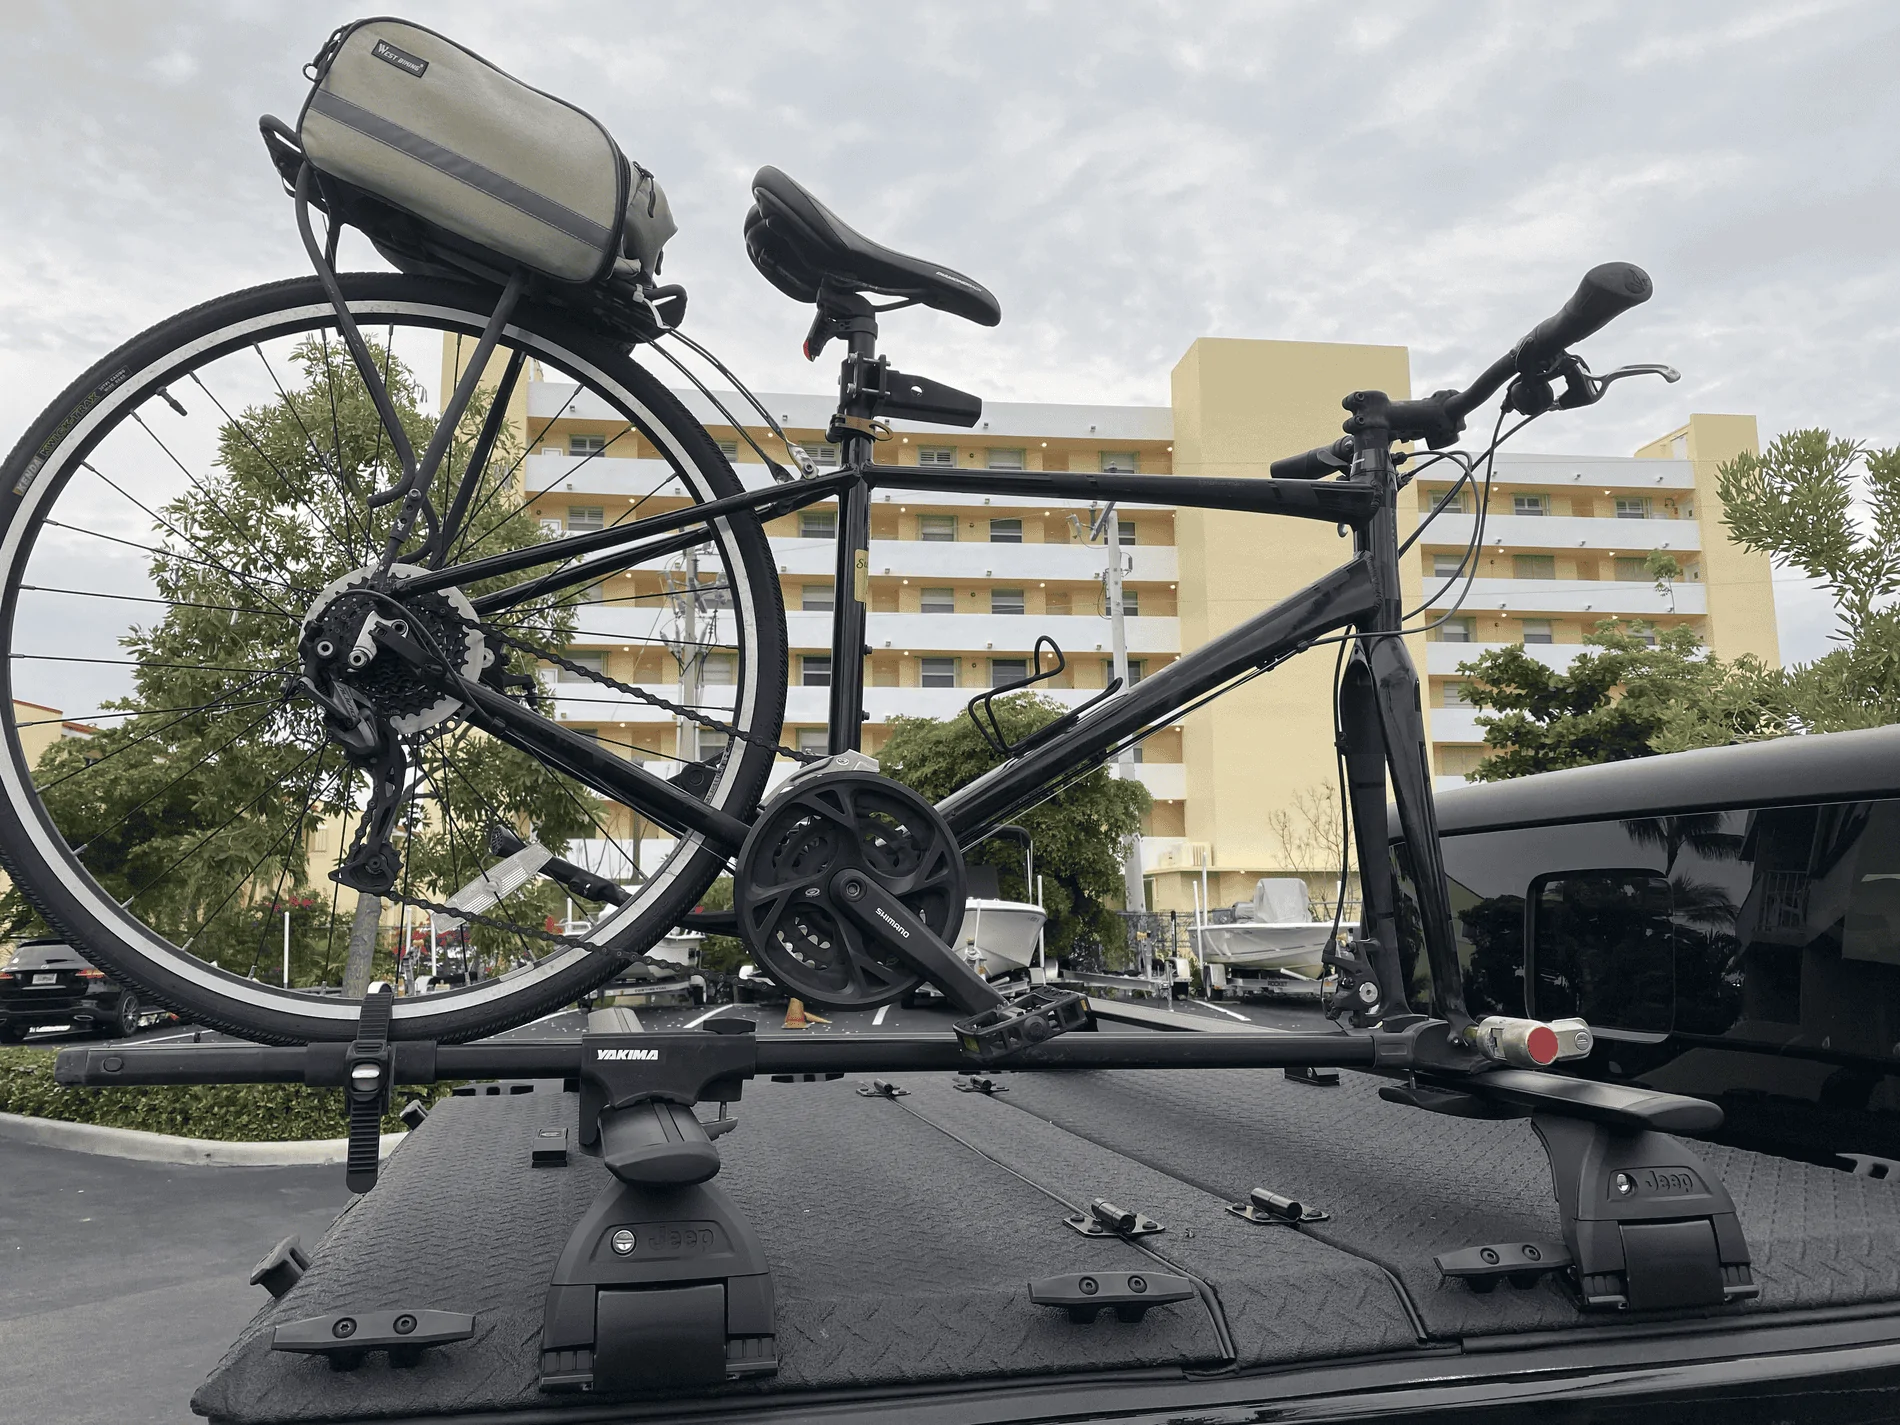
I‘m looking to do the same set up to my Gladiator. How well does the Jeep Rack attach to the Thule gutter mounts.
Sponsored


Hsteeleman

Member
First Name
Hugh
Joined
Feb 14, 2021
Threads
1
Messages
14
Reaction score
2
Location
New City, New York
Vehicle(s)
2021 Jeep Gladiator
Occupation
CFO
off topic but I added Thule artificial rain gutters so I can use lockable roof cross bars, it works great and when not in use they look like they belong.

tempImageiPnj8S.png
I just noticed looking closure to your Thule Artificial mounts that you modified them so the Jeep foot mounts would attach. Can the foot mounts securely attached without modification,
 

MDV Hank

Well-Known Member
First Name
Henry
Joined
Oct 20, 2019
Threads
2
Messages
60
Reaction score
36
Location
Florida Keys
Vehicle(s)
2020 Gladiator Rubicon
I just noticed looking closure to your Thule Artificial mounts that you modified them so the Jeep foot mounts would attach. Can the foot mounts securely attached without modification,
the thule gutters have small tabs that keep thule crossbars from slipping. I popped them off so I can use any gutter mount attachments. The yakima ones are blocked on both ends and don't look as good on the DB cover. Remember if you mount on any roof there is not and tabs or stoppers, and I've never had any issues.
 
First Name
D.
Joined
Feb 20, 2021
Threads
0
Messages
6
Reaction score
8
Location
Michigan
Vehicle(s)
2021 Jeep Gladiator Mojave
Occupation
Entrepreneur
For anyone concerned with crushing the bed rails - I installed the DiamondBack SE without the shims. Zero crushing (That I can see while it's installed) after 10 days and re-tightened twice. Maybe if I ever remove the cover the bed rails will be crushed a bit, but taking off the rails to install the shims seems like a huge waste of time, IMHO. Before I installed the cover I did buy a set of rails from the dealership for $60 just to have on hand. I have a feeling I'll never need em.

Worth noting - During adjusting the locking rods, one of the little red sticky tape plastic pieces that the rod slides under, got a little un-sticky so I emailed DiamondBack, they mailed me a whole set of 4, no charge.

Bed cover is phenomenal!
 

GreyGhost

Well-Known Member
First Name
Sam
Joined
Oct 21, 2020
Threads
2
Messages
61
Reaction score
32
Location
Texas
Vehicle(s)
Jeep Gladiator 2020
Occupation
Retired
For anyone concerned with crushing the bed rails - I installed the DiamondBack SE without the shims. Zero crushing (That I can see while it's installed) after 10 days and re-tightened twice. Maybe if I ever remove the cover the bed rails will be crushed a bit, but taking off the rails to install the shims seems like a huge waste of time, IMHO. Before I installed the cover I did buy a set of rails from the dealership for $60 just to have on hand. I have a feeling I'll never need em.

Worth noting - During adjusting the locking rods, one of the little red sticky tape plastic pieces that the rod slides under, got a little un-sticky so I emailed DiamondBack, they mailed me a whole set of 4, no charge.

Bed cover is phenomenal!
I installed my Diamondback cover back without the shims( no shims at that time for the cover) in July 2020, the installation went smooth without no problem, after a week I decided to inspected the clamp and then I noticed they were loose. I then retightened the clamps and I noticed the bed rail caps start to crush or bend, I loosened the clamps again and retightened and it was good for another week, when I inspected the clamps again they were loose; so I retighten them to have the bed rail cap crush and bend the same way. Finally Diamondback is sending me a kit for this repair hopefully will get here this Saturday. I let you guys how the kit works.....
 

Sponsored

Rockabillyroy

Well-Known Member
Joined
Nov 8, 2020
Threads
15
Messages
825
Reaction score
870
Location
CA
Vehicle(s)
JT
I installed the shims just cause I felt like I had to do the install 'correctly'

Popping off the bed caps is actually not too bad once you get the hang of it. After taking off the tail lights, the first four clips come out easy enough. Then you just have to lift it enough to see the next one.
Using a thin 2 inch flat head wrapped in painters tape, you can push in the barely visible tab on the outer clip. And use that same small screwdriver to slide in between the bed rail and lip of the bed. You can line it up visually by looking at the clip of the bed cap. Give it a small push and the inside clip will pop.

For me, the biggest key was using that 2 inch flat head. I started with a bigger one and it didn't fit anywhere I needed it to.

I actually had to do both sides twice since I put the shims in the wrong spot and had big gap. The second time I did it, it only took a few minutes a side.
 

stingrey

Well-Known Member
First Name
Paul
Joined
Jun 30, 2020
Threads
8
Messages
245
Reaction score
342
Location
Ontario, Canada
Vehicle(s)
2020 Jeep JTR, '15 Range Rover
Occupation
Civil Eng
I installed the shims just cause I felt like I had to do the install 'correctly'

Popping off the bed caps is actually not too bad once you get the hang of it. After taking off the tail lights, the first four clips come out easy enough. Then you just have to lift it enough to see the next one.
Using a thin 2 inch flat head wrapped in painters tape, you can push in the barely visible tab on the outer clip. And use that same small screwdriver to slide in between the bed rail and lip of the bed. You can line it up visually by looking at the clip of the bed cap. Give it a small push and the inside clip will pop.

For me, the biggest key was using that 2 inch flat head. I started with a bigger one and it didn't fit anywhere I needed it to.

I actually had to do both sides twice since I put the shims in the wrong spot and had big gap. The second time I did it, it only took a few minutes a side.
You used a screwdriver! The instructions clearly indicate that a butter knife is required. ;) :)

butter knife.jpg
 

Rockabillyroy

Well-Known Member
Joined
Nov 8, 2020
Threads
15
Messages
825
Reaction score
870
Location
CA
Vehicle(s)
JT
You used a screwdriver! The instructions clearly indicate that a butter knife is required. ;) :)

butter knife.jpg
Not reading the instructions properly is why I had to do it twice. Hahaha.
I got a total of 8 shims and put the first 2 in the divots too close to the tailgate.

The small screwdriver made it easy for me to be able to see the tabs through the small space. And also the tactile feedback was easier to feel on the inner bed side tabs. It was small enough that I was able to avoid making contact with the bed altogether.
 
OP
OP
mmatthie

mmatthie

Well-Known Member
First Name
Matt
Joined
Sep 28, 2020
Threads
24
Messages
255
Reaction score
149
Location
Wisconsin
Website
www.youtube.com
Vehicle(s)
2021 JT Sport S
To anyone that has installed the shims AFTER they already had crushing damage to the rail caps...did it "restore" the caps from the crushed look...or did it still look that way after the shims?

I don't plan to do this work until it gets warmer in my area, but I'm debating if I should just buy new rail caps...or if the old ones can recover their shape?
 

eaglerugby04

Well-Known Member
Joined
Oct 14, 2019
Threads
12
Messages
1,787
Reaction score
1,265
Location
Northern South Carolina
Vehicle(s)
Gator Rubicon Gladiator, Toyota Prius, Toyota Sienna
Occupation
Network Security
To anyone that has installed the shims AFTER they already had crushing damage to the rail caps...did it "restore" the caps from the crushed look...or did it still look that way after the shims?

I don't plan to do this work until it gets warmer in my area, but I'm debating if I should just buy new rail caps...or if the old ones can recover their shape?
It restored them enough that you really have to be looking really close to notice. I never remove mine so it solved the issue from my point of view. If I every remove mine I am guessing there will be some evidence there of the crushing though.
 

Sponsored

Rockabillyroy

Well-Known Member
Joined
Nov 8, 2020
Threads
15
Messages
825
Reaction score
870
Location
CA
Vehicle(s)
JT
So, my cover only had the tiniest leak before installing the shims. Afterward, I had water coming down both sides. And after installing the shims, I cranked the clamps and the rail still smashed down.

So I was going to line both rail caps with come weather stripping underneath and decided to make and add my own shims along the length of the inner rails. So looking around the garage, I noticed the interlocking section of my floor mats might just do the trick.
I snipped off one side, cut it into smaller strips and and stuck them onto the inner rail section with double sided automotive tape.

I reinstalled the diamondback and went ahead and cranked it down. This time, no deformation.
And after pouring a 5 gallon bucket of water, no visible leaks.

Jeep Gladiator Diamondback HD Mounts - Crushing side rails! 20210313_130050


Jeep Gladiator Diamondback HD Mounts - Crushing side rails! 20210314_141350
 
Last edited:

Gatorized

Well-Known Member
Joined
Sep 13, 2019
Threads
6
Messages
1,663
Reaction score
1,535
Location
ME/NH
Vehicle(s)
‘06 CRV, ‘14 Mazda3, ‘20 JTR (Gator)
So, my cover only had the tiniest leak before installing the shims. Afterward, I had water coming down both sides. And after installing the shims, I cranked the clamps and the rail still smashed down.

So I was going to line both rail caps with come weather stripping underneath and decided to make and add my own shims along the length of the inner rails. So looking around the garage, I noticed the interlocking section of my floor mats might just do the trick.
I snipped off one side, cut it into smaller strips and and stuck them onto the inner rail section with double sided automotive tape.

I reinstalled the diamondback and went ahead and cranked it down. This time, no deformation.
And after pouring a 5 gallon bucket of water, no visible leaks.

Jeep Gladiator Diamondback HD Mounts - Crushing side rails! 20210314_141350
Are you using the full thickness of the tile for the shim or just the attachment strip?
 

MSGEngineering

Well-Known Member
First Name
Matt
Joined
Jun 24, 2020
Threads
18
Messages
114
Reaction score
219
Location
Virginia
Vehicle(s)
Jeep Gladiator Mohave
Occupation
Engineer
Is anyone just running one clamp on either side of the diamondback? I started to do that. I feel like the issues with the clamps is they are so close together as you tighten one, the one next to it gets loose and then you end up over tightening the whole thing. I started running only one clamp on each side and it seems to be sitting better. With the locking mechanism it’s pretty much impossible for the thing to fly off.

Jeep Gladiator Diamondback HD Mounts - Crushing side rails! 778E6F8A-572F-46E6-A24D-1BB480CB639C
 

Rockabillyroy

Well-Known Member
Joined
Nov 8, 2020
Threads
15
Messages
825
Reaction score
870
Location
CA
Vehicle(s)
JT
Are you using the full thickness of the tile for the shim or just the attachment strip?
Just the sliver of the attachment strip. Cut it off with scissors and then made three section. Three nub and two nub sectiobs.
 
OP
OP
mmatthie

mmatthie

Well-Known Member
First Name
Matt
Joined
Sep 28, 2020
Threads
24
Messages
255
Reaction score
149
Location
Wisconsin
Website
www.youtube.com
Vehicle(s)
2021 JT Sport S
Well I finally got around to adding the spacers (as per the DB instructions)...and I must say I'm happy. There isn't that "caved in" look anymore with the DB on. If I ever get rid of my DB, I will for sure order new rail caps though since my set are beat to hell and missing a few tabs LOL...but with the cover on you can't notice.
Sponsored


Top