Sponsored

Mopar Trail Rail Kit Installation

Status
Not open for further replies.

Mayhem 6

Well-Known Member
First Name
Dan
Joined
Apr 14, 2020
Threads
8
Messages
82
Reaction score
109
Location
SE USA
Vehicle(s)
2020 JTR; 2020 JLUR; 2015 JKW; 2016 JKUR (Sold); 2014 JKSS (Sold); 2008 JKUR (Sold)
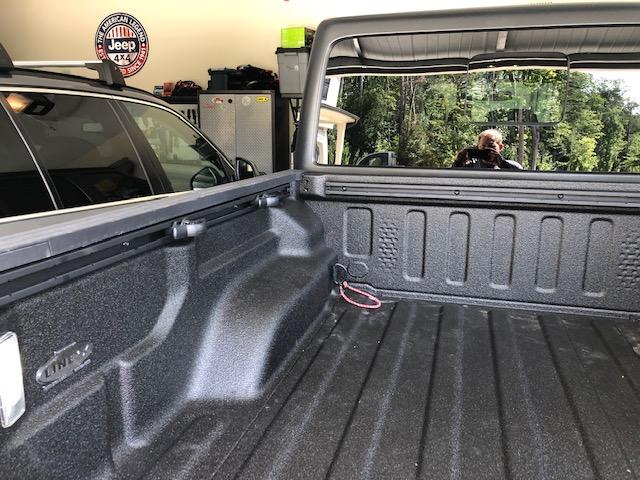
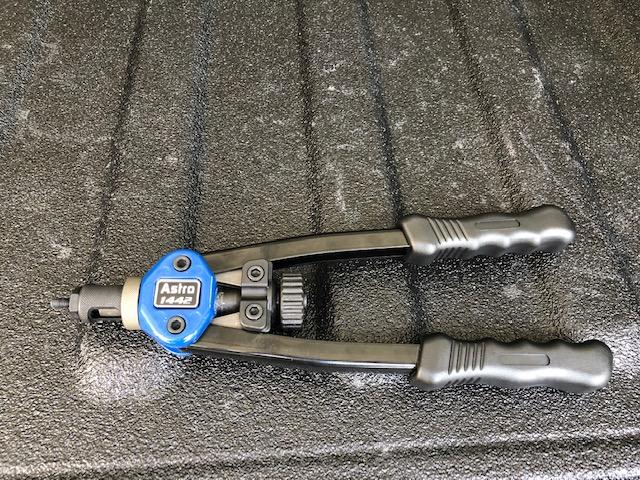
put them in this week. easy. Did go to the hardware store and buy a $3 M6 tap to clean the bedliner...took an extra 2-3 minutes to clean the threads and install the rails.

Wish they were more closely modeled after unistrut. Makes the rail system options limited since the Mopar rails have no inner lip like strut channel does.
Sponsored


Krash1642

Well-Known Member
First Name
C. Brown
Joined
Dec 8, 2018
Threads
8
Messages
158
Reaction score
144
Location
Delaware
Vehicle(s)
1984 CJ 7 (Bessie), 2020 Jeep Gladiator Sport S Bright White (DJ), 2016 Jeep JK Willy’s (traded for wife to get Ford Focus due to work), 2018 JLU Sahara (Wife’s traded for JT)
Occupation
Teacher
Vehicle Showcase
1
Install was a disaster! Even after pre-clearing bed liner material from the holes, I had 2 of the tack welds break loose (against cab and passenger side) and one screw twist off (also against the cab). For what I paid for this kit (and the vehicle while I'm complaining) I'm really disappointed. I love this thing, but this is a chink in the armor. @JeepCares

Hey John,

How did you end up fixing the tack weld nut slots in the bed? Can you access if removing the wheel well liner? I had that happen to the two middle slots on the drivers side. I had made a temporary system and took it off the other day to install the unistrut that I had gotten and cut. installed to make sure every thing was good and those two bolts just spin... I have been searching to see if I can find the best way or anyway to fix the issue... Thanks for your help!
 

Shackleton

Well-Known Member
First Name
Jeff
Joined
Jun 2, 2020
Threads
11
Messages
435
Reaction score
355
Location
Newbury, MA
Vehicle(s)
Gobi Gladiator Sport S Max Tow, Camry
I’m now gun shy about installing what should be an extremely simple installation. Did anyone have any luck using a YouTube video? So far I haven’t found one that shows this install. Is T30 the right size driver as there seems to be some play in mine
Edit Belay my last I had the T25 in there. Still would be happy to see a YouTube link if possible
 

Shackleton

Well-Known Member
First Name
Jeff
Joined
Jun 2, 2020
Threads
11
Messages
435
Reaction score
355
Location
Newbury, MA
Vehicle(s)
Gobi Gladiator Sport S Max Tow, Camry
Ok. It’s installed. Was pretty simple. Not certain the bolt that goes in the nut insert on the back is doing a whole lot though? It’s just holding on a plastic end cap I think and there is a bolt right near it on the side of the bed If I am not mistaken.
 

Moonshineheadache

Well-Known Member
First Name
John
Joined
Jun 1, 2020
Threads
15
Messages
132
Reaction score
203
Location
Longmont, CO
Vehicle(s)
2020 Great White Edition Rubicon
Occupation
Gas Pump Jockey - I hate cans!
Vehicle Showcase
1
Hey John,

How did you end up fixing the tack weld nut slots in the bed? Can you access if removing the wheel well liner? I had that happen to the two middle slots on the drivers side. I had made a temporary system and took it off the other day to install the unistrut that I had gotten and cut. installed to make sure every thing was good and those two bolts just spin... I have been searching to see if I can find the best way or anyway to fix the issue... Thanks for your help!
So as it turns out the weld didn't break, but teh bolt twisted off inside the initial threads that were not grabbing. That said, I had a completely different fix in front of me. I had to really work to get the hardened bolt that twisted off inside the hole. Worked up through 6 sizes of drill bits and eventually had to re-tap a somewhat screwed up hole. Not super happy with it, but it's done!
 

Sponsored

Krash1642

Well-Known Member
First Name
C. Brown
Joined
Dec 8, 2018
Threads
8
Messages
158
Reaction score
144
Location
Delaware
Vehicle(s)
1984 CJ 7 (Bessie), 2020 Jeep Gladiator Sport S Bright White (DJ), 2016 Jeep JK Willy’s (traded for wife to get Ford Focus due to work), 2018 JLU Sahara (Wife’s traded for JT)
Occupation
Teacher
Vehicle Showcase
1
So as it turns out the weld didn't break, but teh bolt twisted off inside the initial threads that were not grabbing. That said, I had a completely different fix in front of me. I had to really work to get the hardened bolt that twisted off inside the hole. Worked up through 6 sizes of drill bits and eventually had to re-tap a somewhat screwed up hole. Not super happy with it, but it's done!
Oh wow! Gotcha! I have not for sure figured out which of these scenarios i'm dealing with... did you take the wheel well liner off to see if the weld was turning or not... or did you use another person to help see if that was happening or not? Thanks again for your help!
 

Wvyou

Member
First Name
Chris
Joined
Aug 1, 2020
Threads
1
Messages
7
Reaction score
13
Location
South Carolina
Vehicle(s)
2020 Gladiator Rubicon, 2007 Wrangler Rubicon
Occupation
Director, Solutions Engineering
Completed my installation today. As earlier posts noted, bedliners certainly complicate the process.

Jeep Gladiator Mopar Trail Rail Kit Installation IMG_2758

The following helped, however...

1. Set the torque on your cordless drill at the lowest setting and use a drill bit to clean out external overspray. Use caution, of course.
2. Backing the screws in and out, with a cleaning of screw threads on each pass, helped tremendously. On average, it took 2-3 passes.
3. The ever handy Astro 1442 Pneumatic tool made short order of the nutserts....perfect fit each time. If you have need of this tool for other jobs, I'd recommend it.
Jeep Gladiator Mopar Trail Rail Kit Installation IMG_2759
 

matter76

Active Member
Joined
Jul 28, 2020
Threads
0
Messages
29
Reaction score
43
Location
Pennsylvania
Vehicle(s)
2020 Gladiator Sport S Gator Green, 2012 Fiat 500 Abarth Grigio
Just installed this today... ish. It appears the instructions were updated in June, however the kit only included 12 bolts despite showing 14 installation points (5 per side, 4 front). They depict a type of hex head bolt going into the nut insert but none such bolt was included in my kit or shown on the parts list.

They fixed their FWD labels though...

20200914_191700.jpg


20200914_191715.jpg
 

mmatthie

Well-Known Member
First Name
Matt
Joined
Sep 28, 2020
Threads
24
Messages
255
Reaction score
149
Location
Wisconsin
Website
www.youtube.com
Vehicle(s)
2021 JT Sport S
Just installed this today... ish. It appears the instructions were updated in June, however the kit only included 12 bolts despite showing 14 installation points (5 per side, 4 front). They depict a type of hex head bolt going into the nut insert but none such bolt was included in my kit or shown on the parts list.

They fixed their FWD labels though...

Jeep Gladiator Mopar Trail Rail Kit Installation 20200914_191715


Jeep Gladiator Mopar Trail Rail Kit Installation 20200914_191715
OMG don't even get me started on the screws/bolts included in the Mopar kit. I just went back and forth 5-6 times with AllMoparParts on this. Let me further explain:
1.) In diagram 1 of the instructions (updated one you have here) it shows there are 12 "D" screws. 4 for the rail against the cab, 4 on the left, and 4 on the right.
2.) Then in diagram 5, it NOW shows those "D" screws are called "F"...and the previously labeled "D" screwed are now a bolt that show going into the nutserts.
3.) Best part...yeah the kit doesn't even include those "D" bolts that go into the tailgate sides.

So in the back and forth I mentioned above...I did find those bolts look to be these: https://www.quadratec.com/p/mopar/trail-rail-hex-bolt-washer-gladiator-jt

Mopar needs yet another redo on this install kit to include all bolts and nuts accordingly. As well as, updating the kit to actually include the 2 bolts.

...ok I feel better now venting that :)
 

LostWoods

Well-Known Member
Joined
Mar 13, 2020
Threads
15
Messages
1,929
Reaction score
2,195
Location
Gilbert, AZ
Vehicle(s)
2024 4Runner / 1995 YJ
Which is funny because I'm 90% sure it used to be the same bolt for the rivnut... I can't remember though because I had to drill mine out but I do know I have two spare rail screws and have no idea where else they would have come from.
 

Sponsored

tumbes2000

Active Member
Joined
Oct 18, 2020
Threads
3
Messages
40
Reaction score
22
Location
Wildwood, Missouri
Vehicle(s)
2020 Gladiator Mojave
I am definitely having issues getting the bolts in with the factory bedliner. Any suggestions on how to clean the holes? I have a meeting tap but does not seem to be doing to much. I have only worked on the rail against the cab and I can get the bolts to thread in but they get stuck way before they should to mount the rail. Any suggestions?
 

LostWoods

Well-Known Member
Joined
Mar 13, 2020
Threads
15
Messages
1,929
Reaction score
2,195
Location
Gilbert, AZ
Vehicle(s)
2024 4Runner / 1995 YJ
I am definitely having issues getting the bolts in with the factory bedliner. Any suggestions on how to clean the holes? I have a meeting tap but does not seem to be doing to much. I have only worked on the rail against the cab and I can get the bolts to thread in but they get stuck way before they should to mount the rail. Any suggestions?
Do not use a tap or you're going to cut out the paint that's in there as well. You need to get a thread chaser instead. A chaser is the size of a bolt and just clears out debris while a tap is slightly larger and is meant to cut new threads with the appropriate clearances.

It's going to be tight most likely but don't force it or you'll break the bolt... M6 fasteners aren't designed for all that much torque.
 

tumbes2000

Active Member
Joined
Oct 18, 2020
Threads
3
Messages
40
Reaction score
22
Location
Wildwood, Missouri
Vehicle(s)
2020 Gladiator Mojave
I was able to get the rail installed, finally. Basically just started running the bolts in and out with some lithium grease. With each pass I cleaned the threads off. Once I got some decent resistance, I would back it out. Eventually the threads would get cleared out. The ones against the cab took the most time and many runs. I had to remove some of the bed liner around the holes just to get the bolts in on some of the holes. I also had to remove some bed liner material where the nutserts go. I have a nutsert tool so that part was pretty easy. Once I had that all done, I realized Mopar shorted me the two bolts for the nutserts. I was able to get replacements from Quadratec though. Without the bedliner (and all of the bolts) this would have been pretty easy
 

USMC32GTR

Well-Known Member
First Name
Dan
Joined
Nov 2, 2020
Threads
1
Messages
52
Reaction score
46
Location
Georgia
Vehicle(s)
1990 Skyline GTR, 2021 JT Rubicon 6MT
Occupation
Analyst
Wife gave me the trail rail kit for Christmas. I don't have the bed LineX’d yet...should I wait to install the rails until I do that or is it pretty easy to take them off for the LineX and then reinstall (especially the nutserts?)?
 

JRobes

Well-Known Member
Joined
Oct 27, 2019
Threads
10
Messages
934
Reaction score
1,469
Location
South Dakota
Vehicle(s)
2020 JT Sport S Max Tow, 2004 WJ Overland
Occupation
Enginerd
Wife gave me the trail rail kit for Christmas. I don't have the bed LineX’d yet...should I wait to install the rails until I do that or is it pretty easy to take them off for the LineX and then reinstall (especially the nutserts?)?
Very easy to take the rails back off for when it gets sprayed, just need to zip out the handful of bolts for each rail. I'd make 100% sure that whoever you have spray your truck that they protect the bolt points with some sort of plug so they don't get bedliner in the threaded nut locations of the bed rails.
Sponsored

 
Status
Not open for further replies.


Top